Working with database
Lesson 4: Define related tables
Since it is a relational database additional tables are needed to relate to.
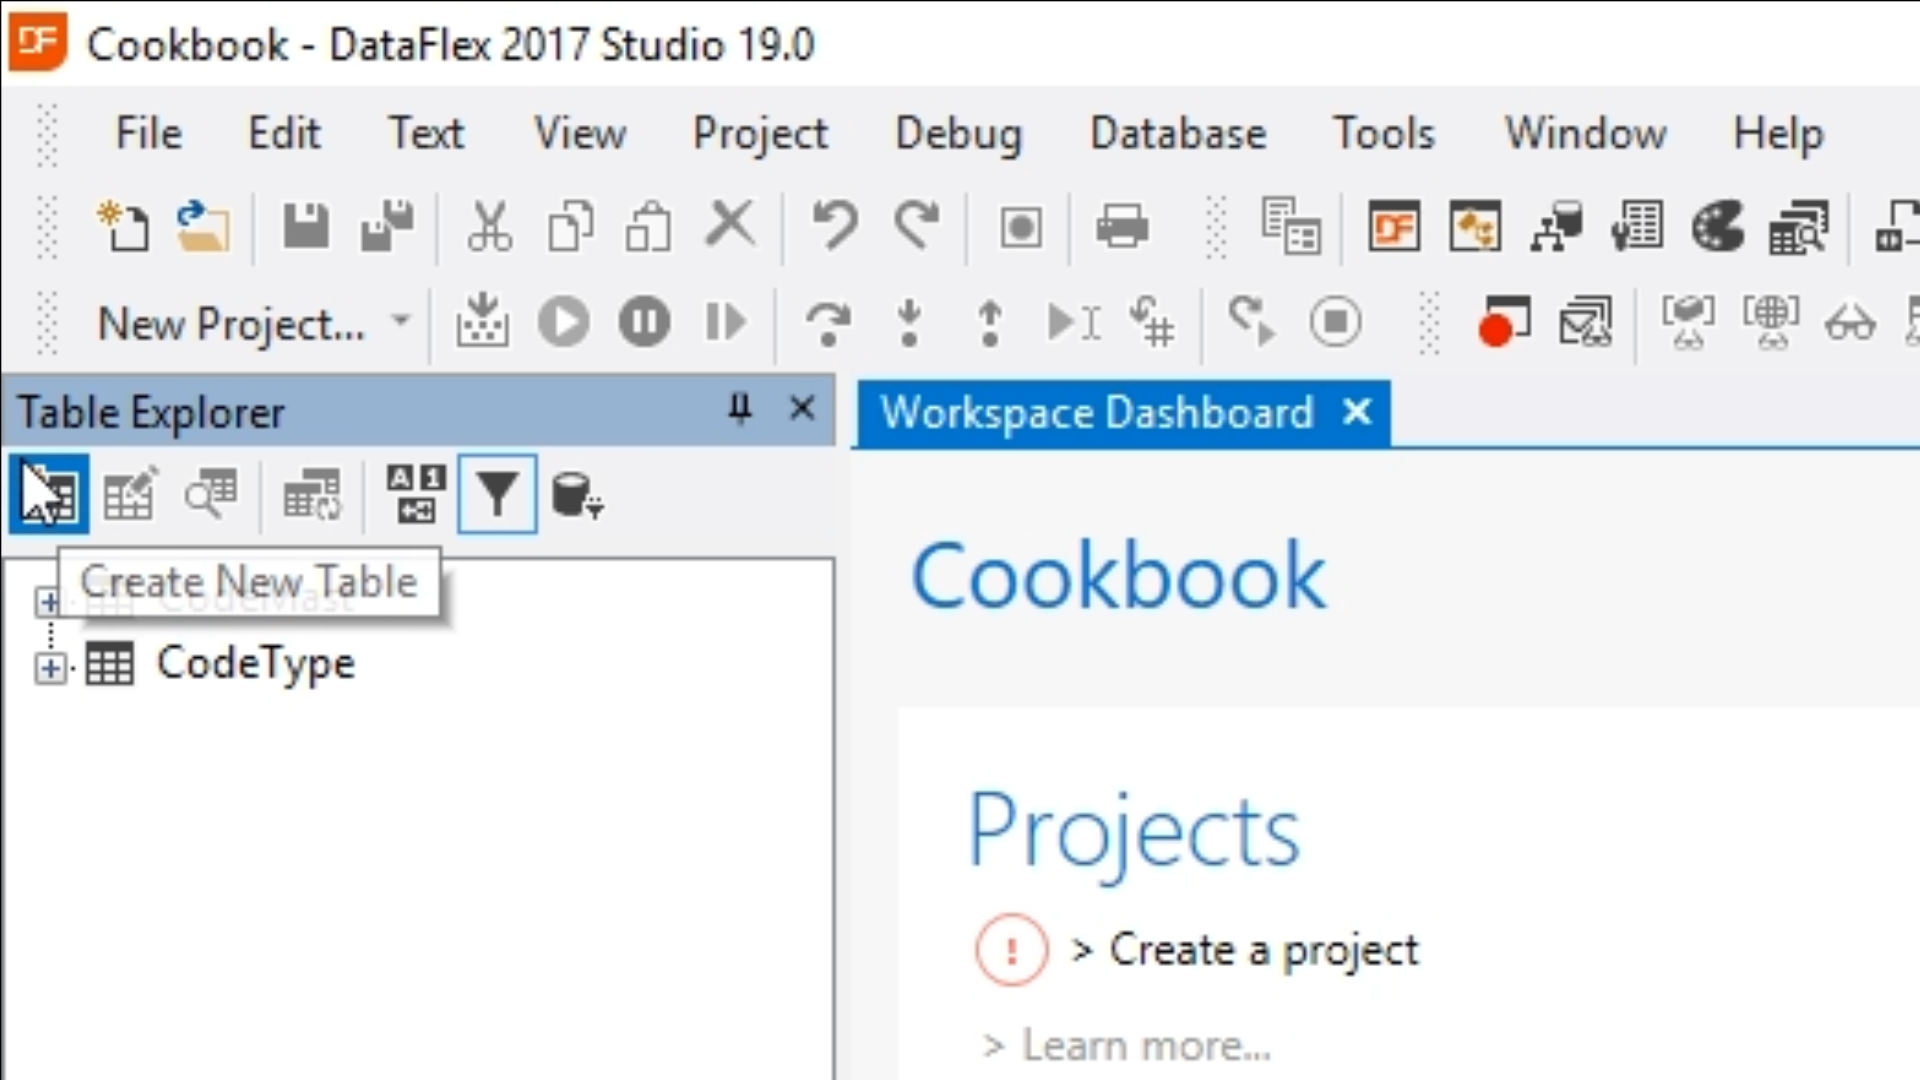
- From the ‘Table Explorer’ on the left, select the ‘Create New Table’ icon from its top menu.
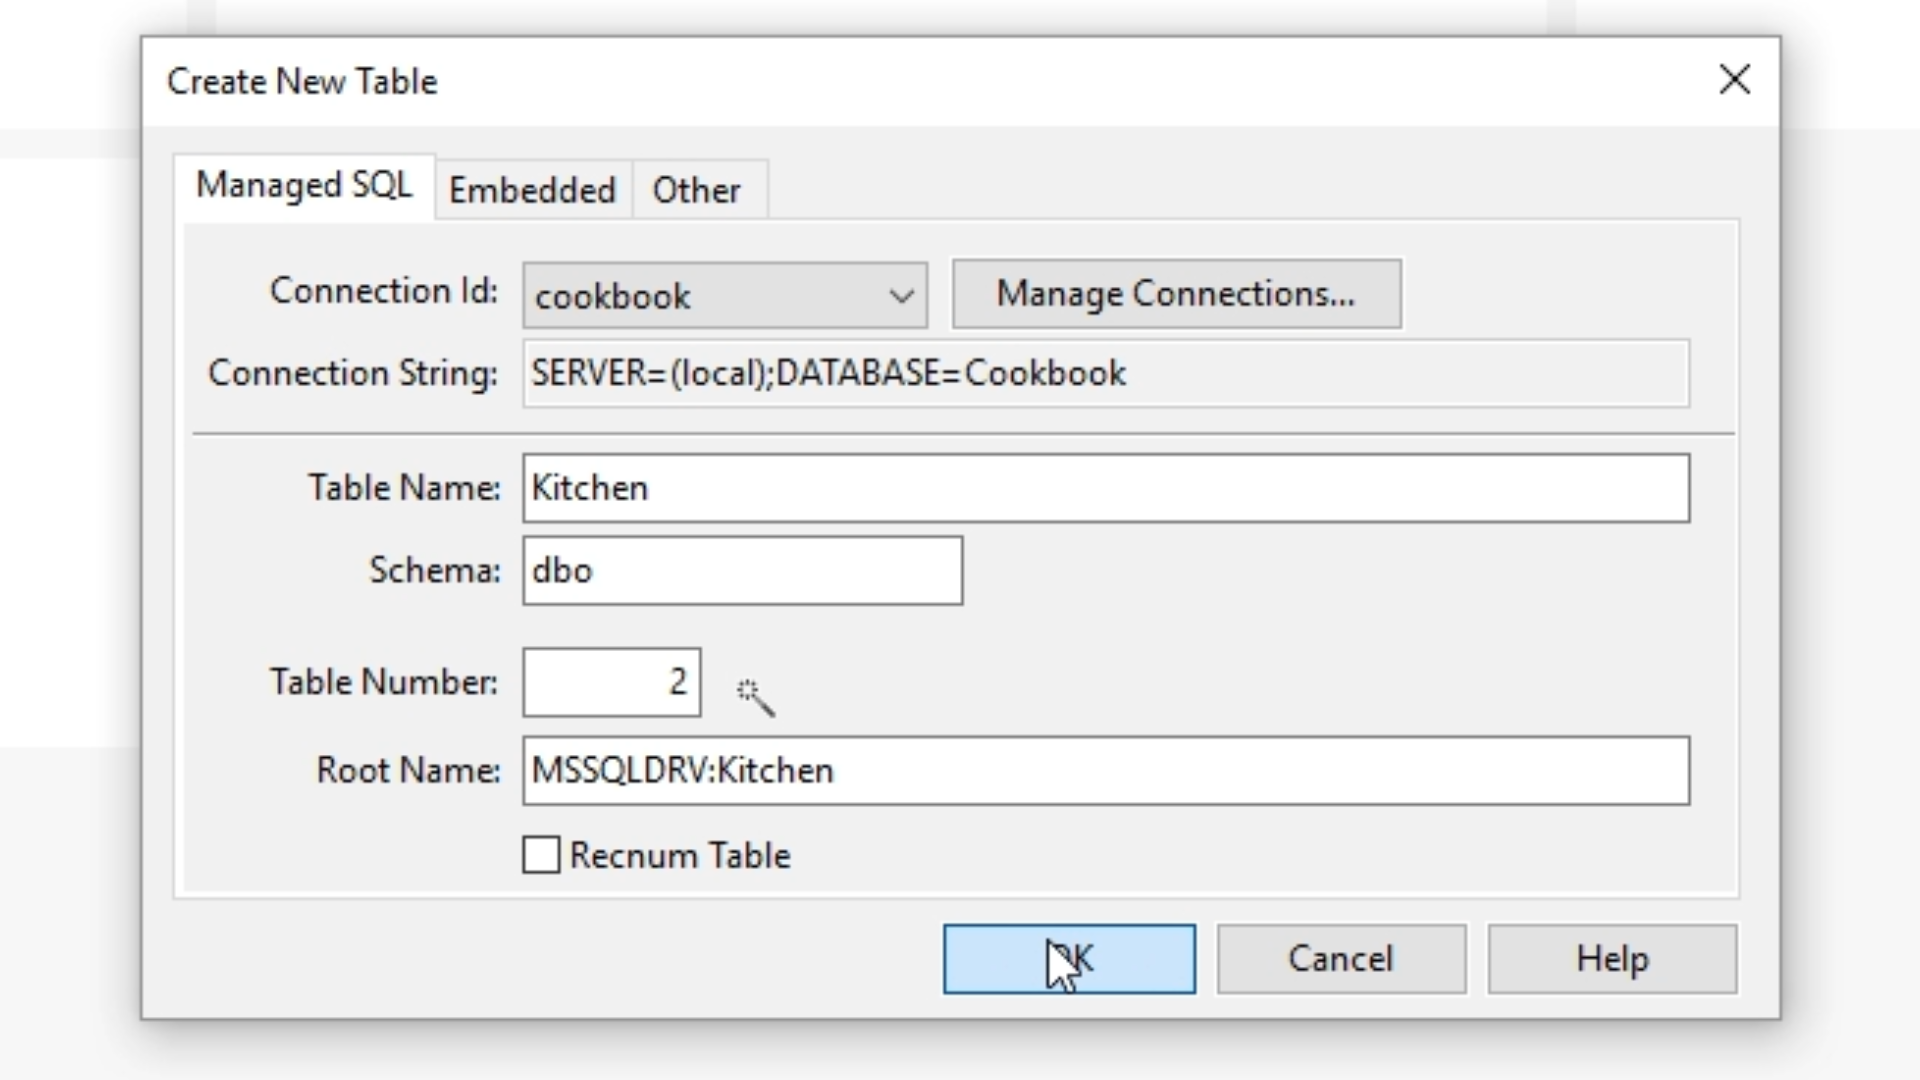
- From the ‘Create New Table’ window that opens, select the desired ‘Connection id,’ which is ‘cookbook’ for this table.
- Add a ‘Table Name.’ “Kitchen” will be the name of this table. Select ‘OK.’
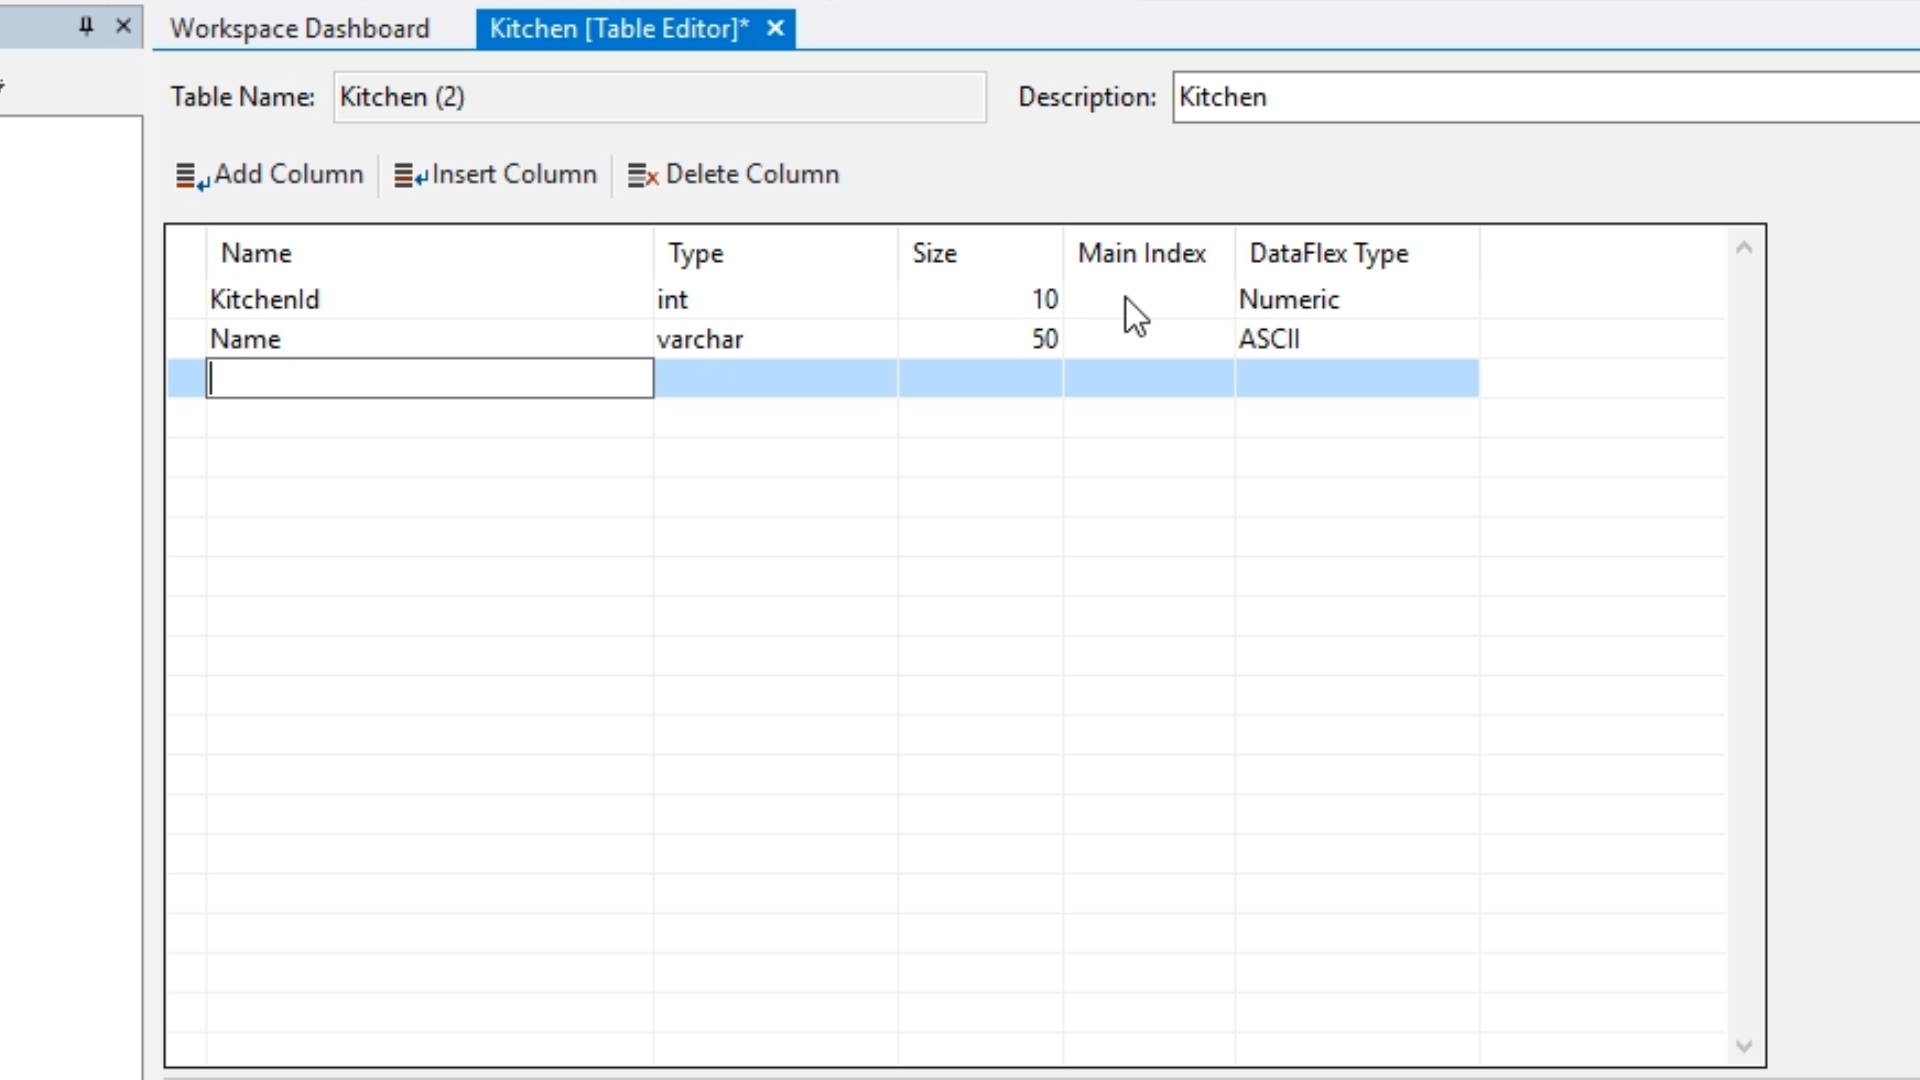
- Add field/column names:
- FIELD 1 - Name: KitchenID, Type: int, Size: 10, DataFlex Type: Numeric
- This KitchenID will be the unique identifier.
- From the ‘Column Properties’ panel on the right, set the ‘is identity’ to “True” to allow SQL to provide the identities. This makes it so every new record will automatically get a unique KitchenID.
- FIELD 2 - Name: Name, Type: varchar, Size: 50, DataFlex Type: ASCII
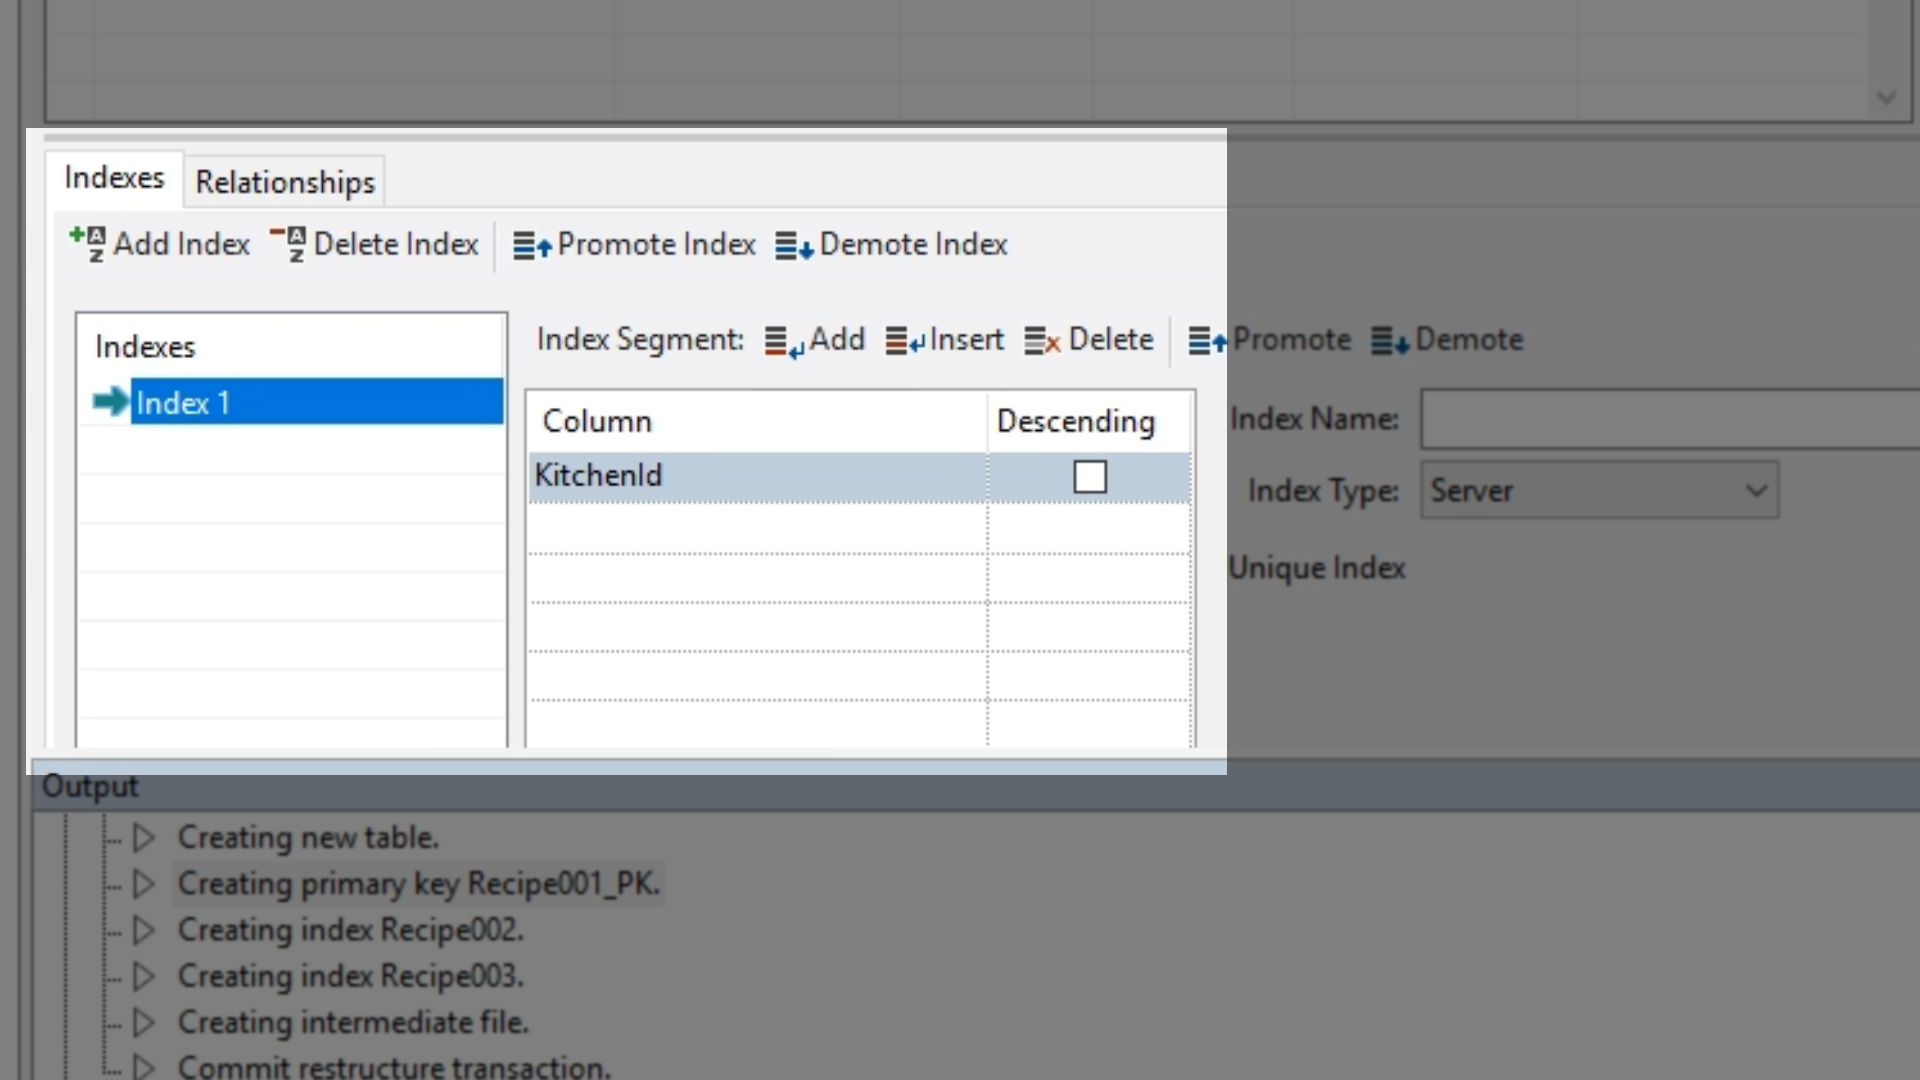
- Add a unique index for the table. From the ‘Indexes’ panel (mid-screen):
- Select ‘Add Index’ from the top of the panel.
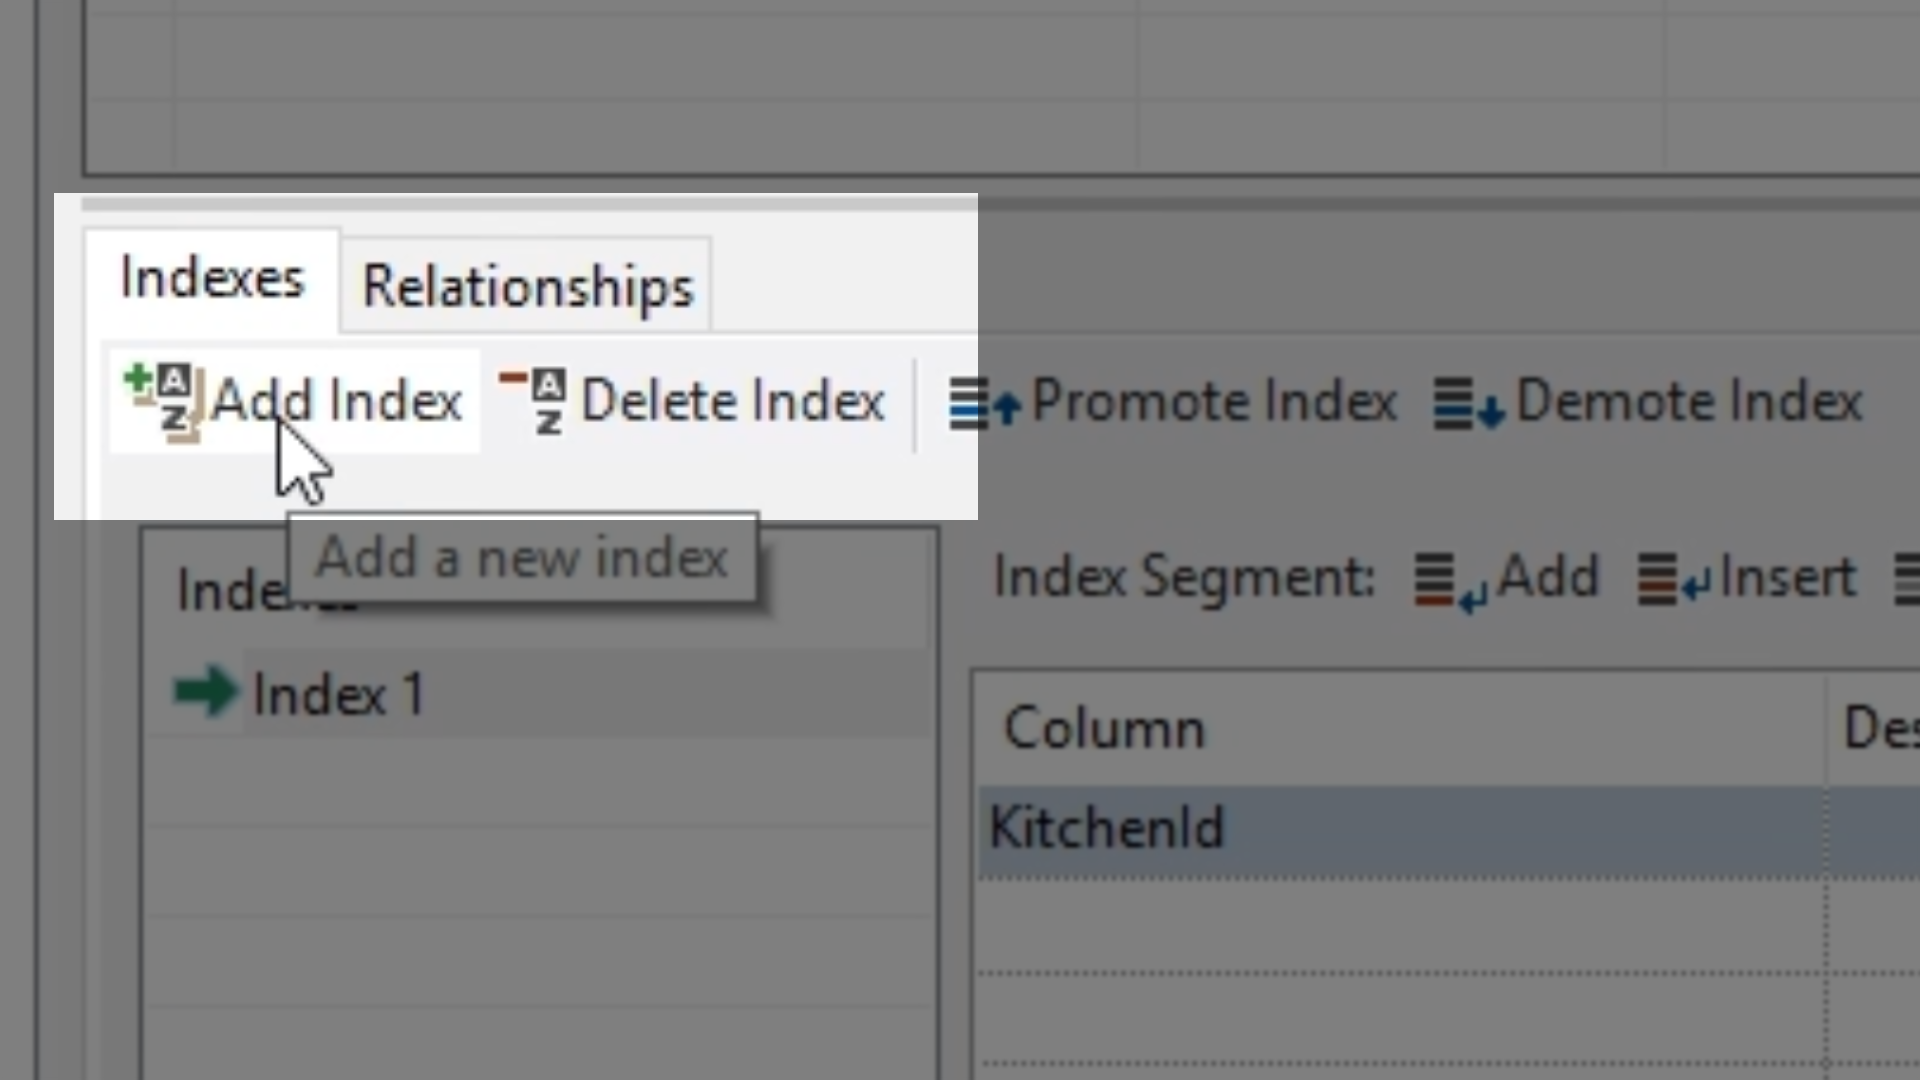
- ‘Index 1’ is automatically added to the ‘Indexes’ list, and ‘KitchenID” is added to the column list making it the unique index.
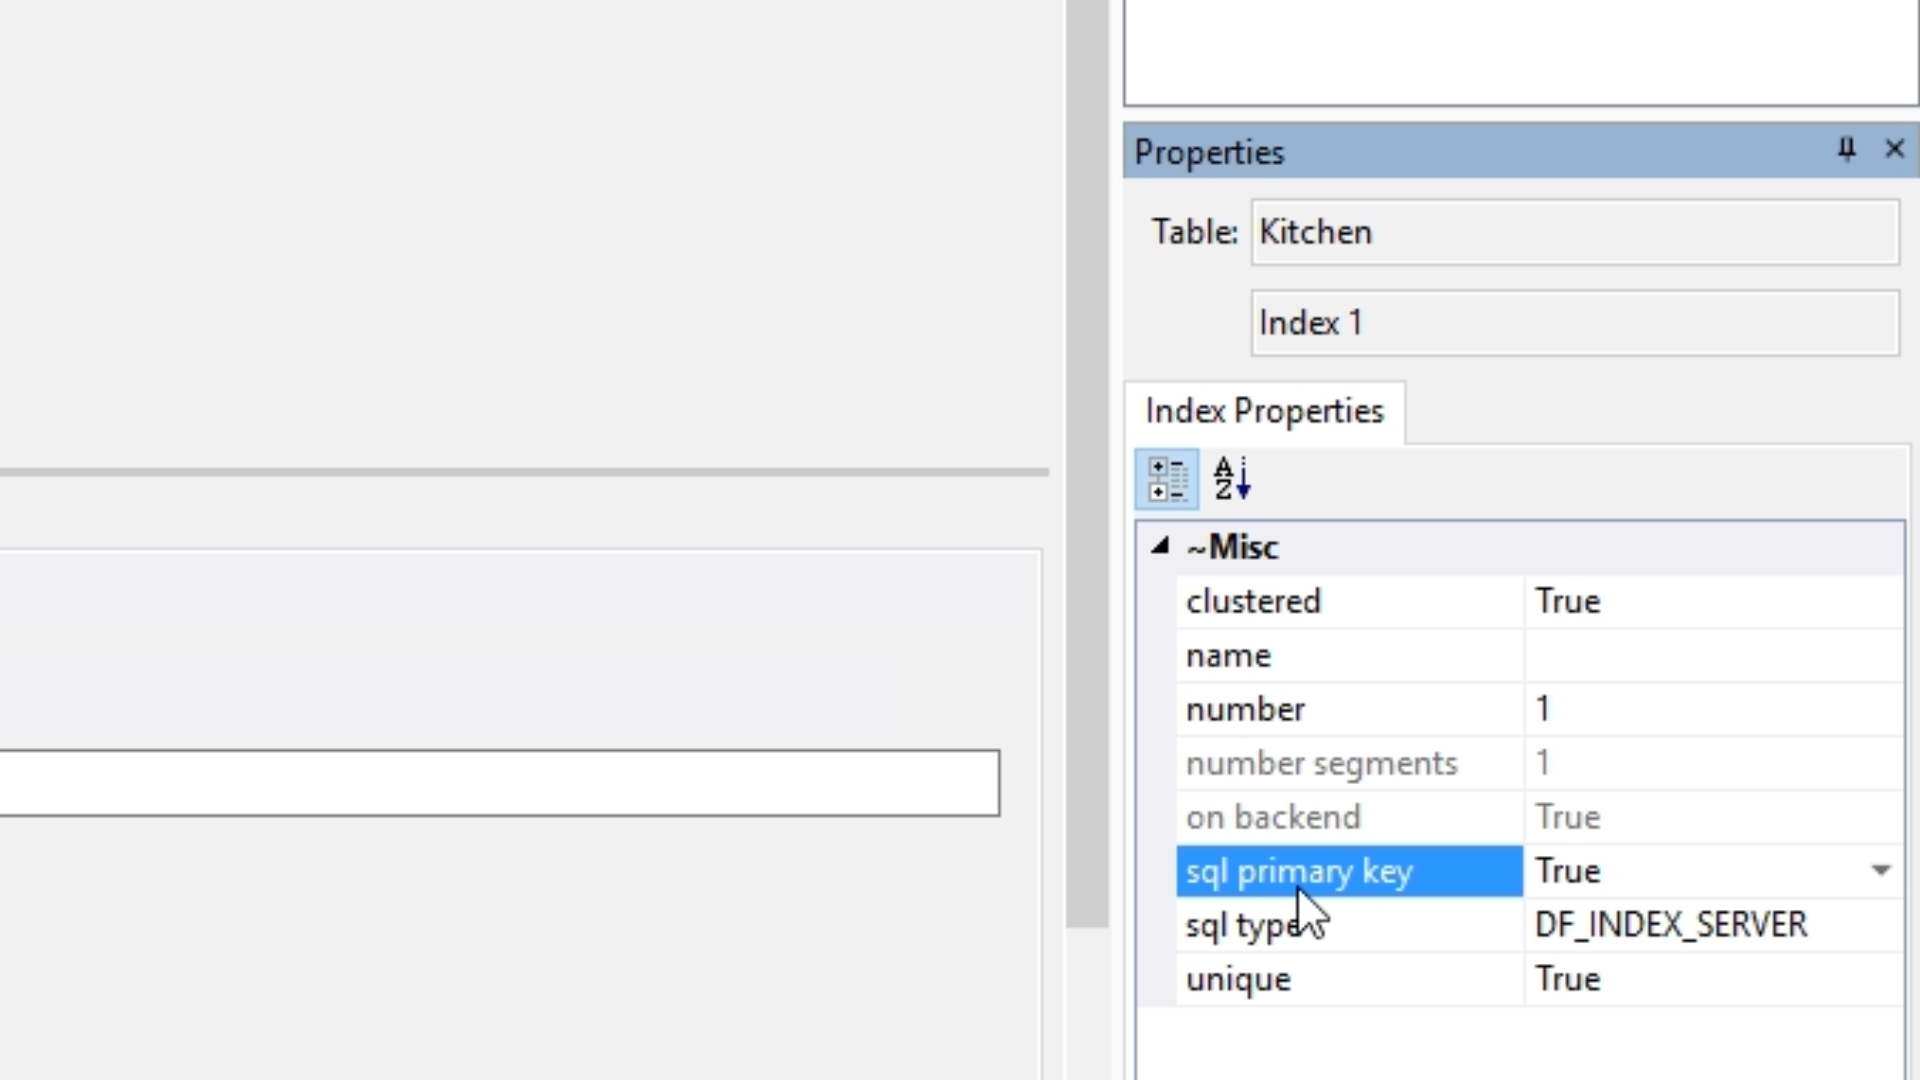
- Optional: Select ‘Index 1,’ and from the ‘Properties’ panel on the right change the ‘sql primary key’ to “True” to make it work faster with SQL.
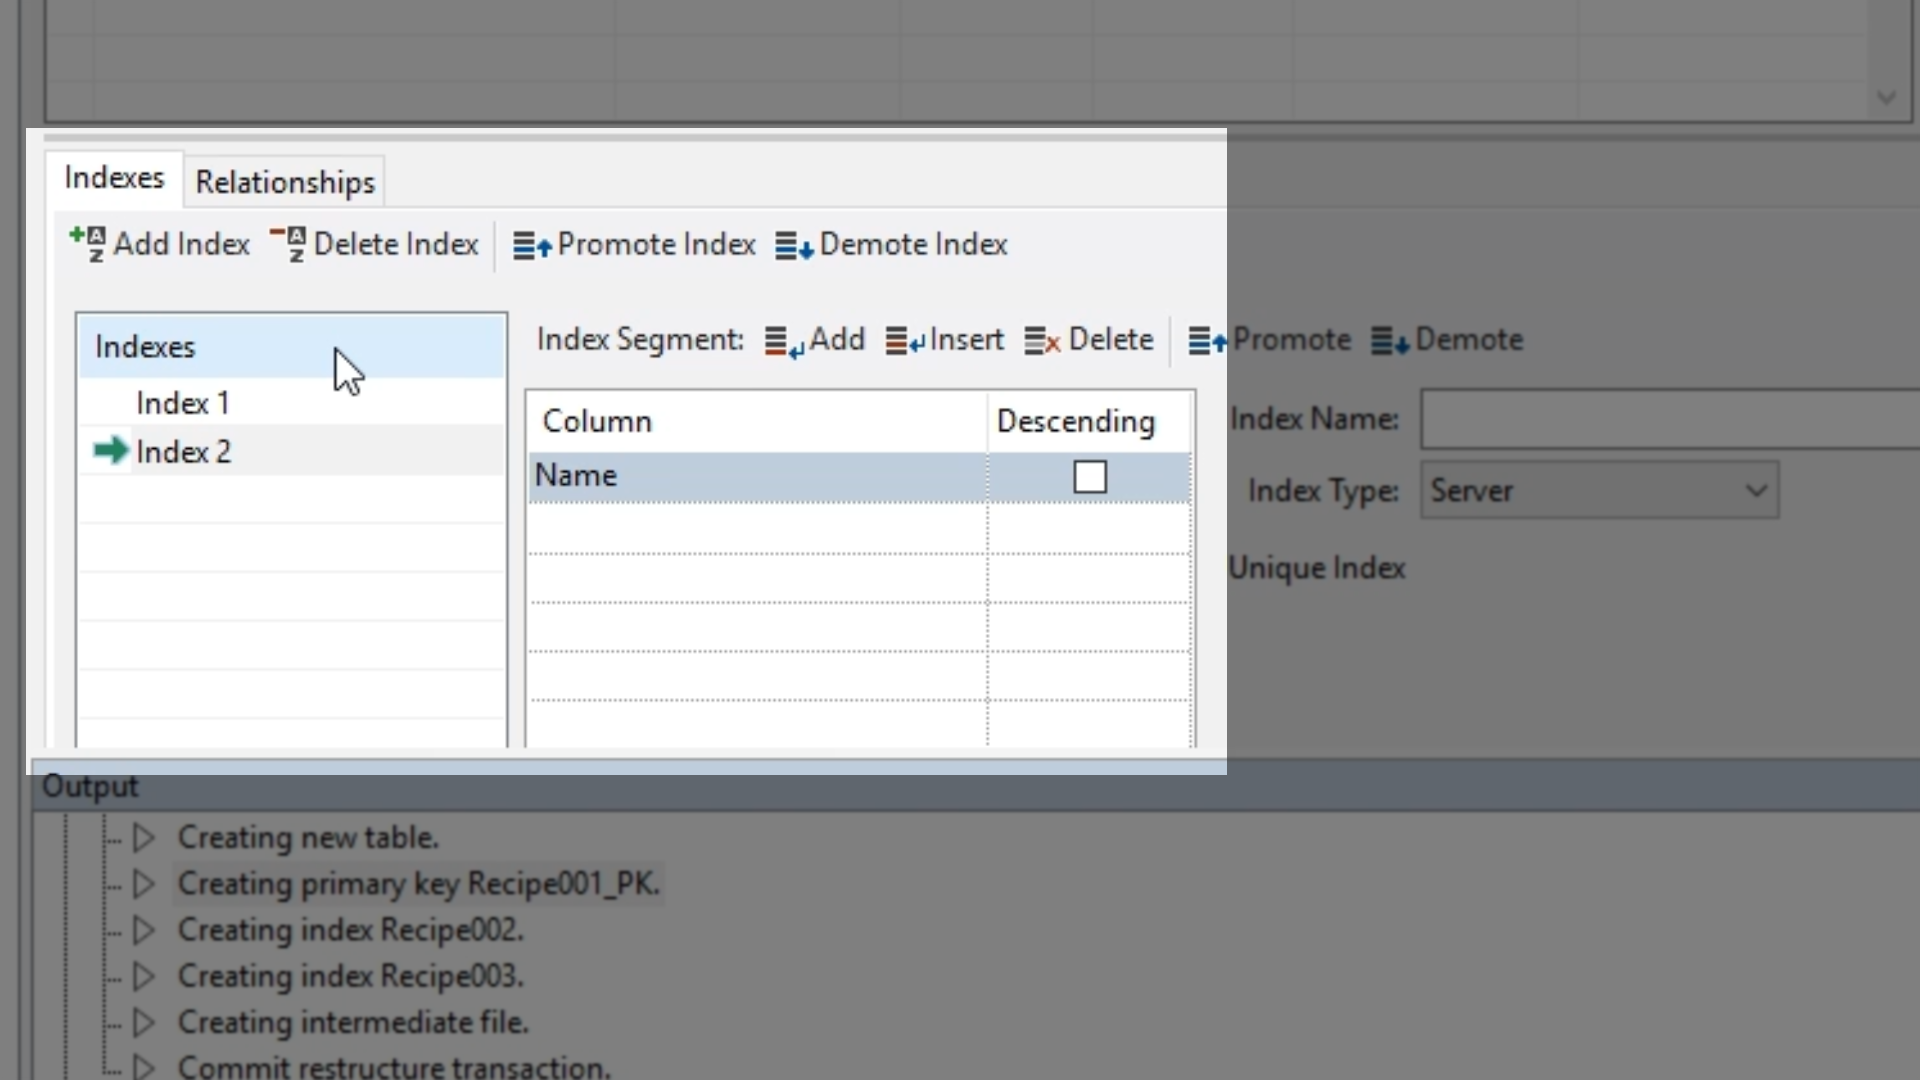
- Again, select ‘Add Index’ from the top of the panel creating ‘Index 2’, and select ‘Name’ for its column.
- Save the table.
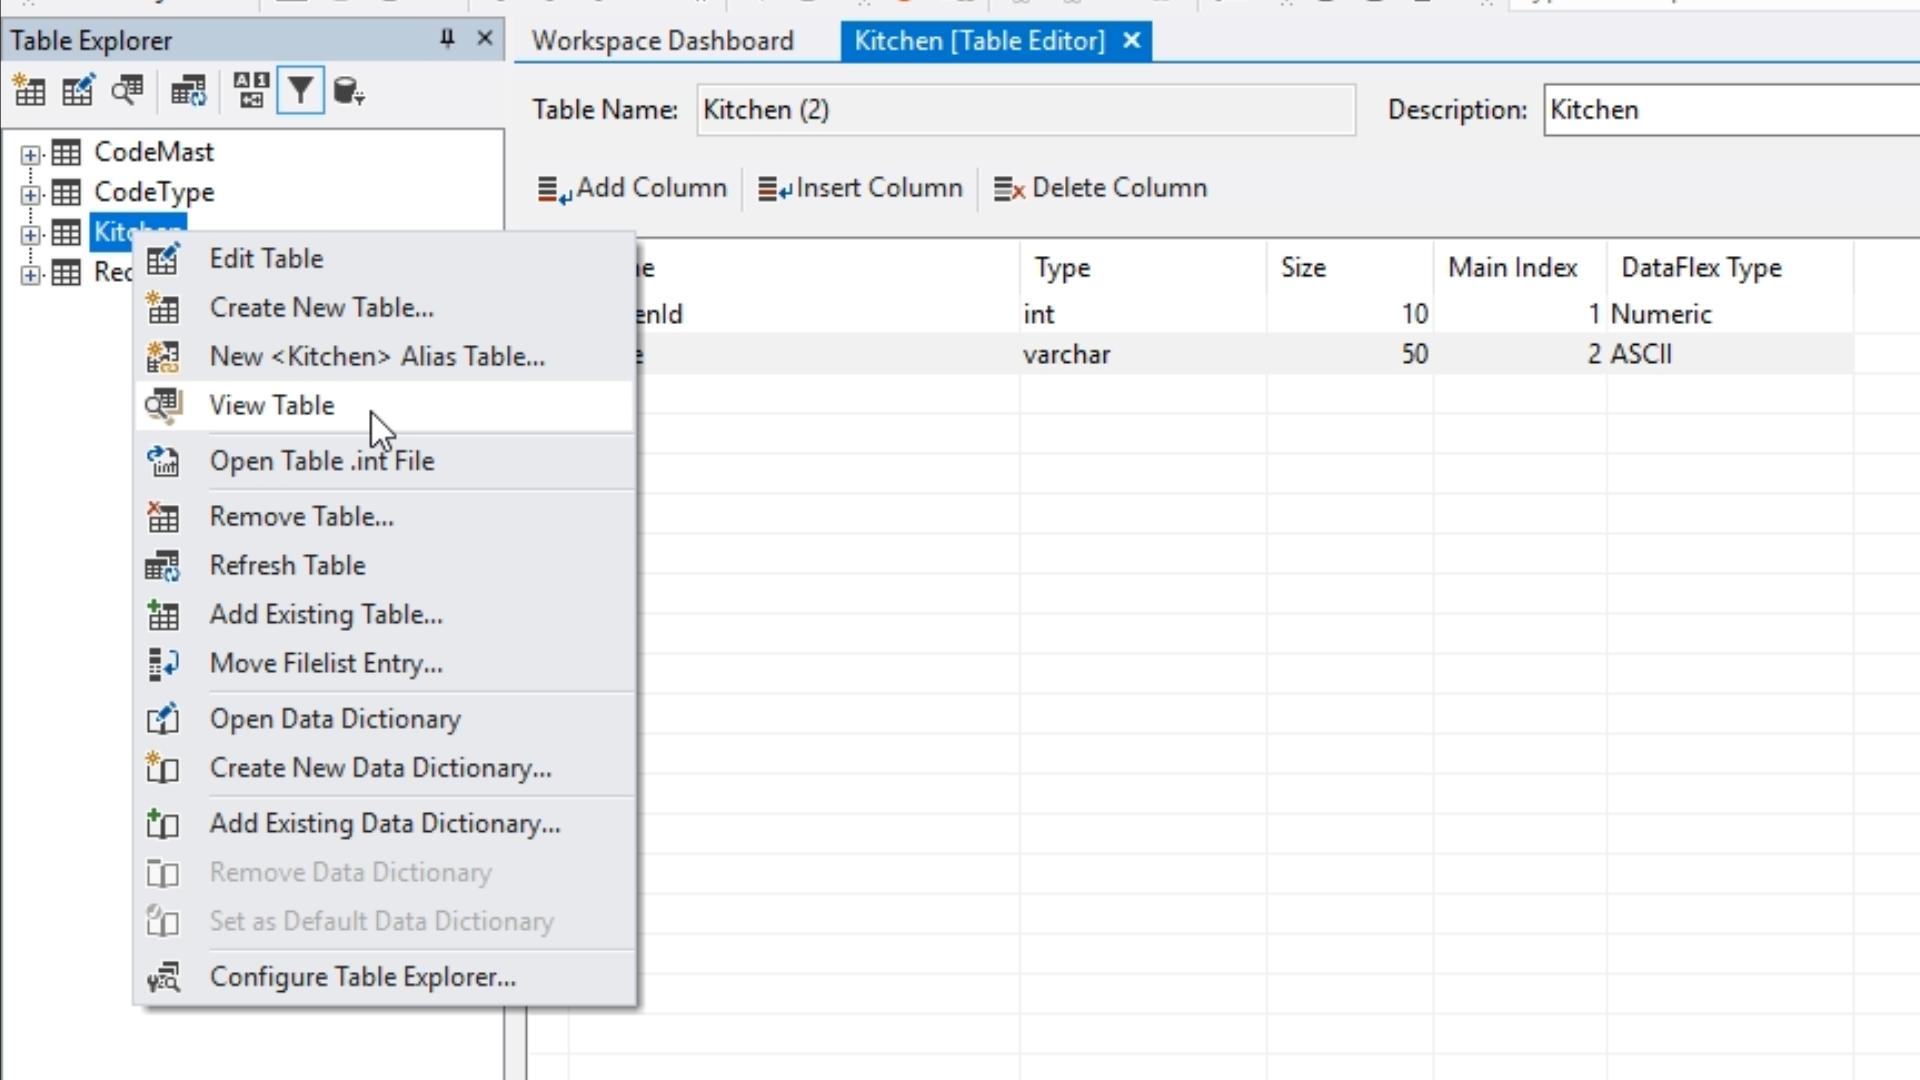
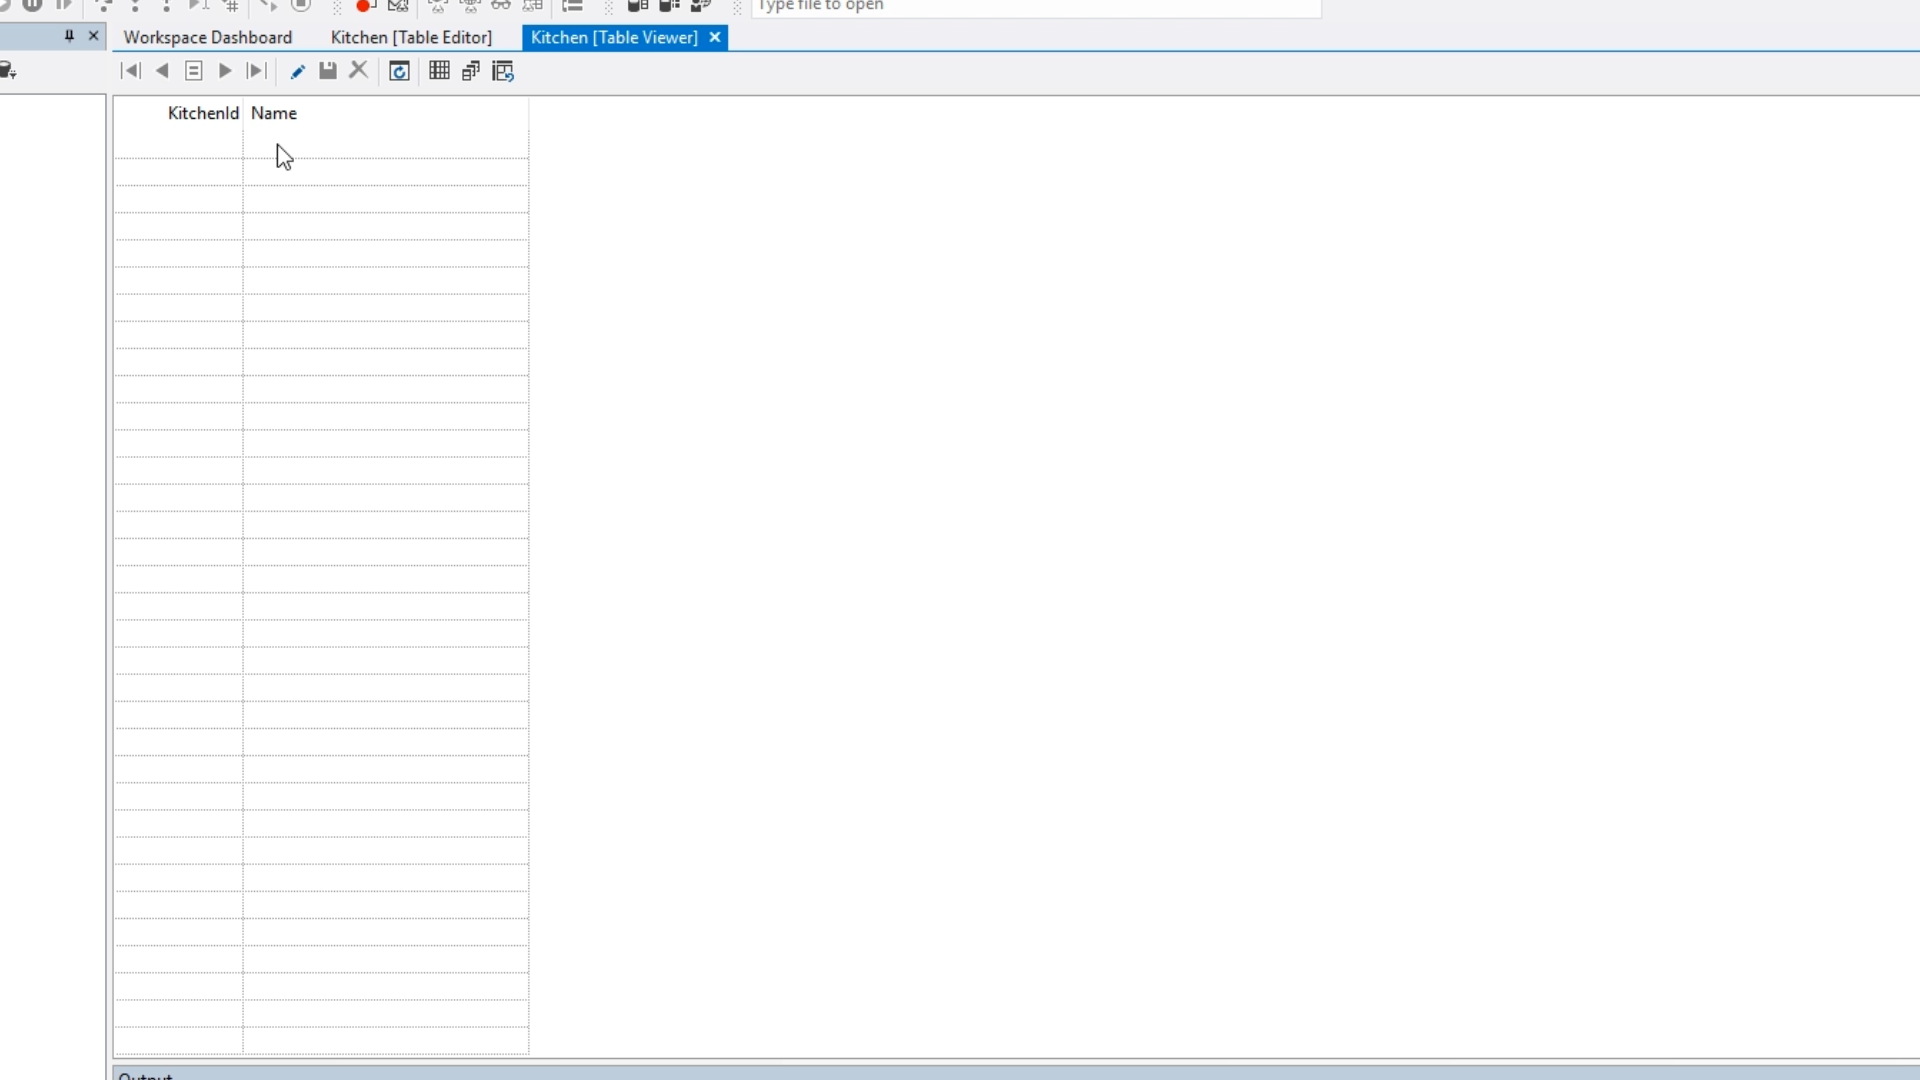
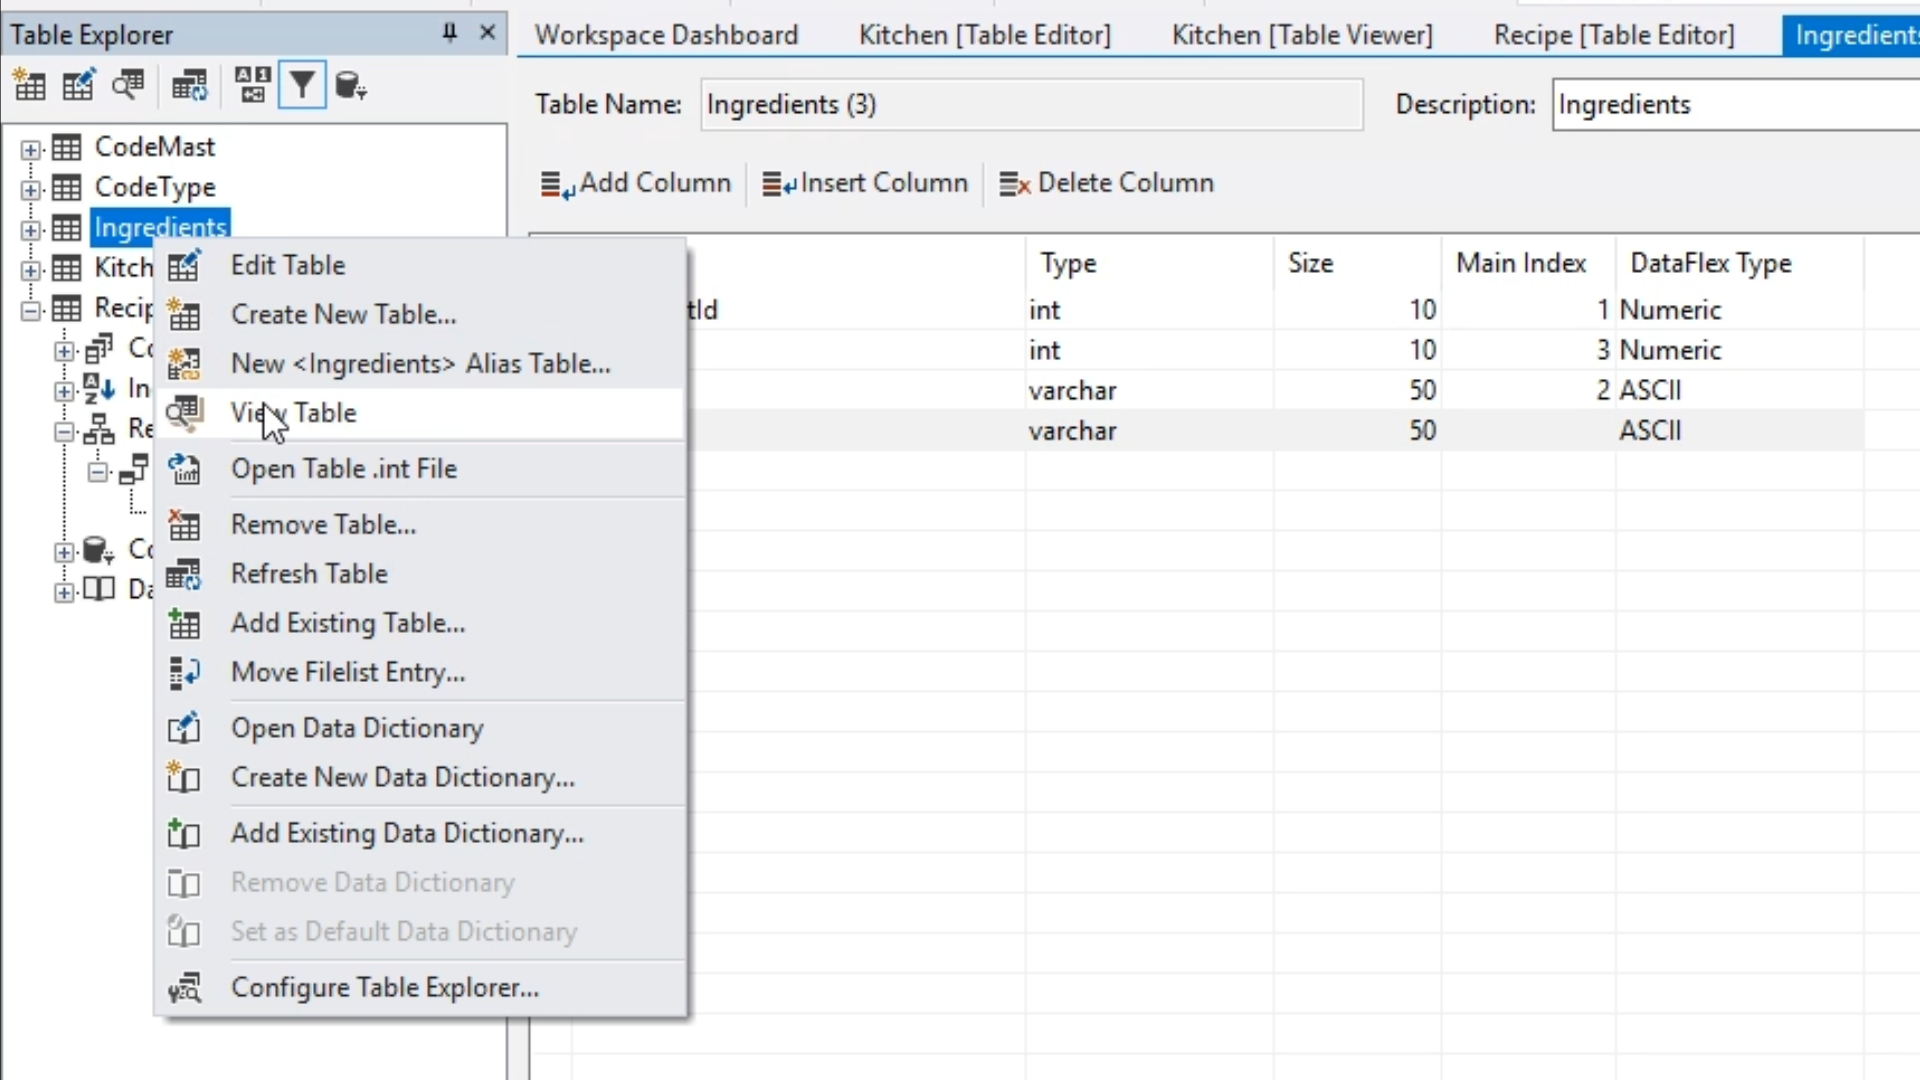
- View the table by right clicking on ‘Kitchen’ from the ‘Table Explorer’ on the left, and selecting ‘View Table.’ The table will be empty.
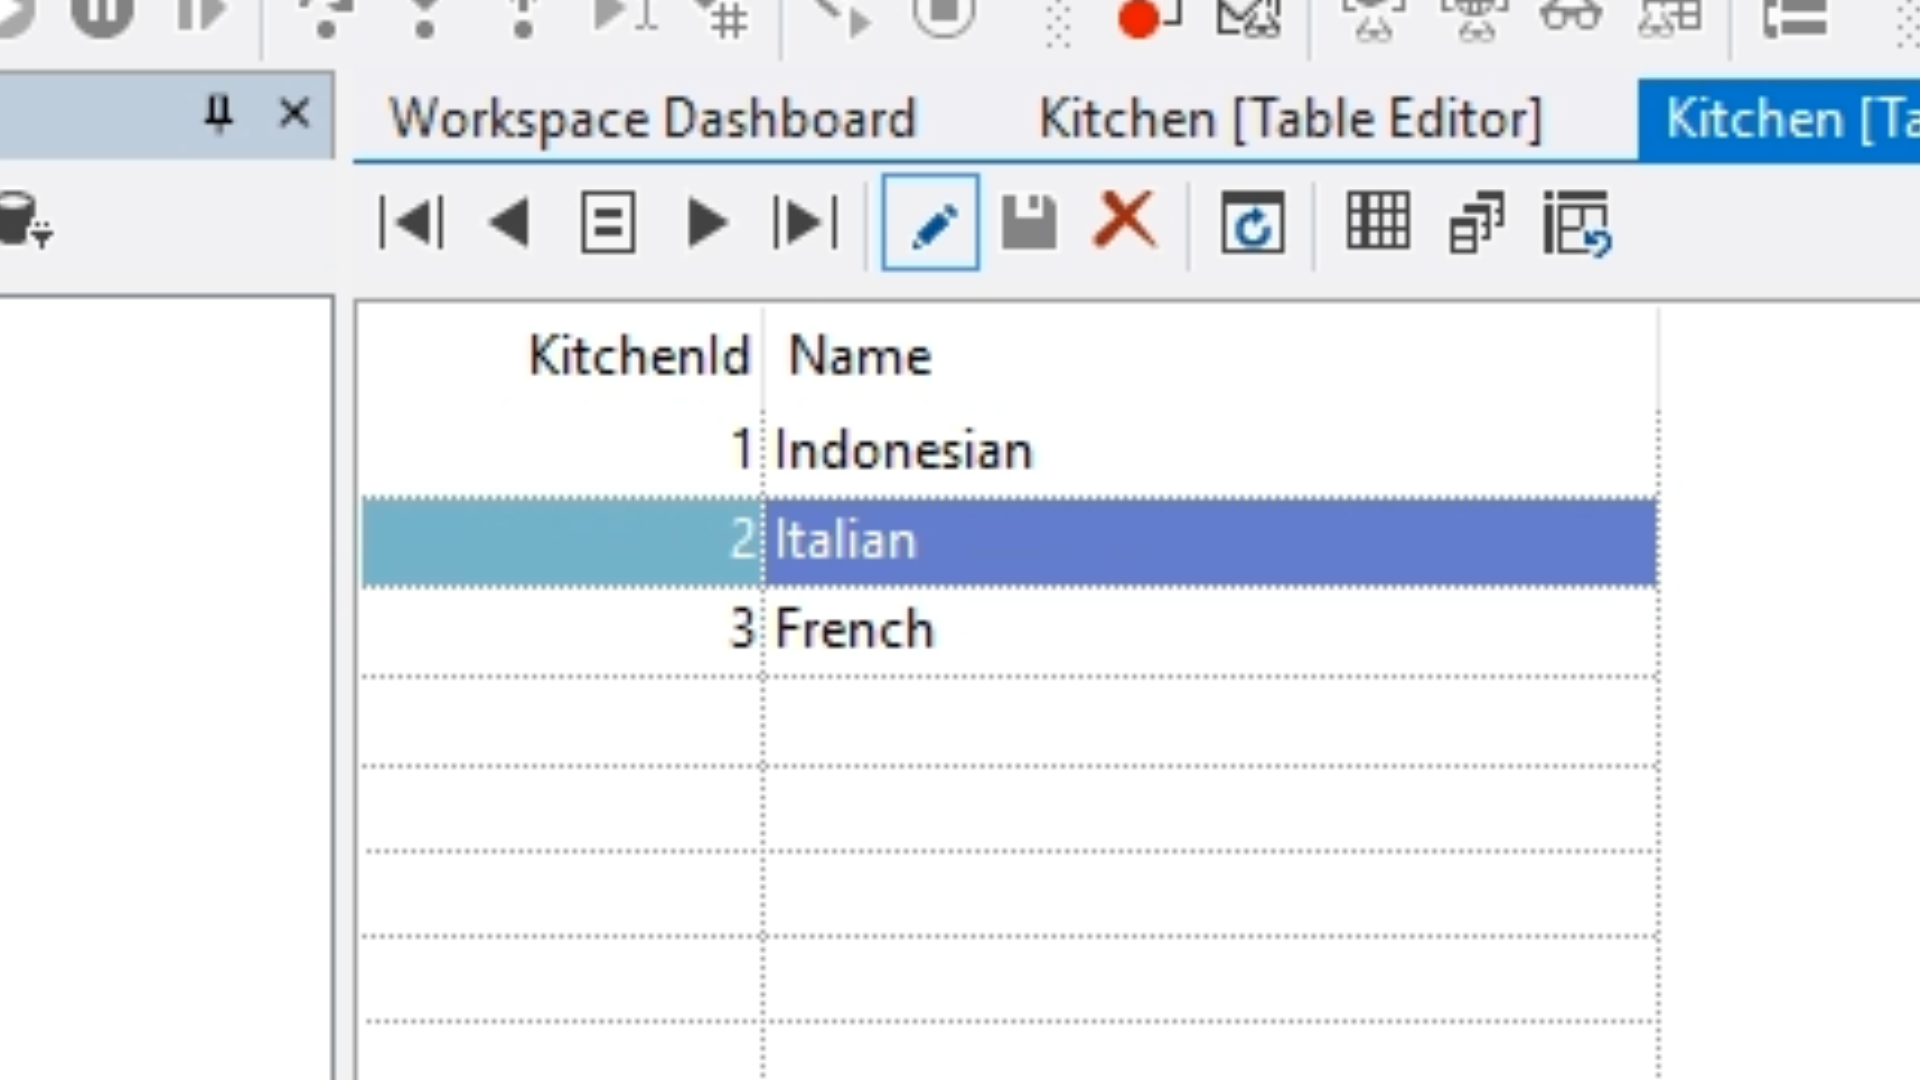
- For example purposes, some test records are added.
- Define the relationship between the ‘Kitchen’ and ‘Recipe’ tables…
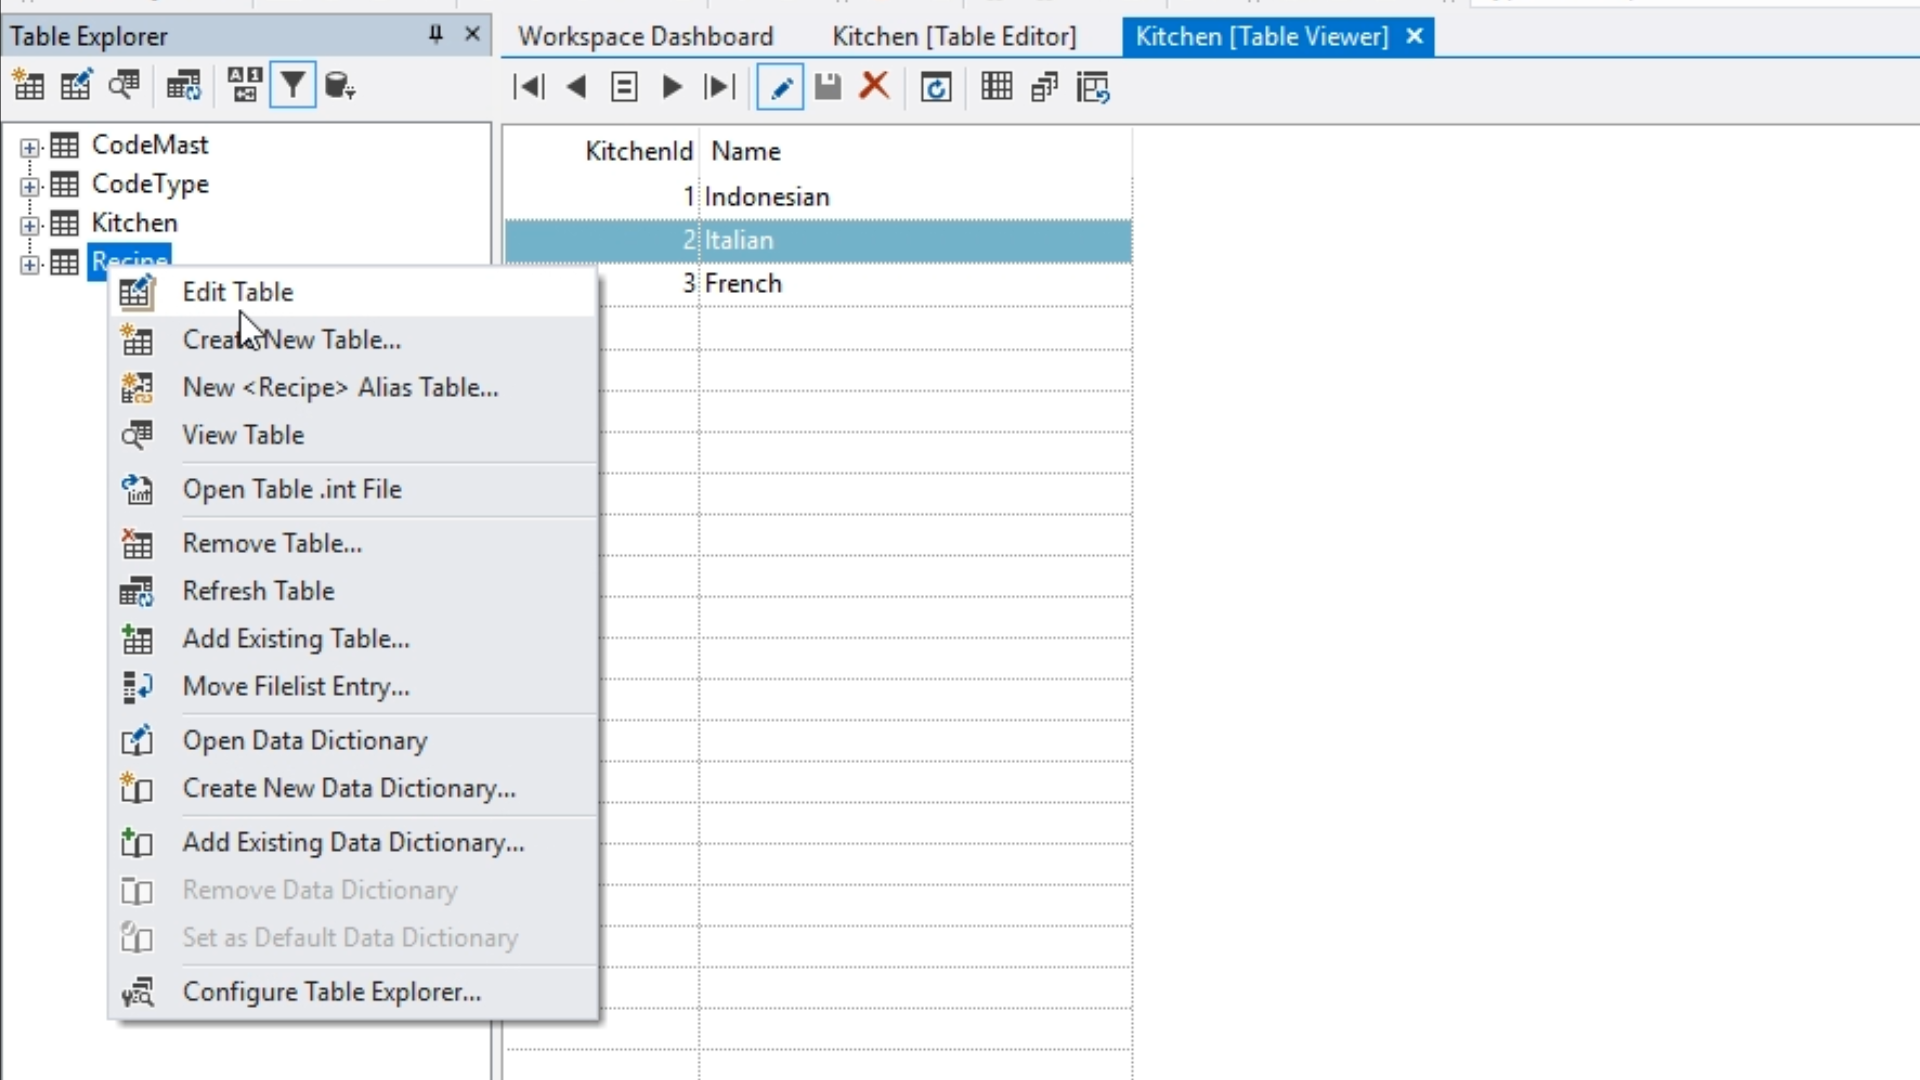
- Right click on the ‘Recipe’ table from the ‘Table Explorer’ on the left and select ‘Edit Table.’
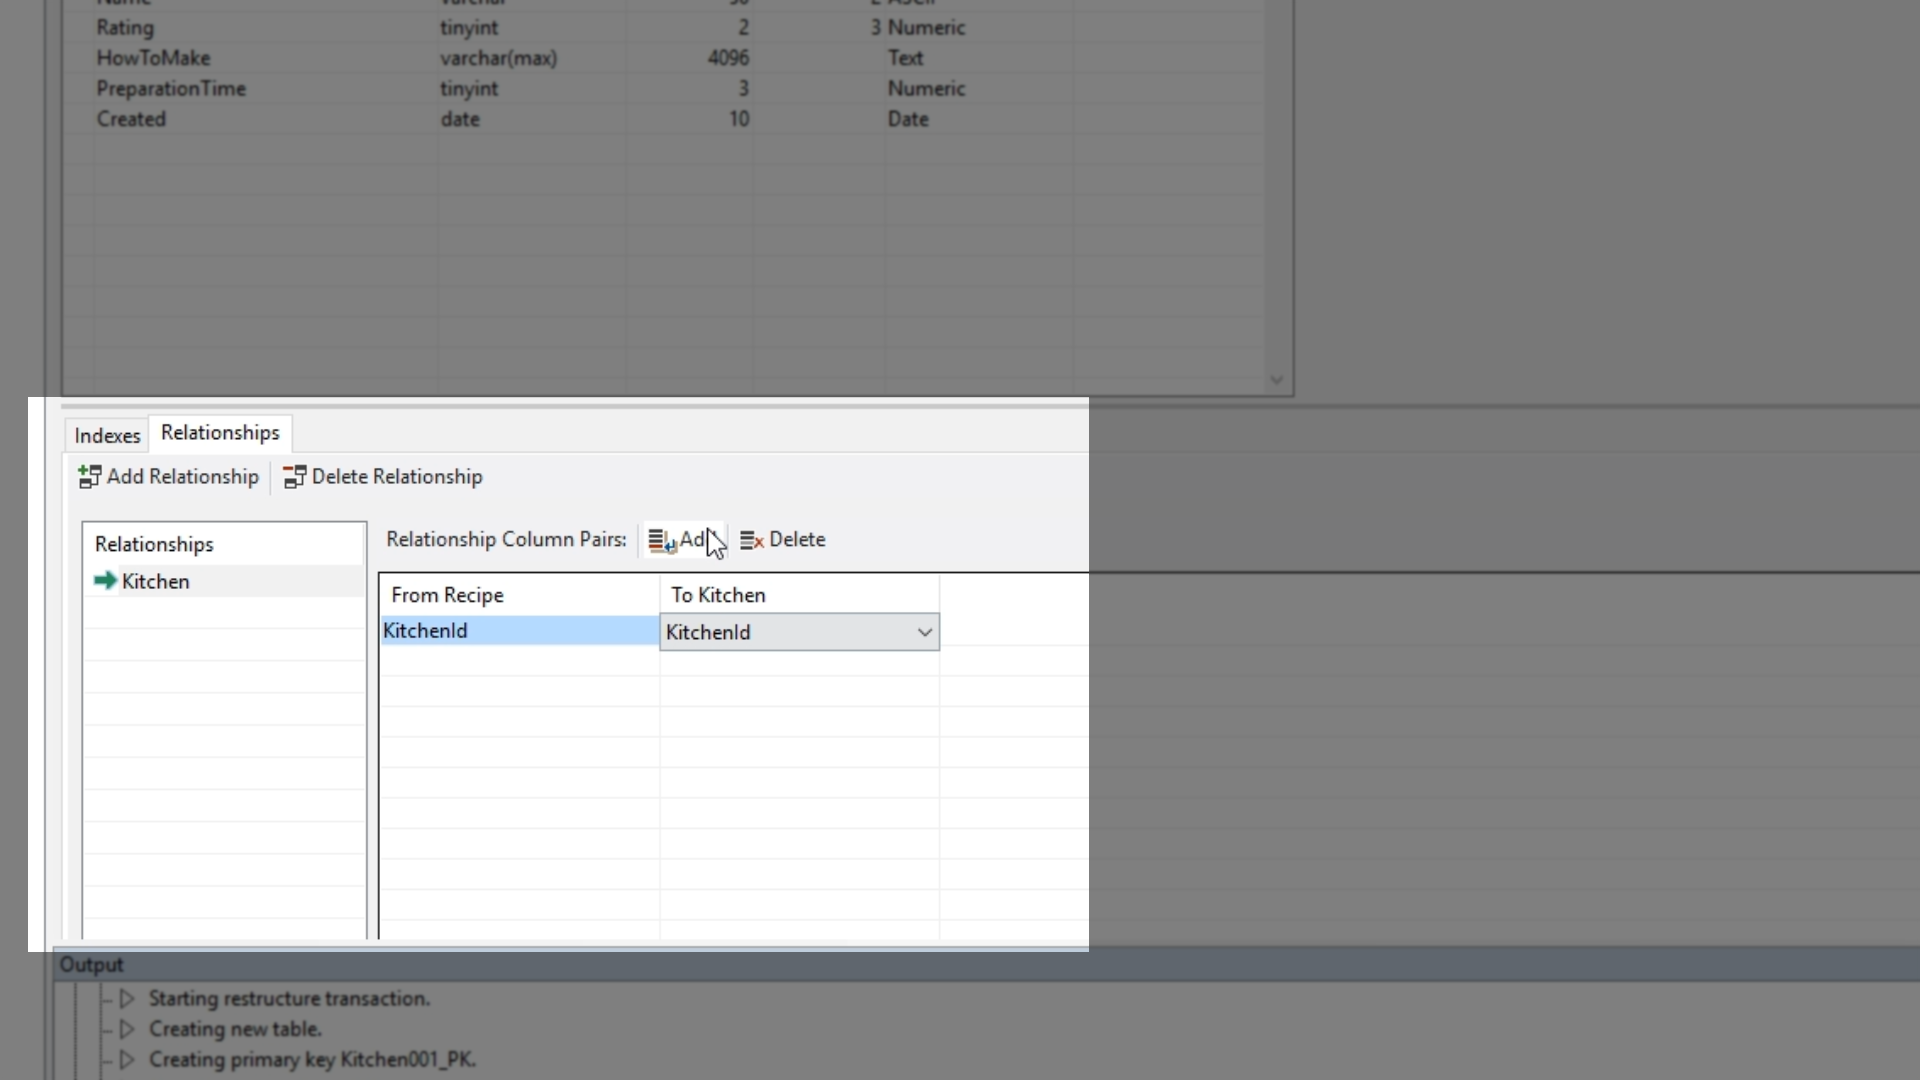
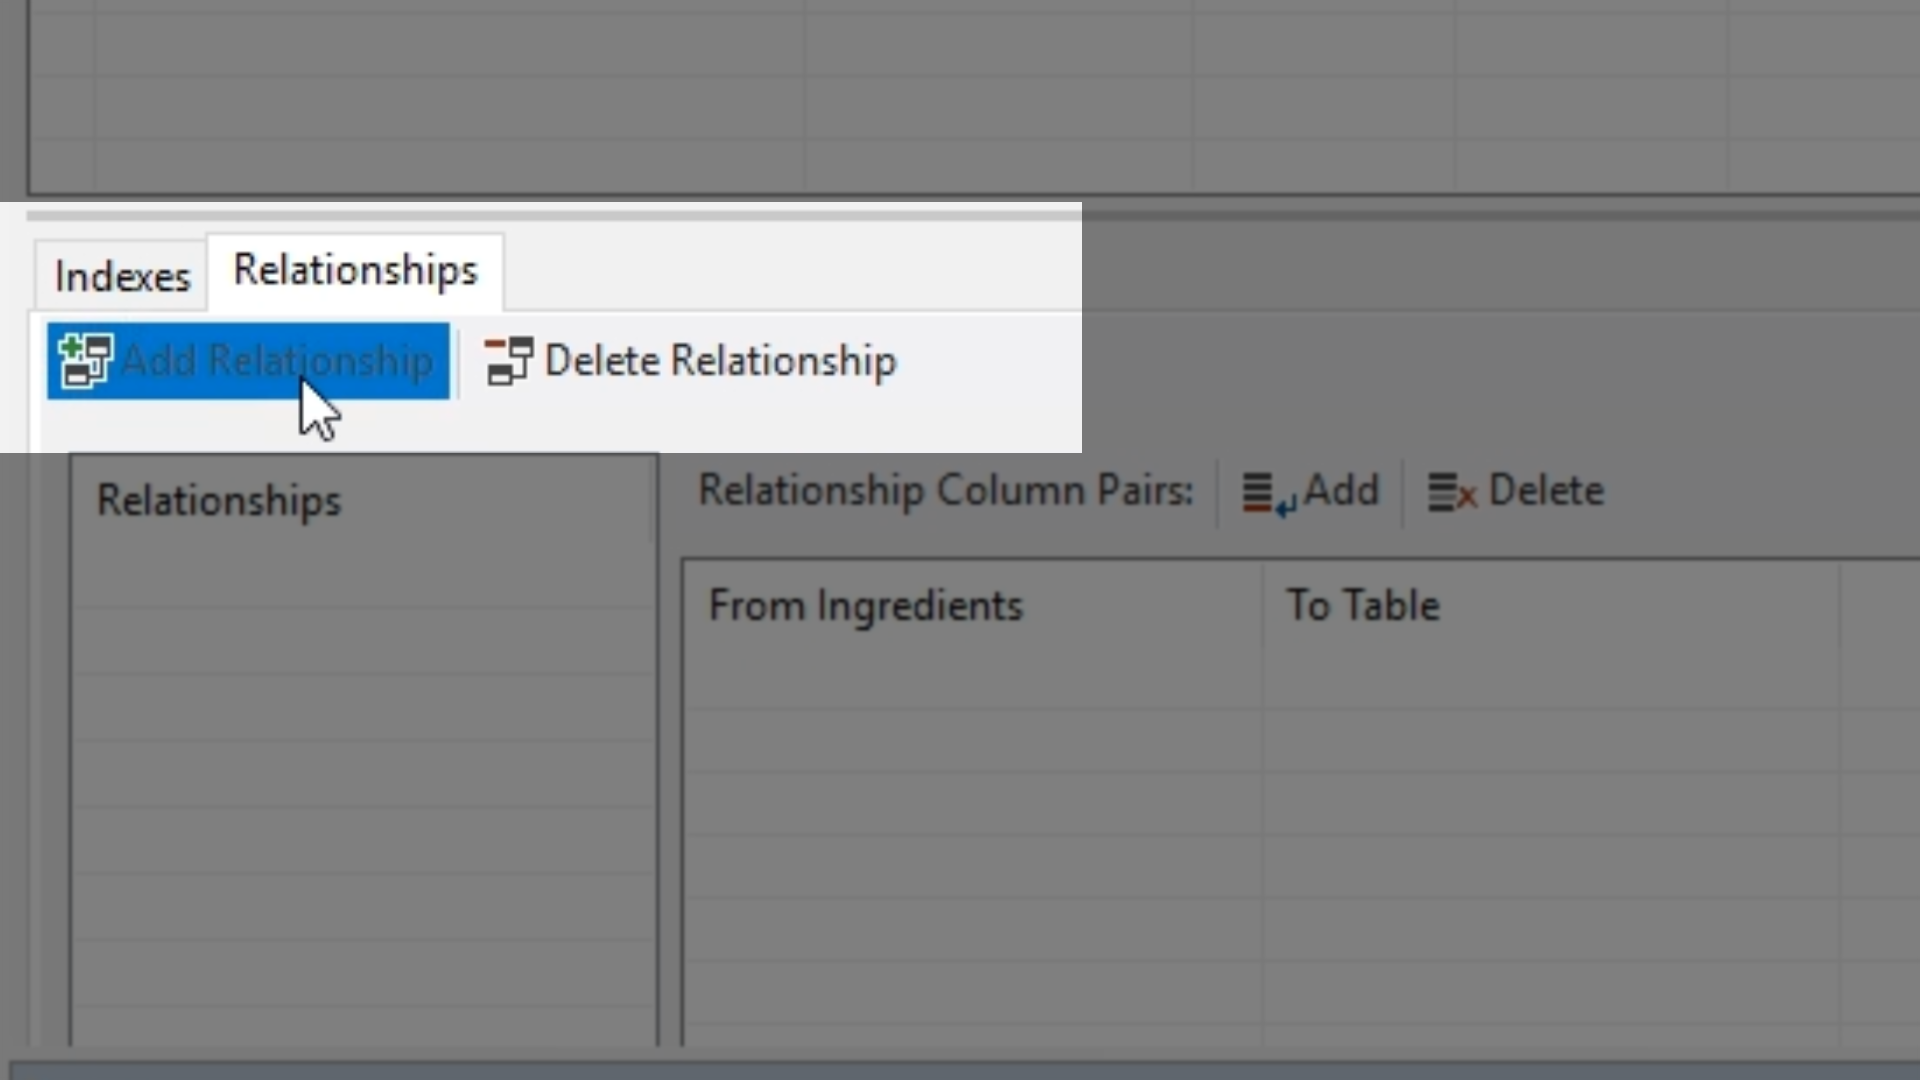
- Select the ‘Relationships’ tab in the middle of the screen.
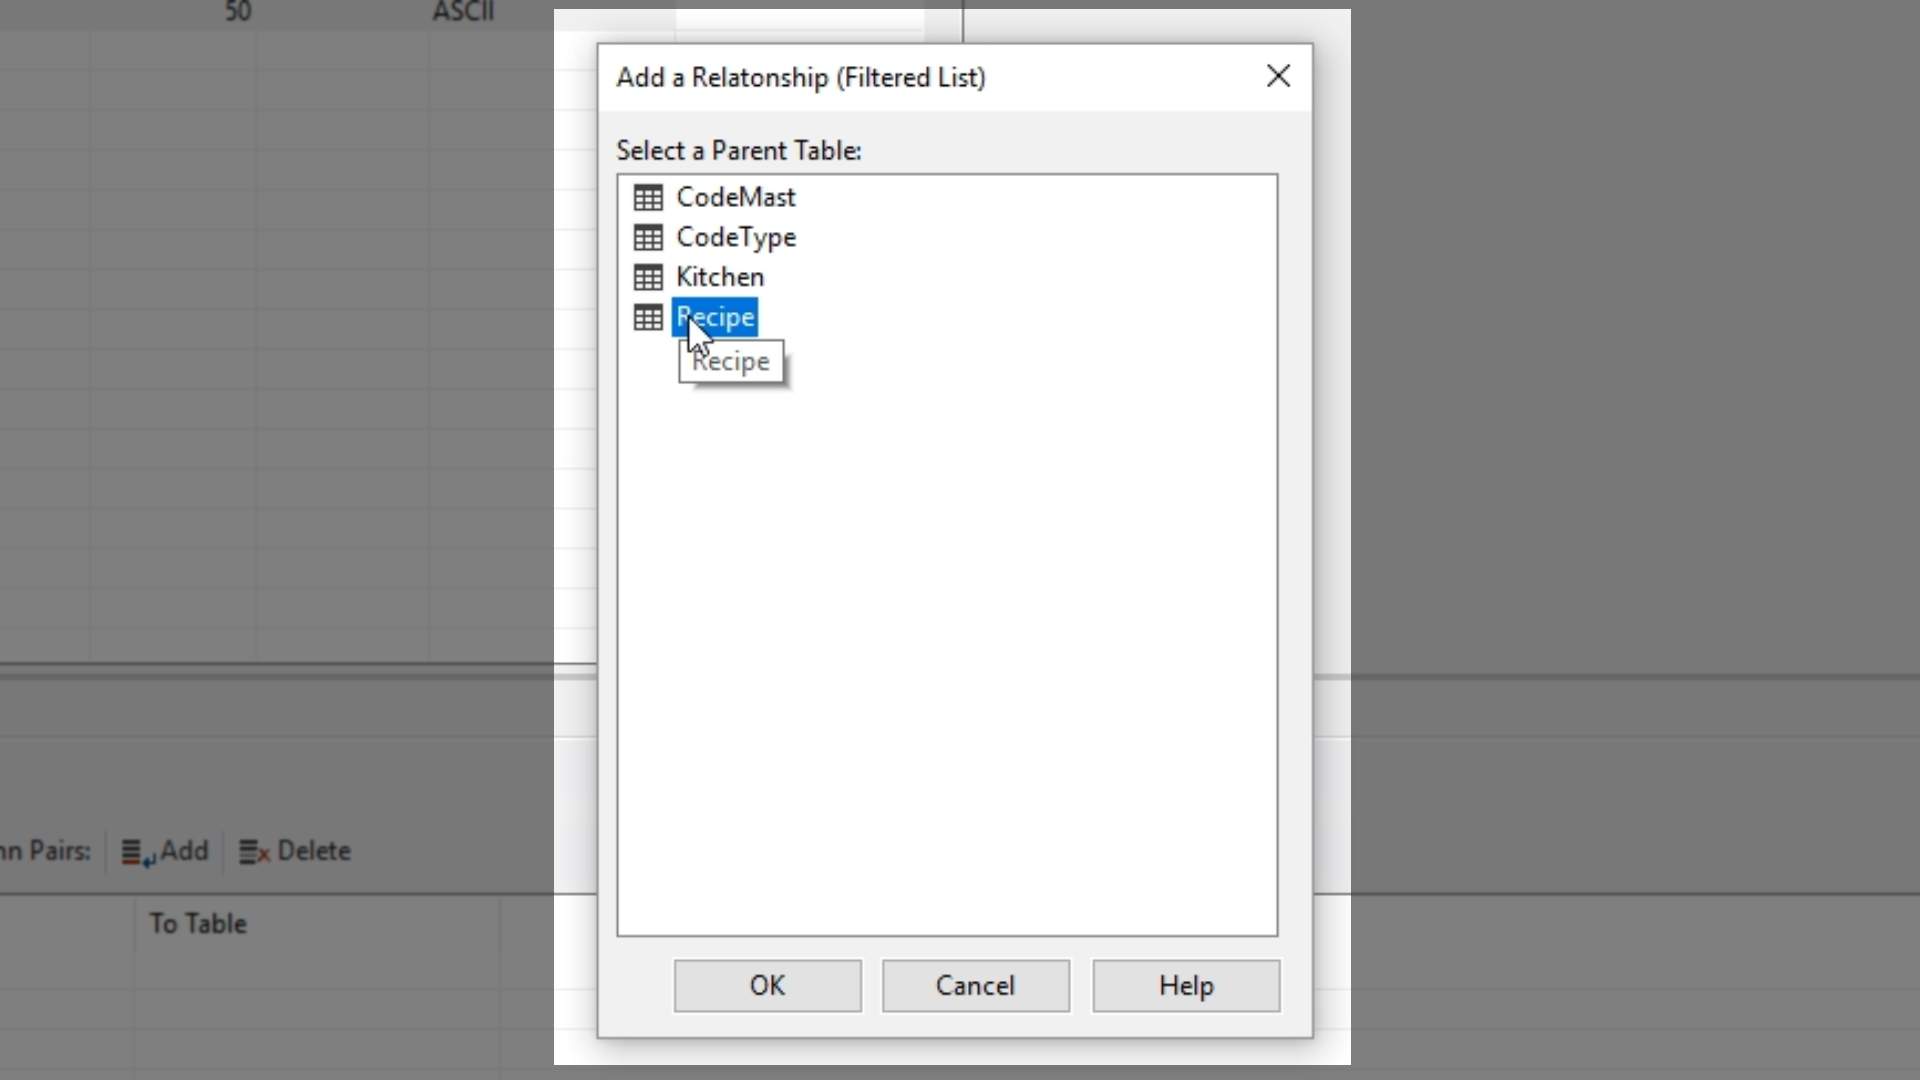
- Select ‘Add Relationship’ from the top of the panel and select the ‘Kitchen’ table from the ‘Add a Relationship’ window that appears.
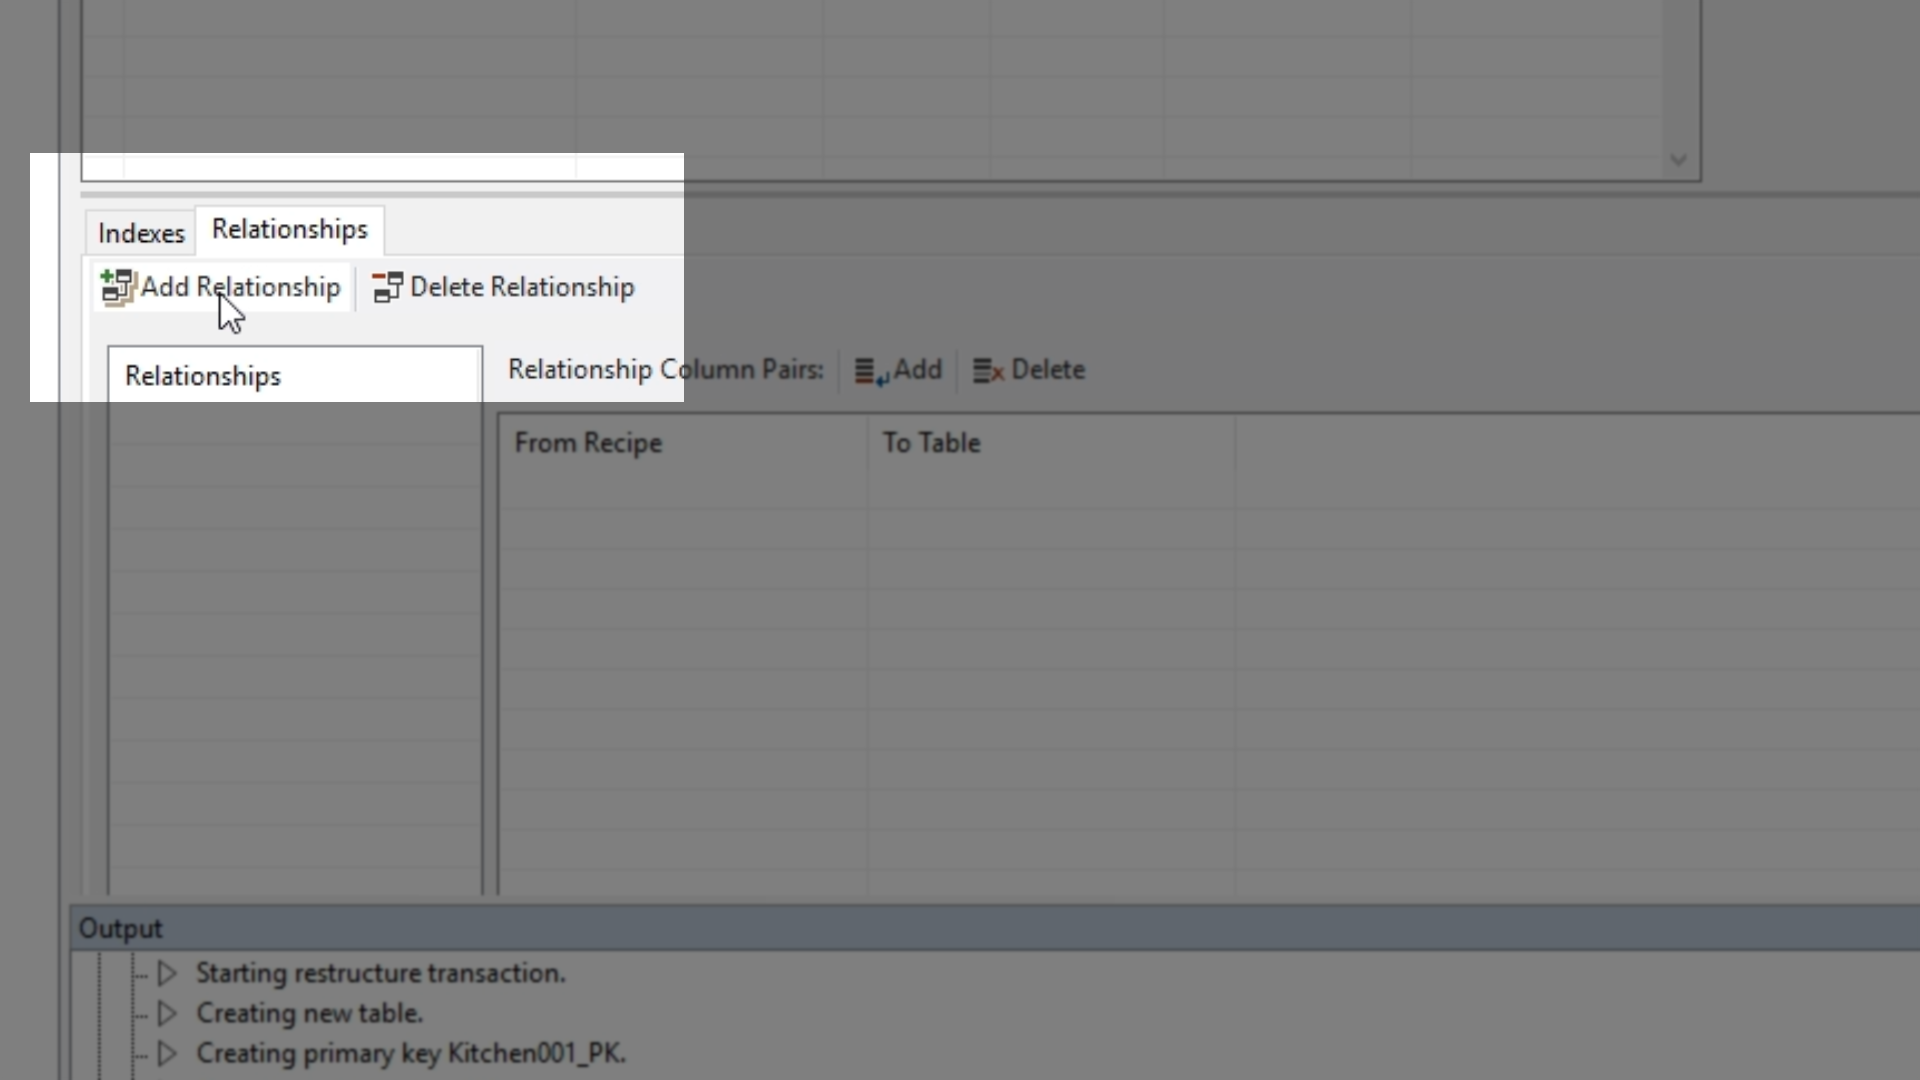
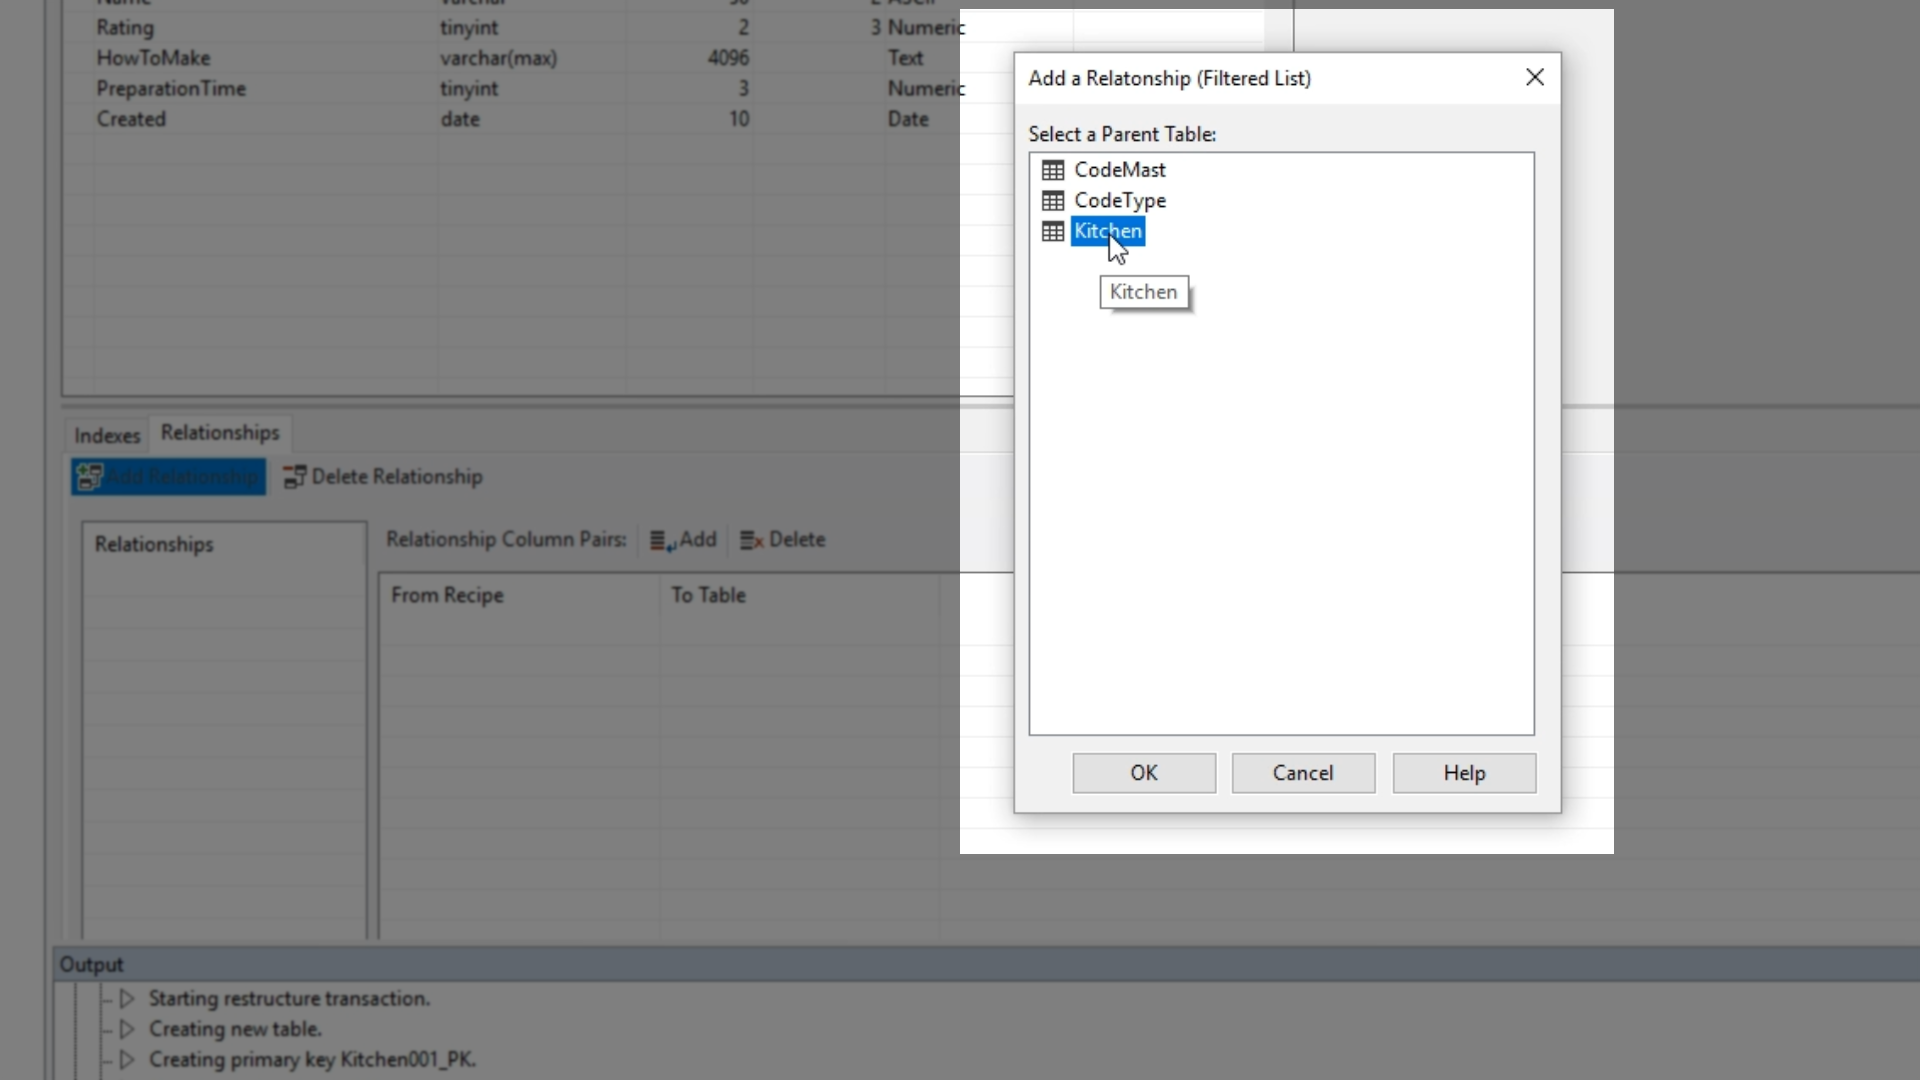
- Under ‘From Recipe’ choose the top empty field and select ‘KitchenID’ from the exposed drop down.
- Under ‘To Kitchen’ choose the top empty field and select ‘KitchenID’ from the exposed drop down.
- Select ‘Add’ from the top of the panel to save the relationship.
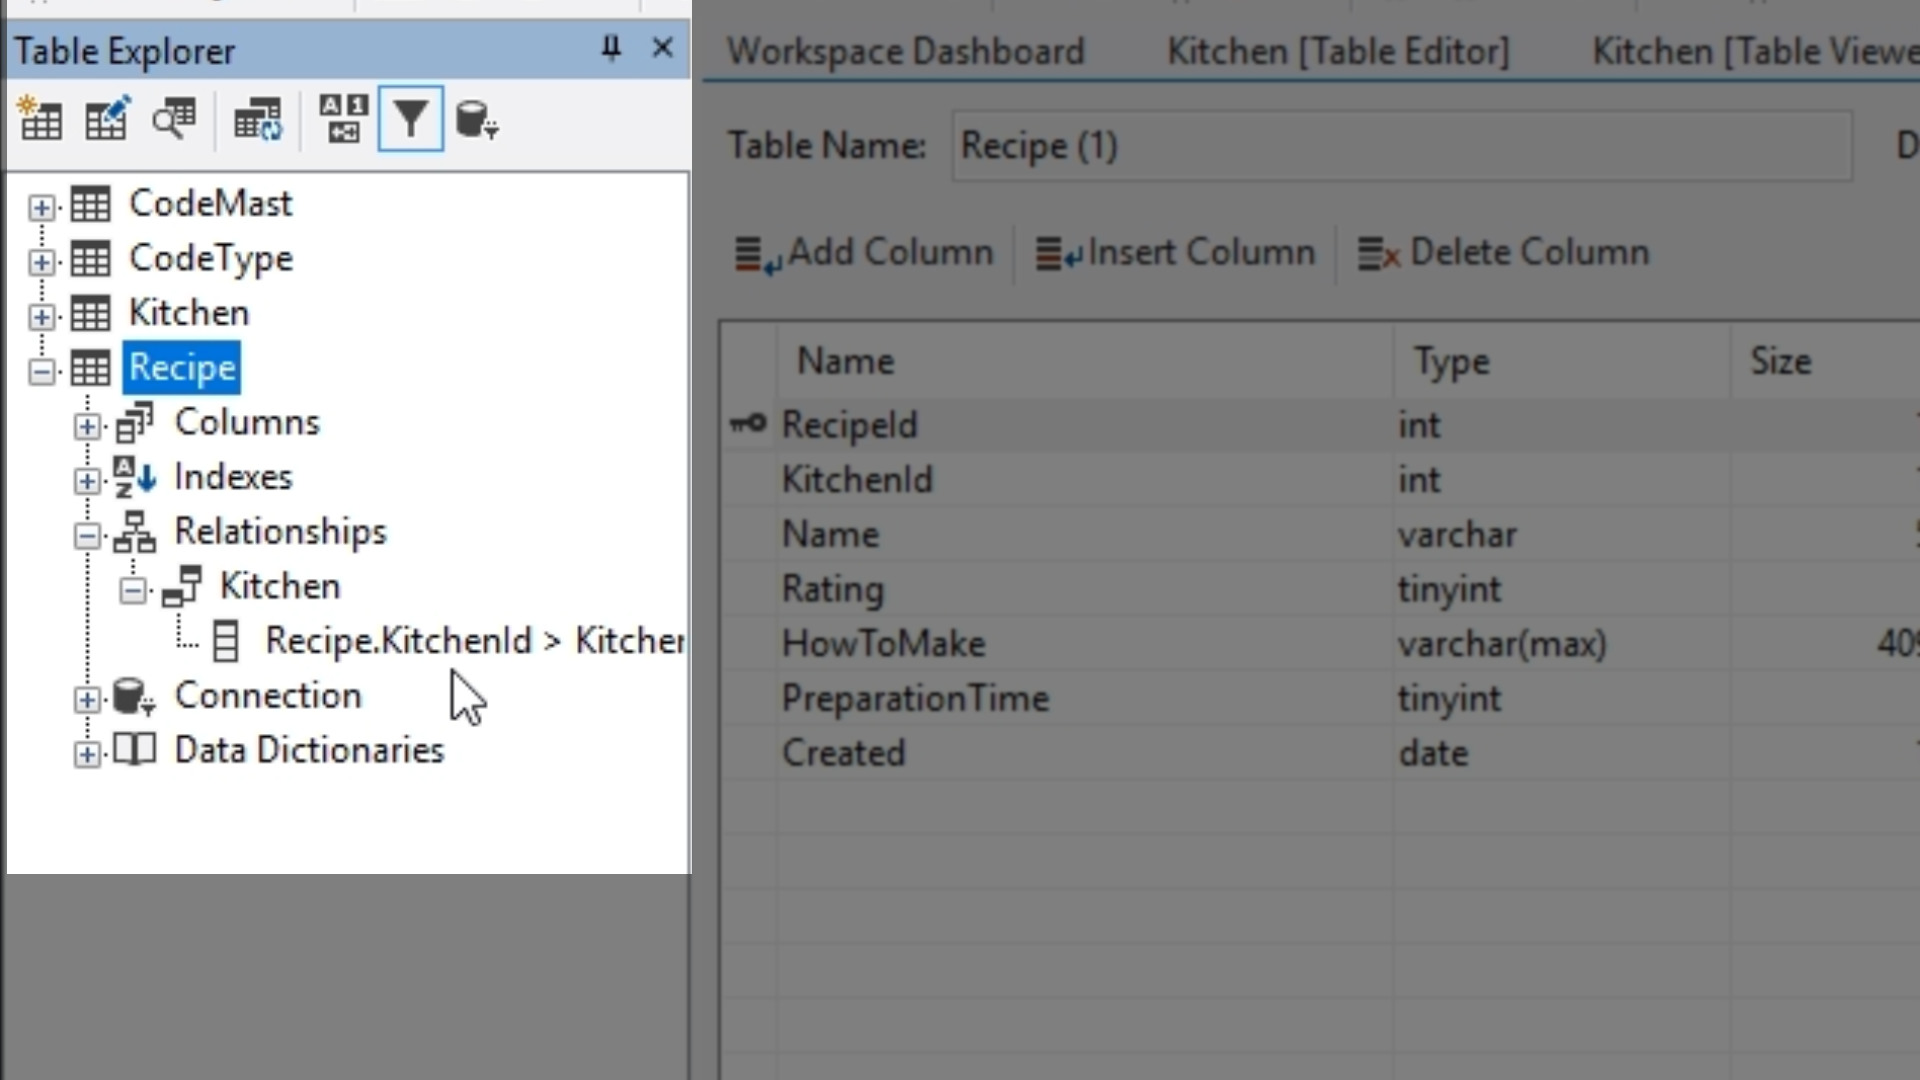
- Expand the ‘Recipe’ section of the ‘Table Explorer,’ and then expanding ‘Relationships’ and ‘Kitchen’ will expose the relationship just created.
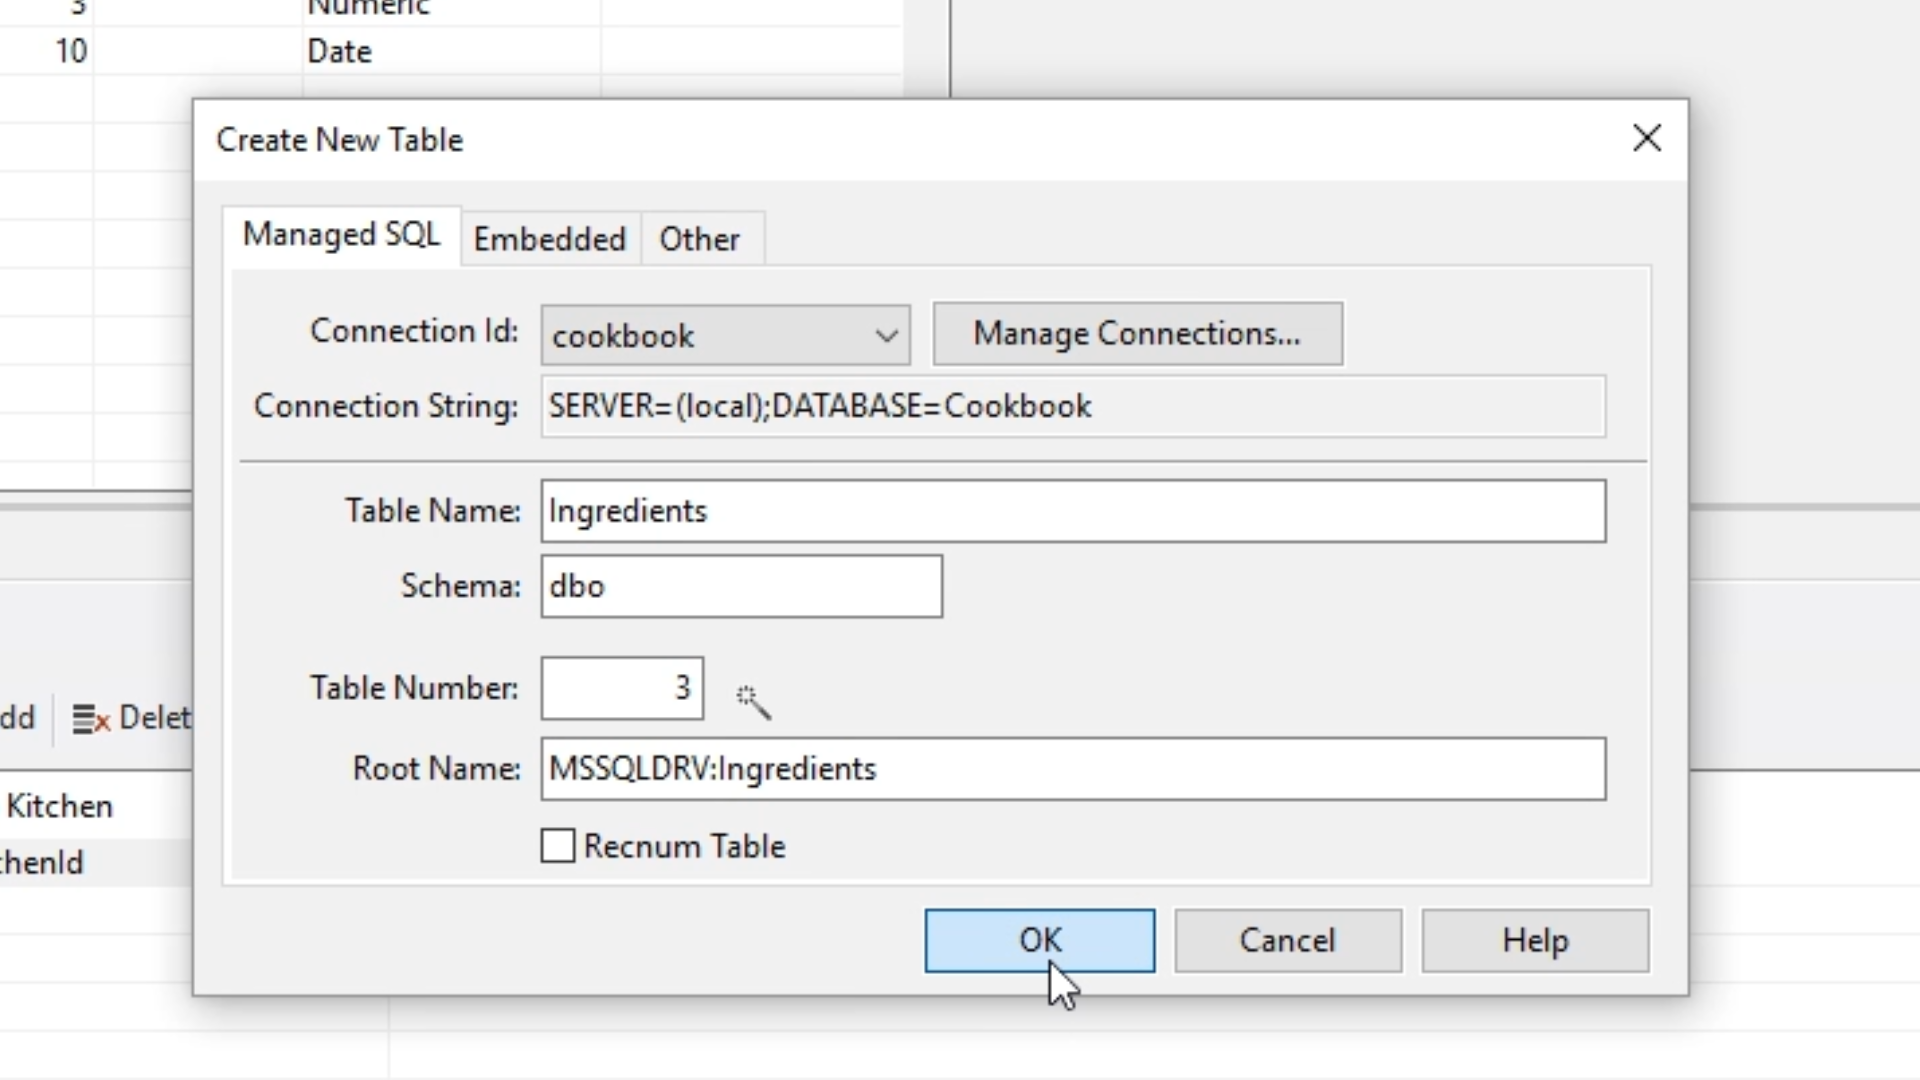
- From the ‘Table Explorer’ on the left, select the ‘Create New Table’ icon from its top menu.
- From the ‘Create New Table’ window that opens, select the desired ‘Connection id,’ which is ‘cookbook’ for this table.
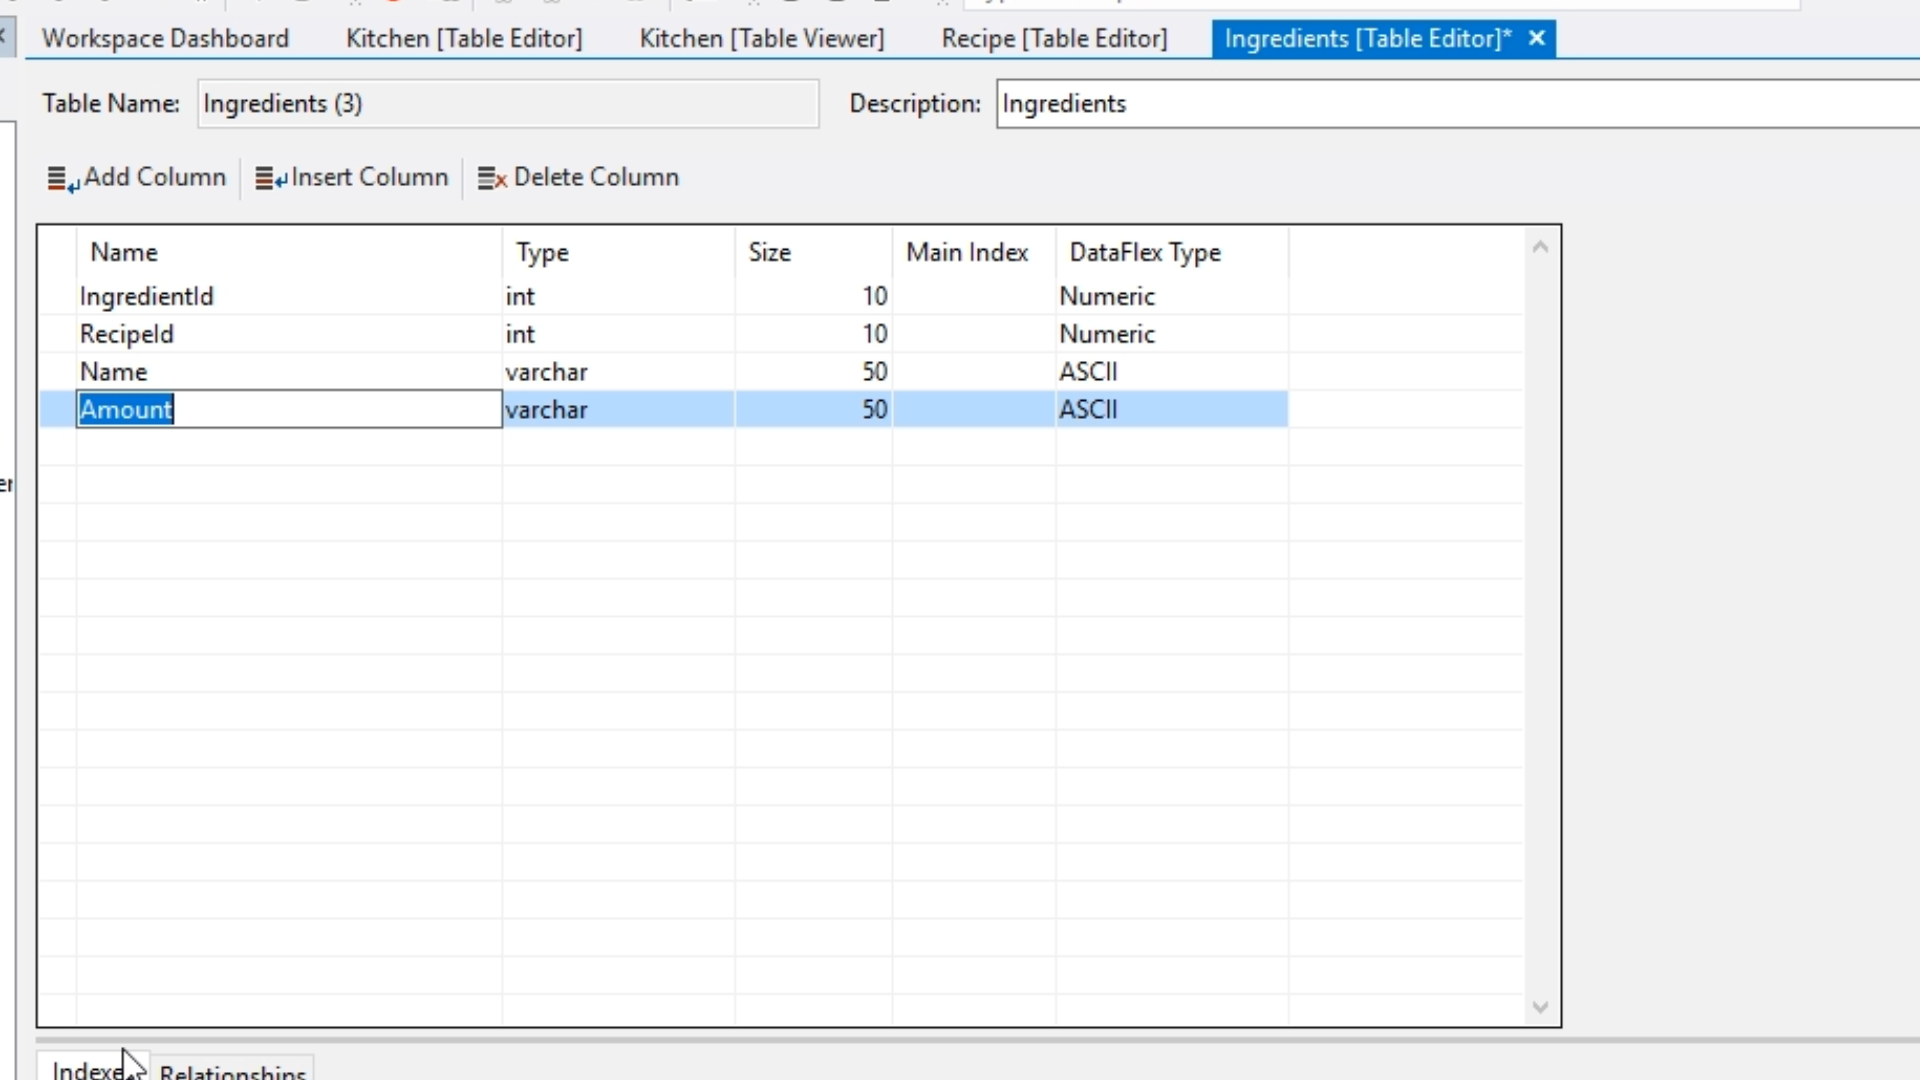
- Add a ‘Table Name.’ “Ingredients” will be the name of this table. Select ‘OK.’
- Add field/column names:
- FIELD 1 - Name: IngredientID, Type: int, Size: 10, DataFlex Type: Numeric
- This IngredientID will be the unique identifier.
- From the ‘Column Properties’ panel on the right, set the ‘is identity’ to “True” to allow SQL to provide the identities. This makes it so every new record will automatically get a unique IngredientID.
- FIELD 2 - Name: RecipeID, Type: int, Size: 10, DataFlex Type: Numeric
- This will be the foreign key. There is a multiple to one relationship between ‘RecipeID’ and ‘IngredientID’ because multiple ingredients can be applied to a since recipe.
- FIELD 3 - Name: Name, Type: varchar, Size: 50, DataFlex Type: ASCII
- FIELD 4 - Name: Amount, Type: varchar, Size: 50, DataFlex Type: ASCII
- Add a unique index for the table. From the ‘Indexes’ panel (mid-screen):
- Select ‘Add Index’ from the top of the panel.
- ‘Index 1’ is automatically added to the ‘Indexes’ list, and ‘IngredientID’ is added to the column list making it the unique index.
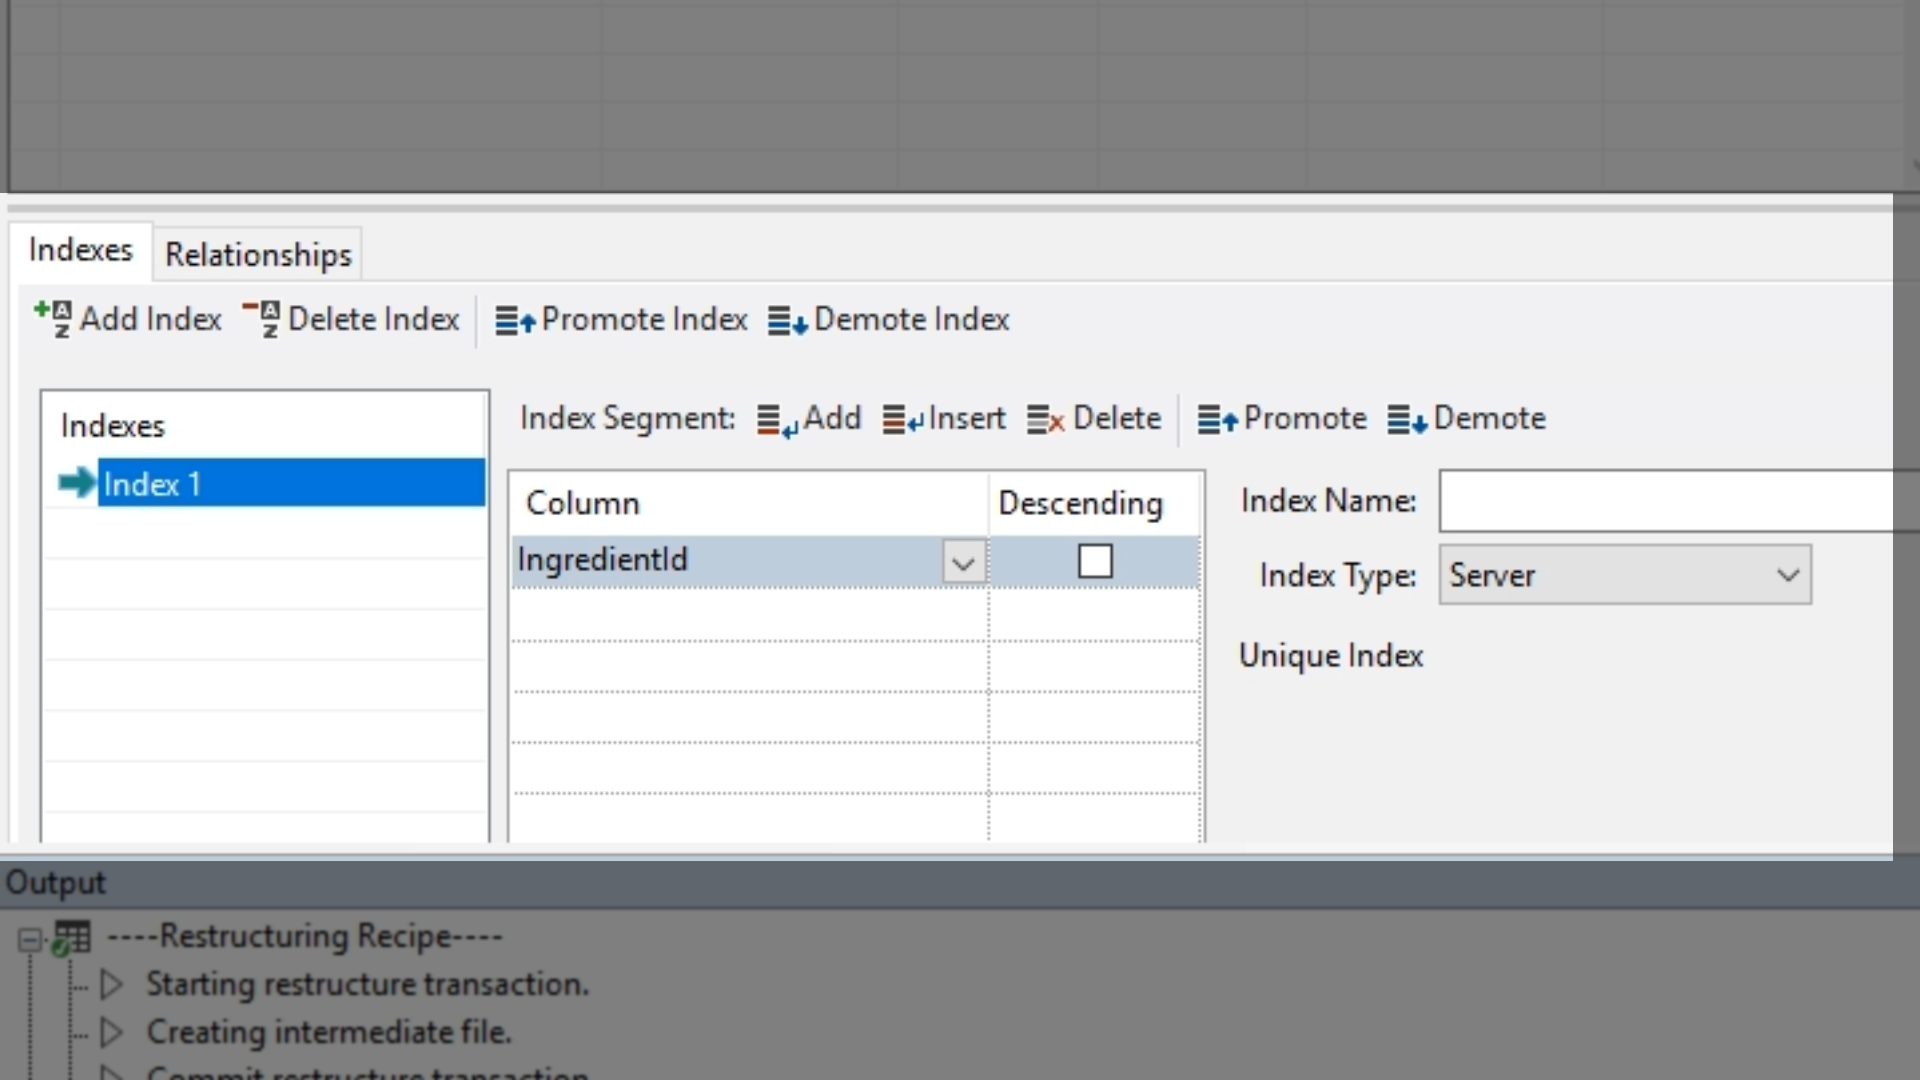
- Optional: Select ‘Index 1,’ and from the ‘Properties’ panel on the right change the ‘sql primary key’ to “True” to make it work faster with SQL.

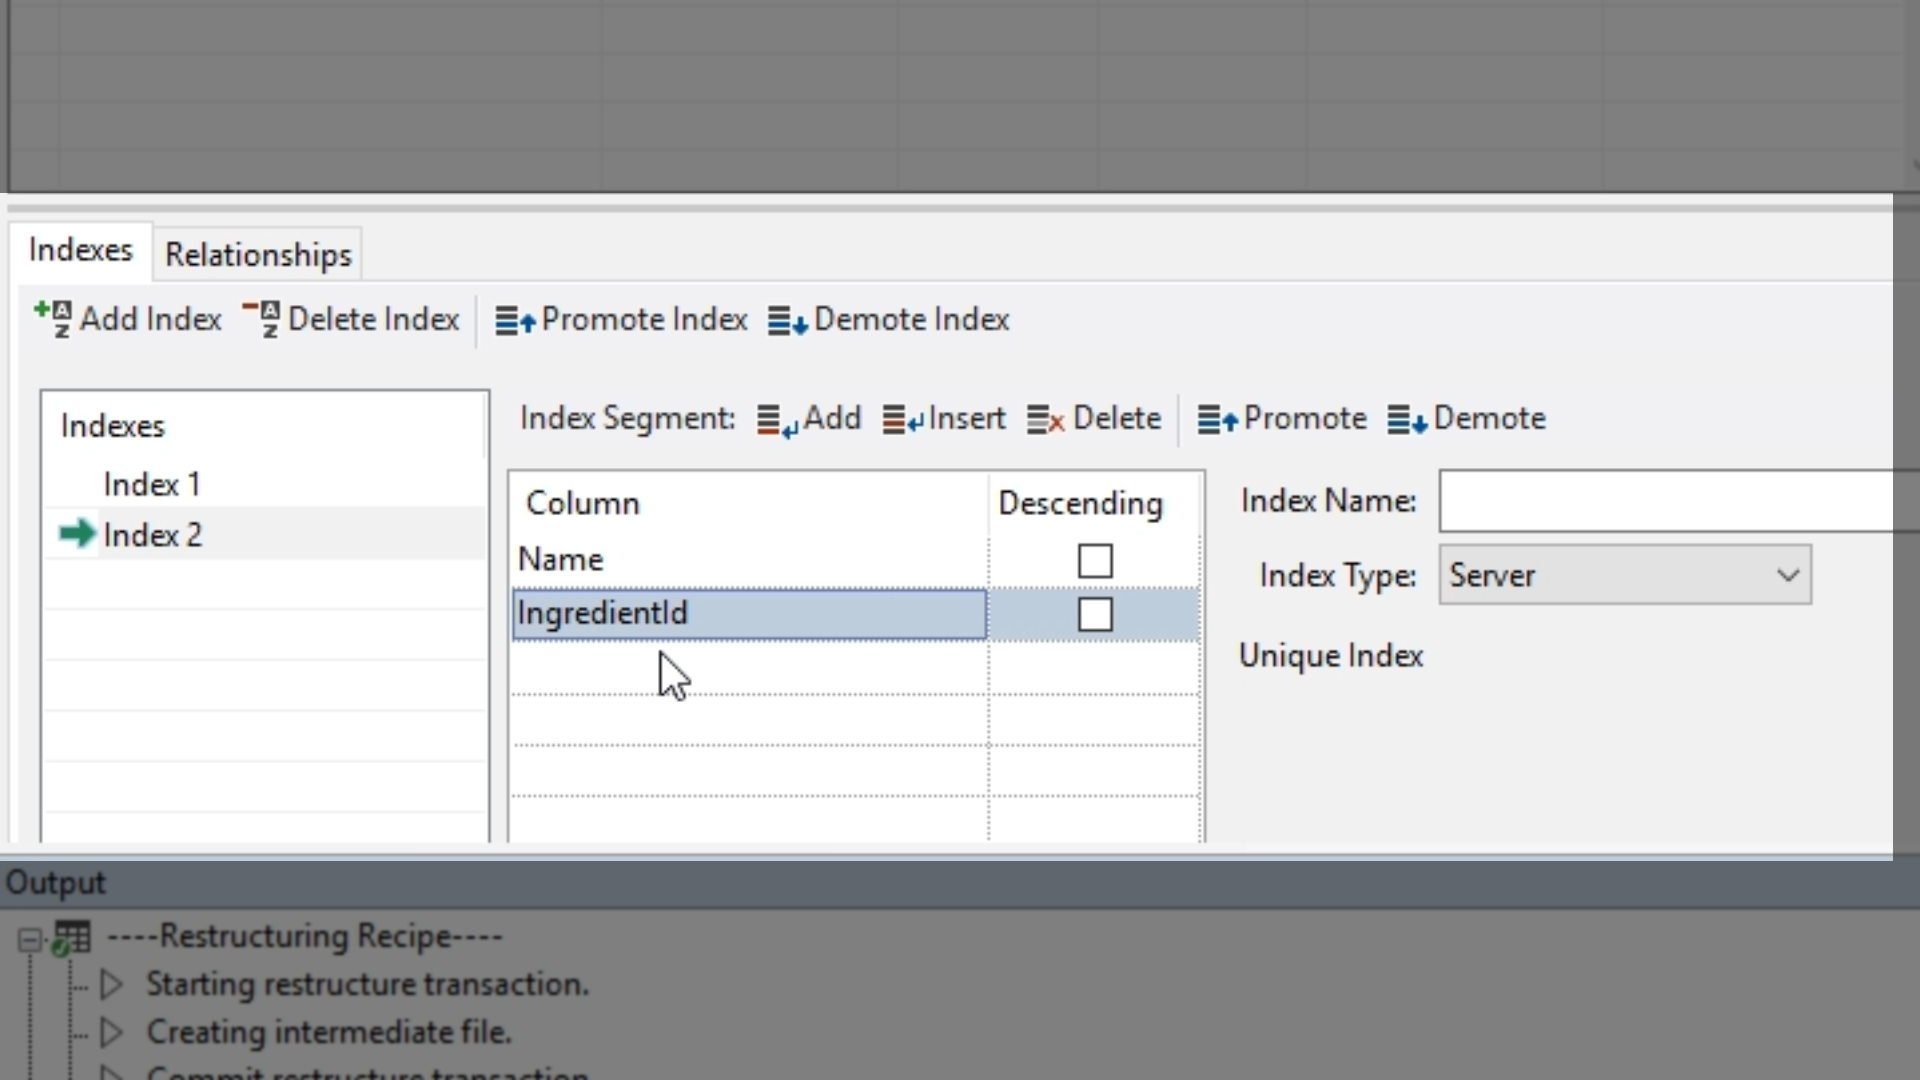
- Again, select ‘Add Index’ from the top of the panel creating ‘Index 2’, and select ‘Name’ for its column.
- Add a second column to Index 2, ‘IngredientID.’
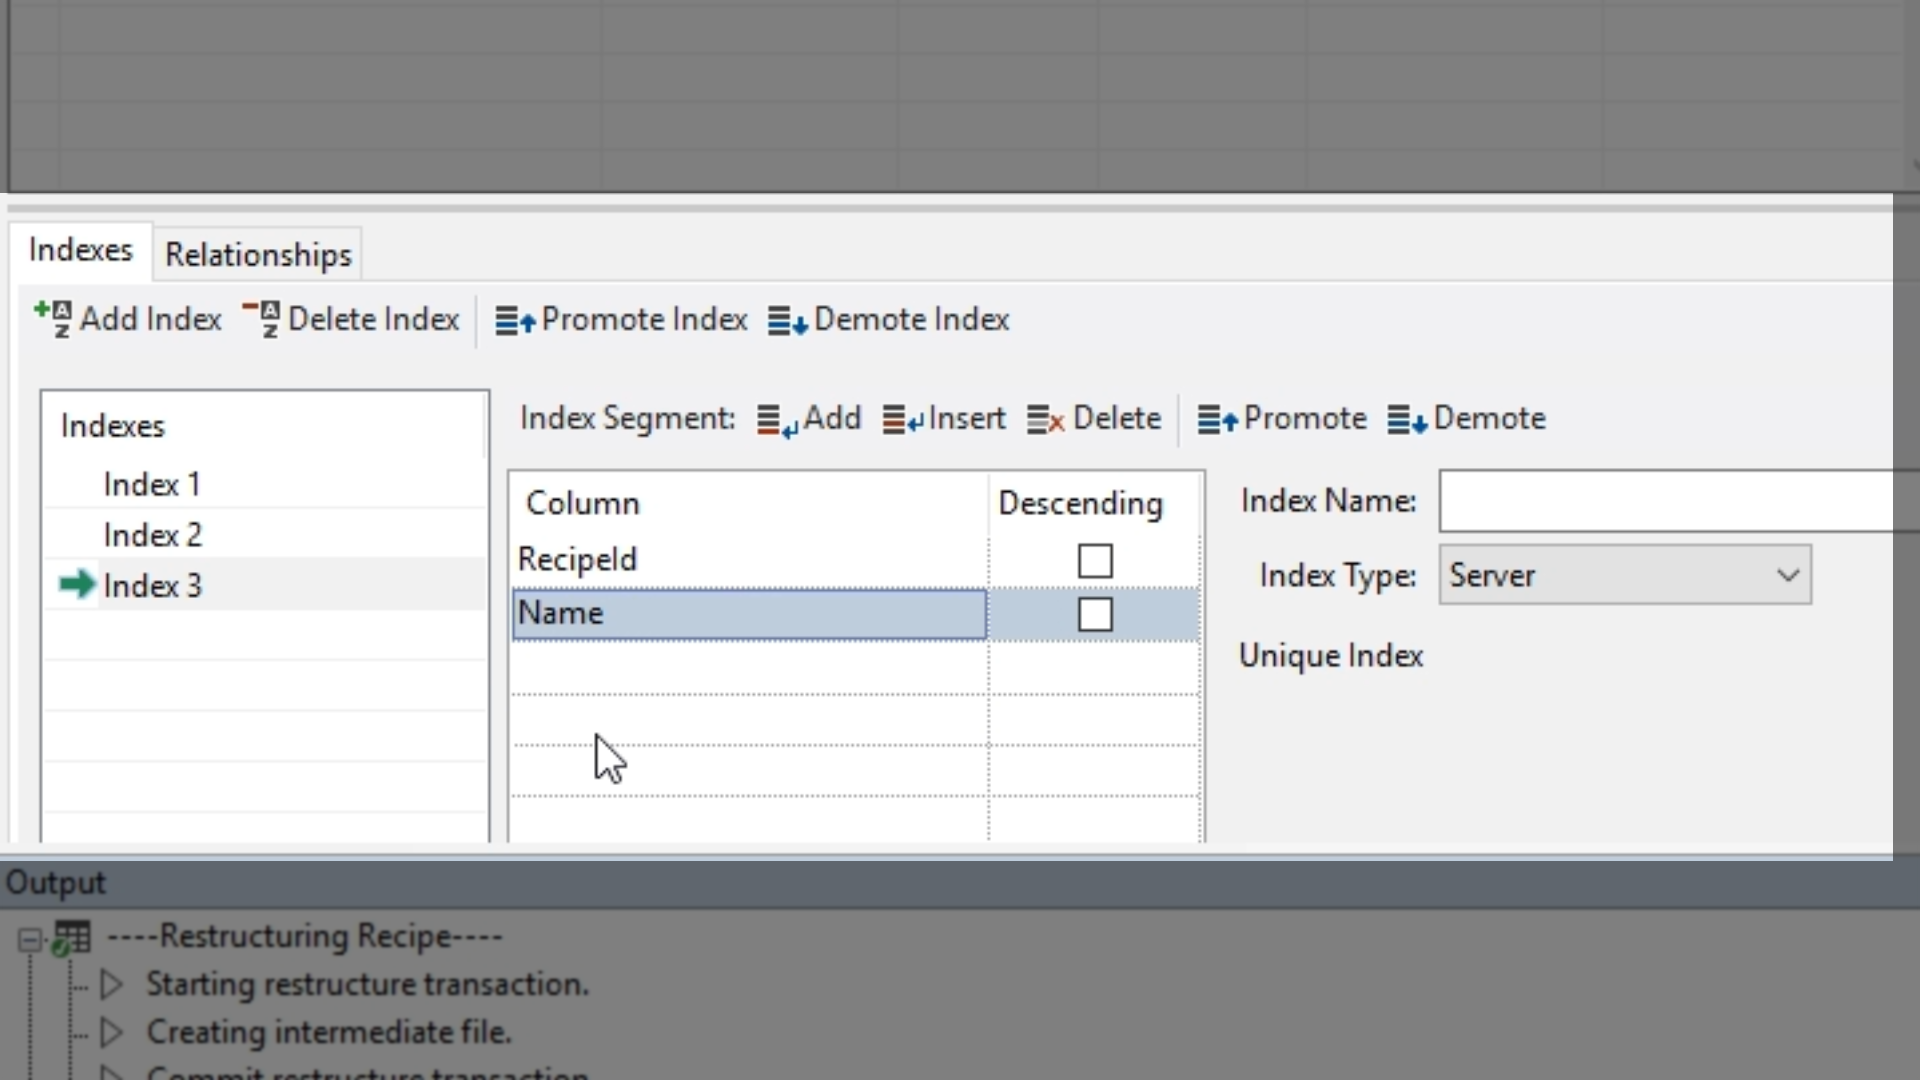
- Again, select ‘Add Index’ from the top of the panel creating ‘Index 3’, and select ‘RecipeID’ for its column.
- Add a second column to Index 3, ‘Name.
- Define the relationships…
- Select the ‘Relationships’ tab.
- Select ‘Add Relationship’ from the top of the panel and select the ‘Recipe’ table.
- Under ‘From Ingredients’ choose the top empty field and select ‘RecipeID’ from the exposed drop down.
- Under ‘To Recipe’ choose the top empty field and select ‘ReceipeID’ from the exposed drop down.
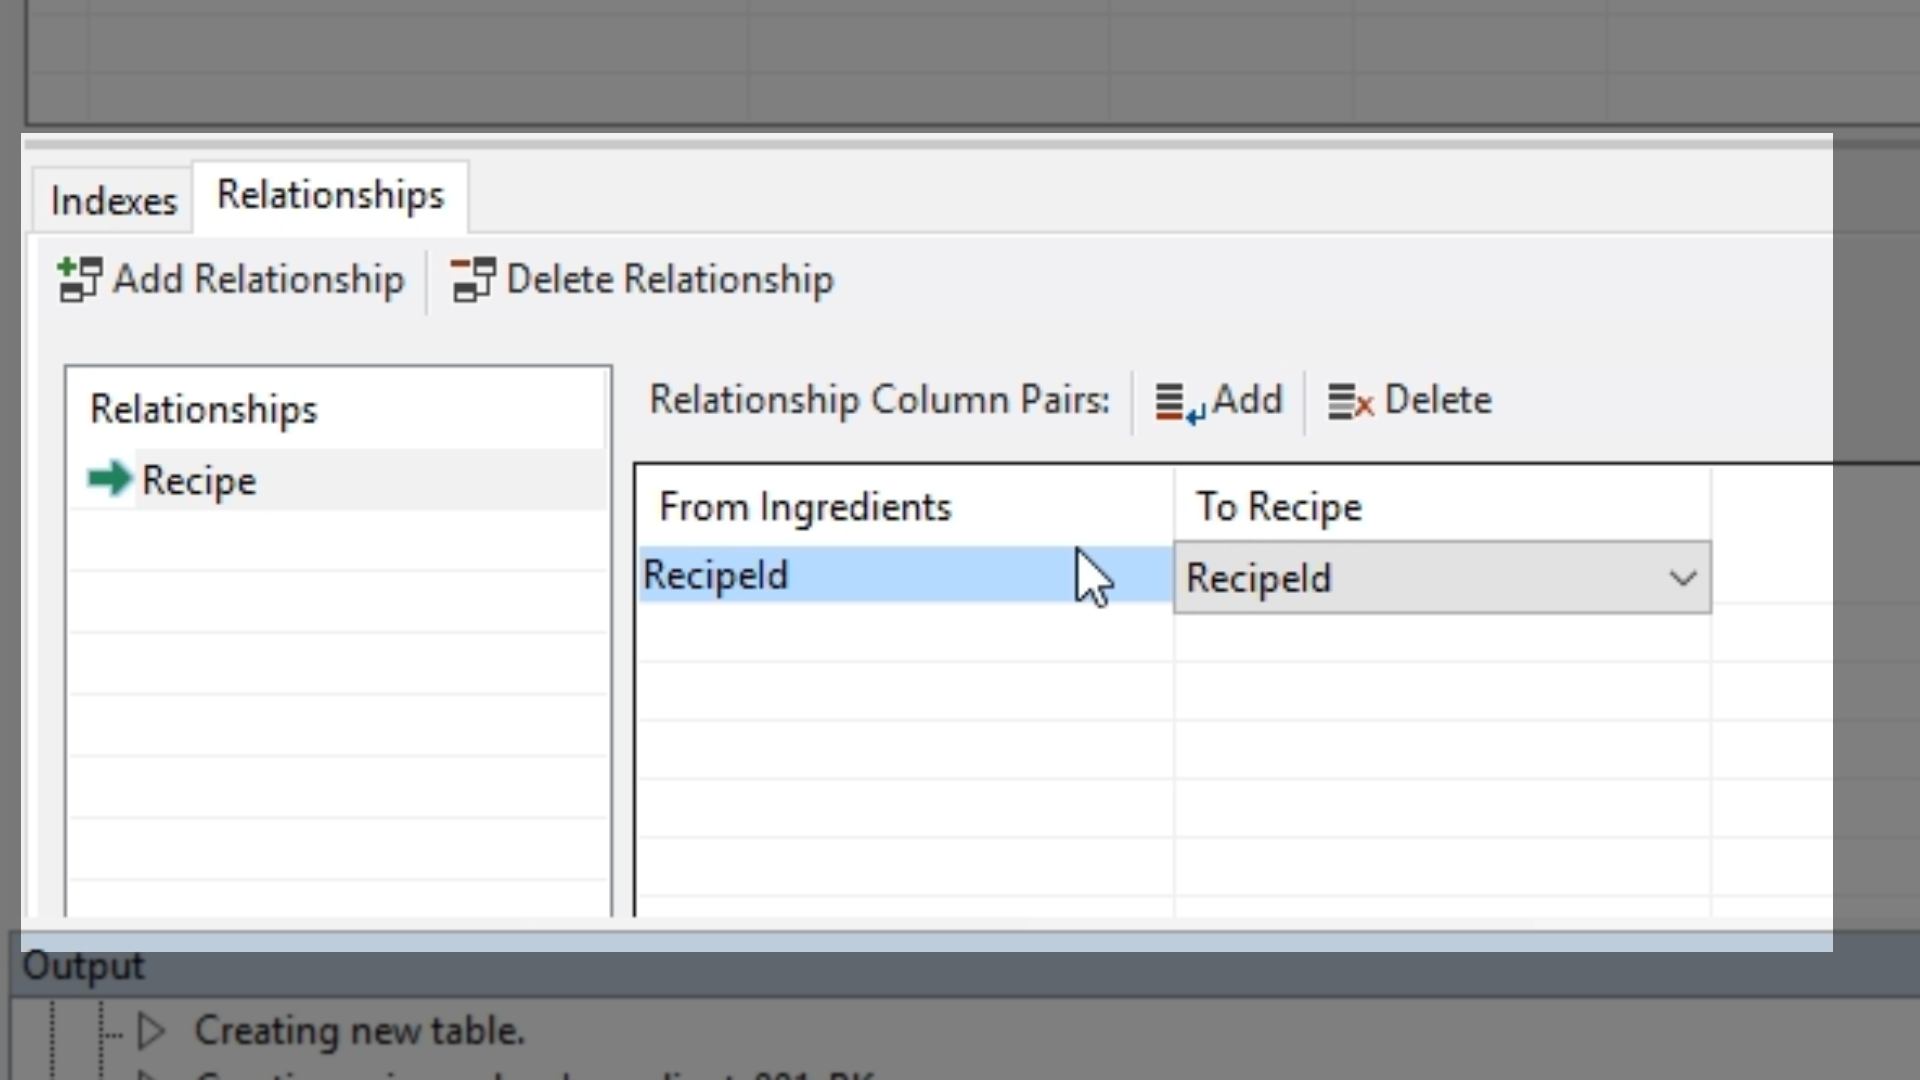
- Select ‘Add’ from the top of the panel to save the relationship.
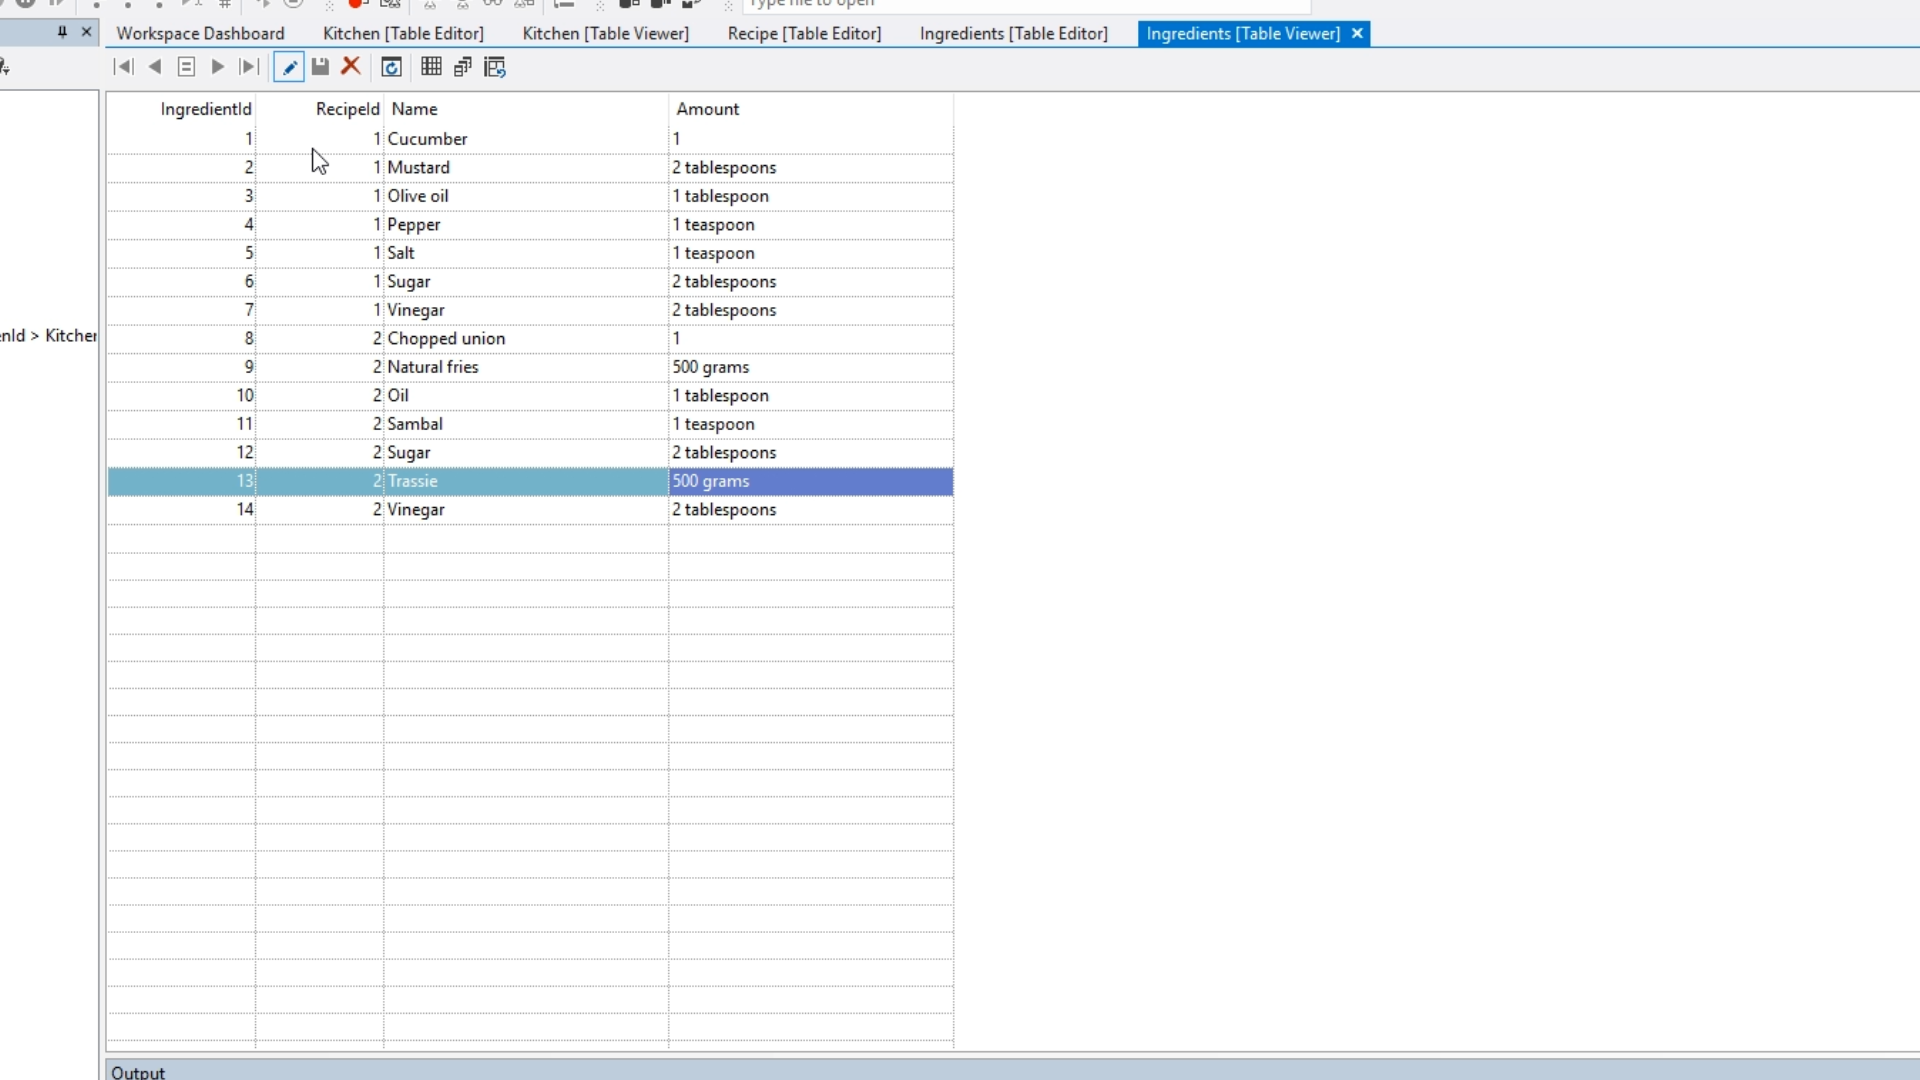
- View the table by right clicking on ‘Ingredients’ from the ‘Table Explorer’ on the left and selecting ‘View Table.’ The table will be empty.
- For example purposes, some test records are added.
- Save the table.


