Working with databases
Lesson 3: Creating your first table
With the workspace prepared, the next step it to create a table.
- From the ‘Table Explorer’ on the left, select the ‘Create New Table’ icon from its top menu.
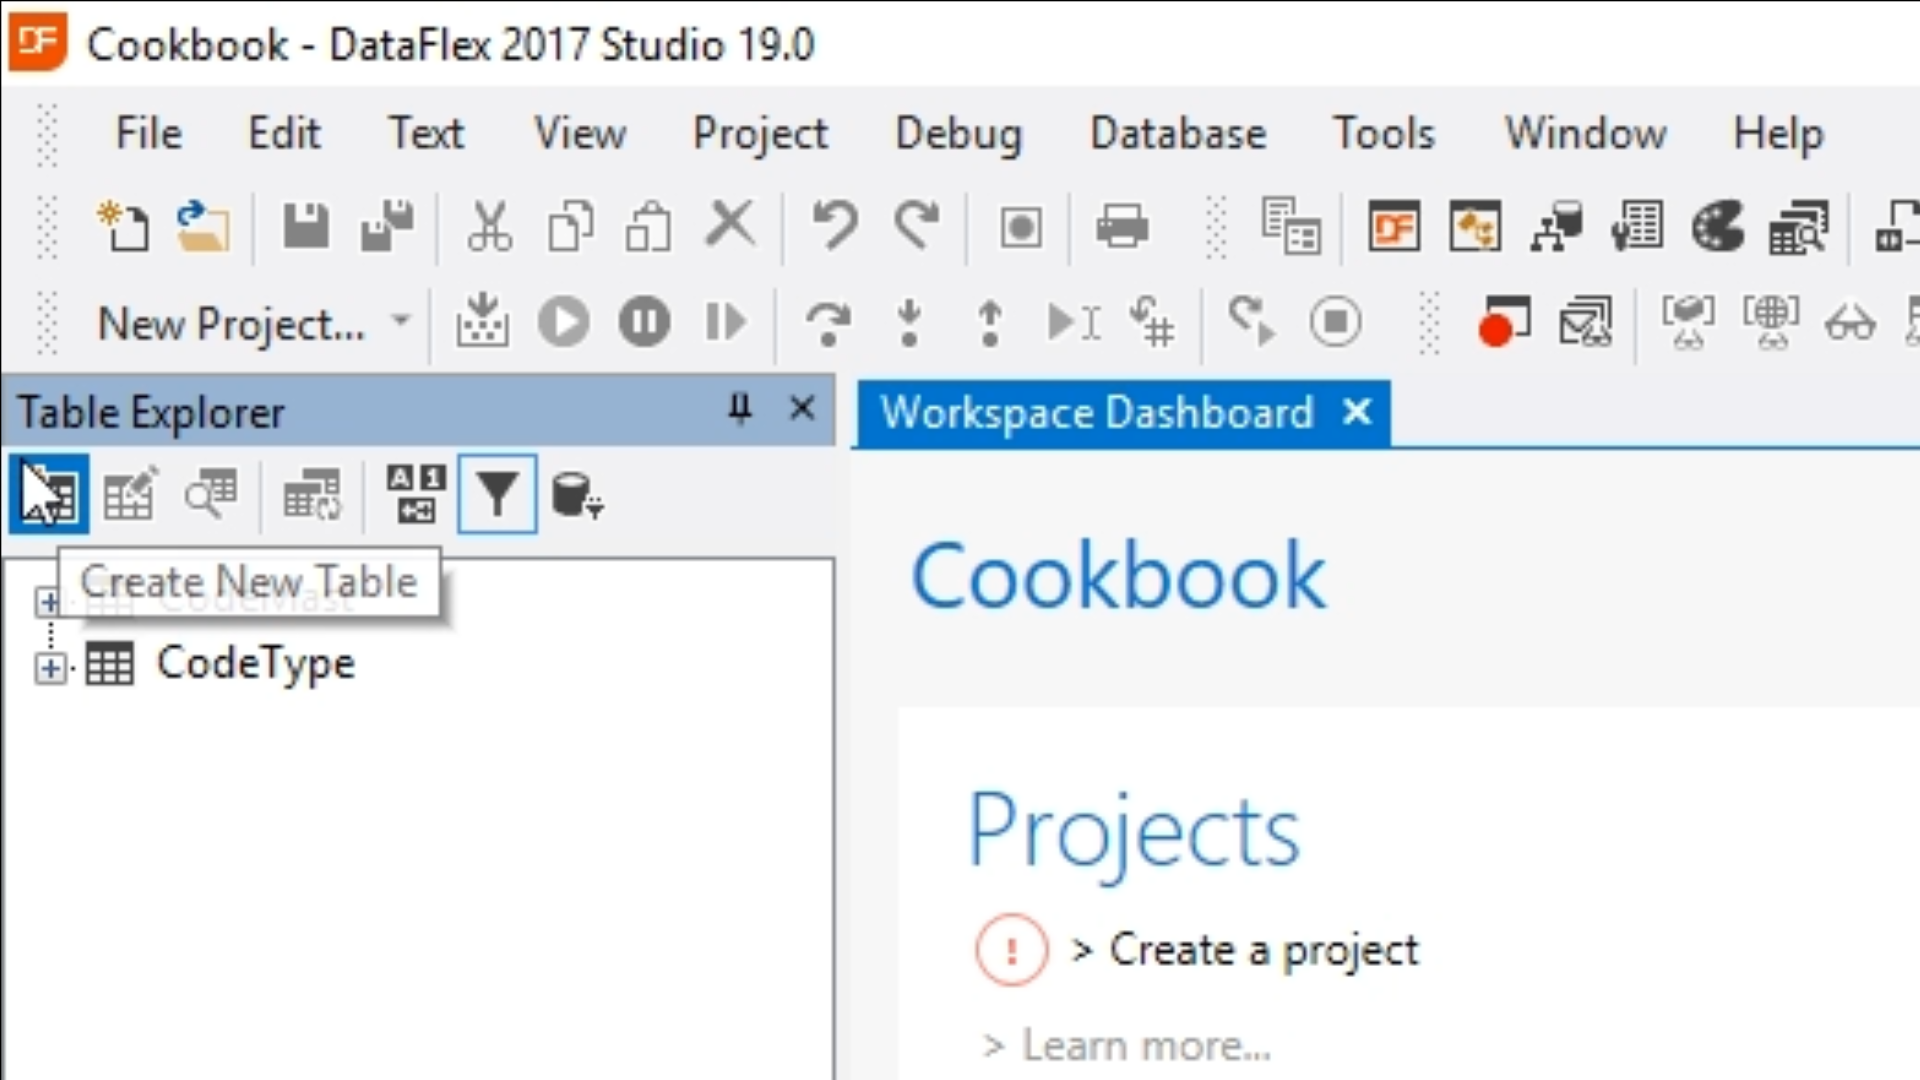
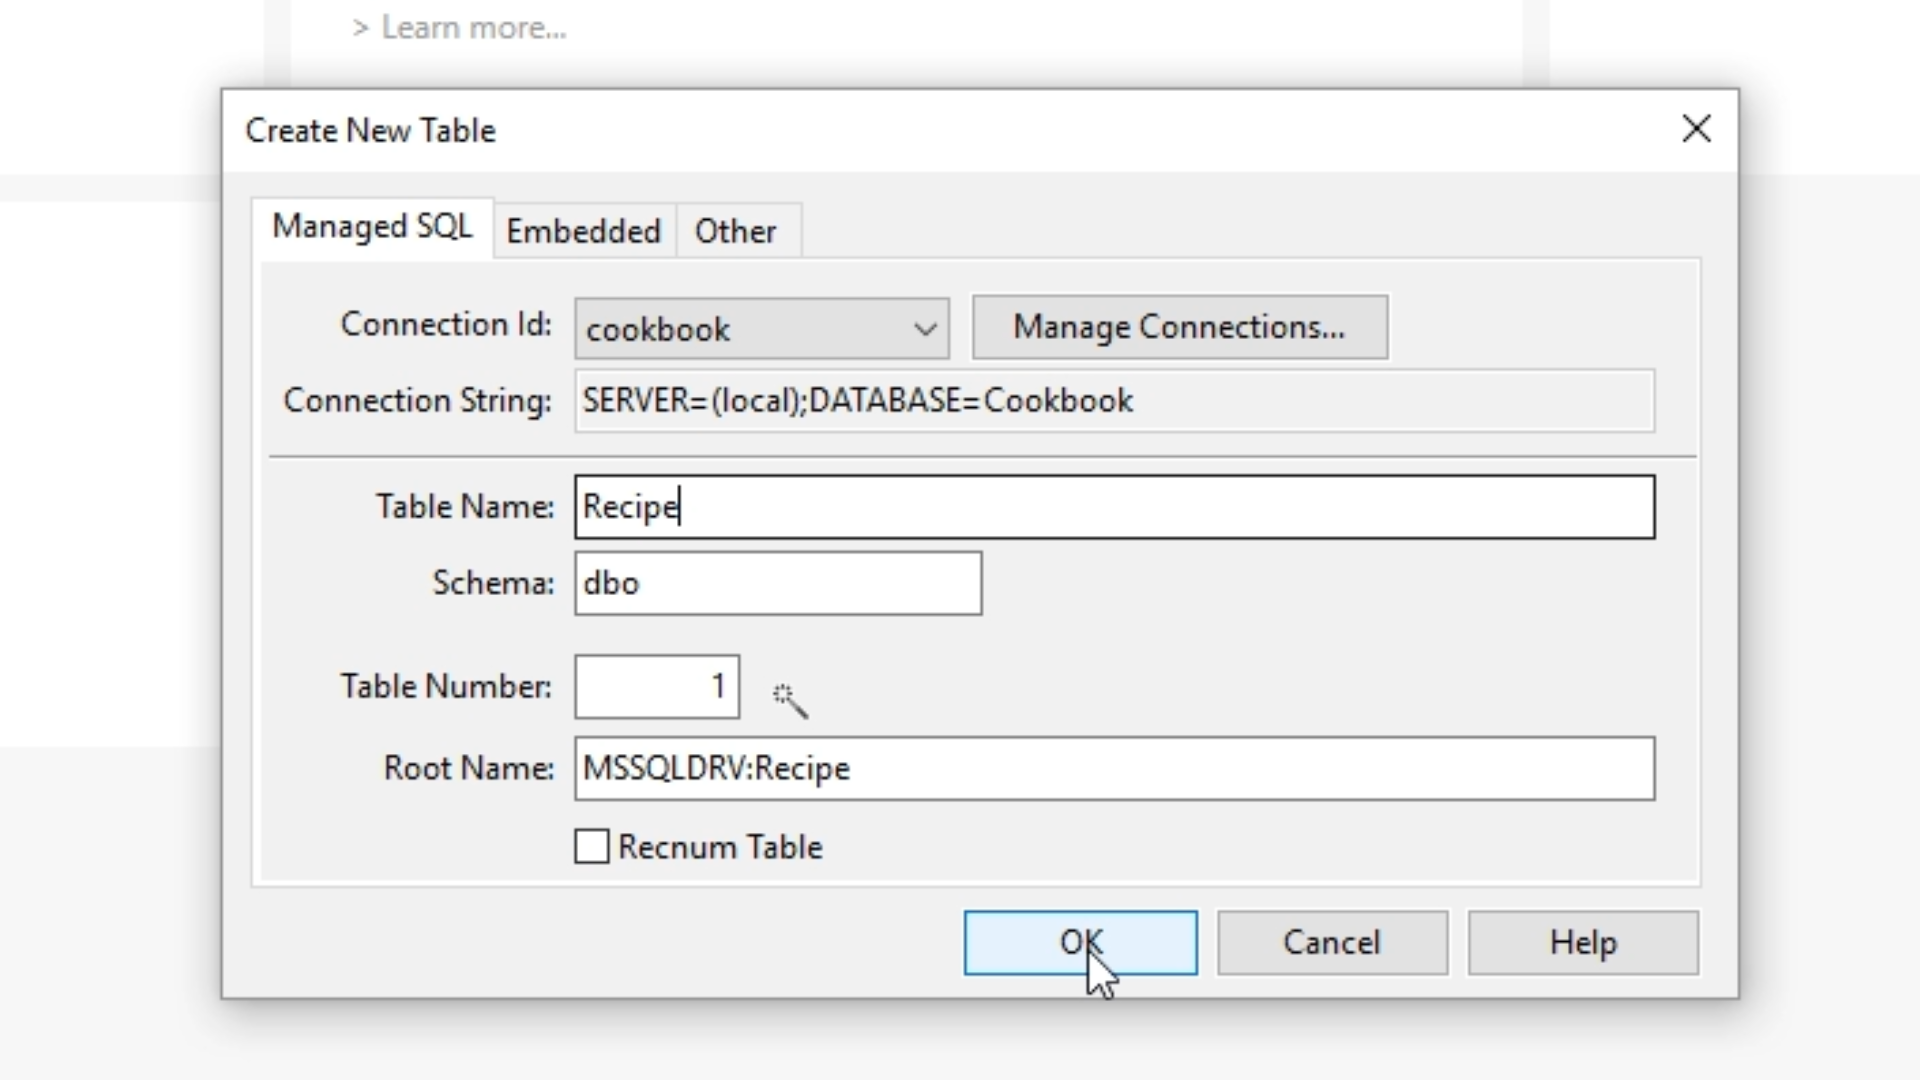
- From the ‘Create New Table’ window that opens, select the desired ‘Connection id,’ which is ‘cookbook’ for this table.
- Add a ‘Table Name.’ “Recipe” will be the name of this first table. Select ‘OK.’
- Add field/column names:
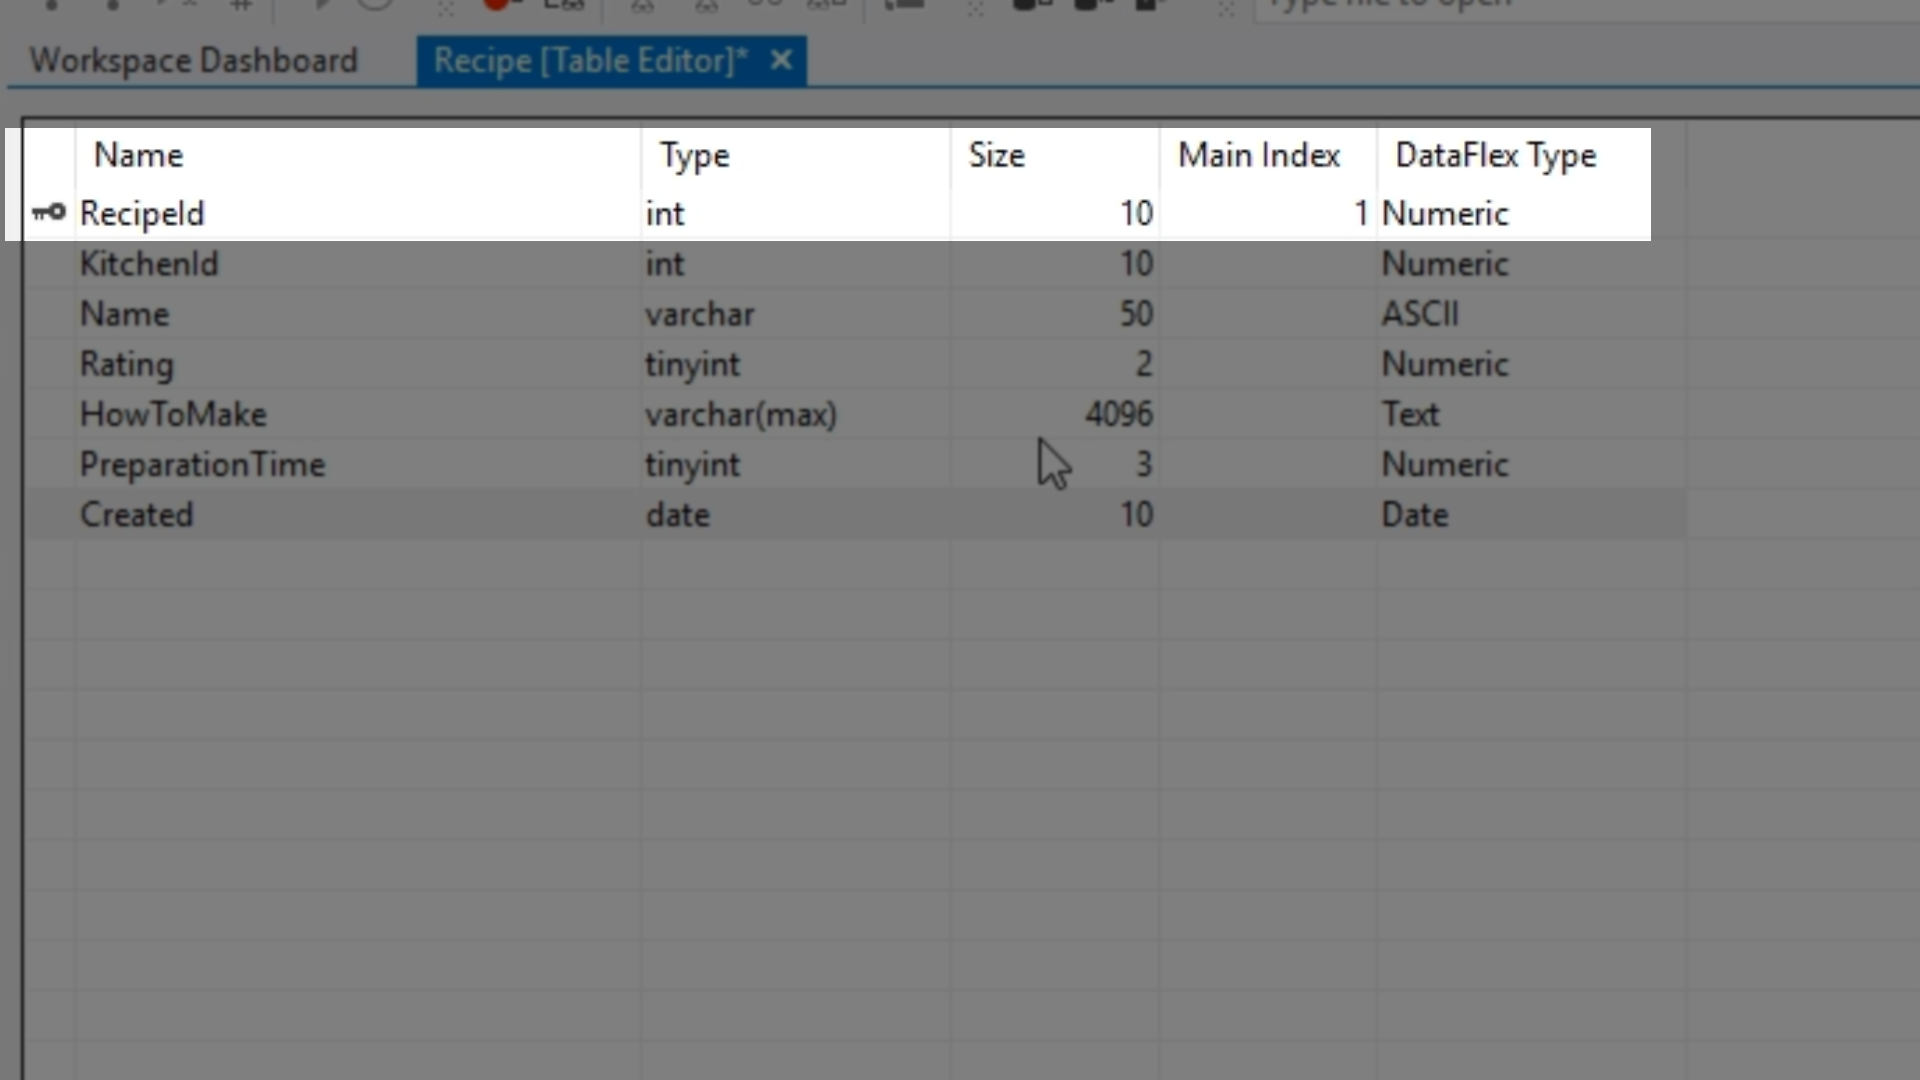
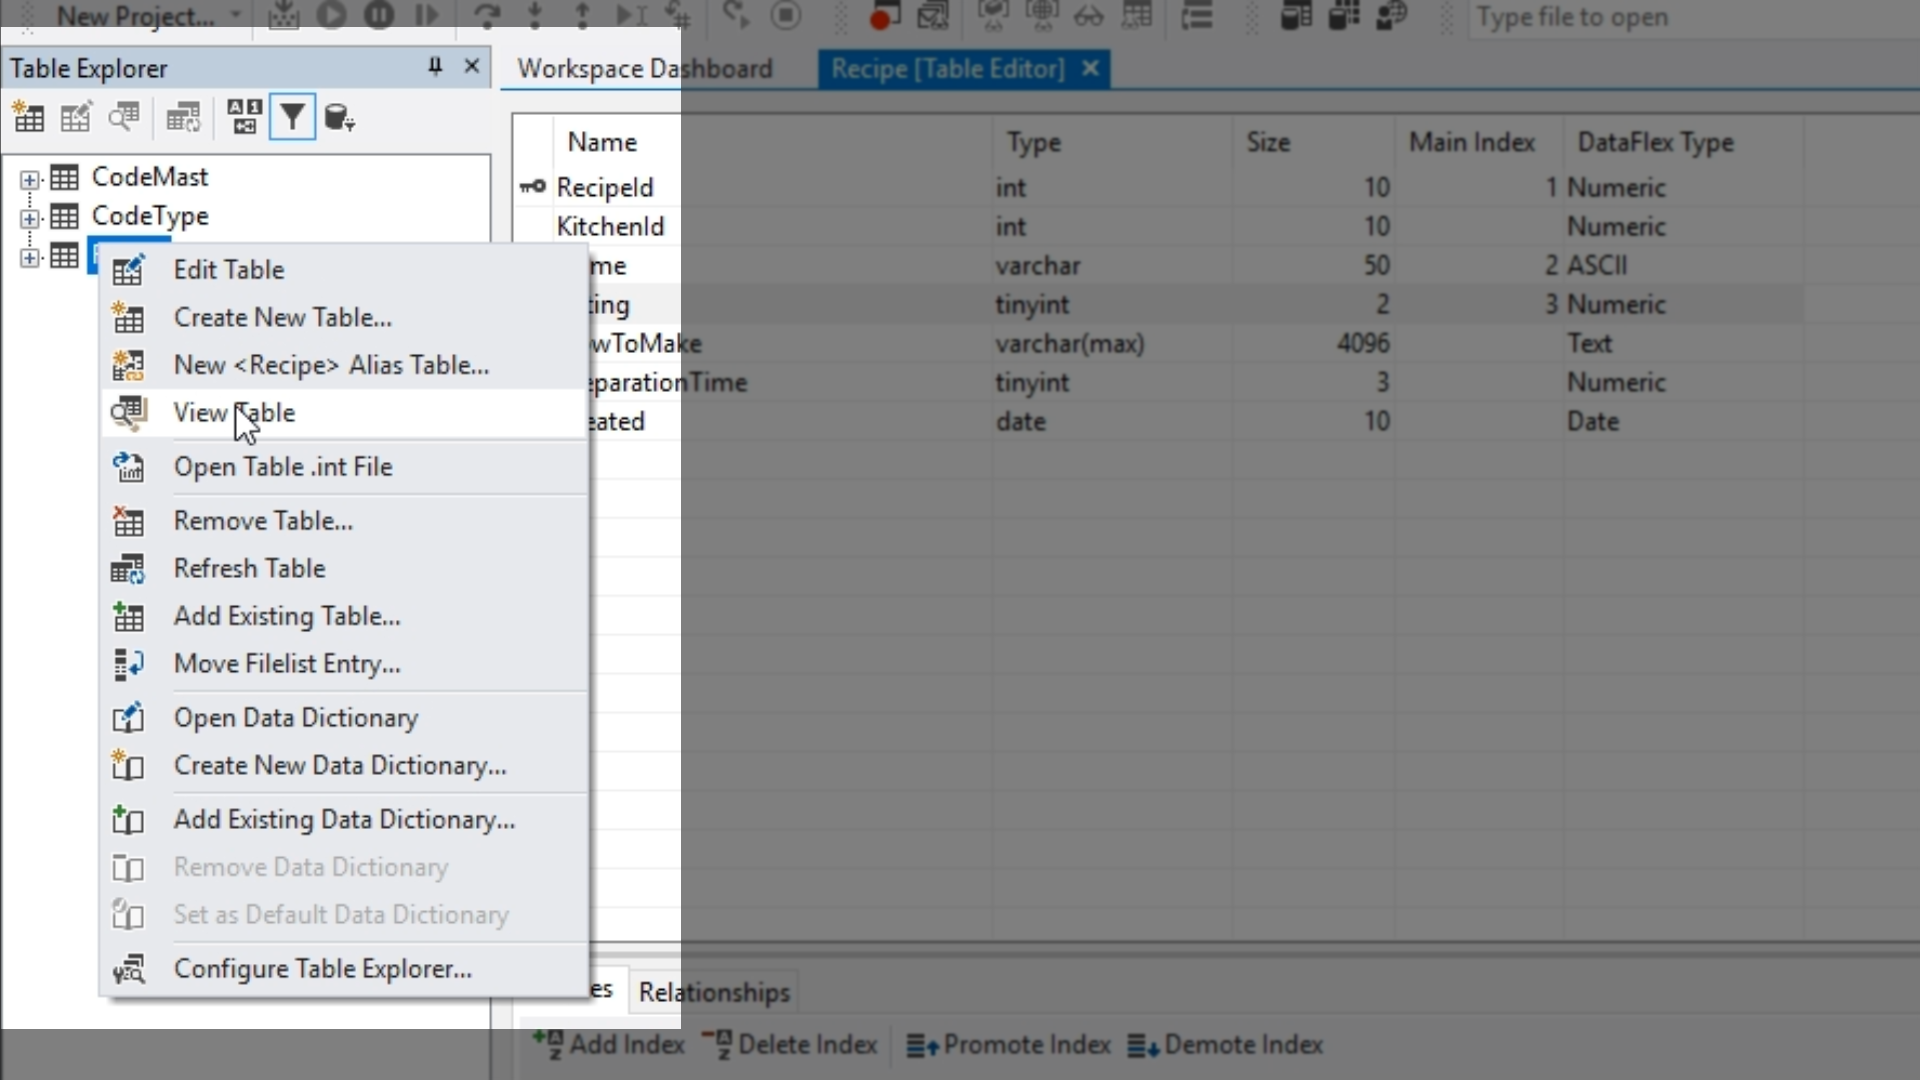
- FIELD 1 - Name: RecipeID, Type: int, Size: 10, DataFlex Type: Numeric
- This RecipeID will be the unique identifier.
- From the ‘Column Properties’ panel on the right, set the ‘is identity’ to “True” to allow SQL to provide the identities. This makes it so every new record will automatically get a unique RecipeID.
- FIELD 2 - Name: KitchenID, Type: int, Size: 10, DataFlex Type: Numeric
- This field will be the Foreign Key, which means it will define the relation to the Kitchen table.
- FIELD 3 - Name: Name, Type: varchar, Size: 50, DataFlex Type: ASCII
- FIELD 4 - Name: Rating, Type: tinyint, Size: 2, DataFlex Type: Numeric
- FIELD 5 - Name: HowToMake, Type: varchar(max), Size: 4095, DataFlex Type: Text
- FIELD 6 - Name: PreparationTime, Type: tinyint, Size: 3, DataFlex Type: Numeric
- FIELD 7 - Name: Created, Type: date, Size: 10, DataFlex Type: Date
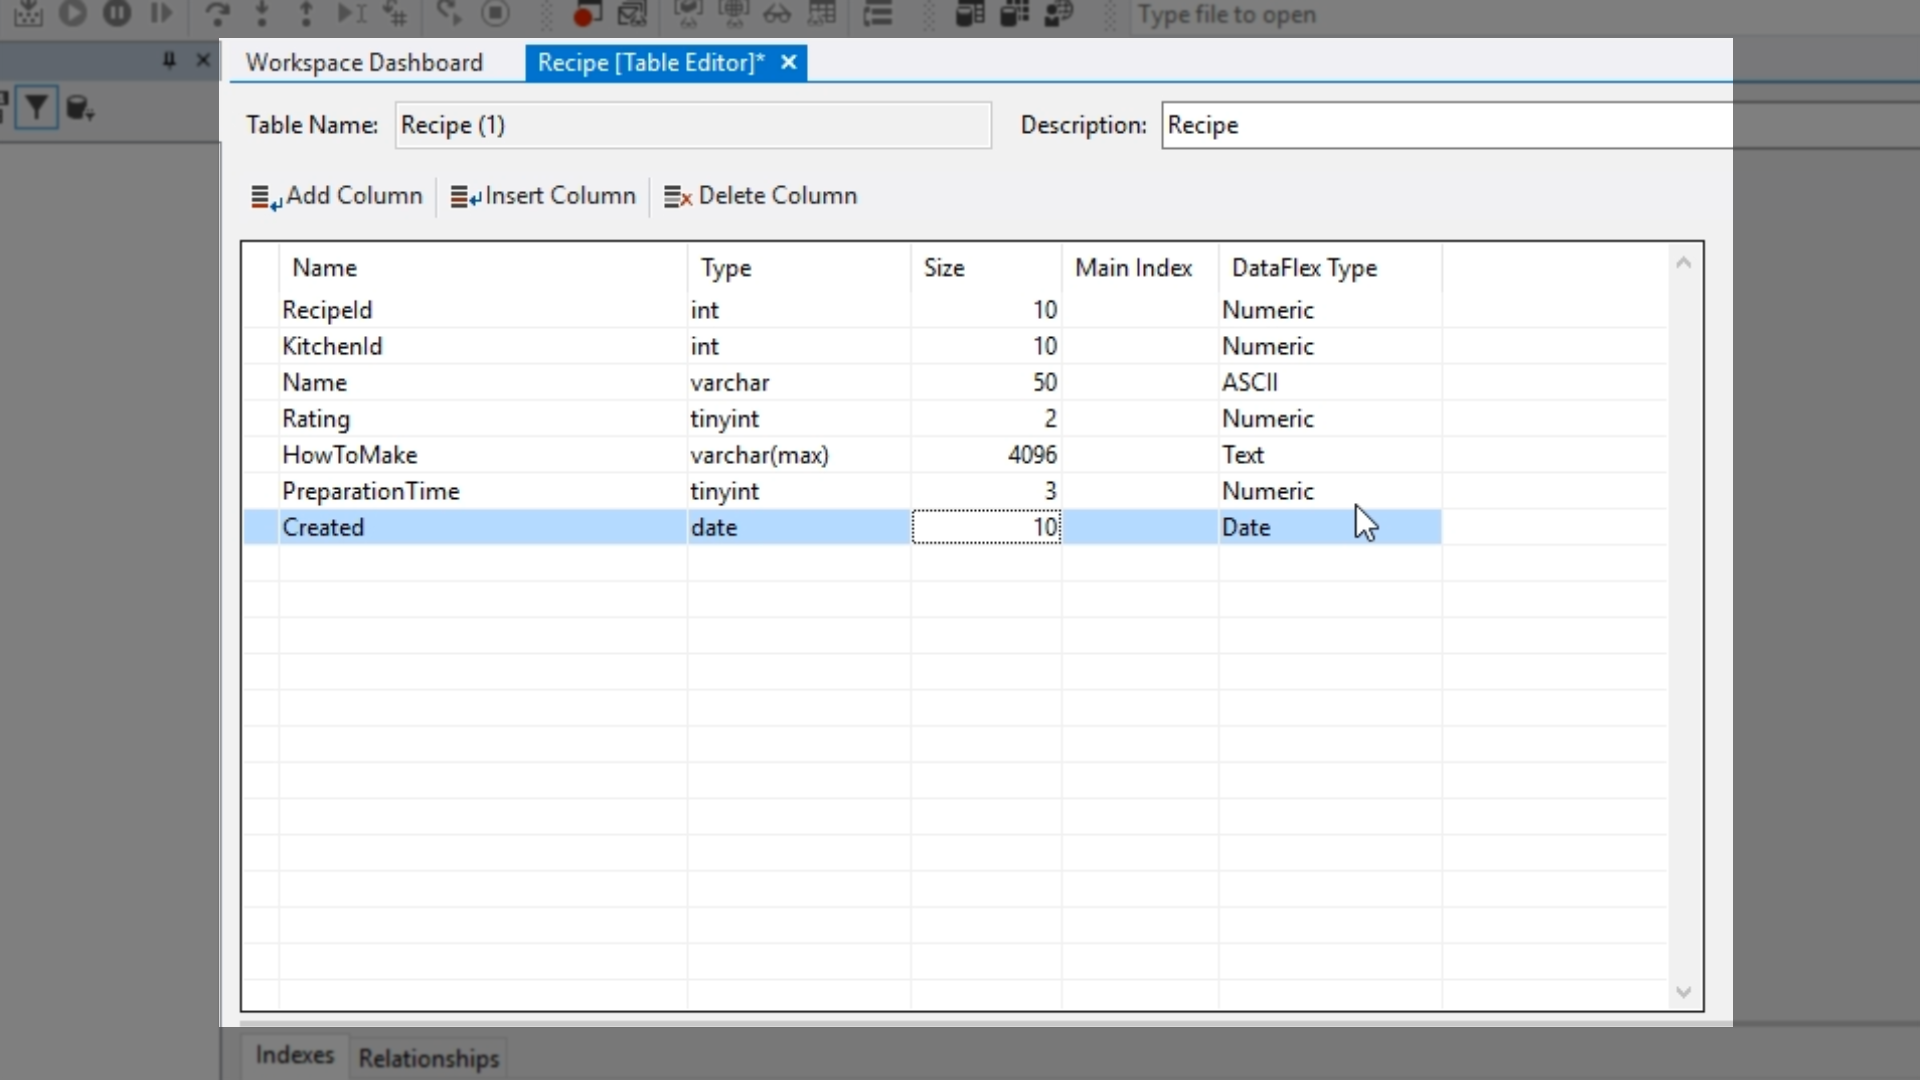
- Note: When using an SQL database the tables shows the SQL type as ‘Type,’ and the ‘DataFlex Type’ it maps to. For example, ‘tinyint’ is seen by DataFlex as a ‘Numeric’ column. When using the embedded database, the DataFlex Types are the actual field types.
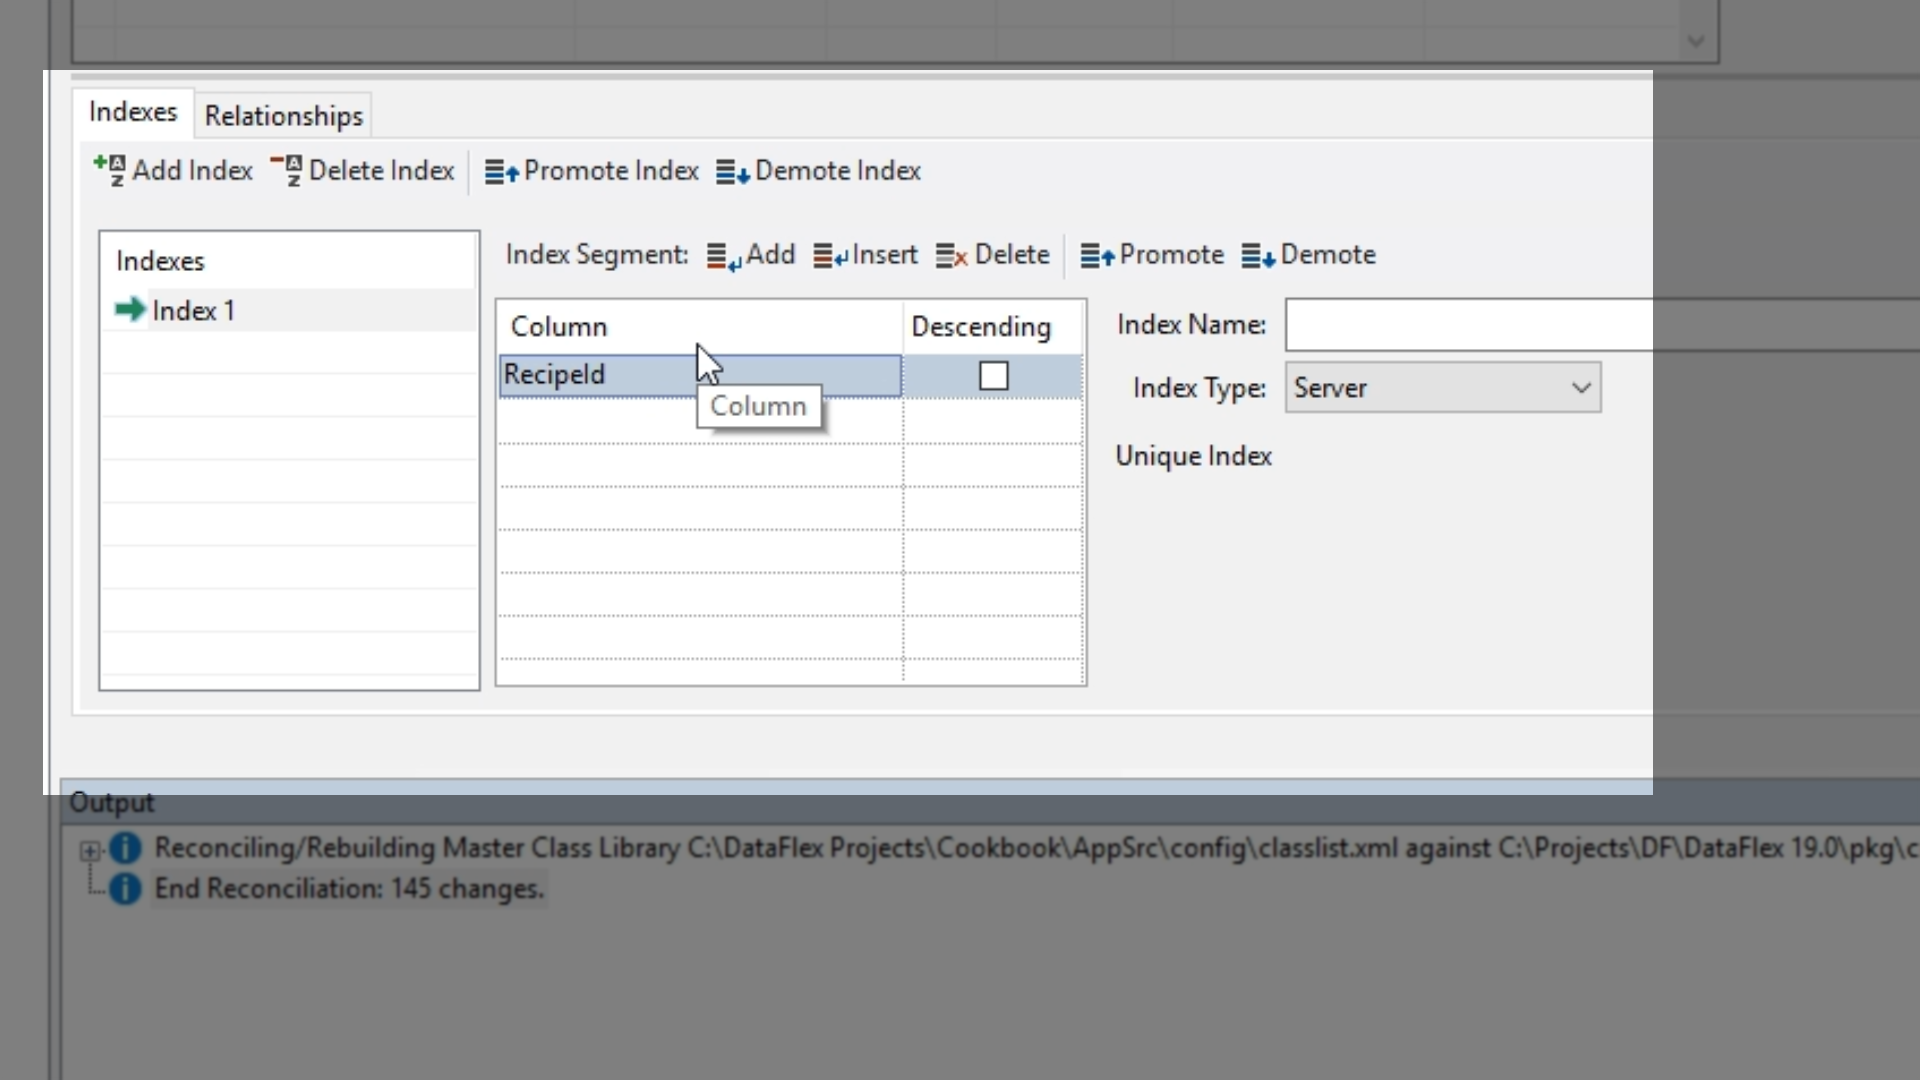
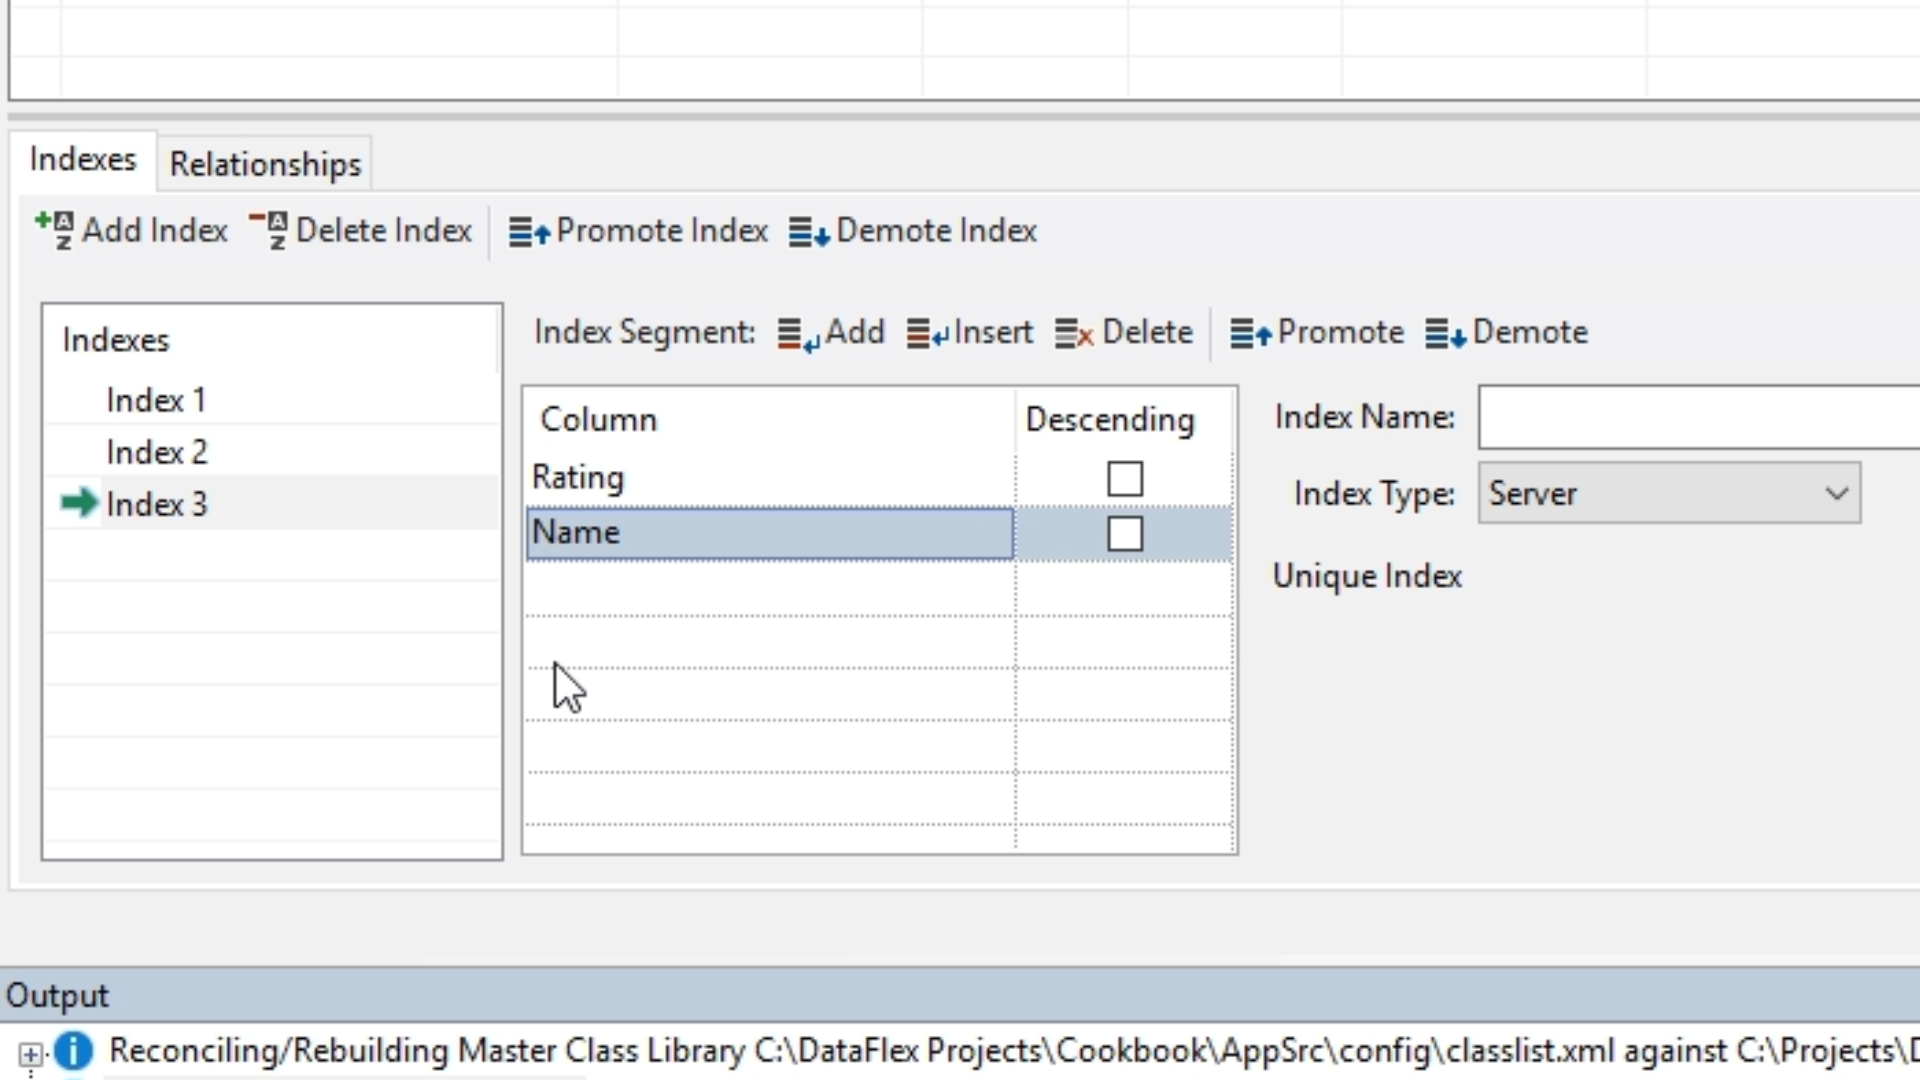
- Add indexes. From the ‘Indexes’ panel (mid-screen):
- Each table needs a unique index, which is typically the first index listed.
- Select ‘Add Index’ from the top of the panel.
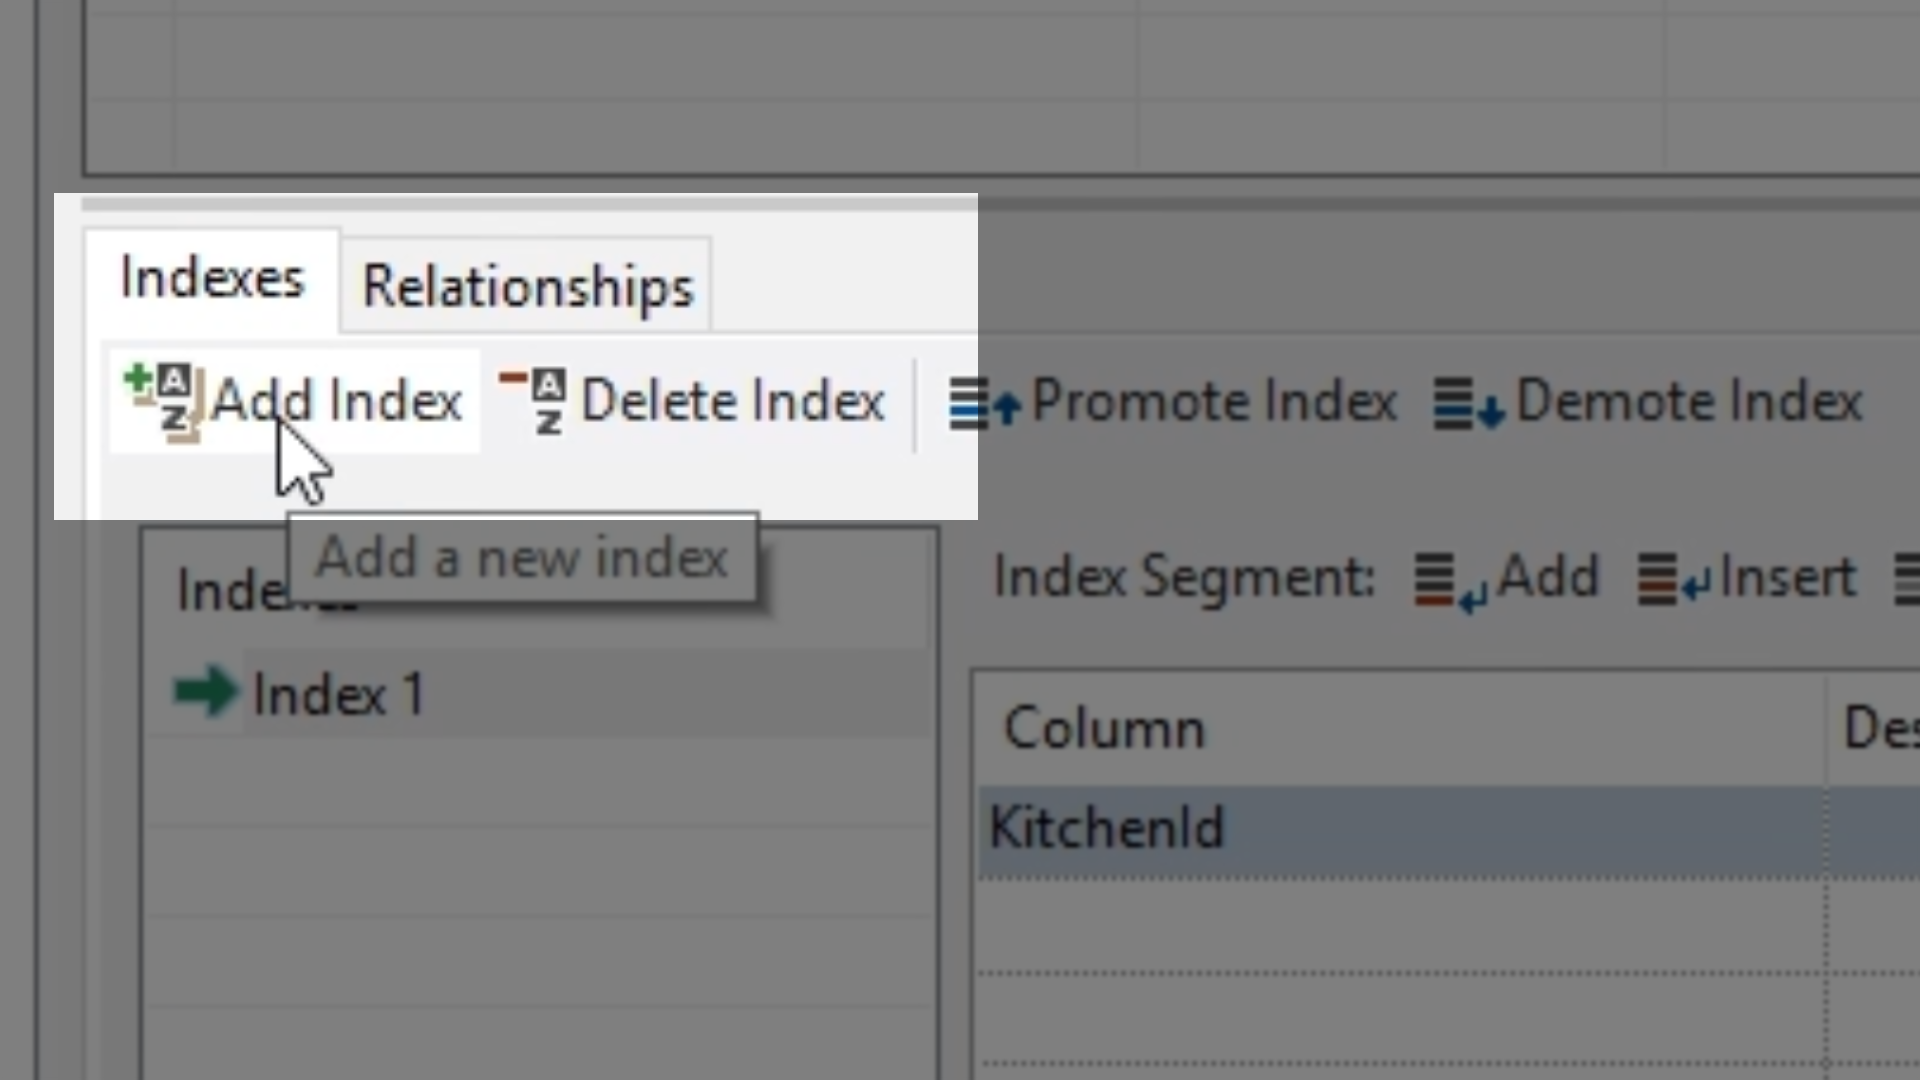
- ‘Index 1’ is automatically added to the ‘Indexes’ list, and ‘RecipeId’ is added to the column list making it a unique index.
- Optional: Select ‘Index 1,’ and from the ‘Properties’ panel on the right change the ‘sql primary key’ to “True” to make it work faster with SQL.
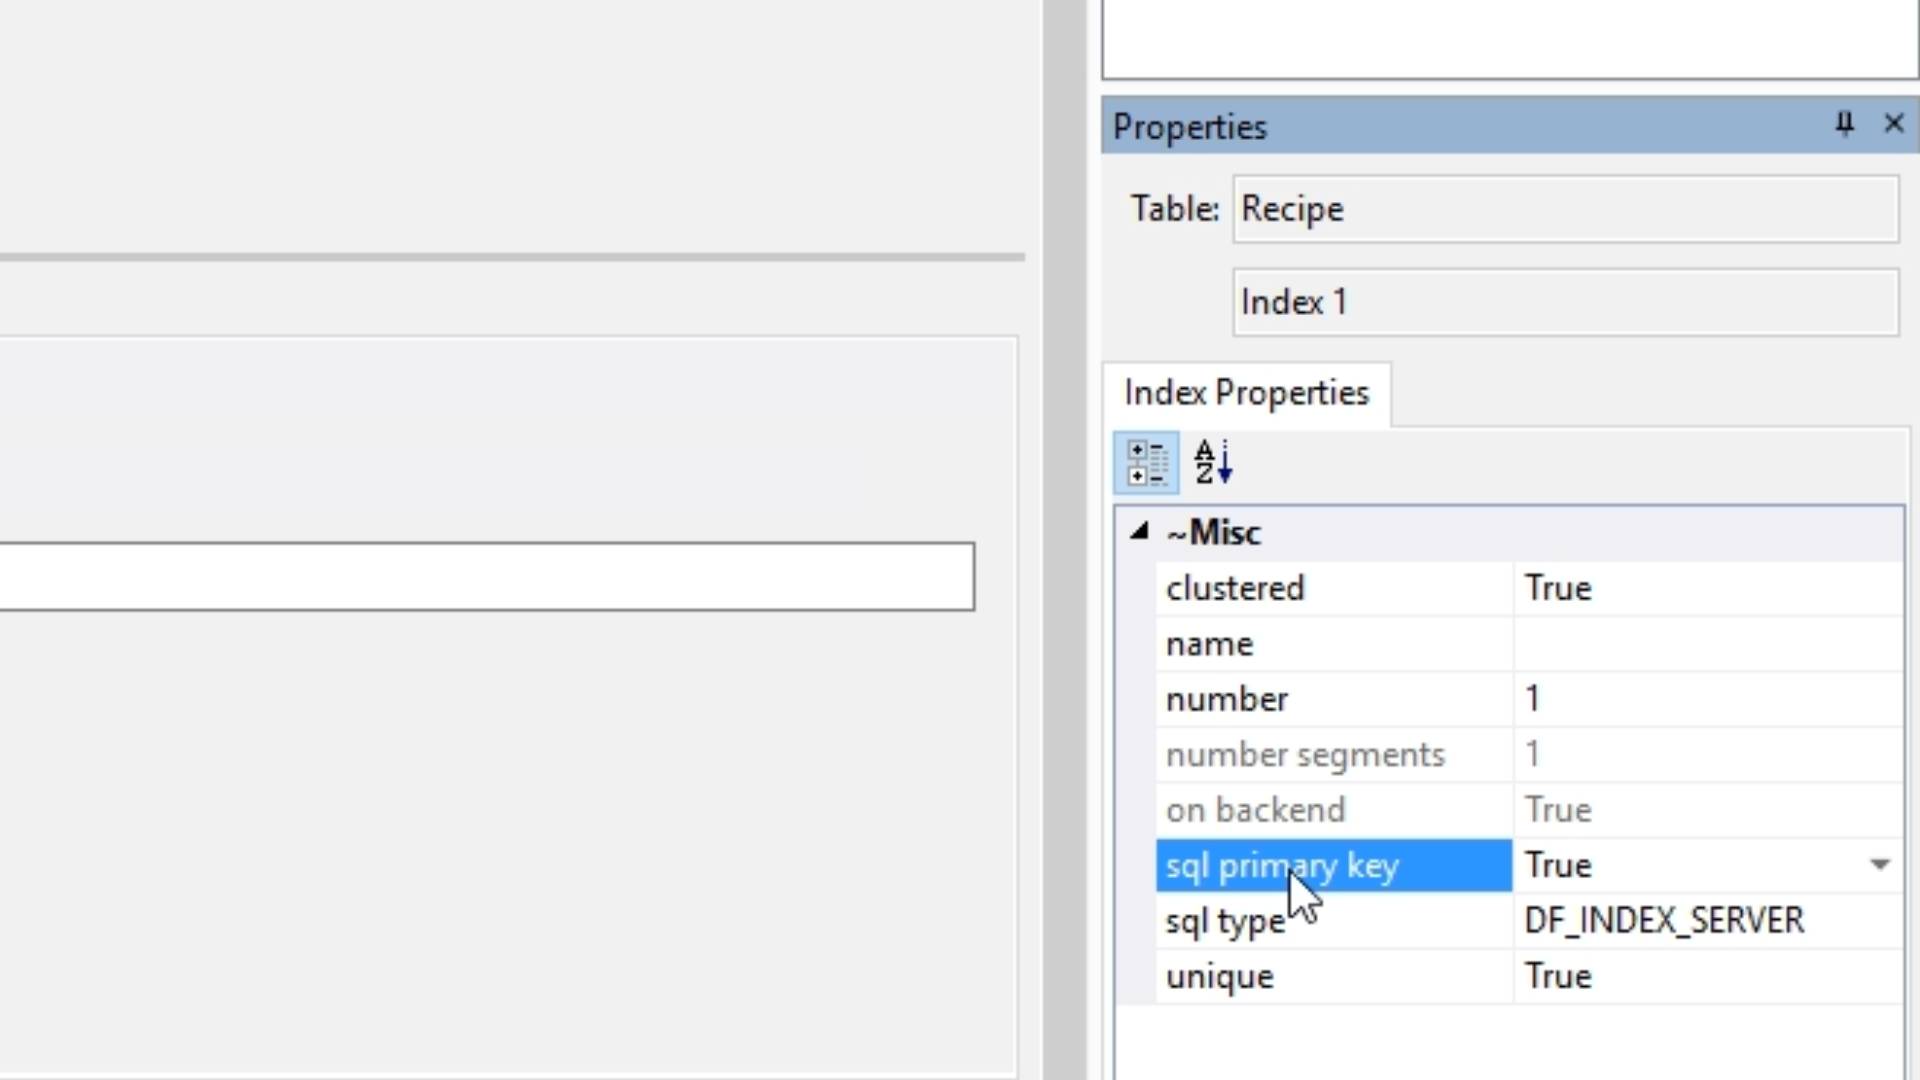
- Note: The key icon added to the table alongside ‘RecipeId’ shows that it is now the primary key, and its ‘Main Index’ has been set to 1 because that is the main index for that field. Indexes other than the primary key are used to sort the data.
- Again, select ‘Add Index’ from the top of the panel creating ‘Index 2’, and select ‘Name’ for its column. This index will be sortable.
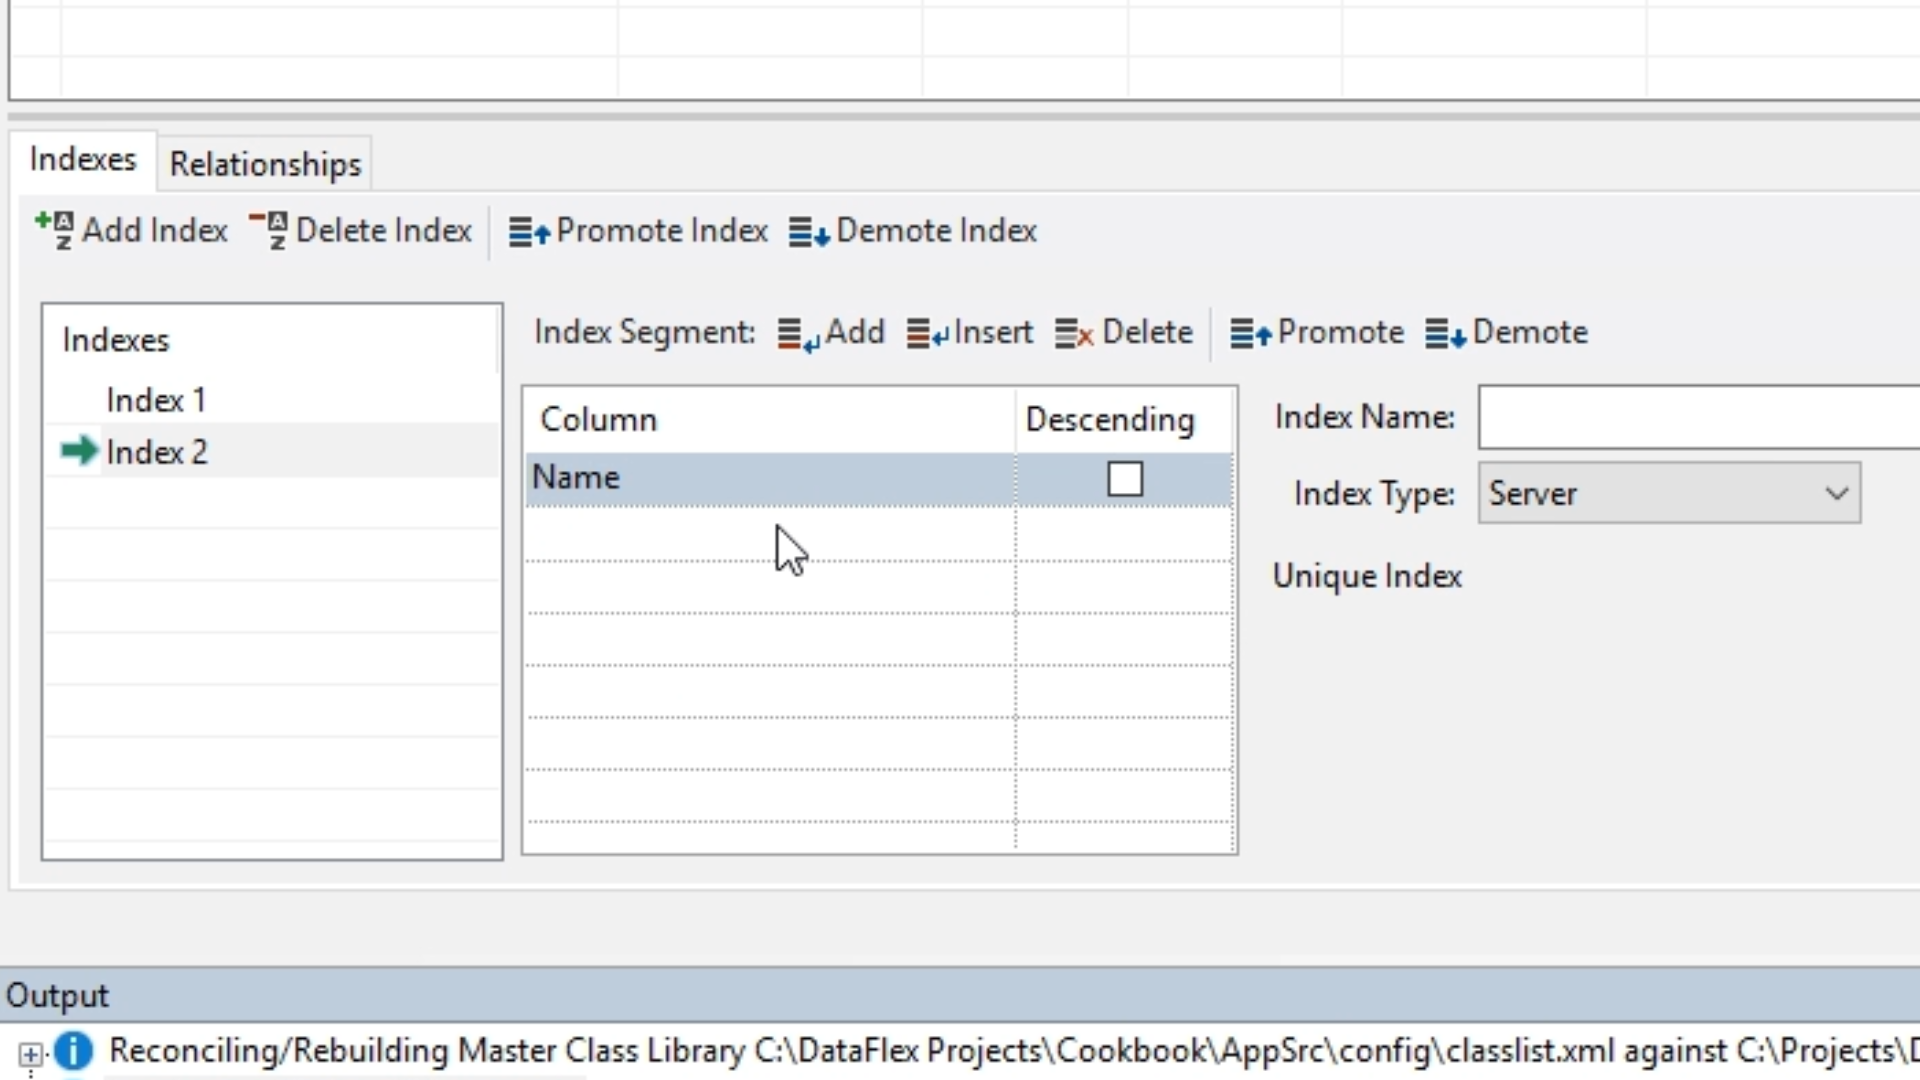
- Again, select ‘Add Index’ from the top of the panel creating ‘Index 3’, and select ‘Rating’ for its column.
- Add a second column to Index 3, ‘Name.’
- Note: Indexes must be unique. For example, if two identical names are entered an error will be returned.
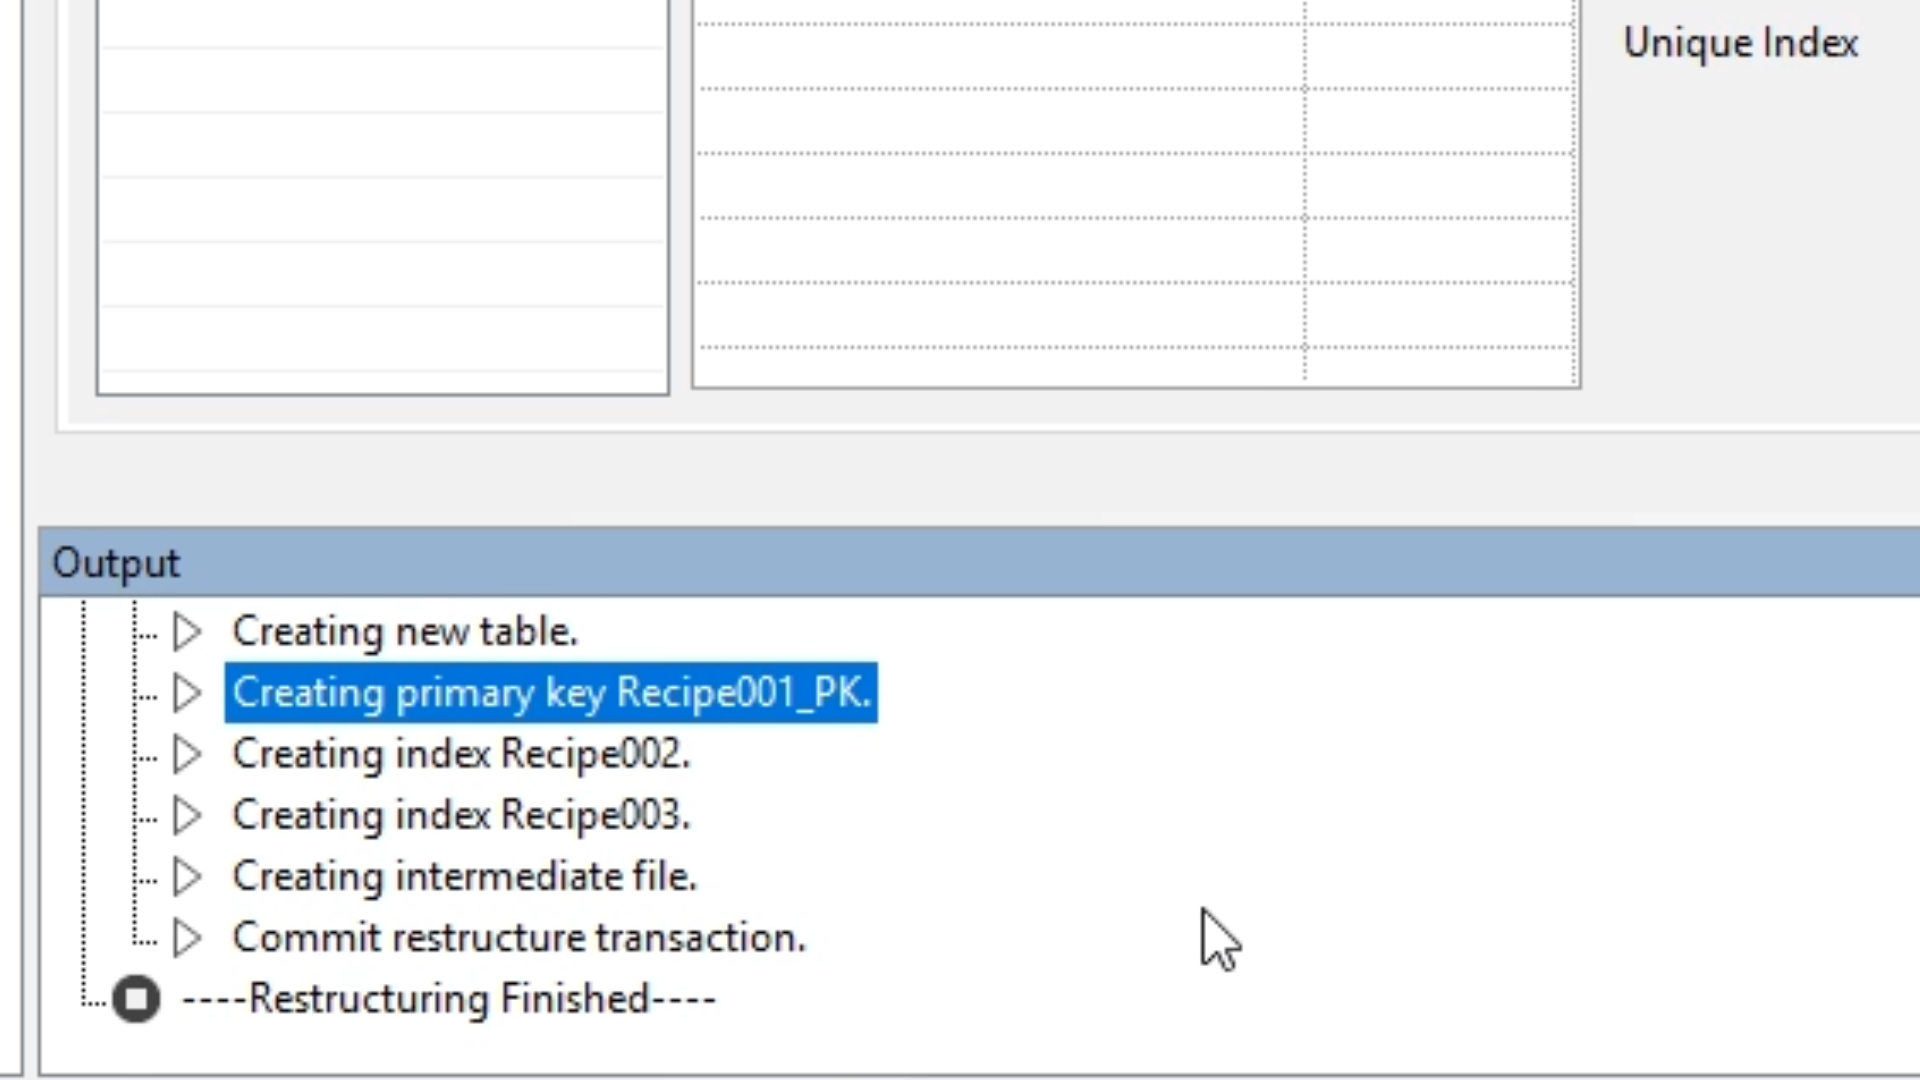
- Save the table.
- The ‘Output’ panel at the bottom will show the creation of the table, the assignment of the primary key, the other indexes, and the intermediate file in the data folder.
- View the table by selecting ‘Recipe’ from the ‘Table Explorer’ on the left. The table will be empty.

- For example purposes, some test records are added.


