Managed Connections
Lesson 2 - Connection Strings and ID's
Now that we talked about how DataFlex connects and interacts with SQL databases, let’s now look at Connection Strings and IDs.
Connection Strings contain all the elements necessary to access data in SQL, including the server instance name, user id (UID) and password, the database name and optional arguments that are supported by the server. In the case of Microsoft SQL Server, we can also access the data using Windows Authentication, or Trusted Connections.
Due to the “bottom-up” approach in DataFlex, every table accessed in the application needs to know the details of the connection string being used. Complex applications may manipulate dozens, even hundreds, of tables. Instead of keeping the full connection string in each table’s intermediate file, abstract Connection IDs eliminate redundancy and are less error prone.
The Connection ID is stored in a single, central location and maps the abstract identifier to the full connection string. All of this is fully under control of the developer, but it defaults to the DFConnId.ini file in the workspace’s Data folder.
Working with managed connections is essentially the pairing of connection IDs and connection strings through the cConnection class. We’ll take a closer look at cConnection later in the course.
Let’s now look at a simple example.

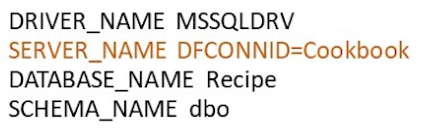
- In the first example, we see that this table will be accessed using a connection string.
- There is the SQL Server database driver name (MSSQLDRV)
- The full connection string, using the SQL Server instance, named SQLEXPRESS, Windows Authentication (Trusted Connection=yes) and the Cookbook database.
- Then there is the Recipe table and the default schema name dbo.
- The second example replaces the full connection string with the Connection ID “Cookbook”, which is stored in the DFConnId.ini file in the workspace’s Data folder.
Before we dive more deeply into Managed Connections, let’s take a minute to set up our demo environment…
DEMONSTRATION
- We will be doing several exercises during this course, so we’ll start by taking a copy of the Cookbook workspace and setting it up in our environment.
- This workspace will become the basis for other exercises, and you can use similar steps to create your own local examples to experiment with.
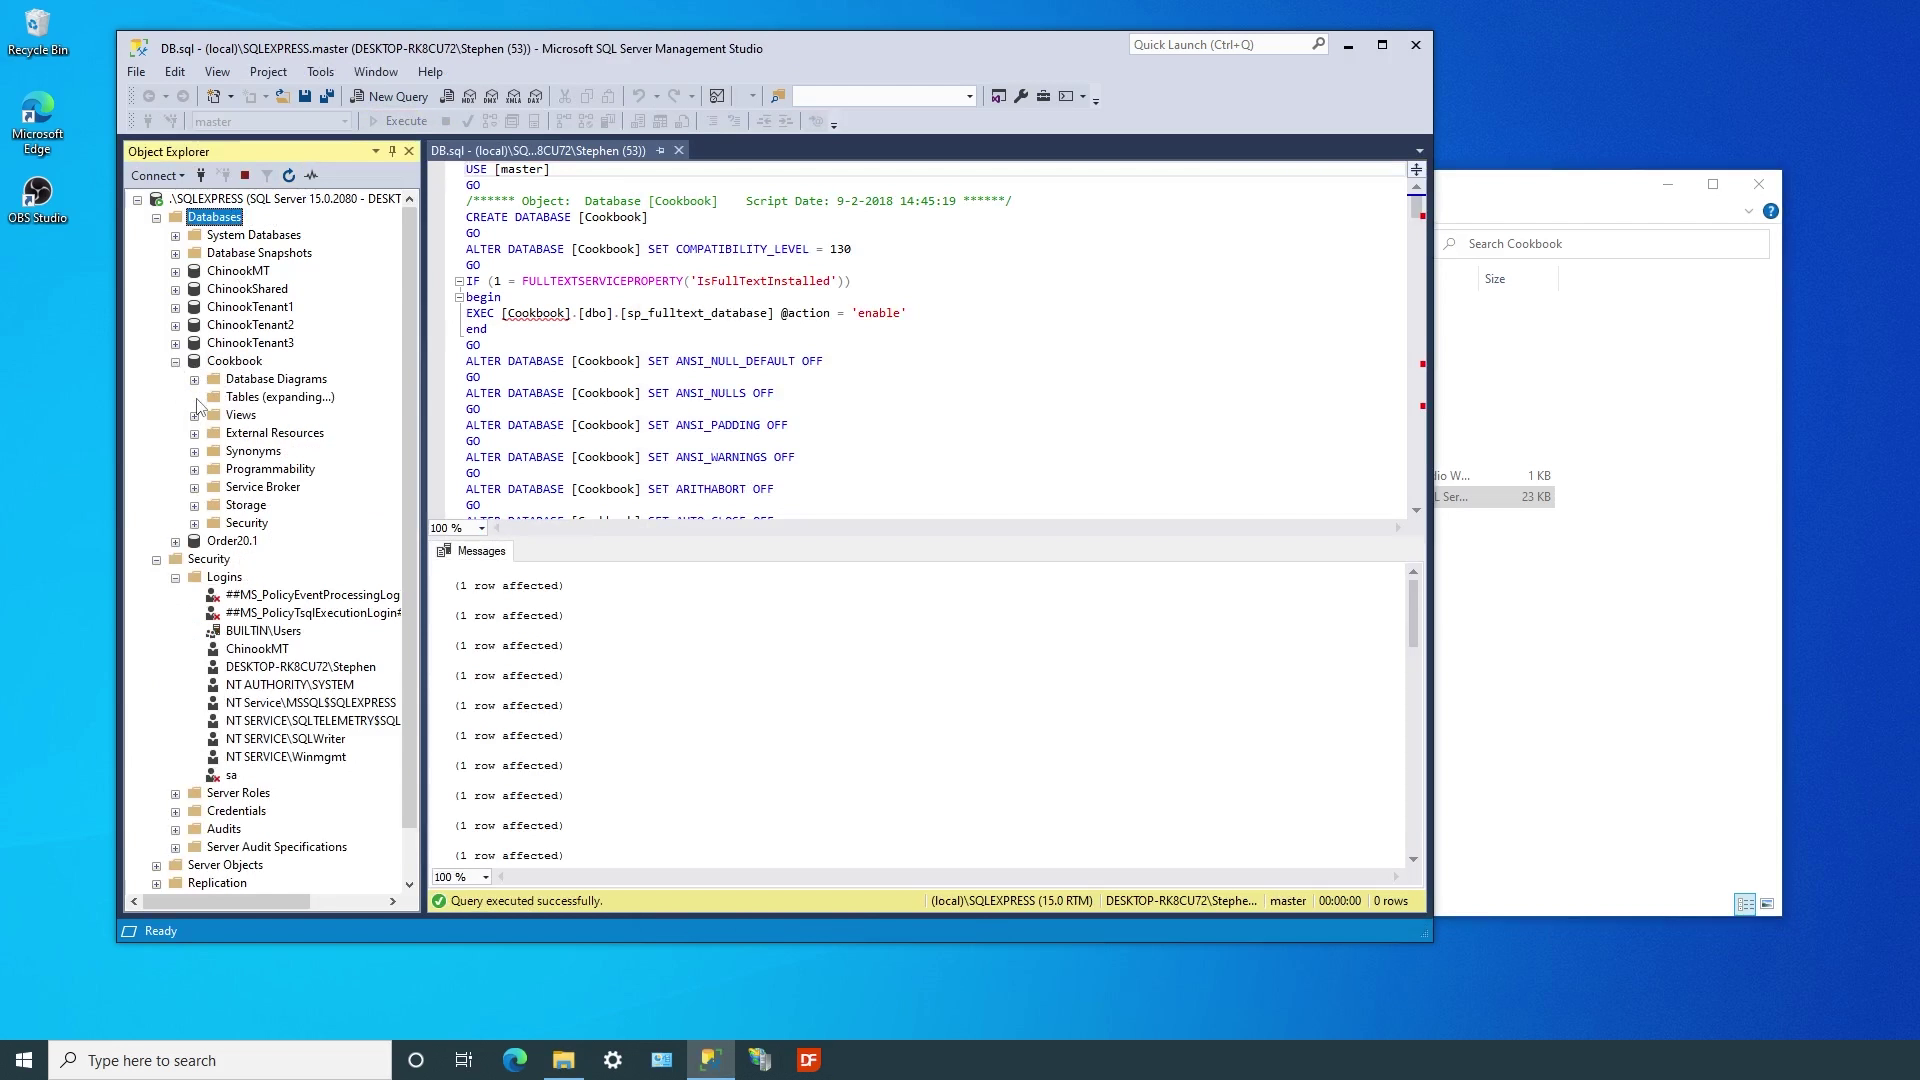
- As mentioned earlier, we already have SQL Server, Management Studio and DataFlex Studio installed. We’ll unzip the downloaded Cookbook workspace to our local projects folder. It contains the complete workspace created in the Working with Databases course. There is also an SQL script that will create the Cookbook database and populate the tables with data. Just drag it into the Management Studio and Execute the script. We see the Cookbook database and the Ingredients,Kitchen and Recipe tables created.
While we are here in the Management Studio, we want to mention how DataFlex WebApp Server accesses data. By default, the server runs under the Windows System account. When you create a new database, get into the habit of adding rights for it to the Windows System account if you will be using Web or Mobile applications to access the data. If you have installed the DataFlex WebApp Server to run under a different Windows account, you would assign read and write access to that account.
DEMONSTRATION
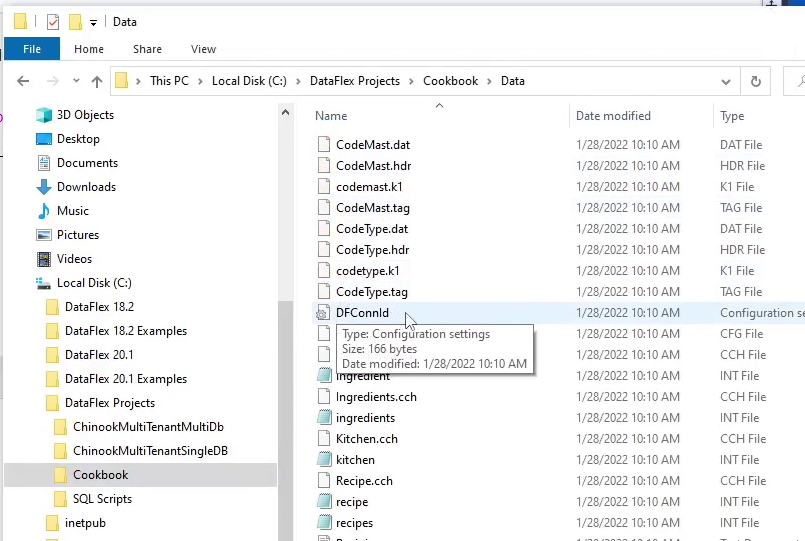
- Now that we have created the database, the next step is to adjust the Managed Connection, that was already created in this workspace, to our local environment. We can open dfconnid.ini file in the Data folder
- And see that it contains all the components needed to create the connection string, including the server, database, UID and passwords that the application and tools use when using SQL Server Authentication in the environment where the workspace was last used.
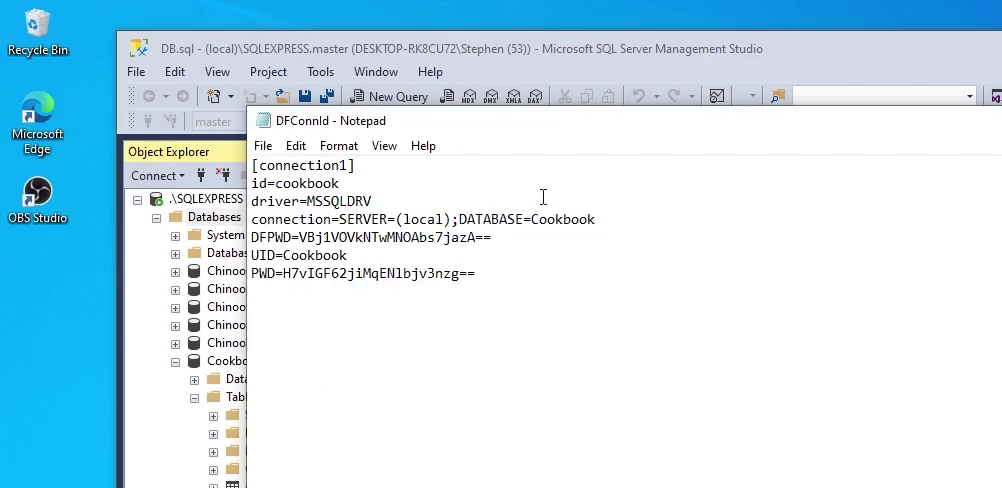
- In order to work in our environment, we’ll adjust the name of the server and remove the existing user and password entries, which are not yet needed because we are starting with Windows Authentication in this lesson.
- Now I open the workspace in the latest DataFlex revision. Since this workspace was created with an earlier revision of DataFlex, the Studio will automatically update it to work within our environment. We’ll migrate in place because we’ve already obtained a copy of the workspace.
- As the Studio opens the workspace, it uses the managed connection entry to establish communication with the server.
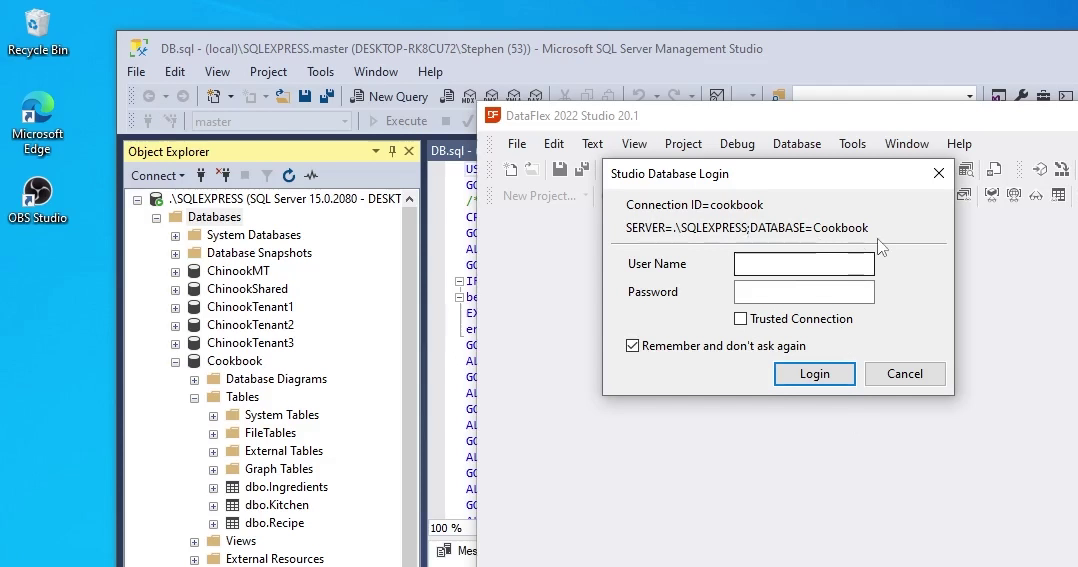
- At this point, instead of providing an SQL UID and password, we’ll tell it to use a Trusted Connection through Windows Authentication.
- The Studio can now access all the tables in the database, including the indexes. And you can view the table data.
- We can compile the main application and run it without any further interaction.
- In the next lesson we’ll look more closely at the Managed Connections architecture.


