To continue with this content, please log in with your Data Access ID or create a new account.
Cancel Data Access ID
You may not be authorized to see this content. Please contact Data Access Europe for more information.
Cancel Data Access Europe
You are not authorized to see this content.
Cancel Data Access Europe
Next lesson:
How to use Jenkins and Conclusion
Cancel

Tips on using the build automation tool Jenkins within DataFlex

Lesson 2: Installation of Jenkins

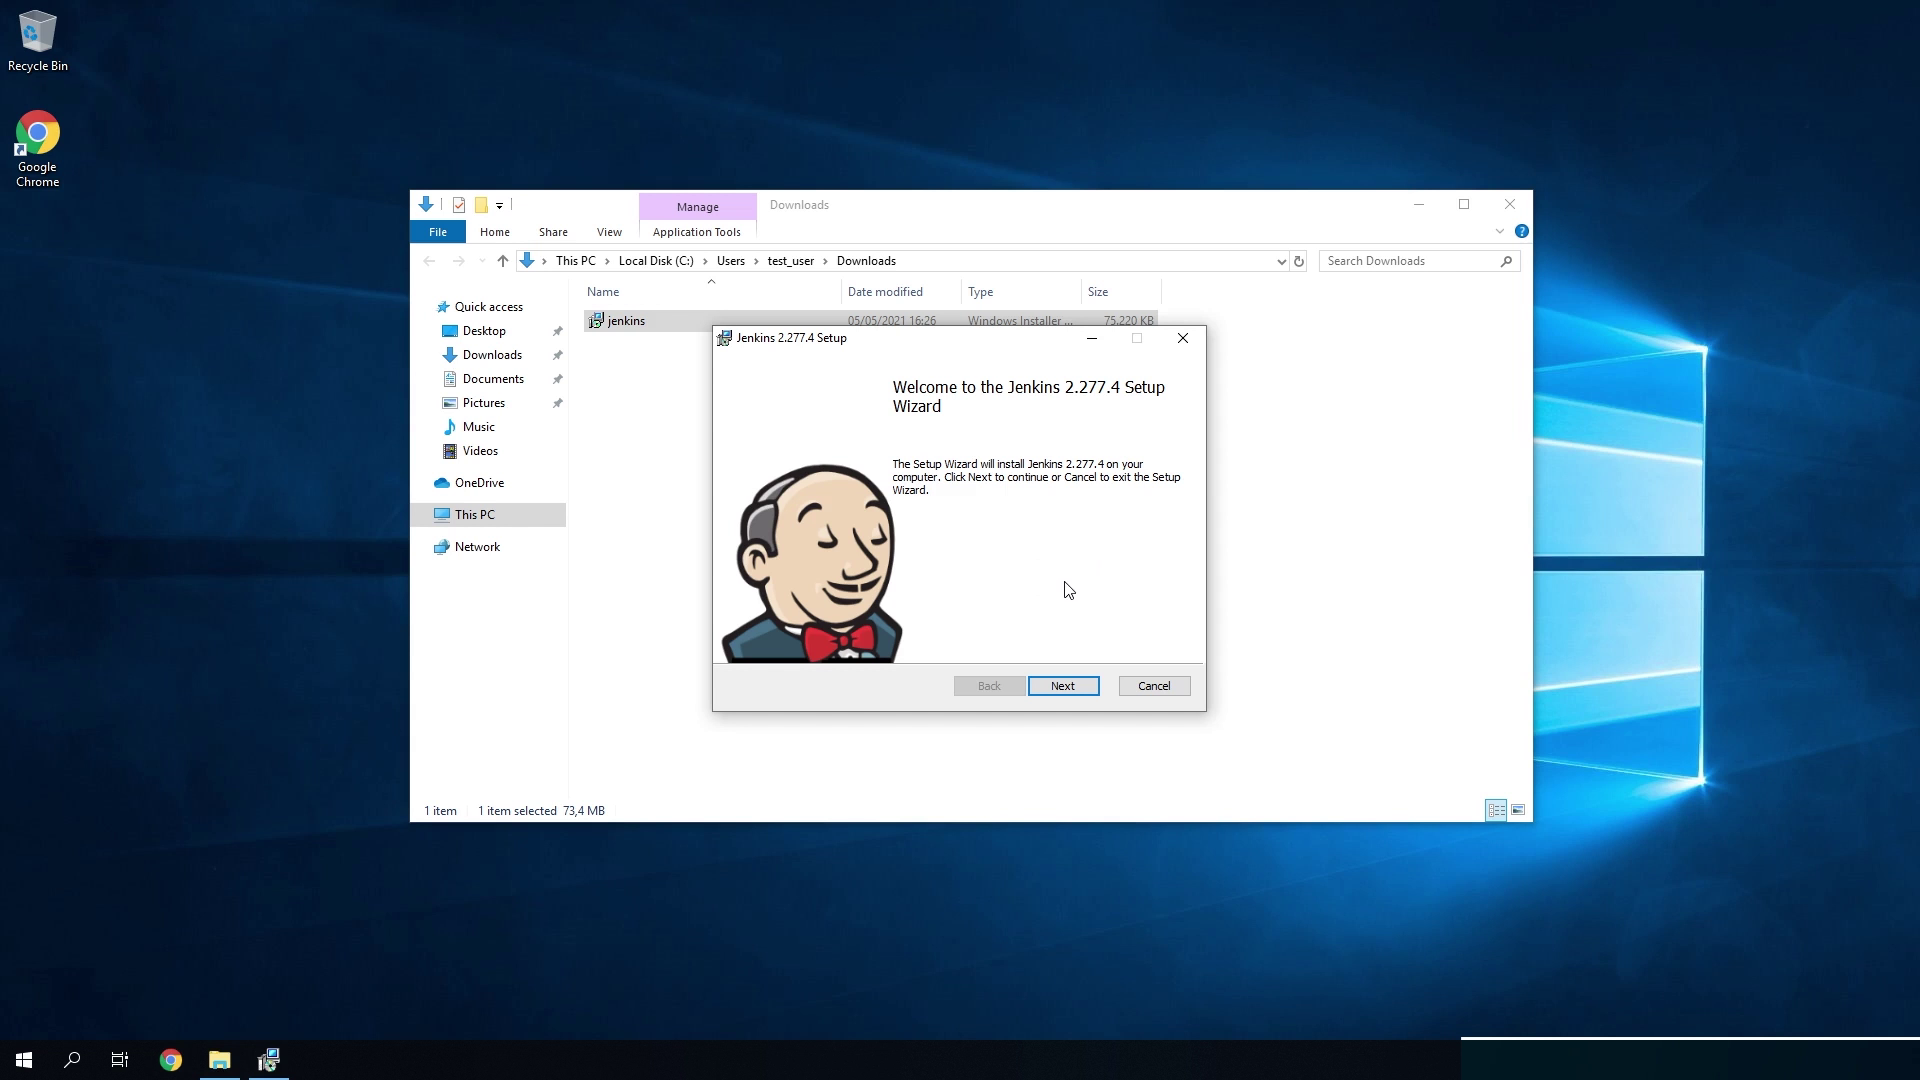
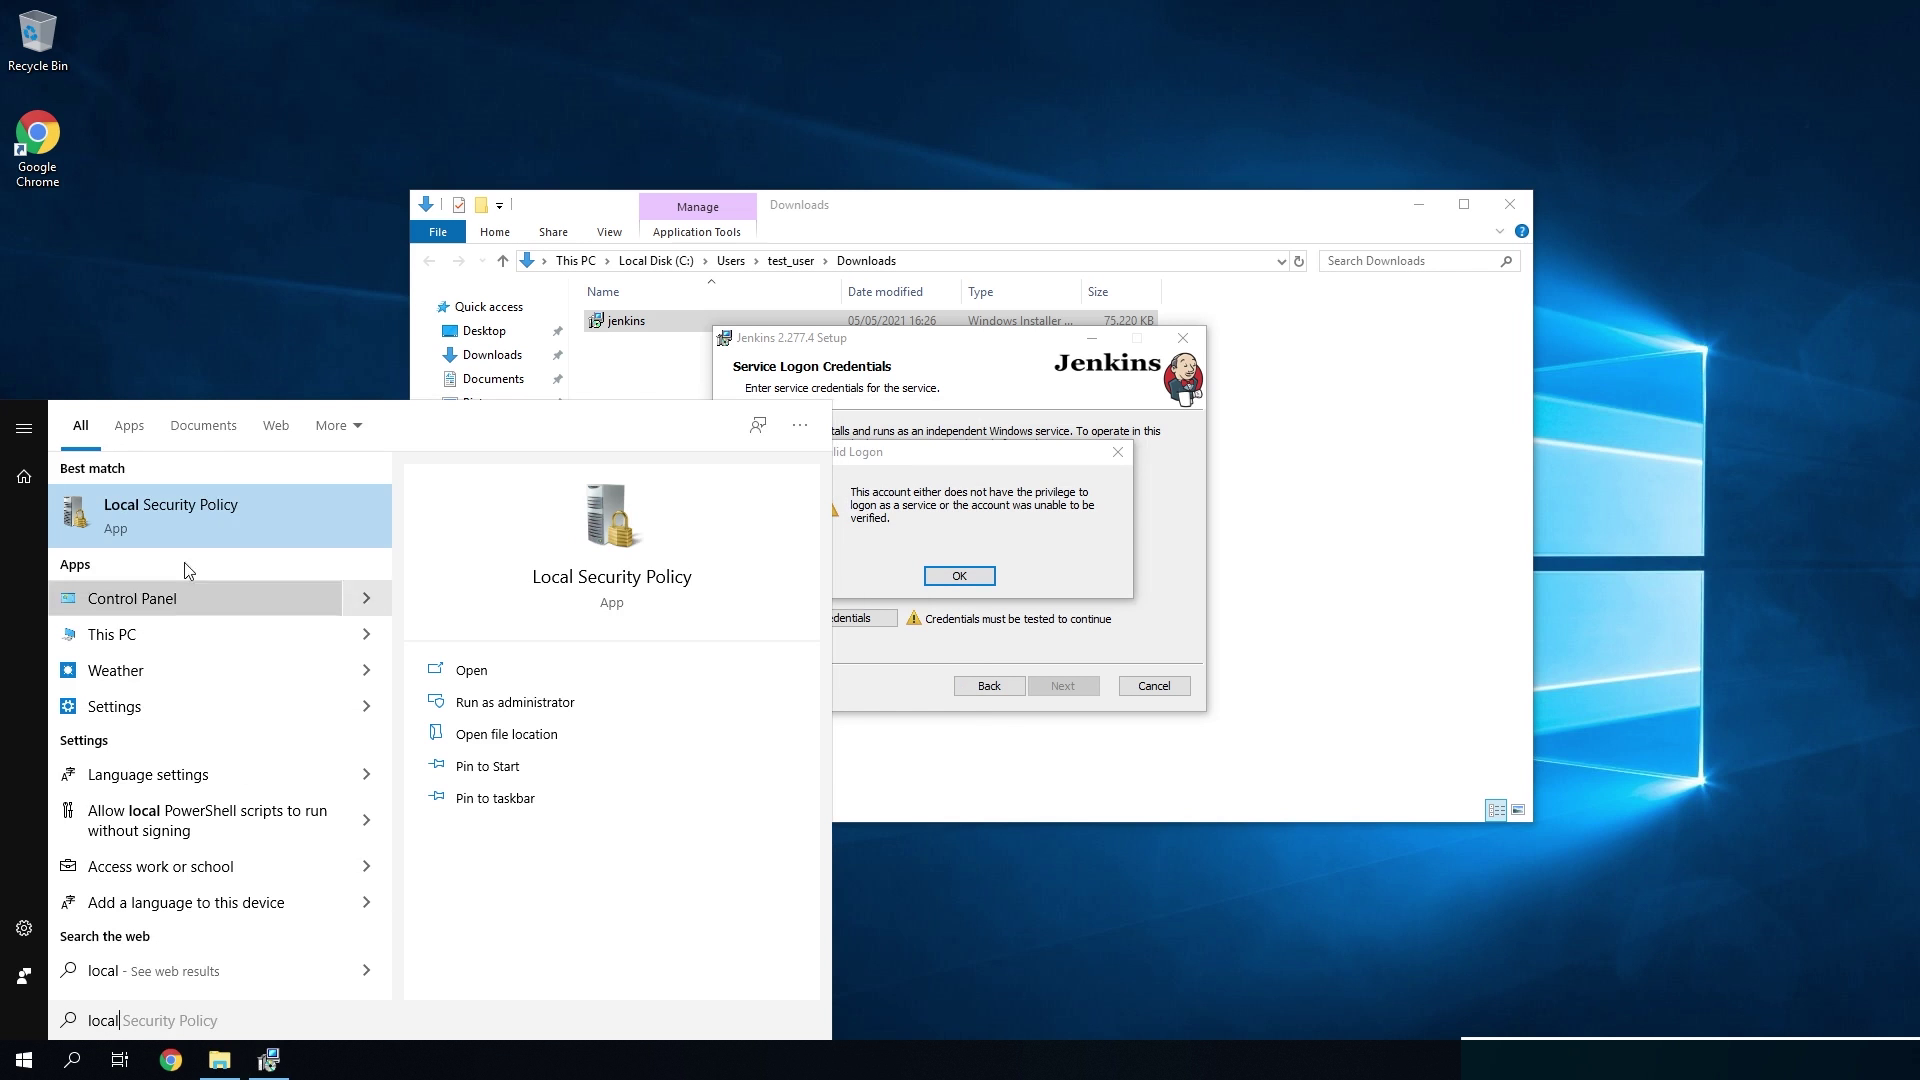
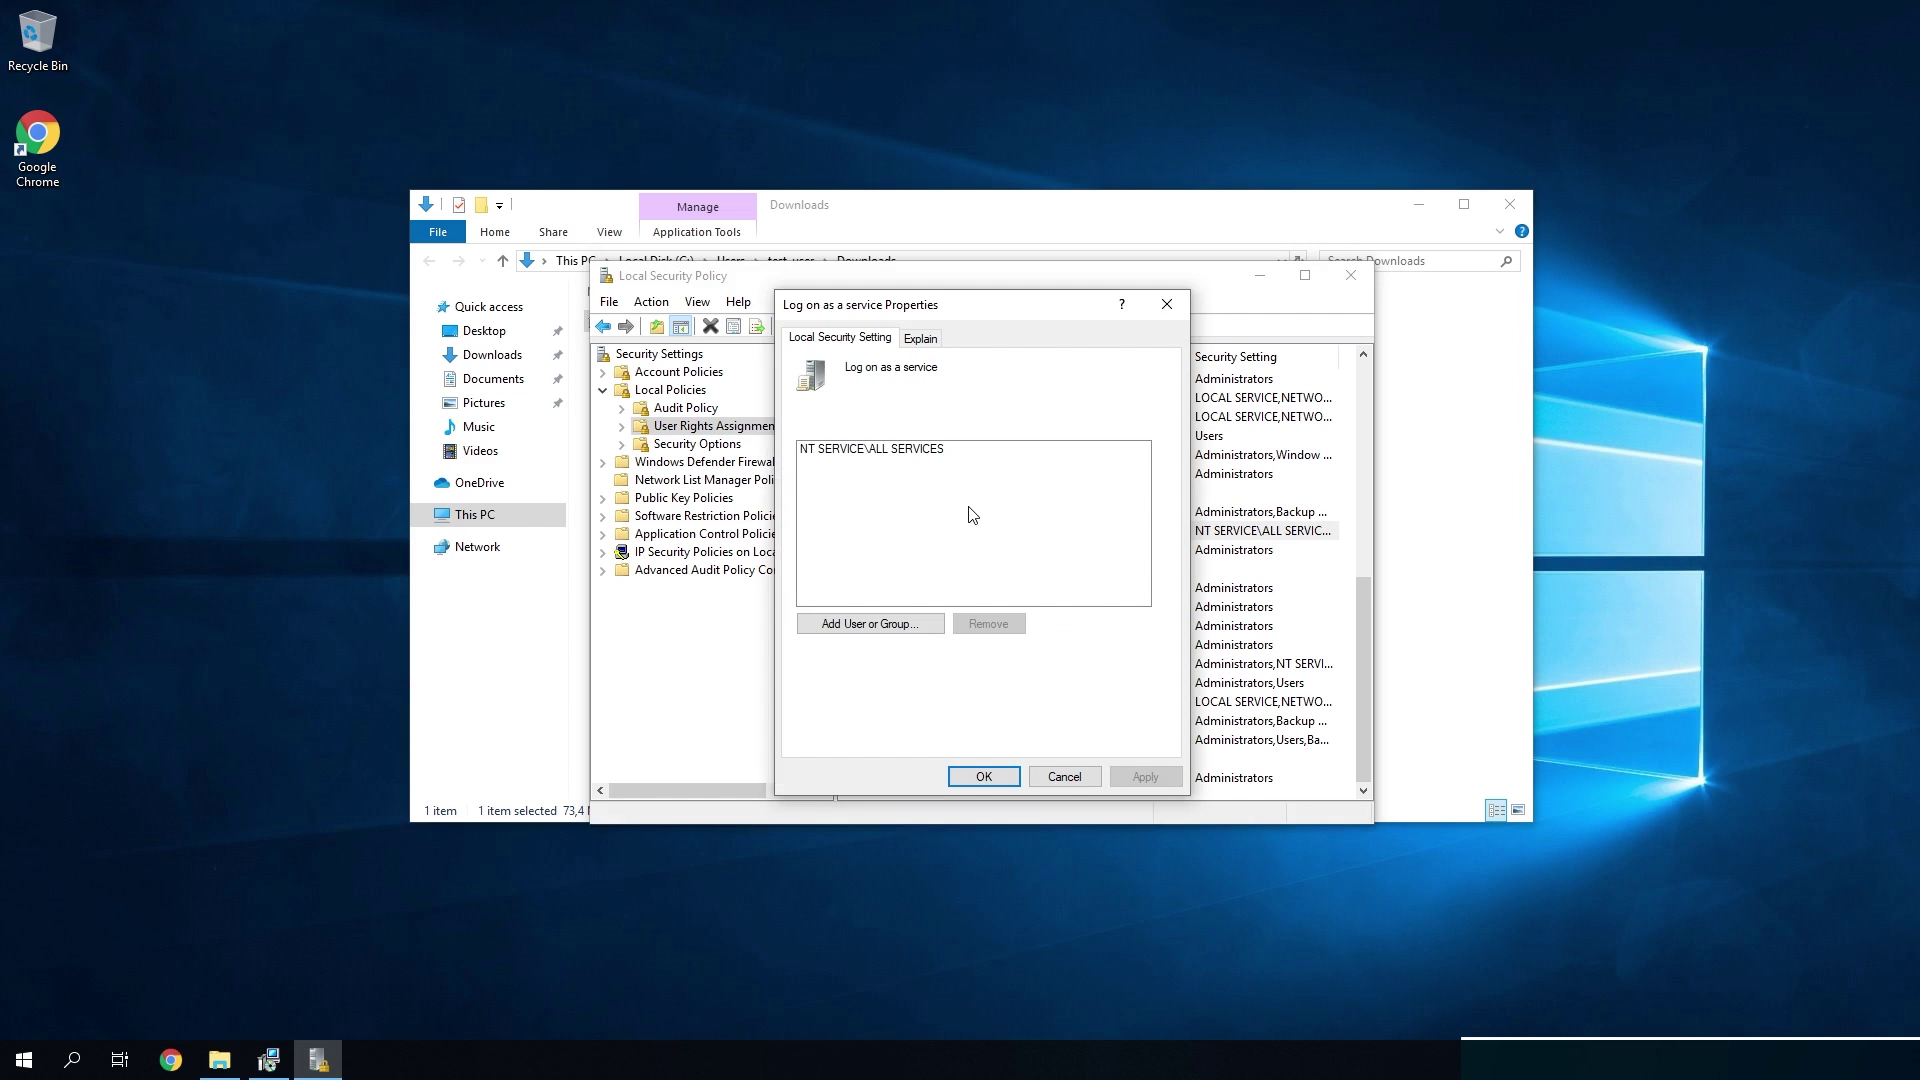
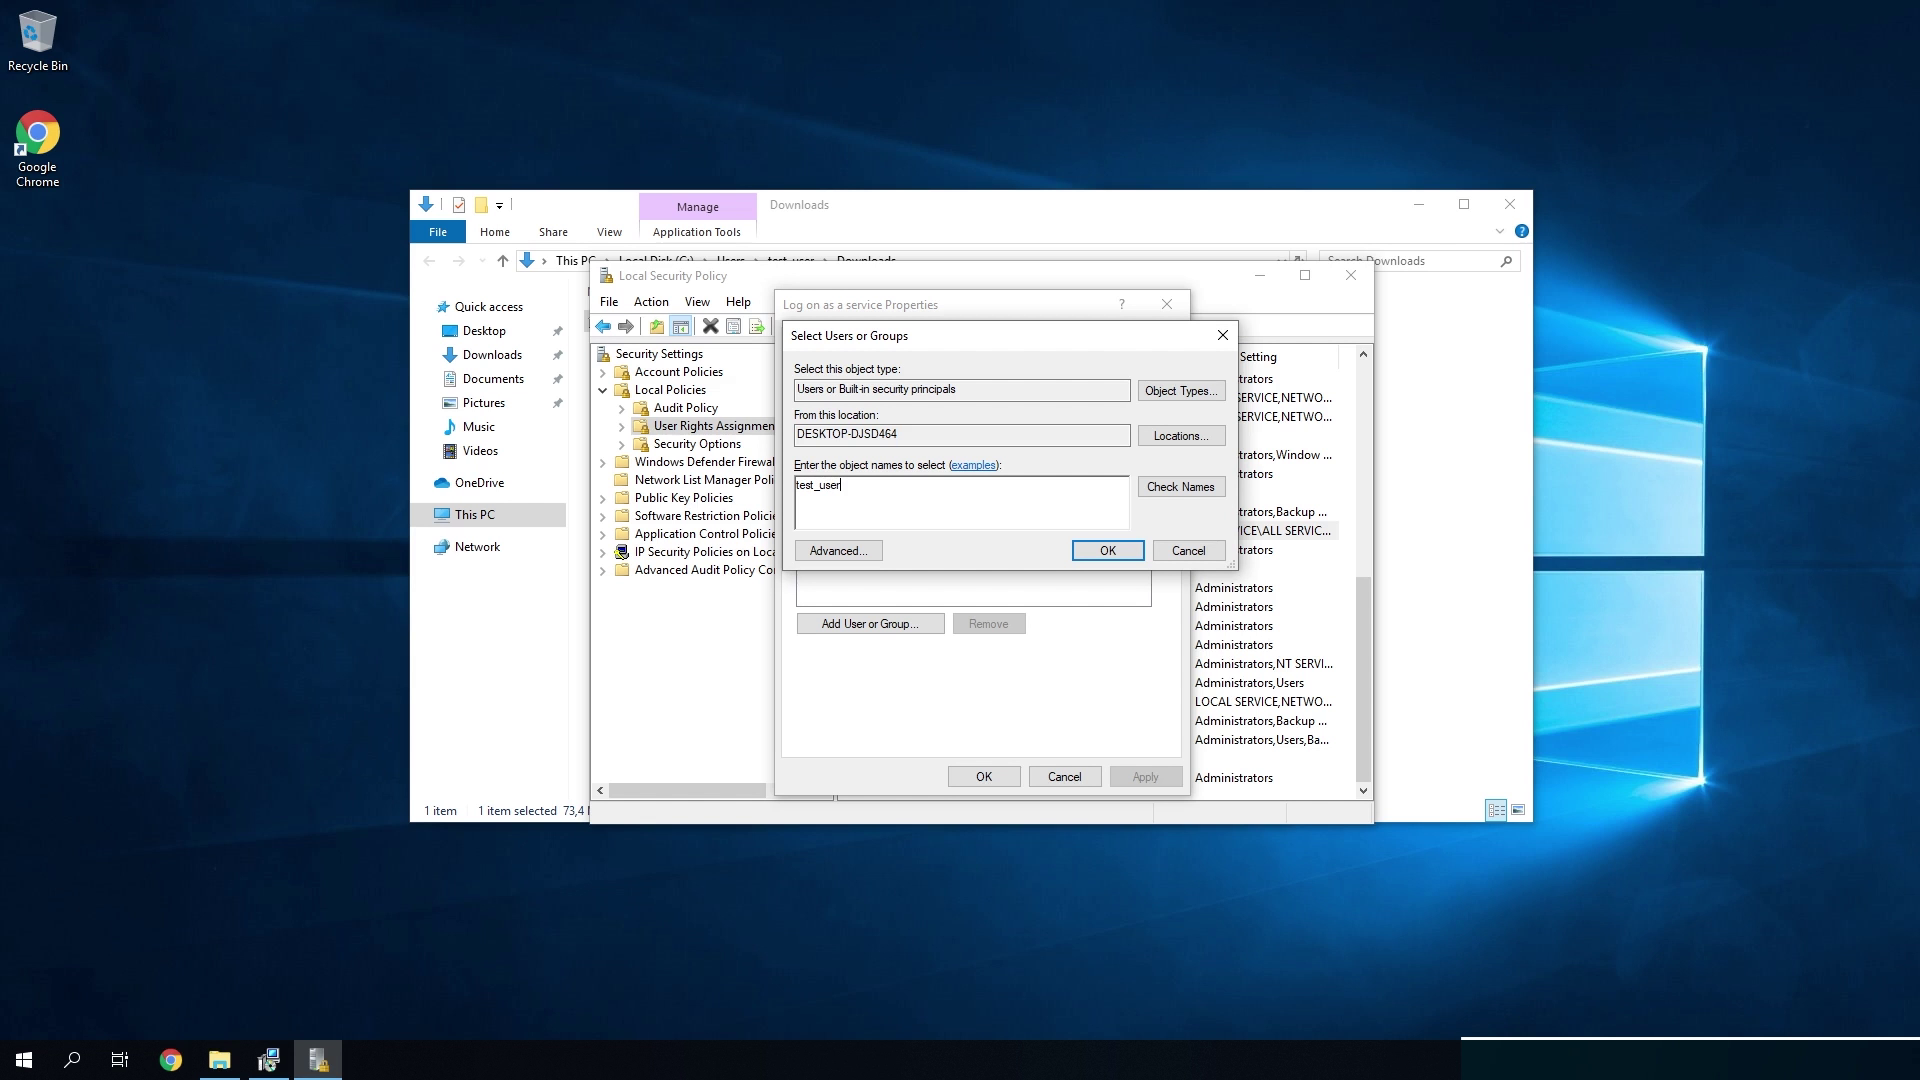
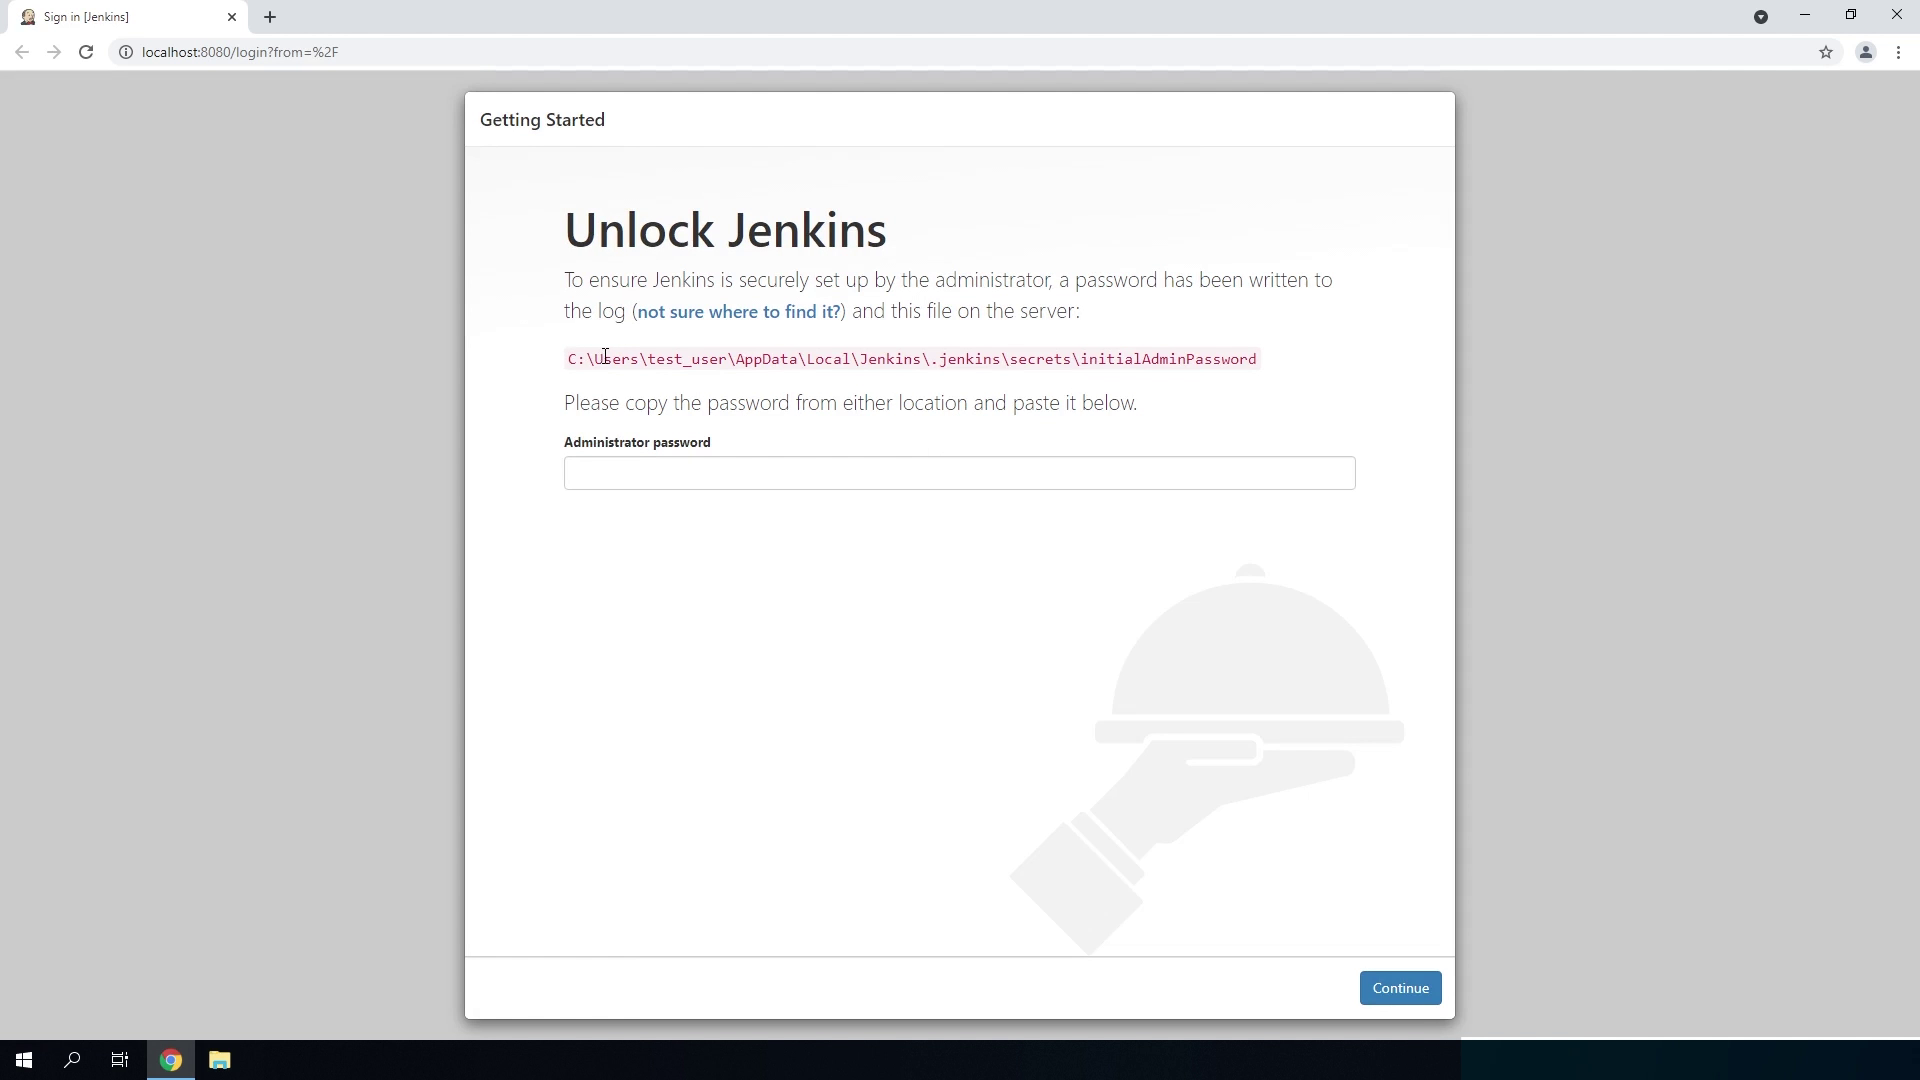
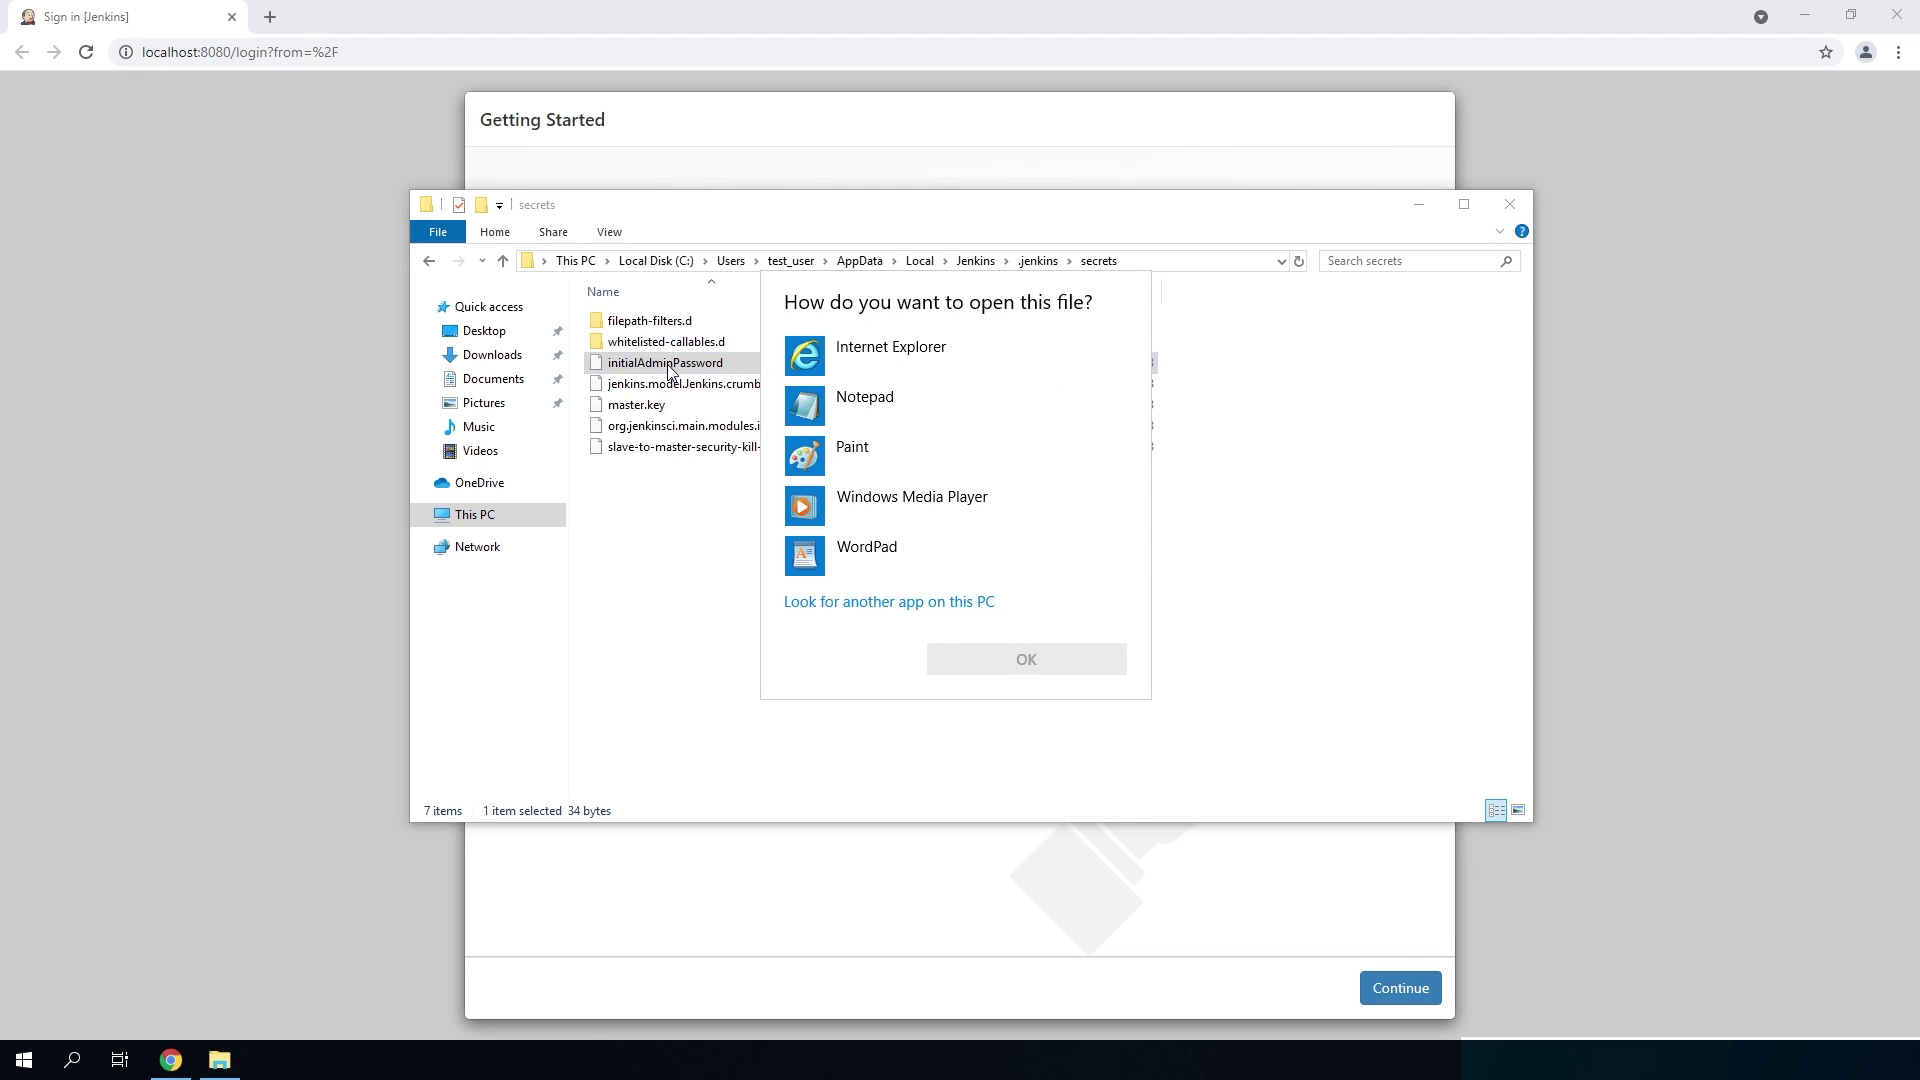
In this lesson I will demonstrate how to install Jenkins on a clean Windows environment using the Windows 64 bit Jenkins Installer and the Java SE Development Kit version 8.

DEMONSTRATION

  • To install Jenkins we need two installers. 
  • We need the latest stable version of Jenkins and we need the Java Development Kit or the Java Runtime Environment. These need to be version 8 or 11. Within this example I will use the Java Development Kit version 8.
  • So let’s download these first.
  • To download and install JDK 8, simply open your browser, I am using Google Chrome, and type Java 8 JDK into Google and click on the first link which leads to Oracle.com/Java
  • We get a list of downloads for the JDK installers. Since I am on a Windows 64bit system I will also need the Windows 64bit installer which is located right here.
  • I have already installed this version on my system earlier on so let’s go to the next step.
  • Now, let’s download Jenkins for Windows. Simply type in "Download Jenkins" in Google and click on the first link which leads to Jenkins.io/download. Here we can see that Jenkins provides two types of releases.
  • The Long Term Support releases and the Weekly releases. I am interested in the most stable release so I will go for the LTS. When I scroll down I will get an option for Windows.
  • When I click on that the download will begin. This might take a few seconds.
  • When the download has finished we can go ahead and run the installer.
  • At the first dialog we can click Next to go to the destination folder dialog.
  • Here we can select the path to the home folder of Jenkins. In this example we will leave the default path as it is which leads to the Program Files folder. After choosing your own folder you can click Next.
  • Here we need to enter the local or domain user which will be used to run the Jenkins service. I will fill in the local user I made to run Jenkins.
  • Let’s see if the account will be recognized by Jenkins.
  • Here we run into a common problem which is that the user hasn't been given the rights to log on as a service. To give the user these rights open your Local Security Policy and follow the next steps.
  • Go to Local Policies, then select User Rights Assignment, then scroll down and look for the Log on as a service policy. When you double click on it you will see that the user we wanted to enter earlier hasn't been given the rights to log on as a service.
     
  • So let’s give it the rights right now.
  • Click on Add User or Group and type in the username of the account. Then click on Check Names where your full account name will be shown.

  • Now click on OK two times and the settings will be saved. Now let’s test the account to see if it works.
  • The account has been recognized by Jenkins. Now click Next to go to the next dialog.
  • In this dialog we have to choose a port number for the Jenkins service. Within this example we will stick with the default 8080 port. Before we can go to the next dialog we have to test the port to see if it is available. After that we can click Next to go to the next dialog.
  • Here we have to select the path of the Java Development Kit we installed earlier on. The default path is also the path I have installed the JDK version 8 into. So let’s click Next to go to the next dialog.
  • Here we can select if we want to add a firewall exception for the port we selected earlier. This is not recommended by Jenkins so we will not do that. You can leave the settings on default and Click Next.
  • As the final step we can click on Install to install Jenkins. If a notification pops up asking if we want to allow Jenkins to make changes to our device you can simply click Yes. 
  • After the installation has finished we can click on Finish which automatically opens the localhost in the browser. This might take a few seconds to fully load.
  • The next step we need to do is Unlock Jenkins by going to the path shown right here and open the initialAdminPassword file.
  • So we can copy the file path right here and paste it into the explorer. Up next we can double click on the initialAdminPassword file and open it with Notepad.
  • Here we see the password needed to unlock Jenkins. Copy it, then paste it into the password box located in your browser and click Continue.
  • Now we have come to the part where we need to install the plugins Jenkins recommends or choose for ourselves which plugins we find most useful. In this example we will install the plugins Jenkins recommends to us because we can always install more plugins within the Plugin Manager later on. Click on Install suggested plugins. Now we see that the recommended plugins are being installed.
  • Wait for the installation to finish before closing or reloading the browser.
  • Up next we have to create our first admin user which will be used to login into the Jenkins environment. After filling in the data of the new user we can click on Save and Continue.
  • As the final step we can change the URL we use to browse to Jenkins. Since we use Jenkins on our local system we can leave the default localhost URL as it is and click Save and Finish.
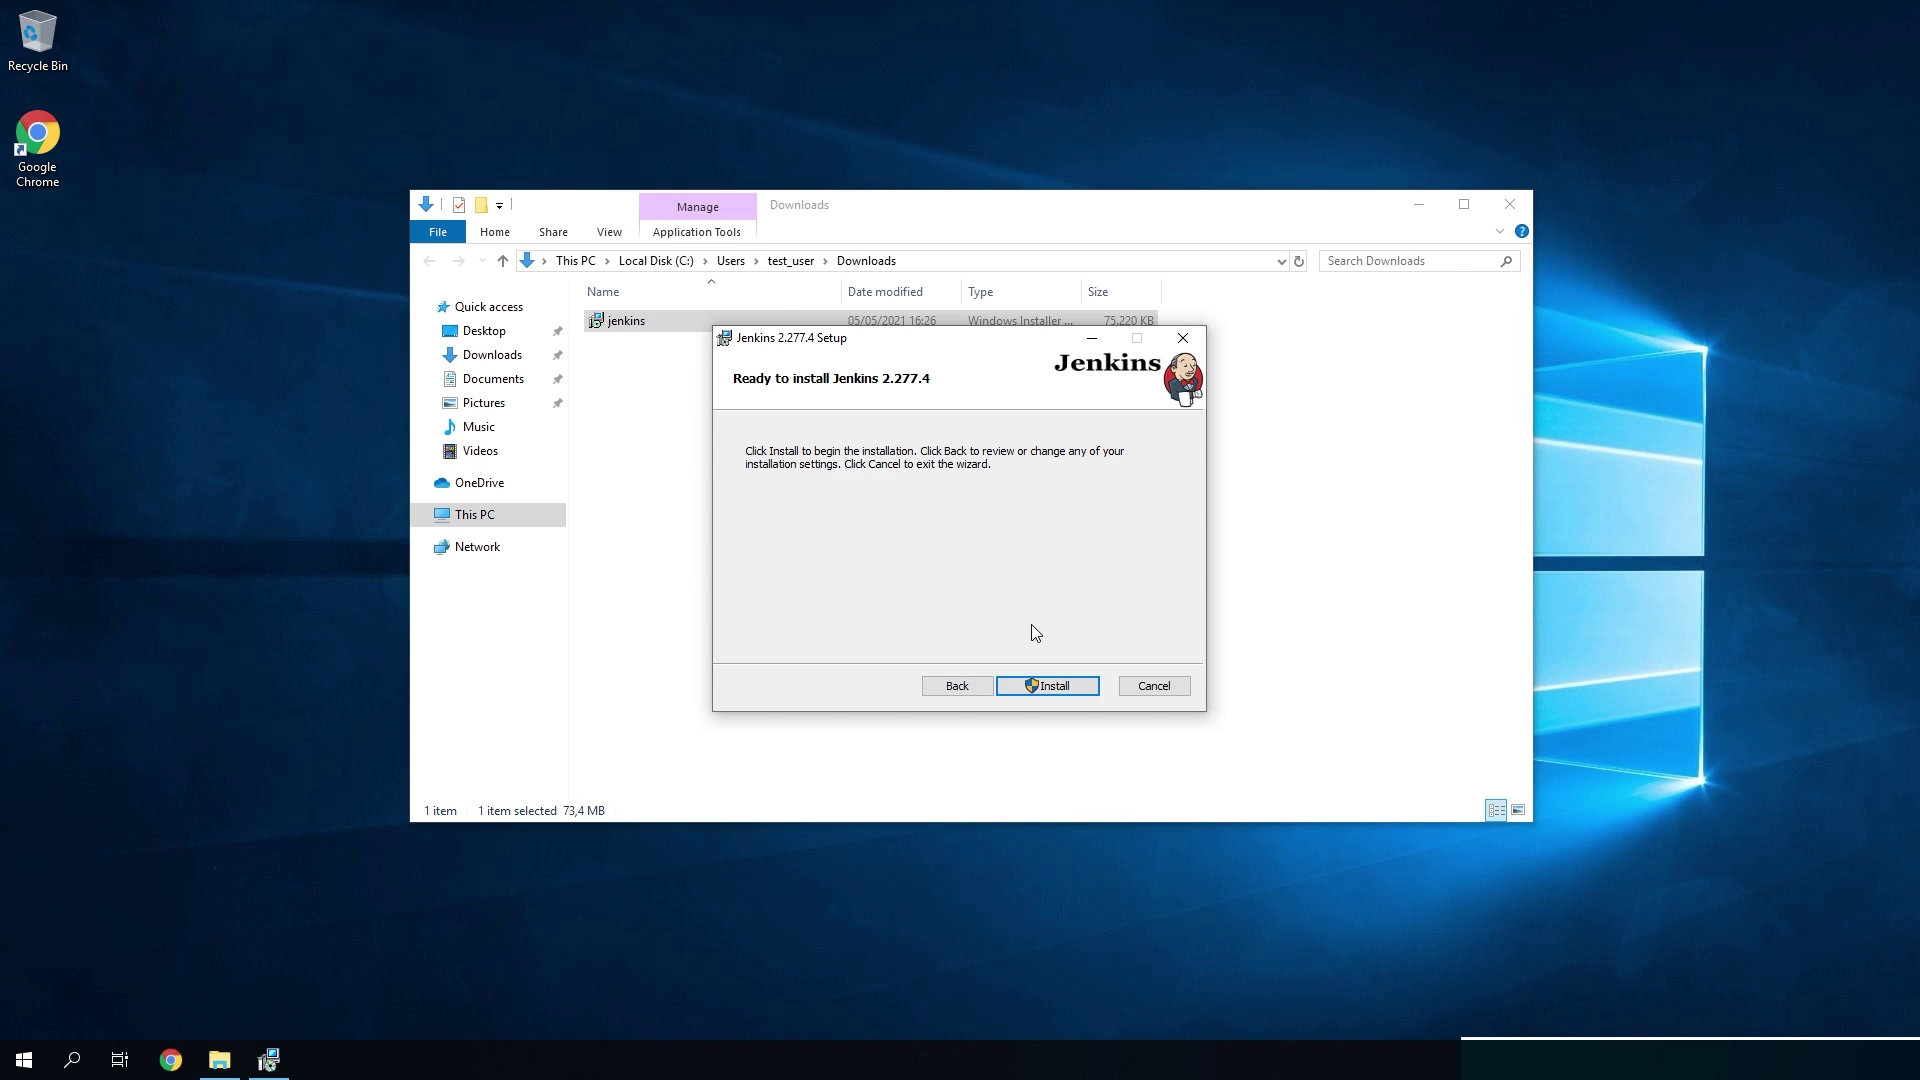
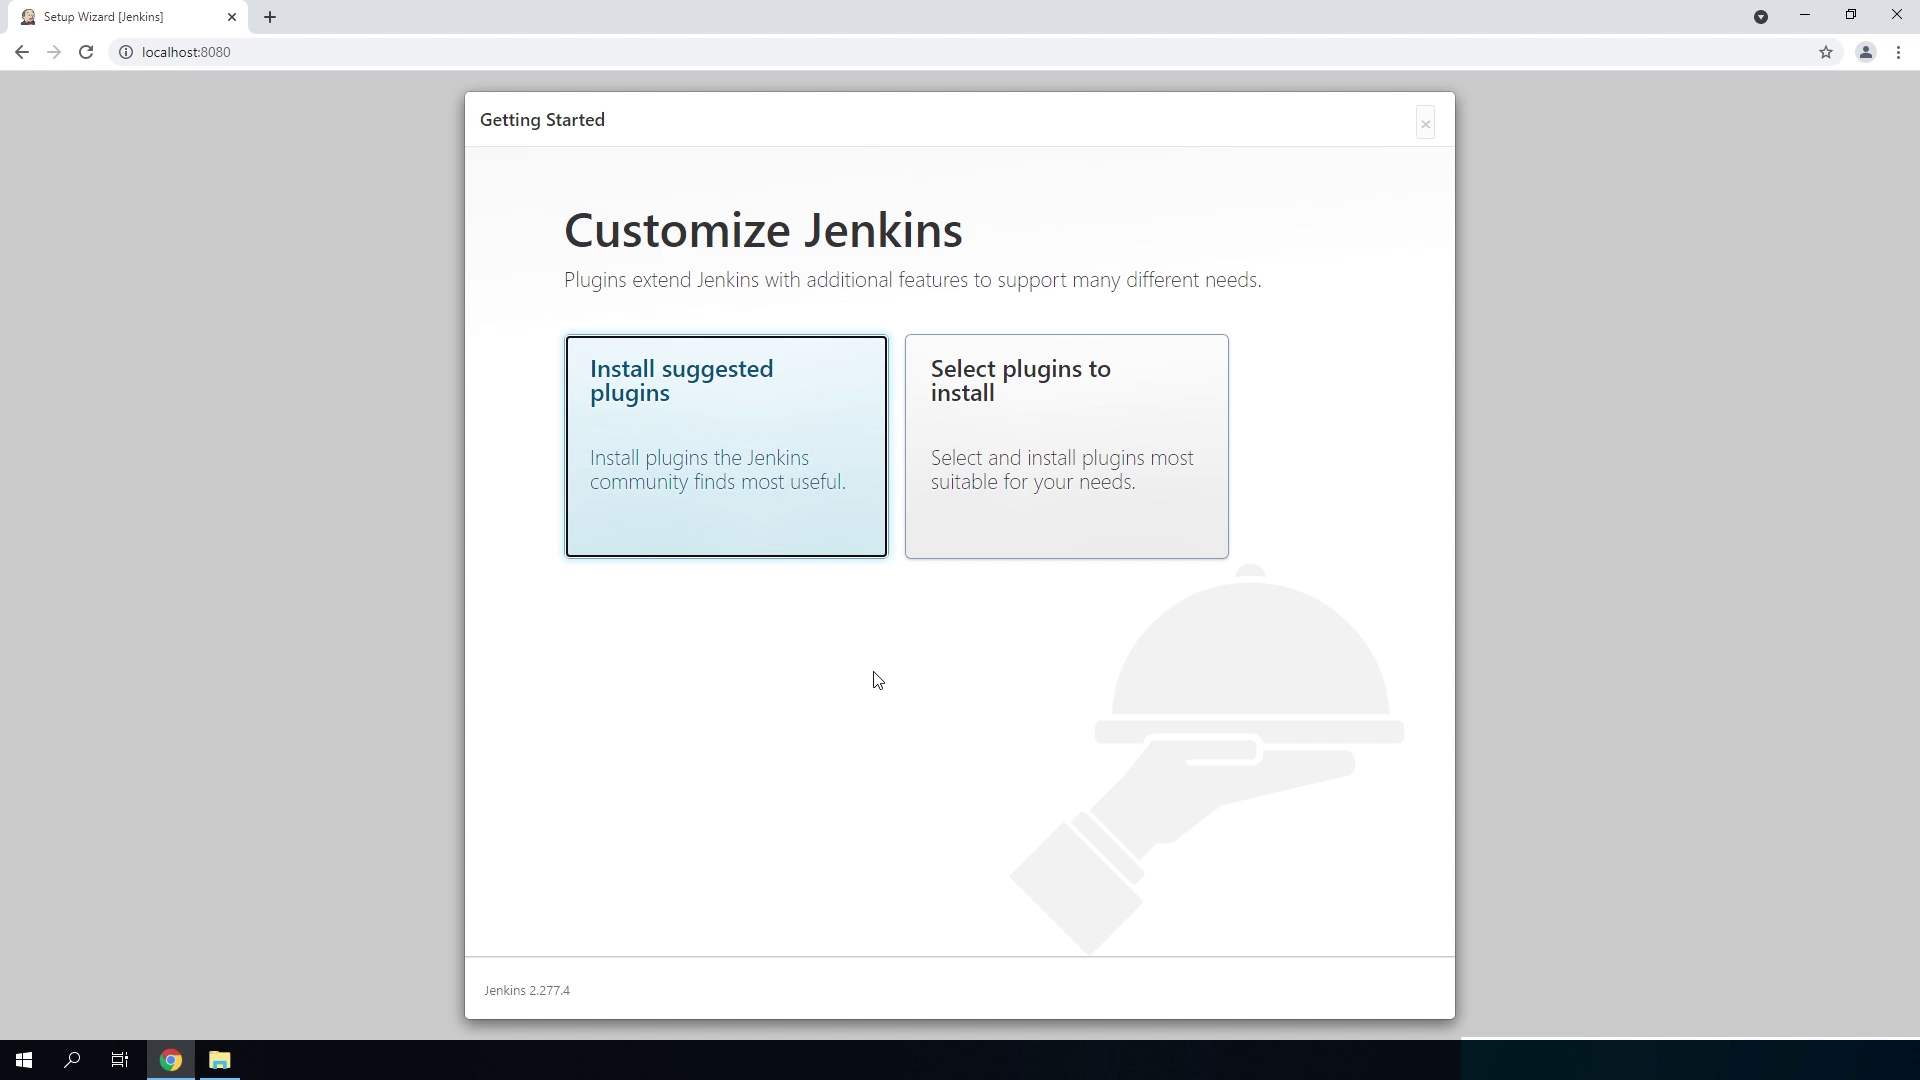
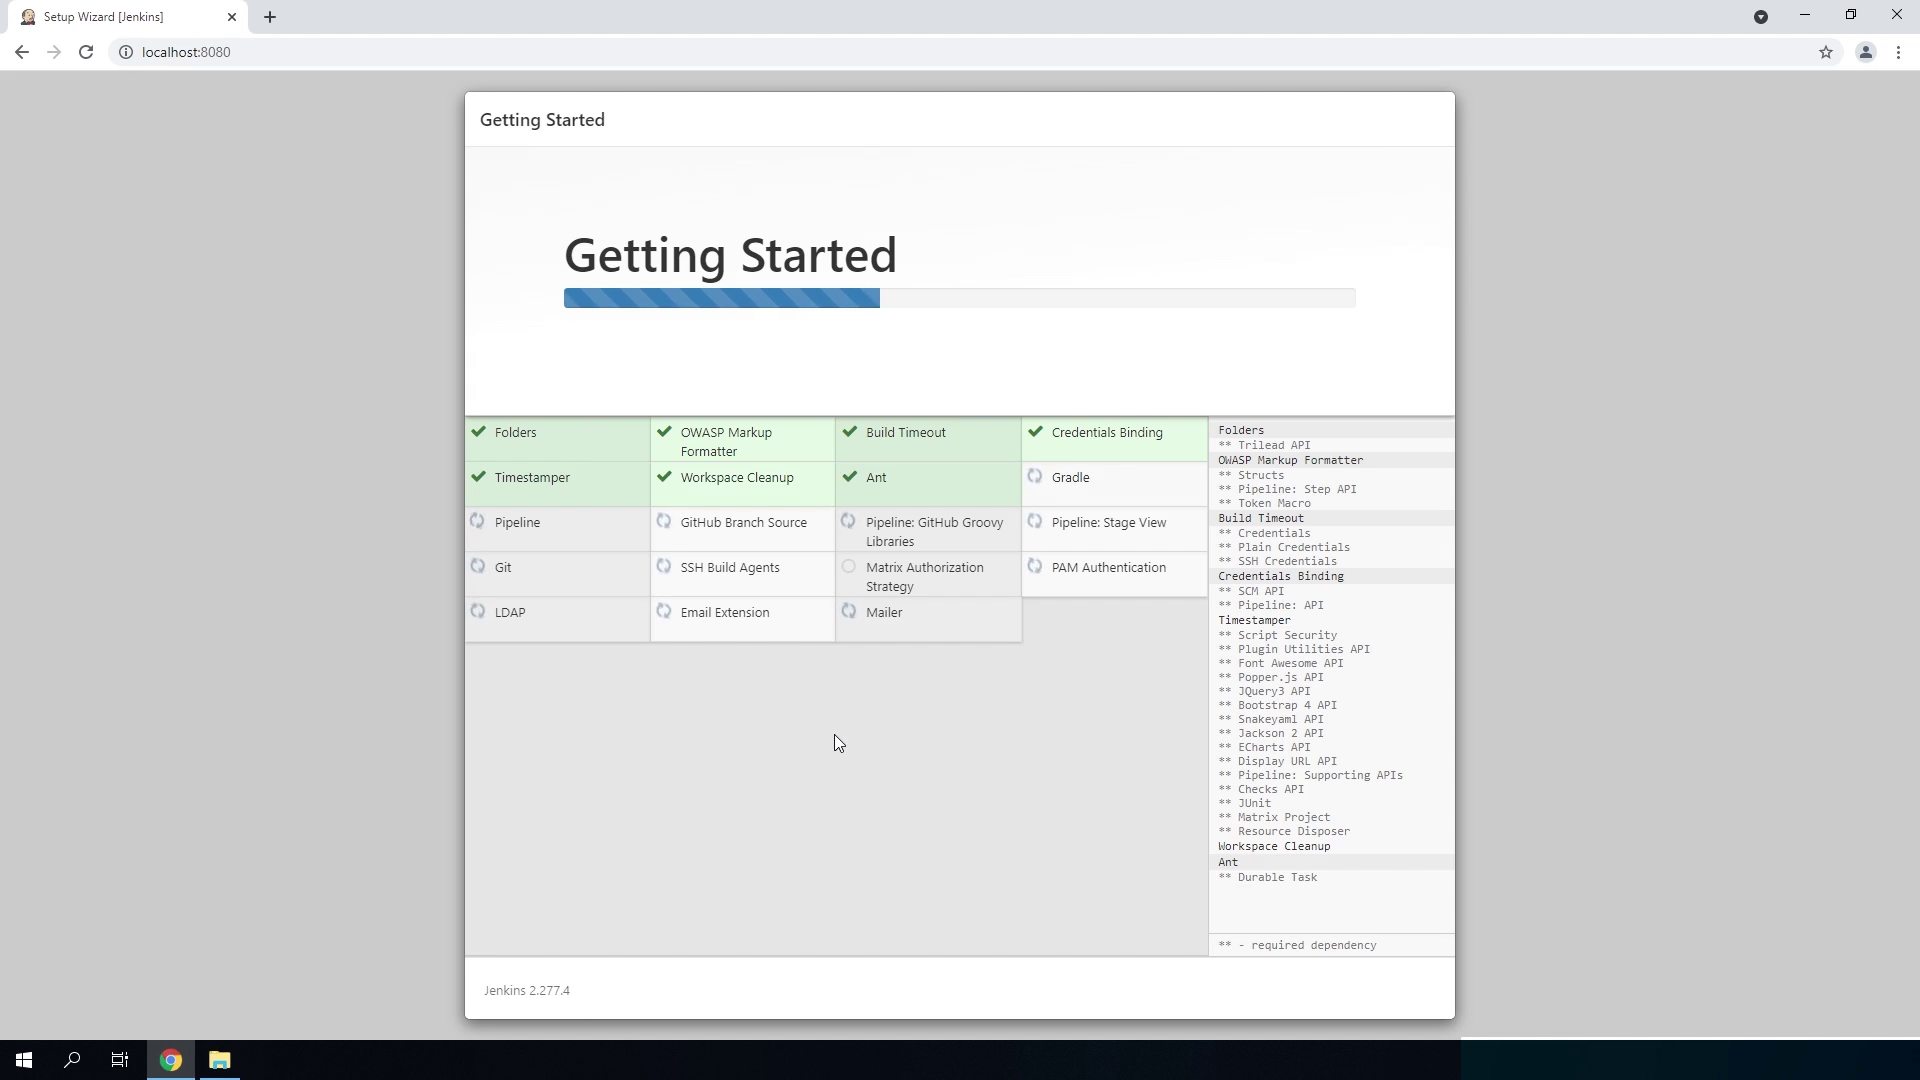
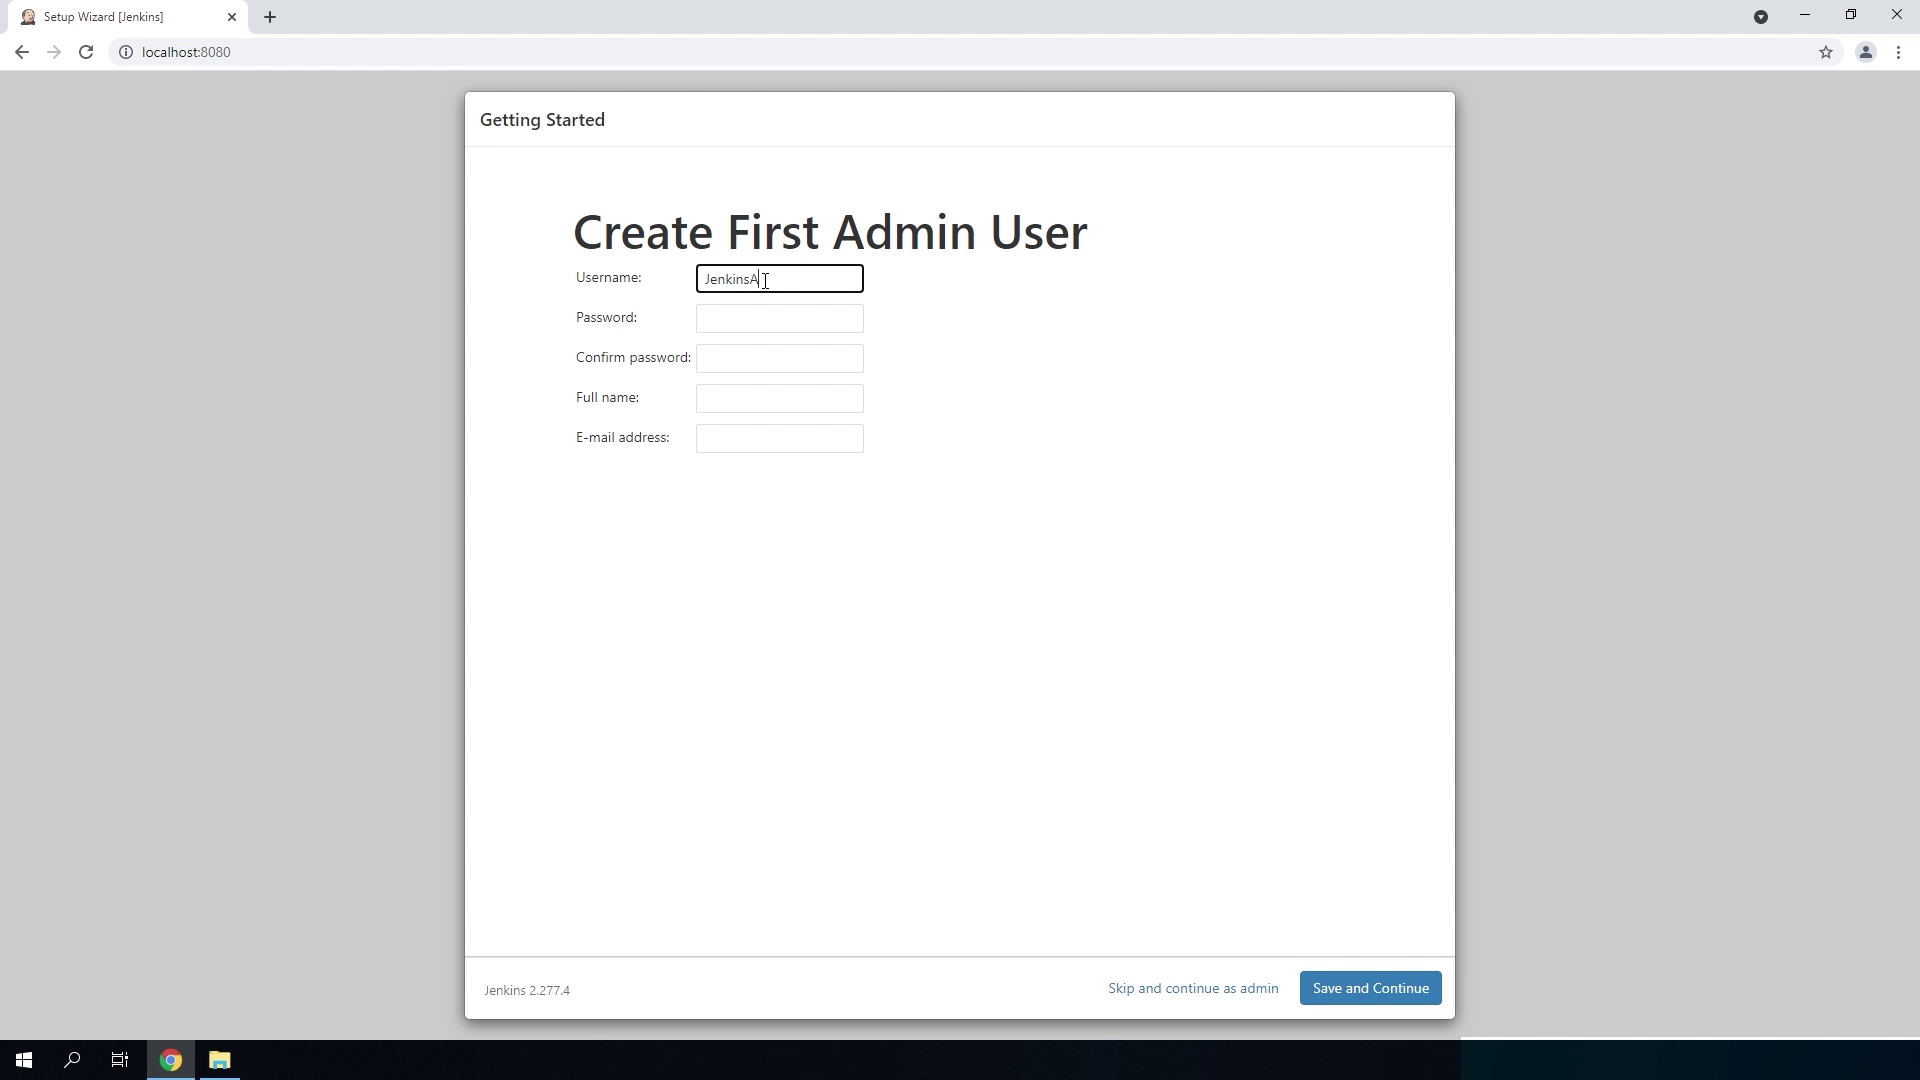
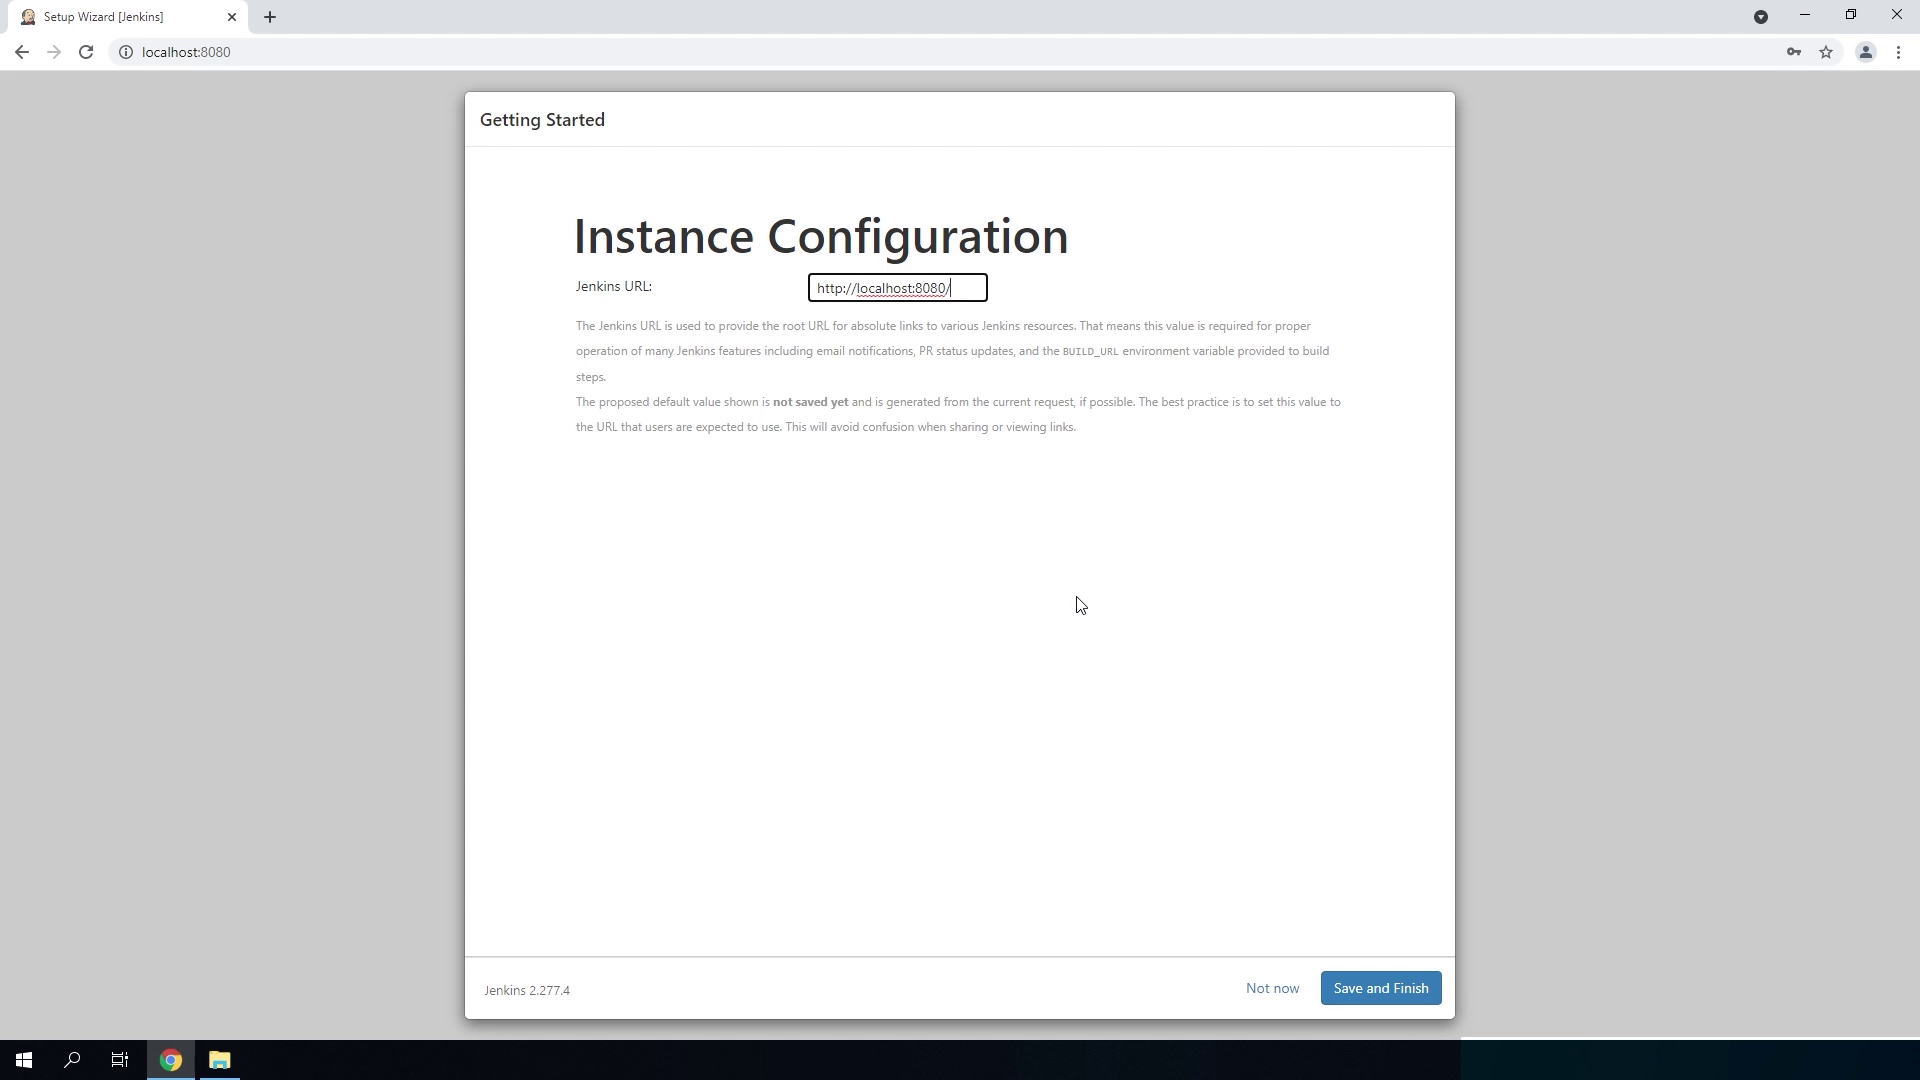
    These were all the steps we needed to take to install Jenkins. Now click Start using Jenkins to automatically login to our Jenkins environment.
  • And there we have it! Jenkins is now ready to be used and make software development much easier!

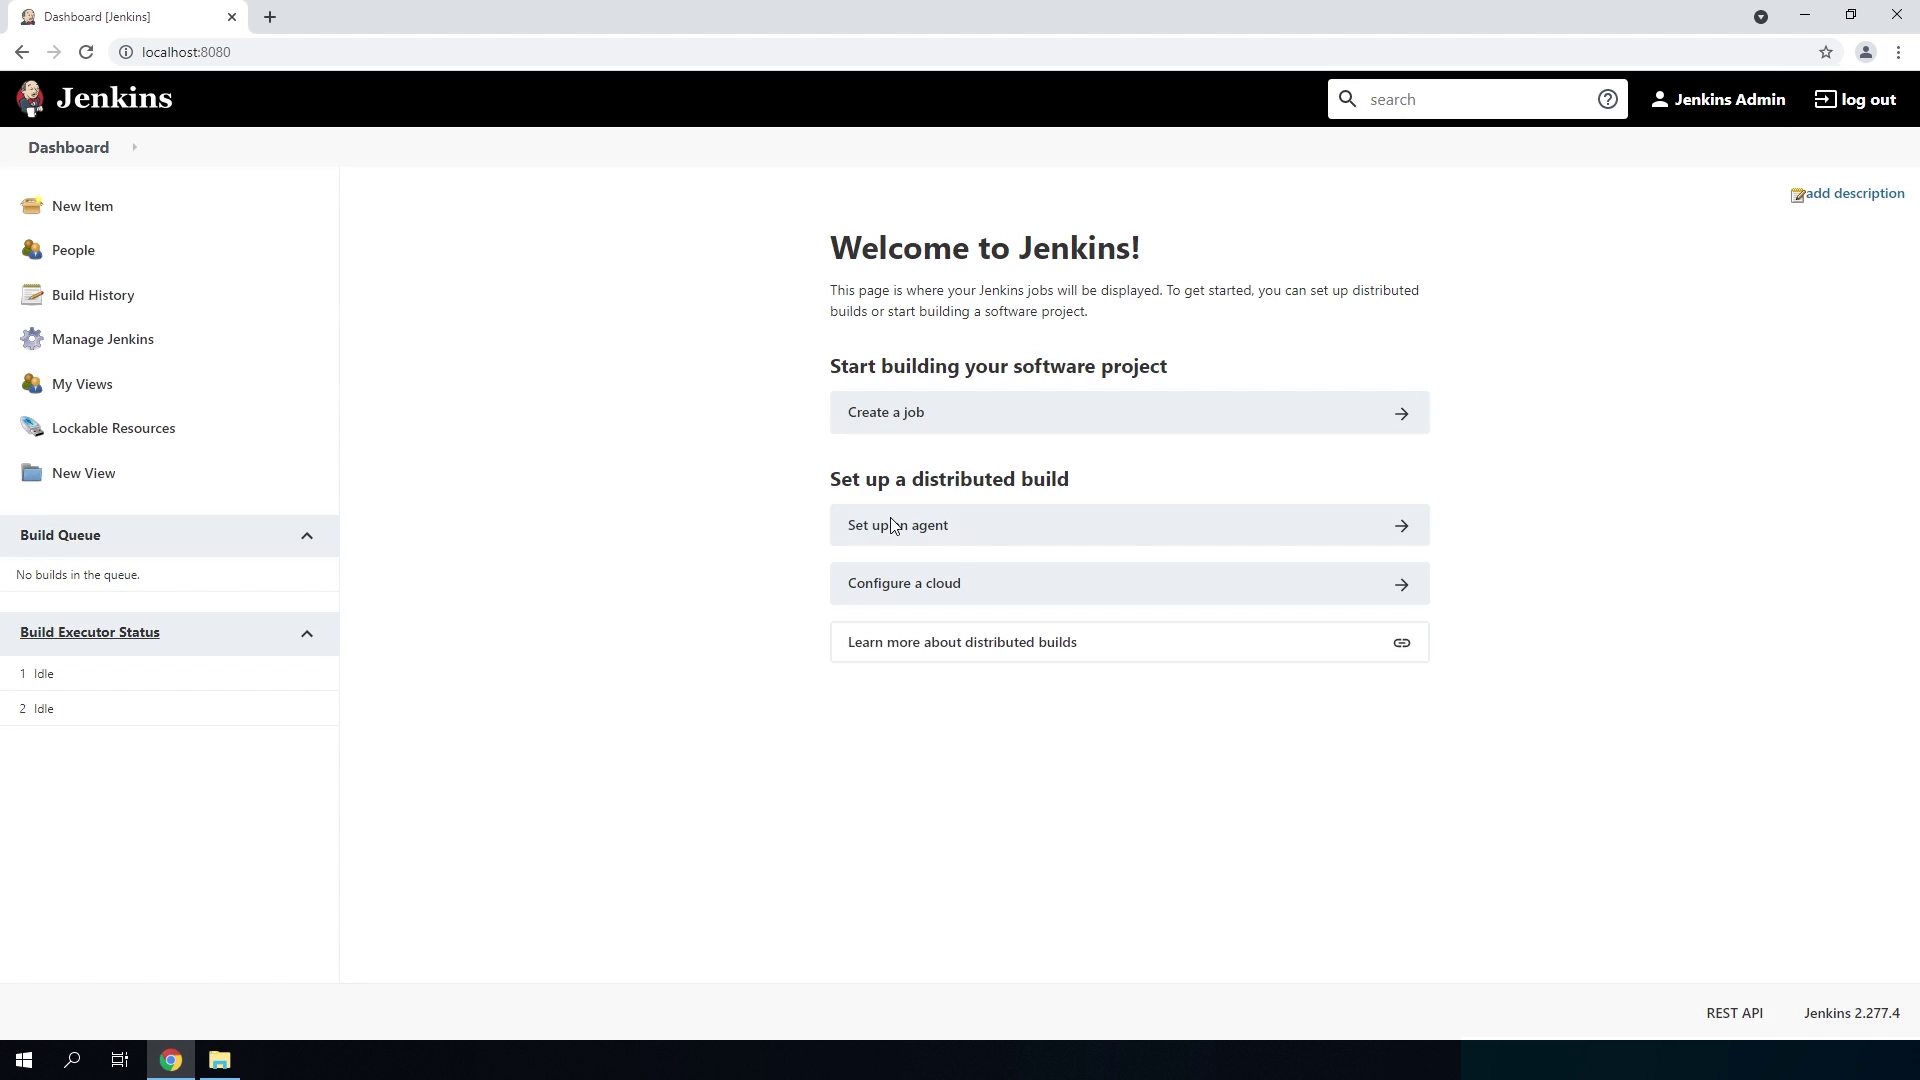
In the next lesson we will see how we can use a DataFlex workspace within Jenkins