Tips on using the build automation tool Jenkins within DataFlex
Lesson 3: How to use Jenkins and Conclusion
In this lesson we will demonstrate how to create a build project, fetch a GitHub repository, compile a DataFlex workspace with the DataFlex compiler and send an email when a build has failed or has been successful.
DEMONSTRATION
- Beforehand I have downloaded and installed the latest DataFlex 2021 Studio so we can use the DataFlex compiler within our builds.
- To make sure we can use Git and fetch our repository needed for our build we need to install Git. So let’s do that first before creating our first build project.
- To download and install Git, simply go to Google and type in Git. Then click on the download button, in the first link we see, which leads to git-scm.com.
- Since I am on a Windows 64bit system I will need the latest Git Windows installer located right here. I have already downloaded and installed Git earlier on so let’s go back to Jenkins.
- Now we have everything we need to create a build project so let’s start by looking at the basic settings we need.
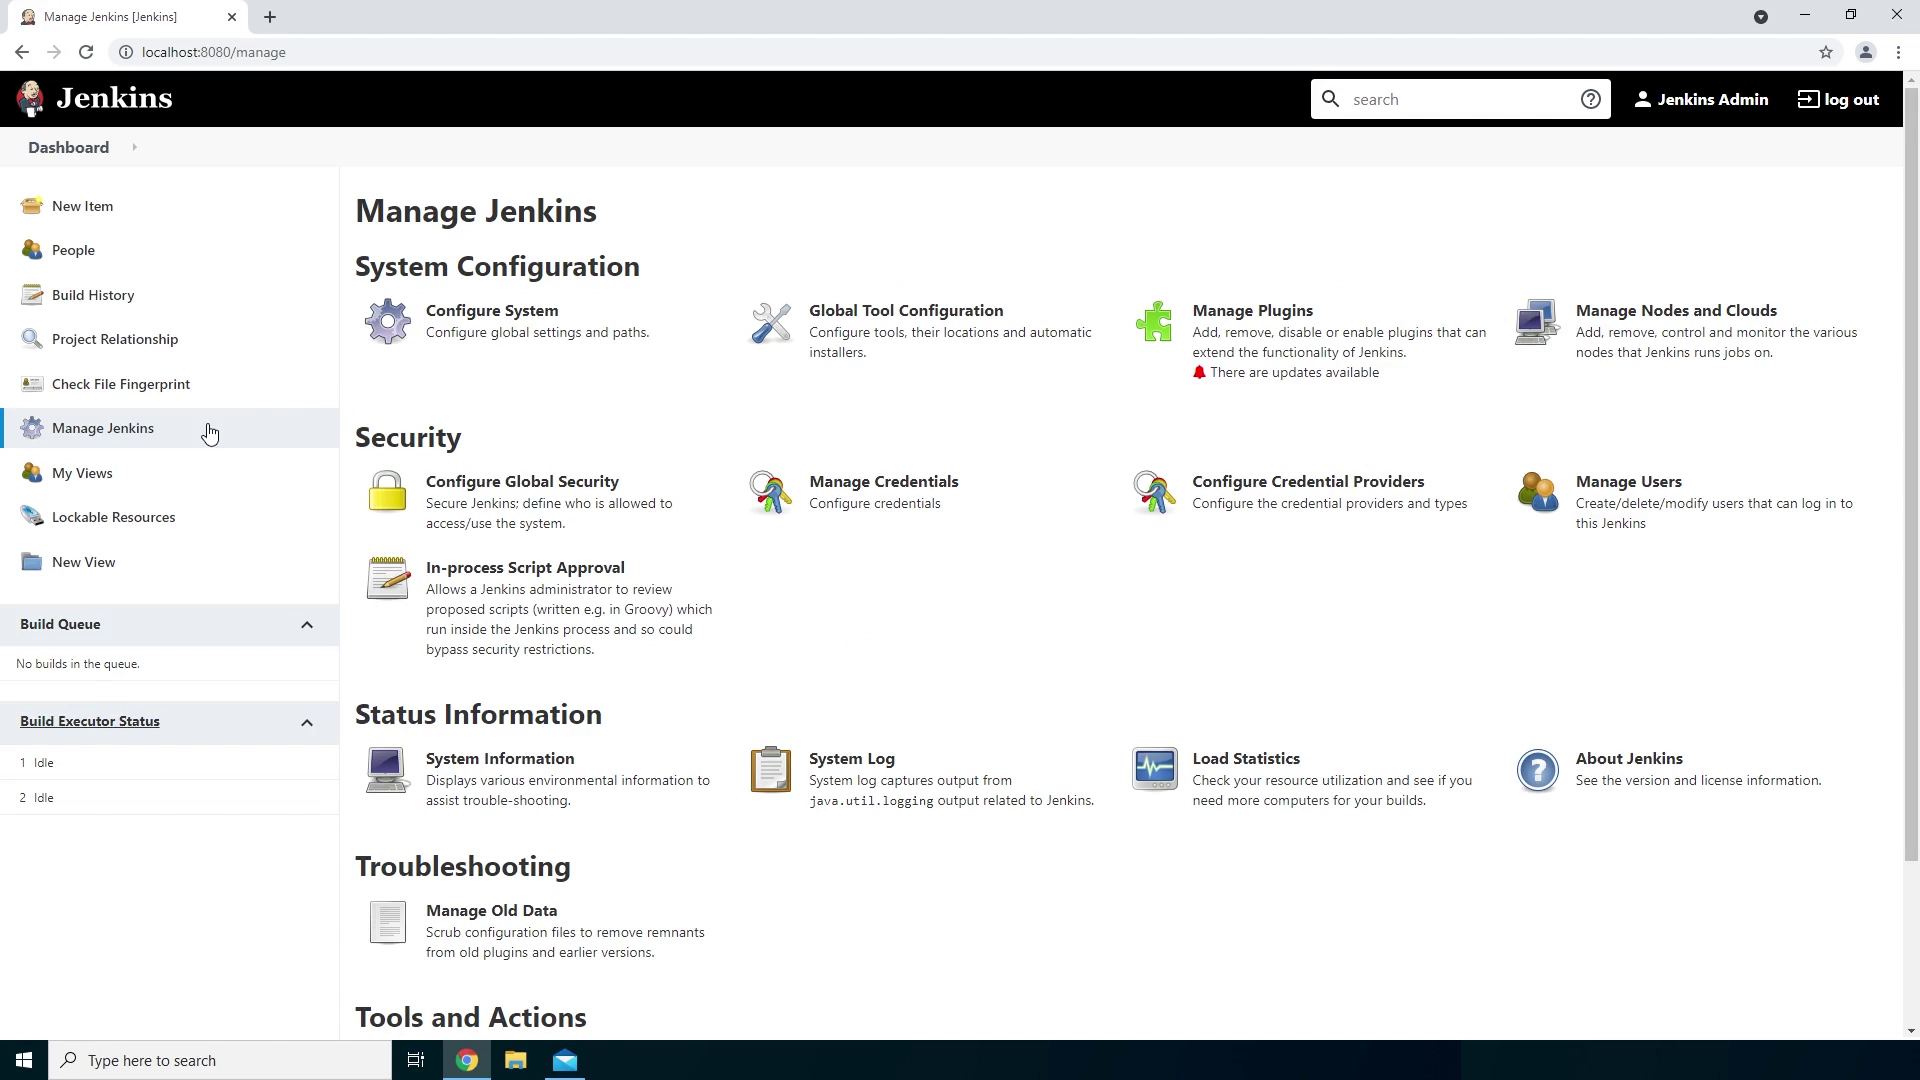
- Let’s go to Manage Jenkins and then go to Configure System.
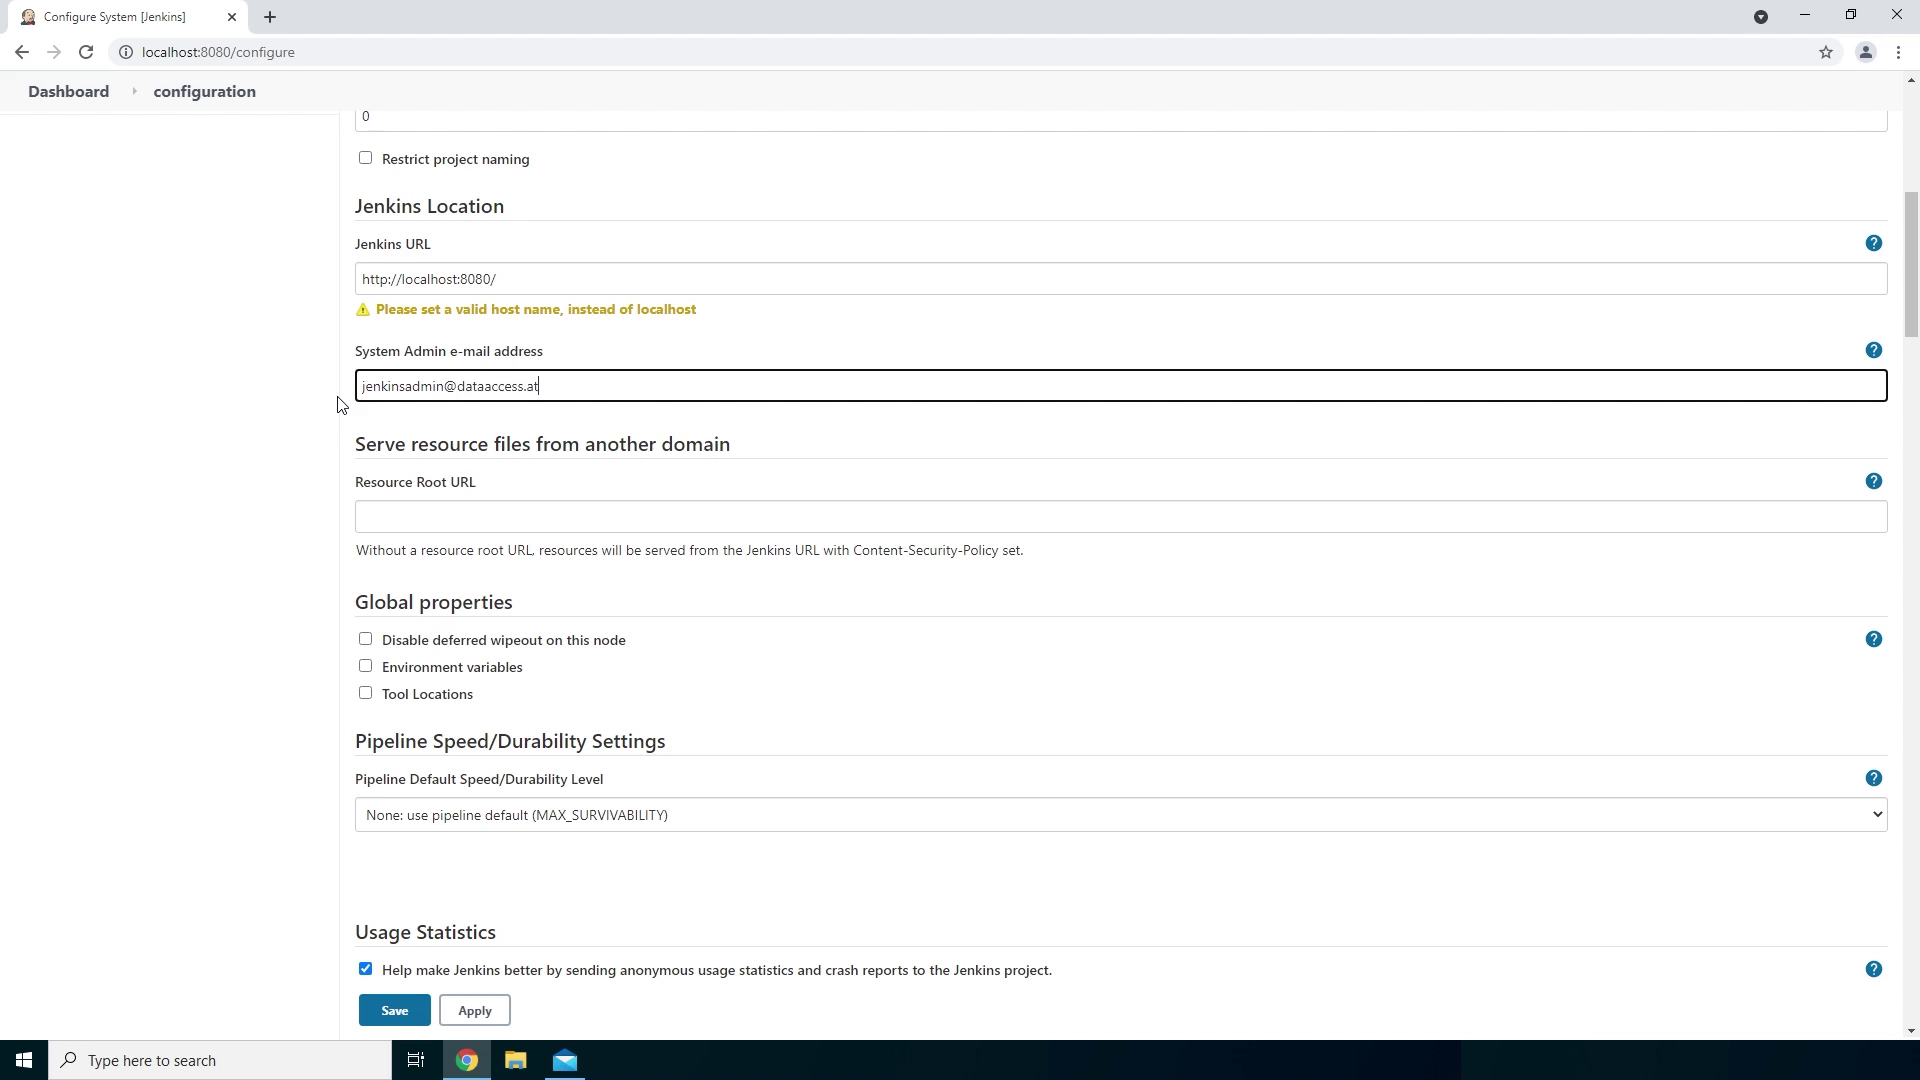
- On this page we will enter our email settings to make sure we are receiving the emails correctly.
- The first thing we need to do is set the System Admin email address so we will receive the emails from this specific address. So let’s fill in jenkinsadmin@dataaccess.at.
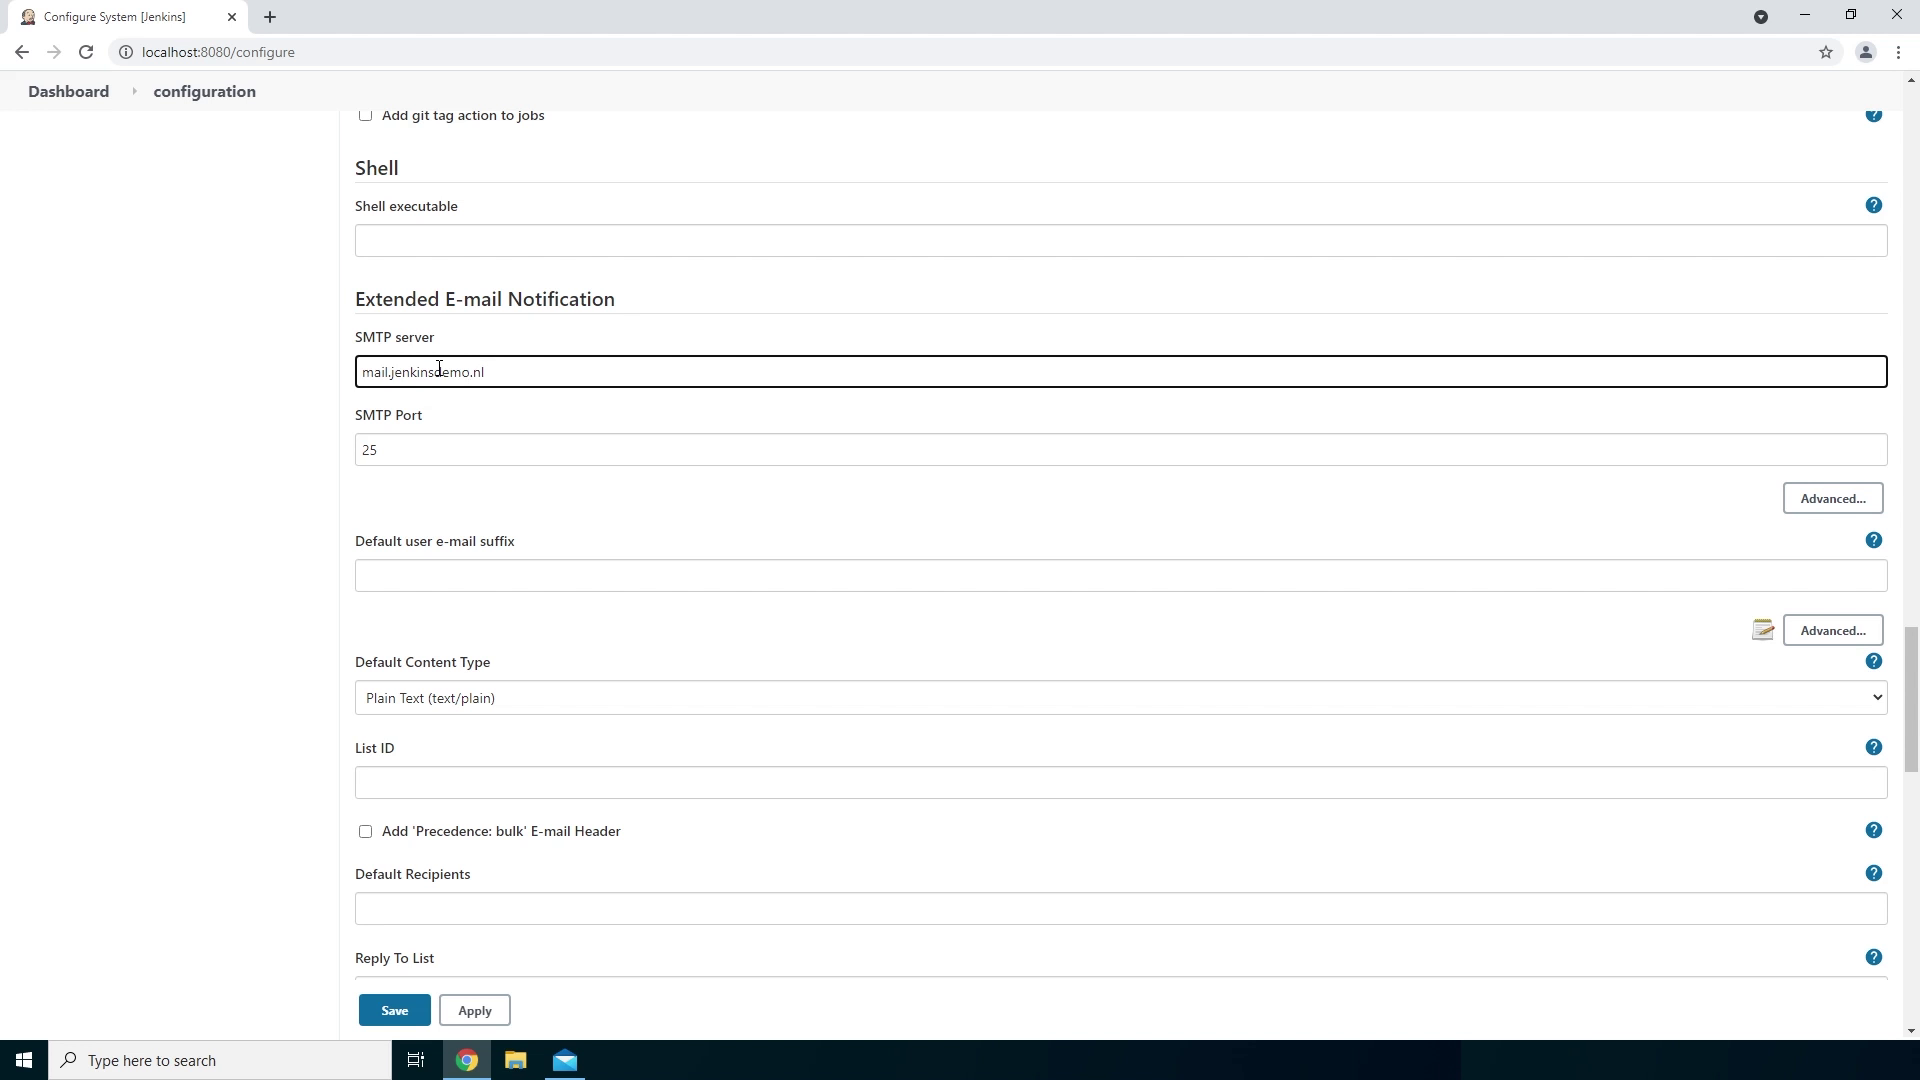
- Up next, if we scroll further down, we see the Extended E-mail Notification. The only thing we need to do is enter our SMTP server which will send us the success or failure emails.
- So let’s fill in mail.jenkinsdemo.nl.
- If we scroll down a bit more we will see our default subject and content of the email. The Default Subject will show us the Project name, the build with the build number and the build status.
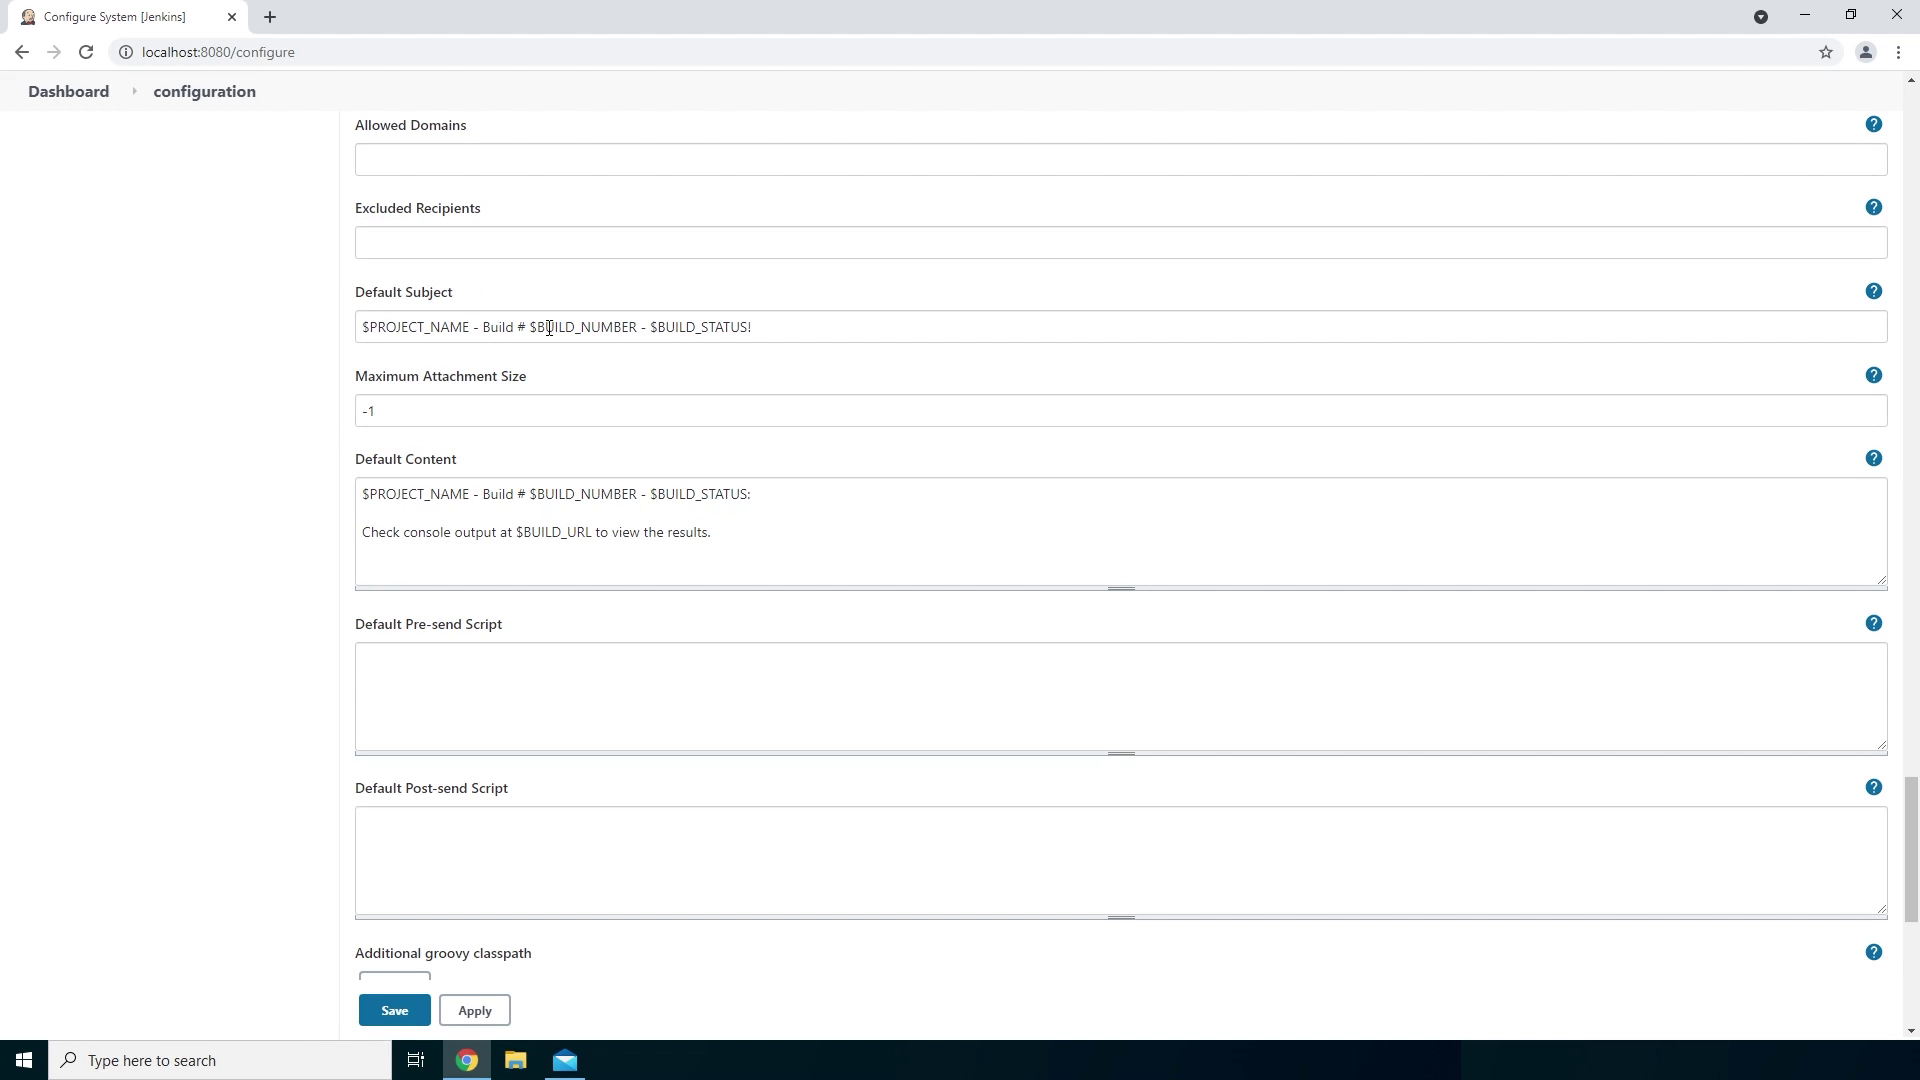
- And the Default Content will show us the same but will also add the URL to our build output.
- Now let’s save these settings by clicking on Save.
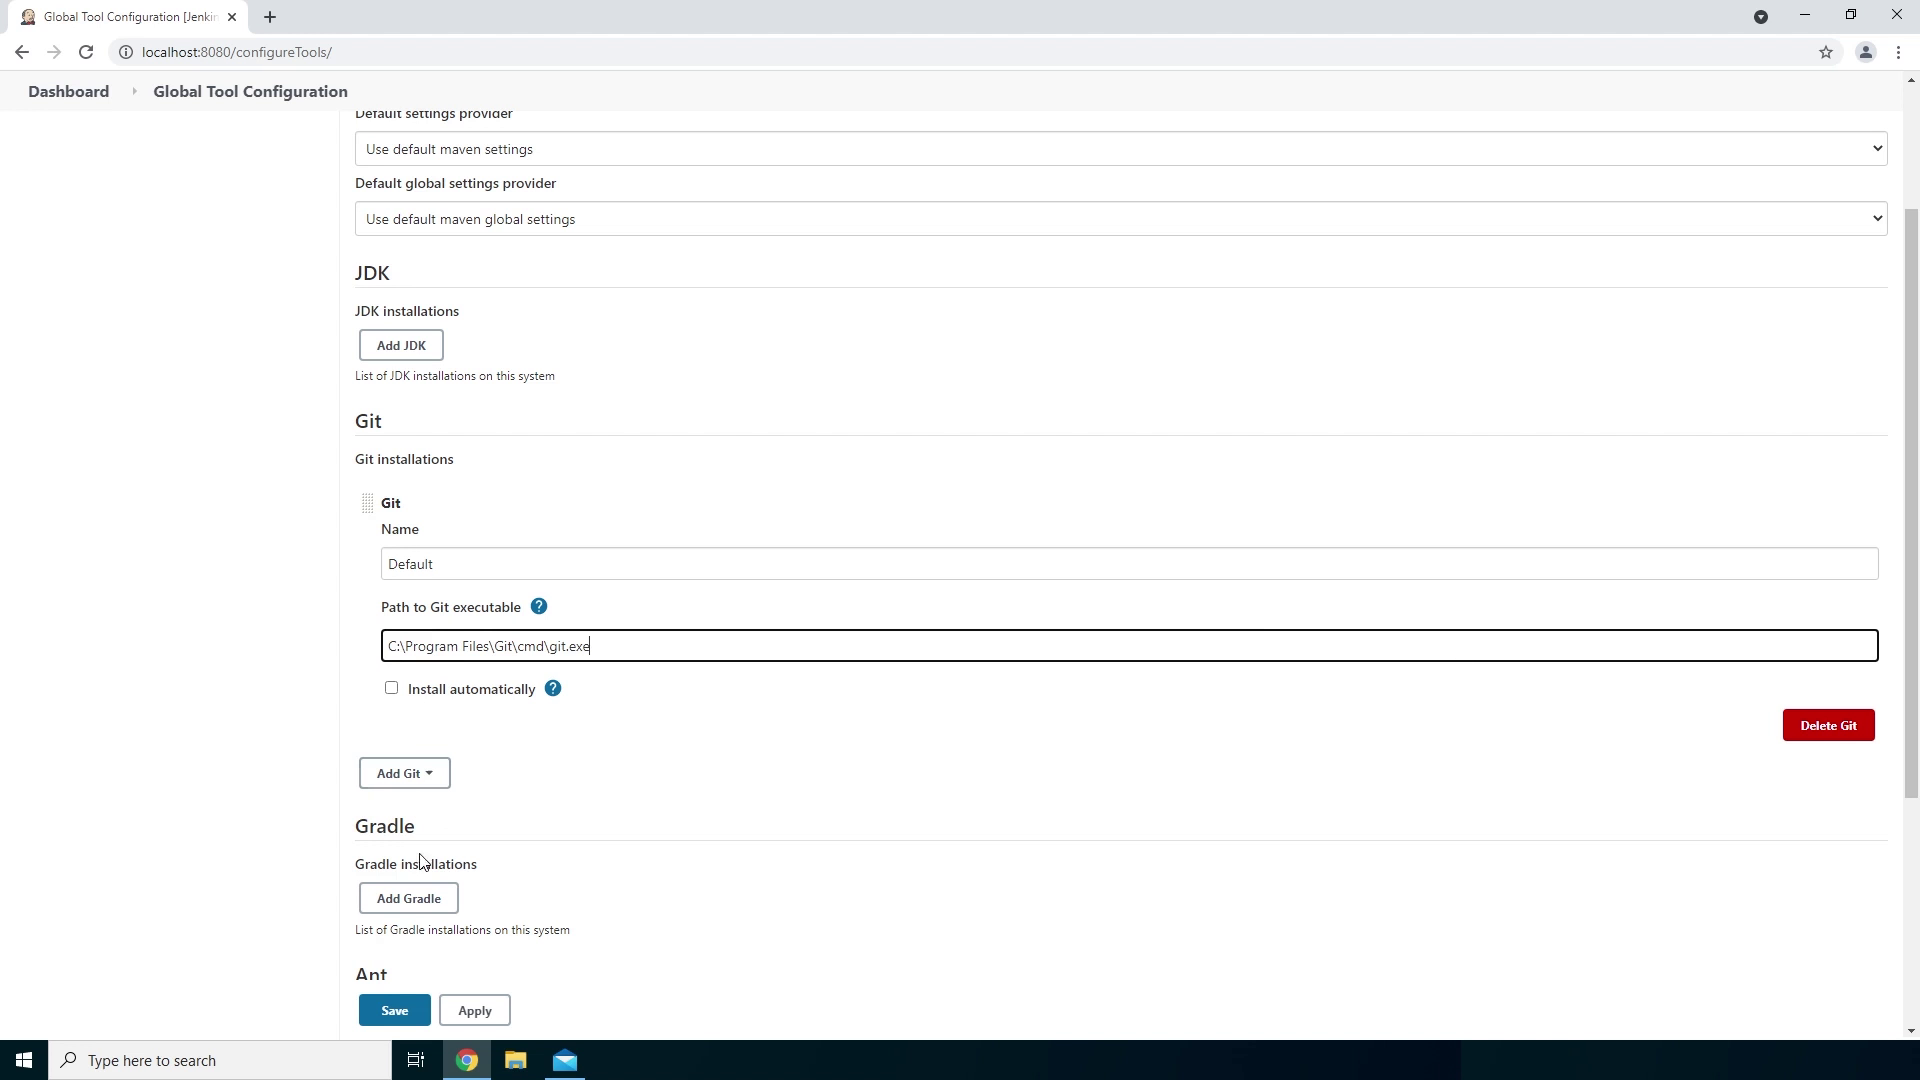
- The last settings we need to change is the location of the Git executable. Let’s go to Manage Jenkins, then go to Global Tool Configuration where we will see the path to the Git executable located right here.
- I have already installed Git earlier on so let’s fill in the location of the Git executable and then click on Save.
- Now we are ready to create our first build project. Click on New item and fill in the name of our project.
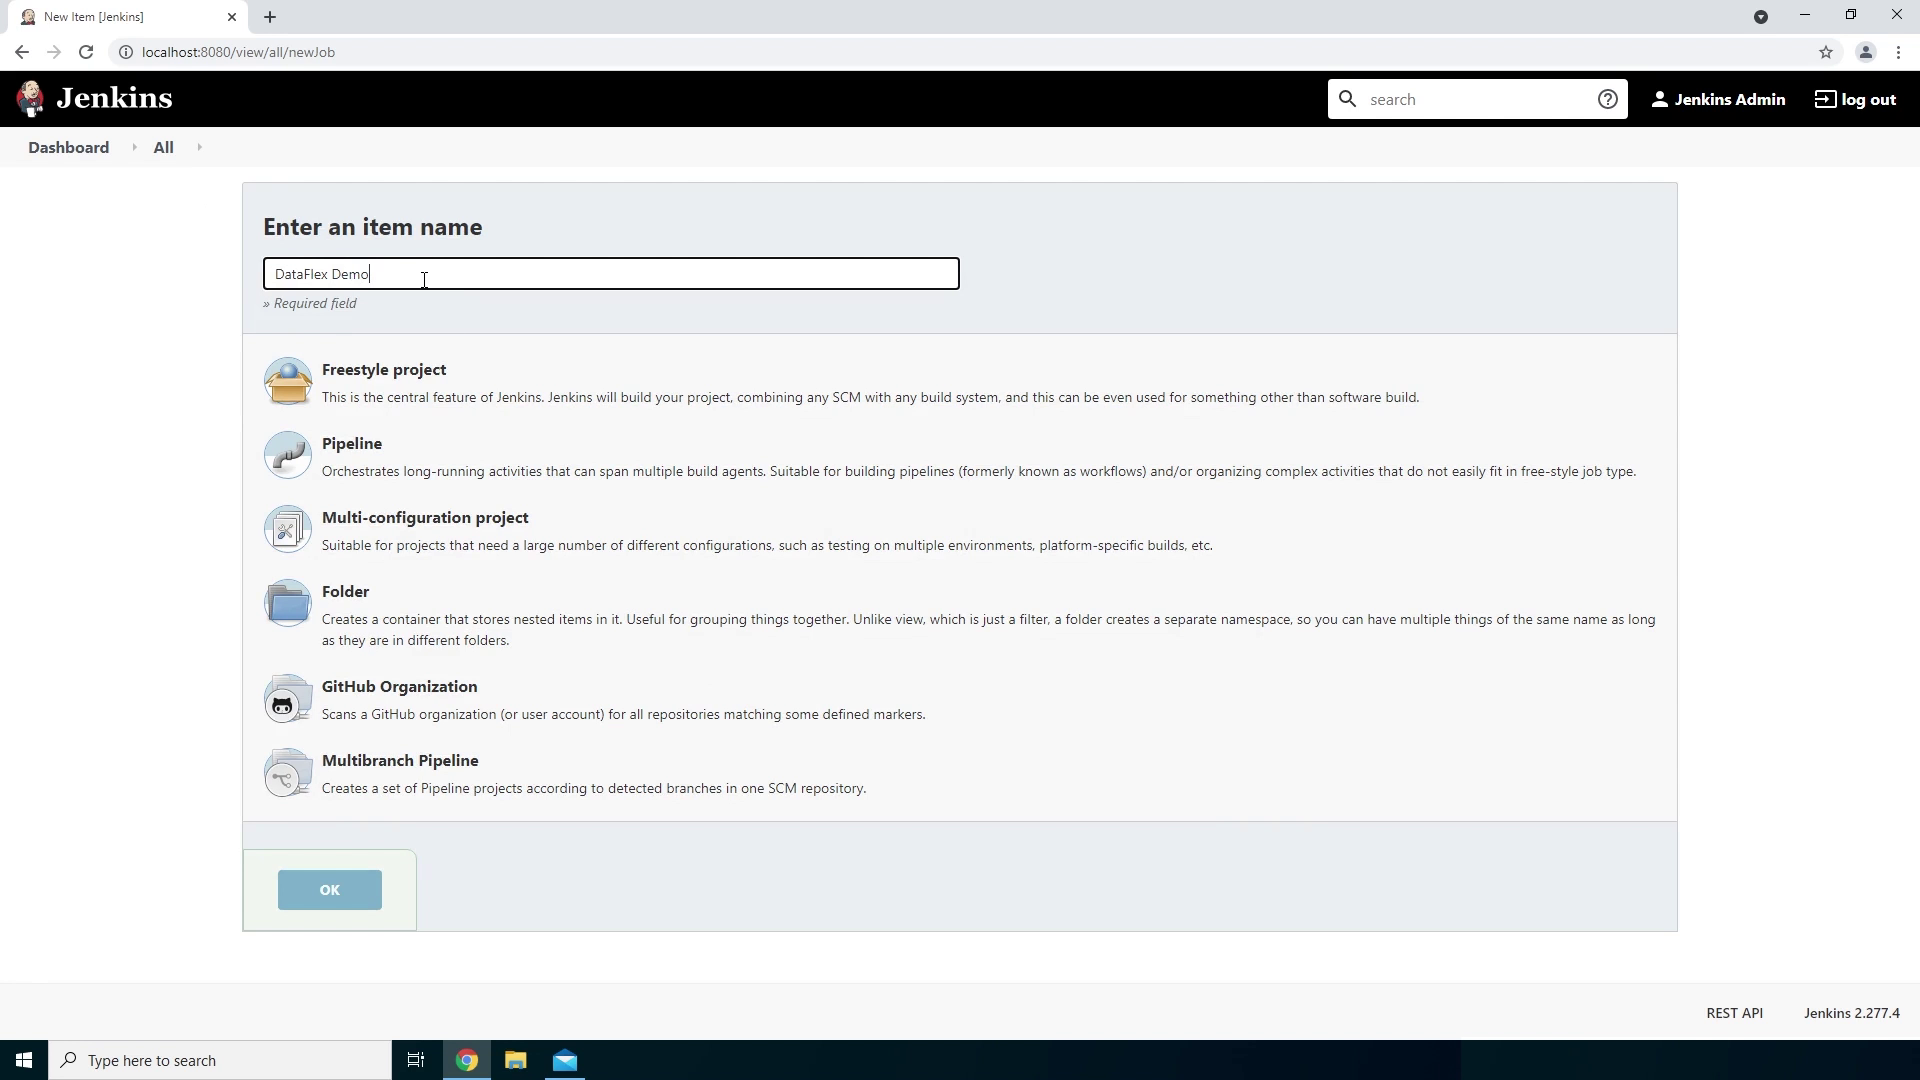
- We will go for a freestyle project which will be used in general for building an application, running tests, building or sending a report or even just running a few commands. So let’s click Ok to create the project.
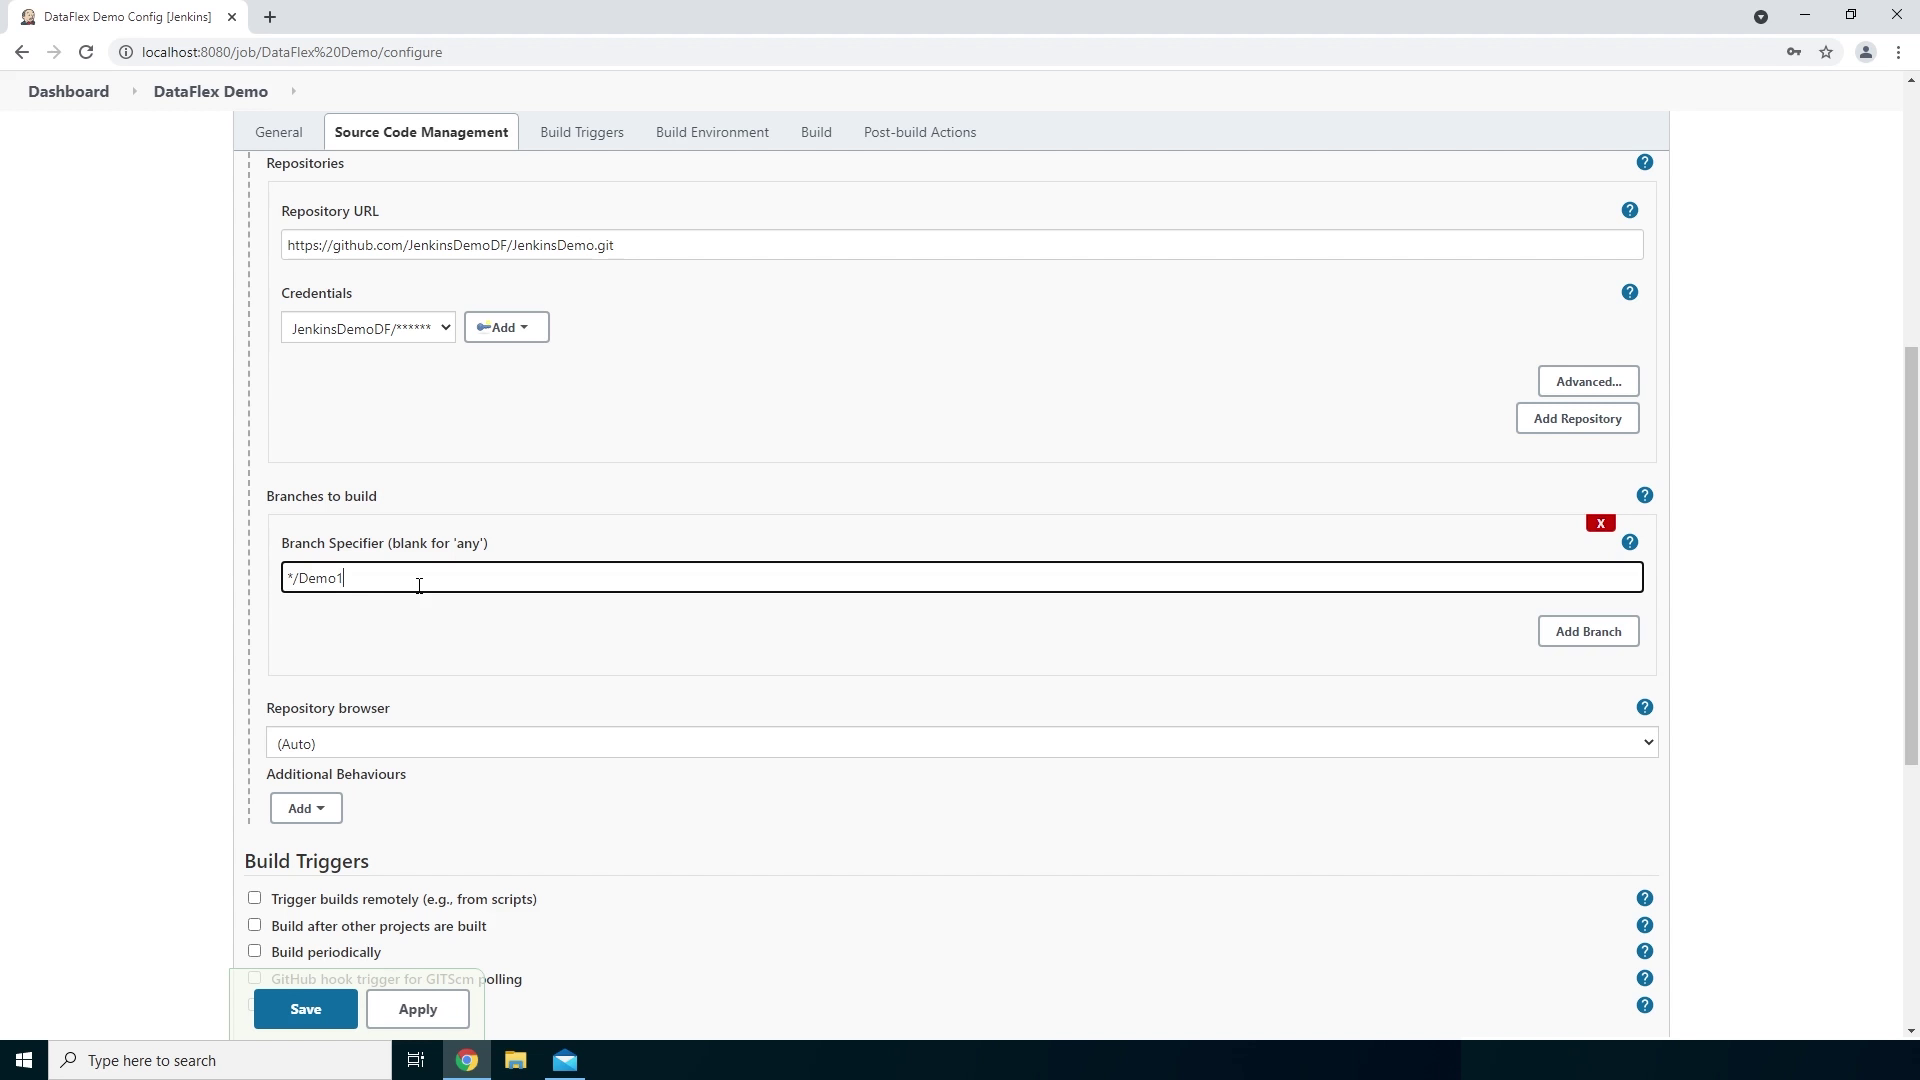
- The first thing we are going to do is add our GitHub repository to the Source Code Management located right here. So we click on Git and we paste the URL to our repository into the following input box.
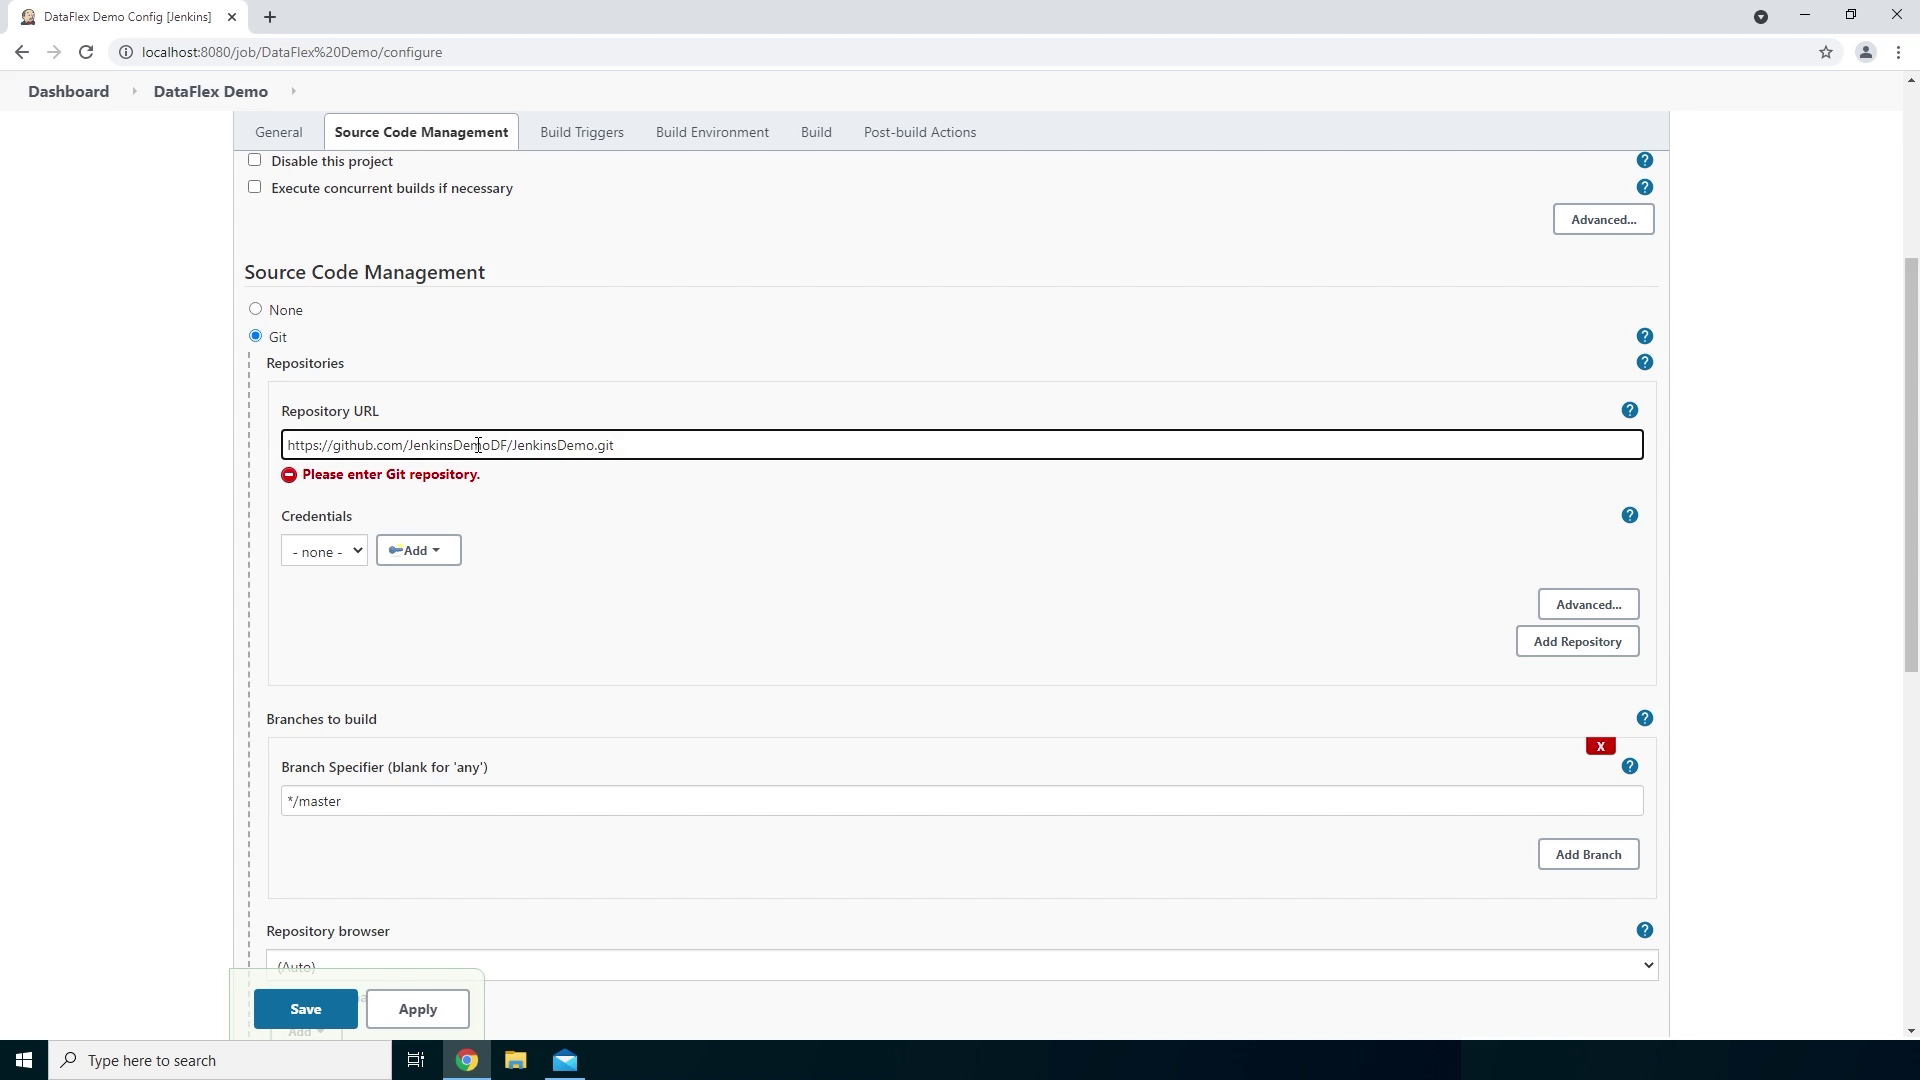
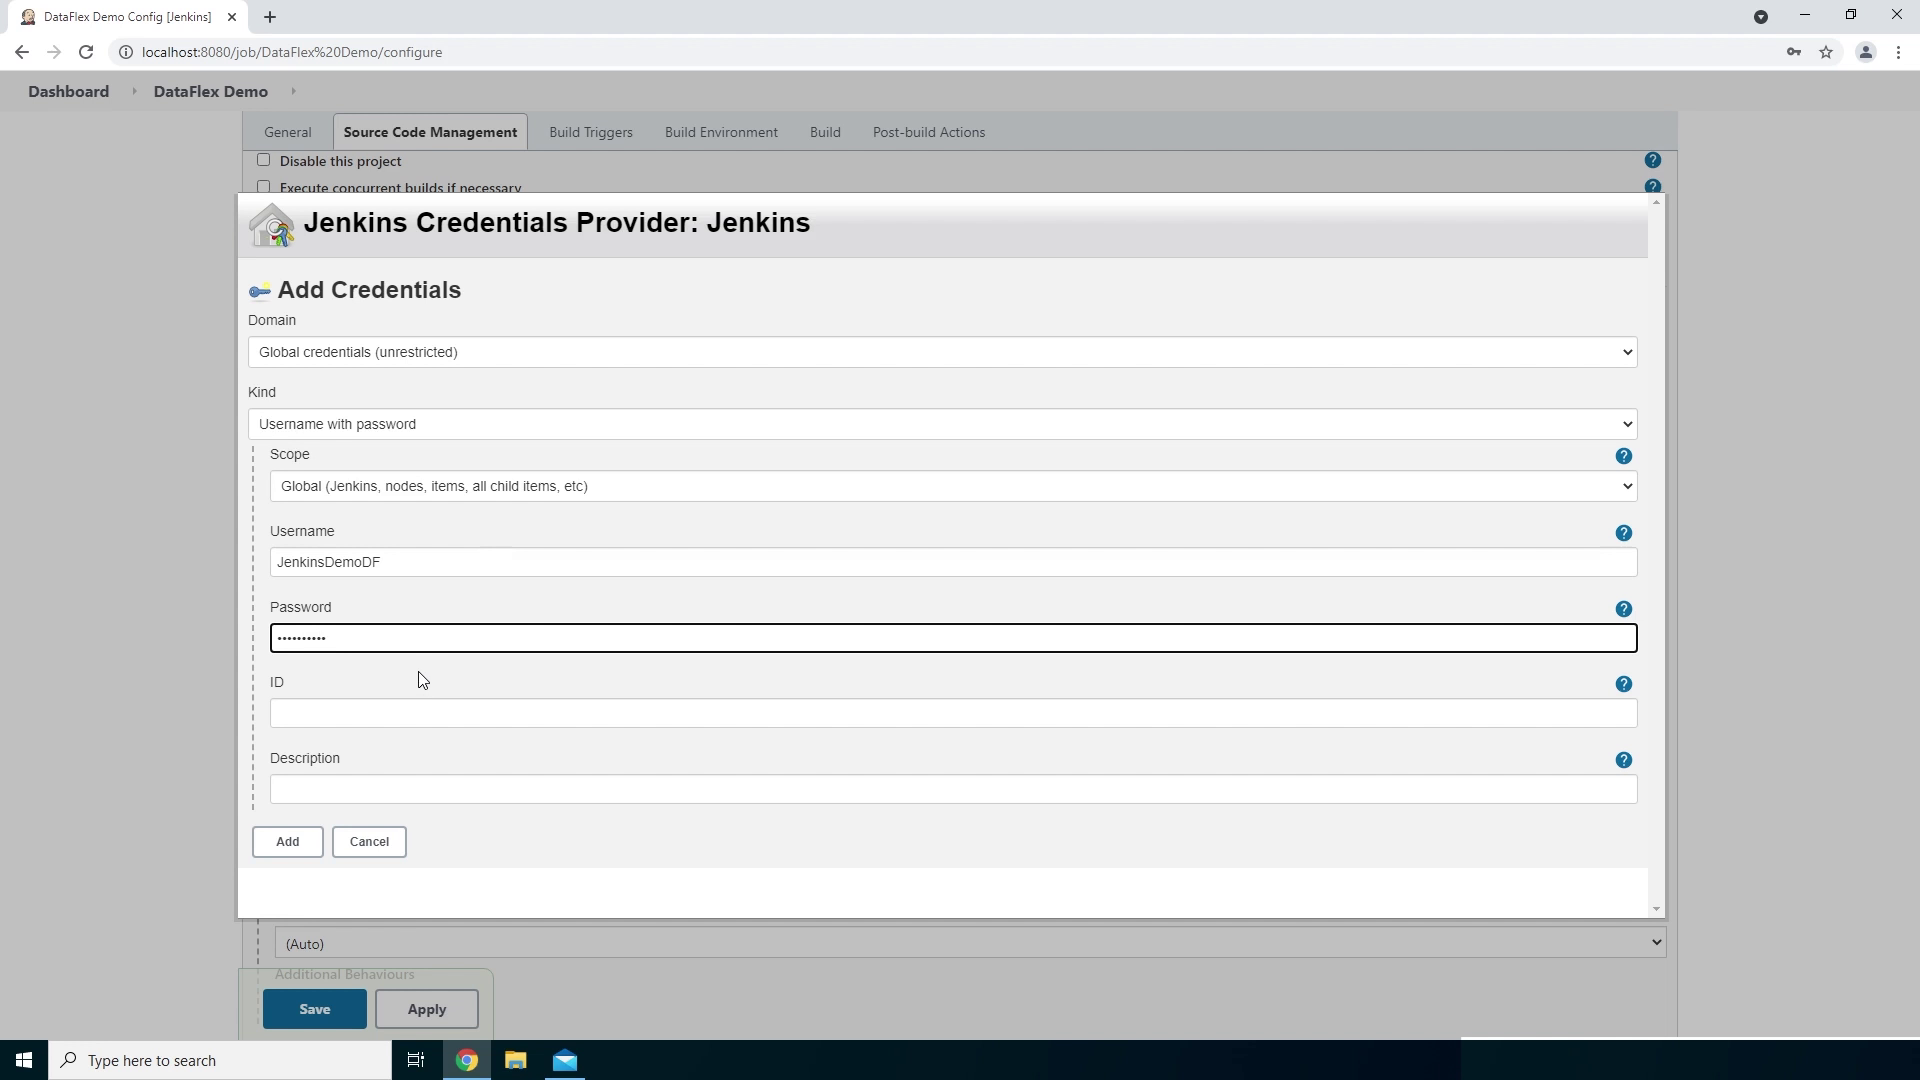
- The next thing we need to do is add our credentials to make sure we have enough rights to fetch our repository. Click on Add and then Jenkins and fill in your username and password.
- The ID and Description we can ignore in this case.
- So now we have added our credentials and we can select them in the dropdown box. Up next we can choose which branch we want to use. For this example we will use the Demo1 branch.
- The next thing we need to do is enable the Delete workspace before build starts option. We are going to do this because we want our workspace to be empty with each build when Git is fetching our repository.
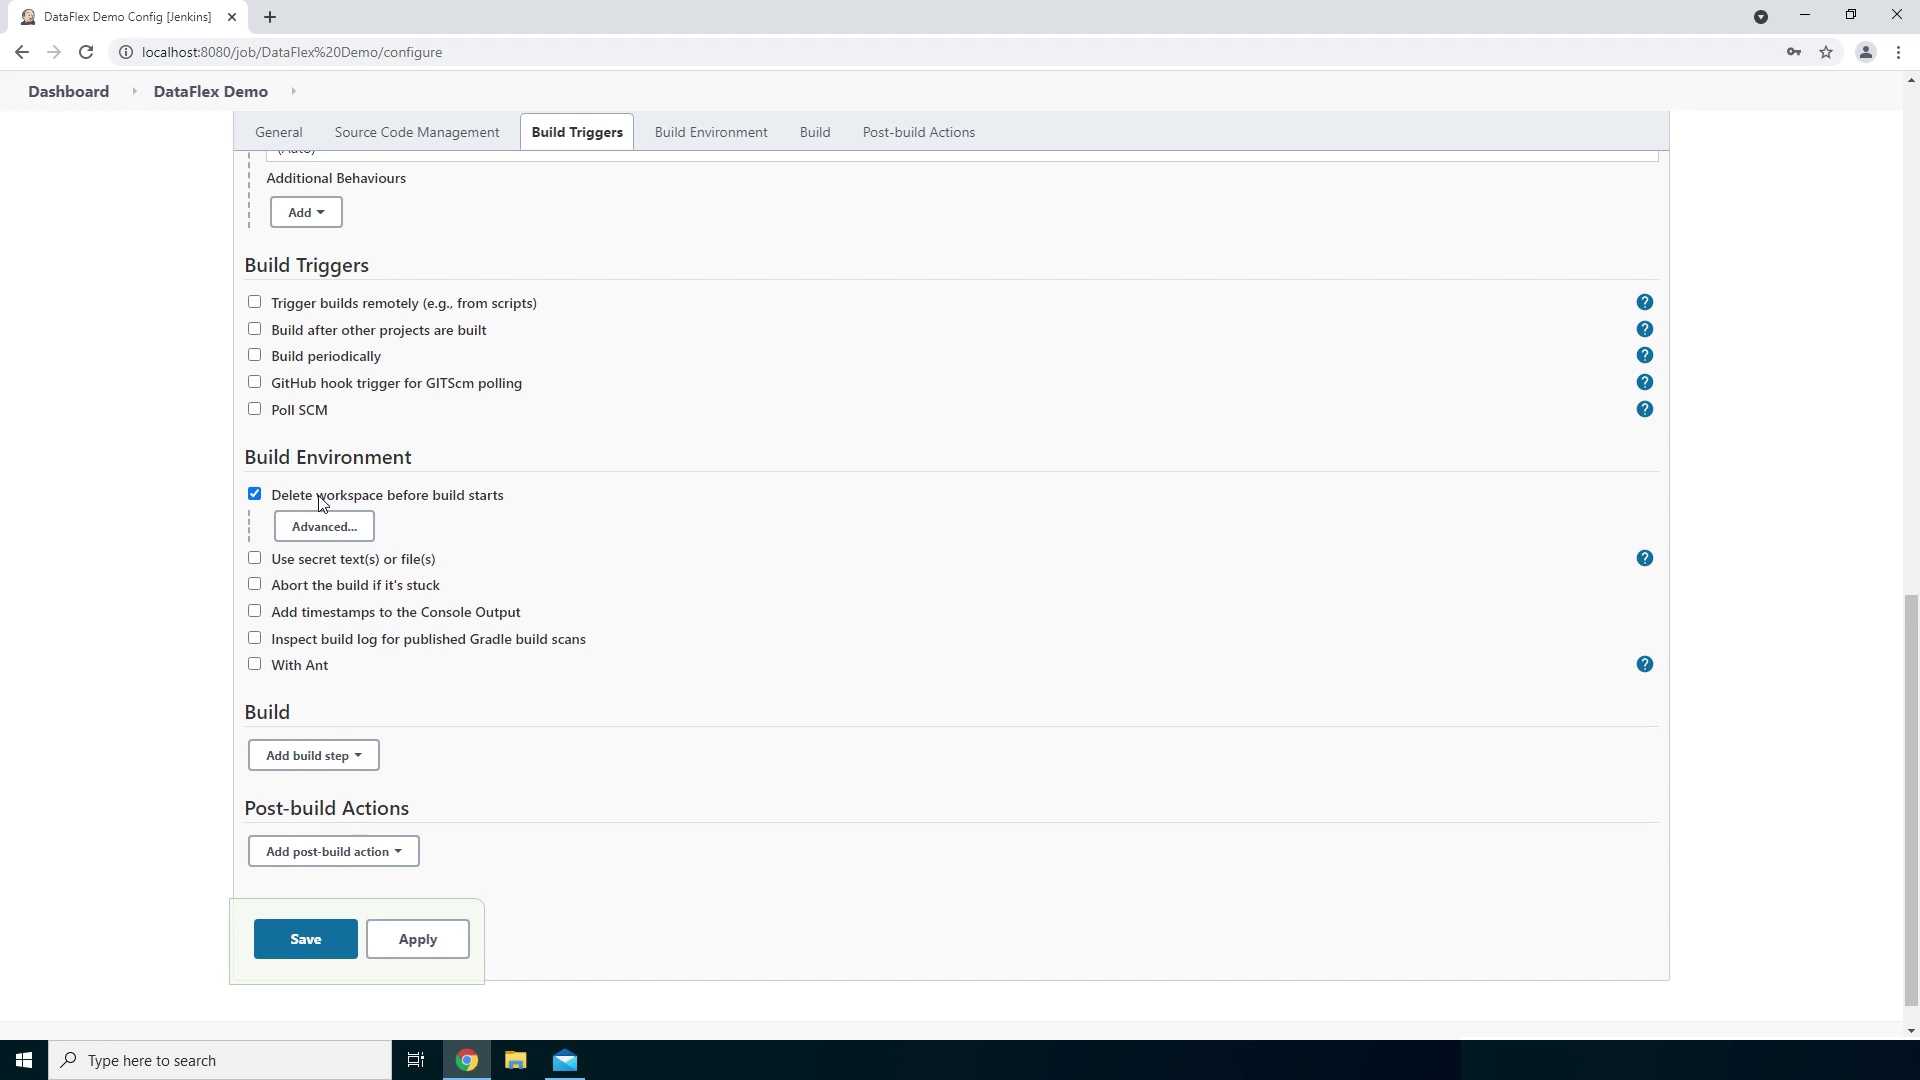
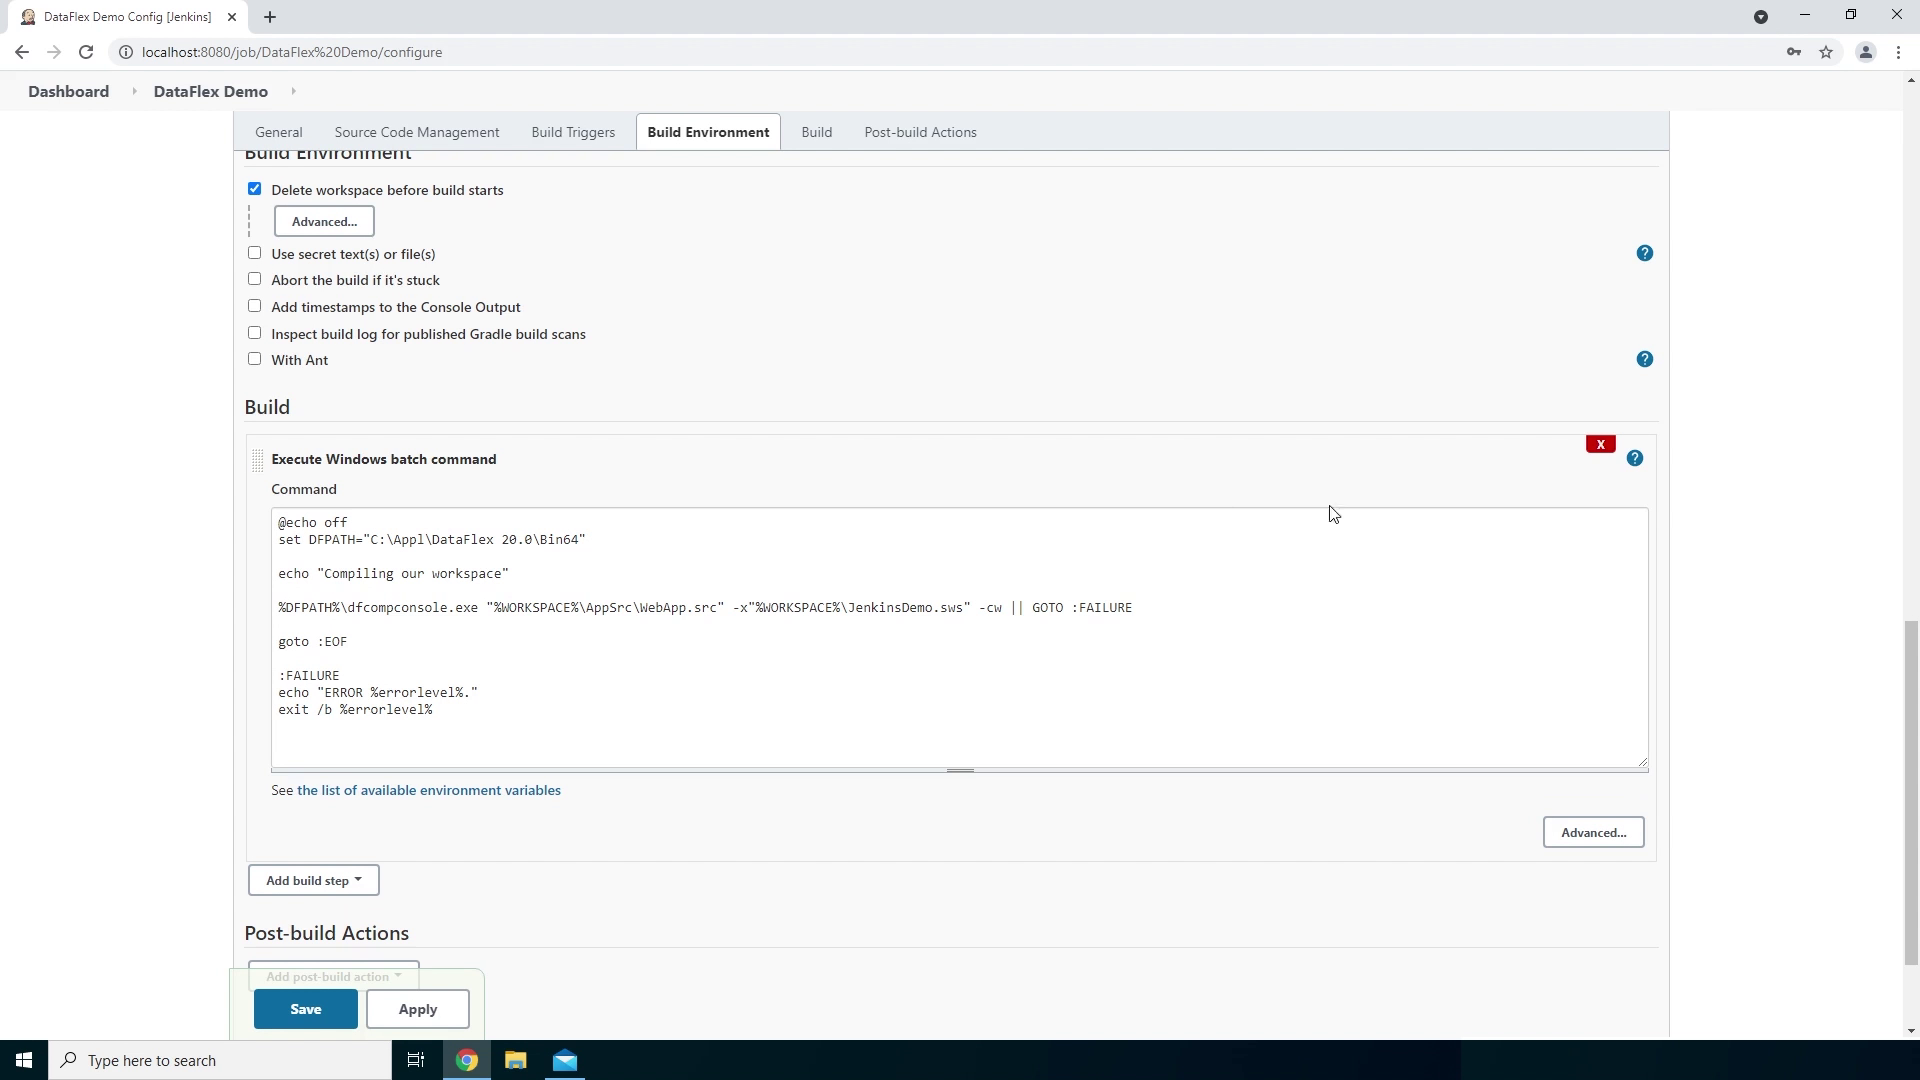
- So now let’s add a build step. Click on Add build step and then on Execute Windows batch command. This will give us the option to write a batch file within Jenkins. I have prepared a small batch file which will do the following.
- At first it will set the path to the DataFlex Bin64 folder which I have installed earlier on. Within the Bin64 folder it will use the DfCompConsole executable to compile the WebApp.src using the JenkinsDemo workspace.
- I have added the (dash) -cw parameter to make sure that even when there are no changes detected the program will be recompiled and an error log will be made when an error has been detected.
- The reason that we are using the DFCompConsole executable instead of the DfComp executable is because the DFCompConsole executable will return all output to the command line instead of using a User Interface like the DFComp executable. This way Jenkins can easily catch the error codes the compiler is returning and fail a build if it finds an error.
- Next up we are using a simple Failure function, located right here, which returns the error code given by the DataFlex compiler and exits the batch file with that same error code.
- If the compiler doesn't return any error codes it will go to the EOF also known as the End Of File. It will skip the failure function and exit the batch file without any errors.
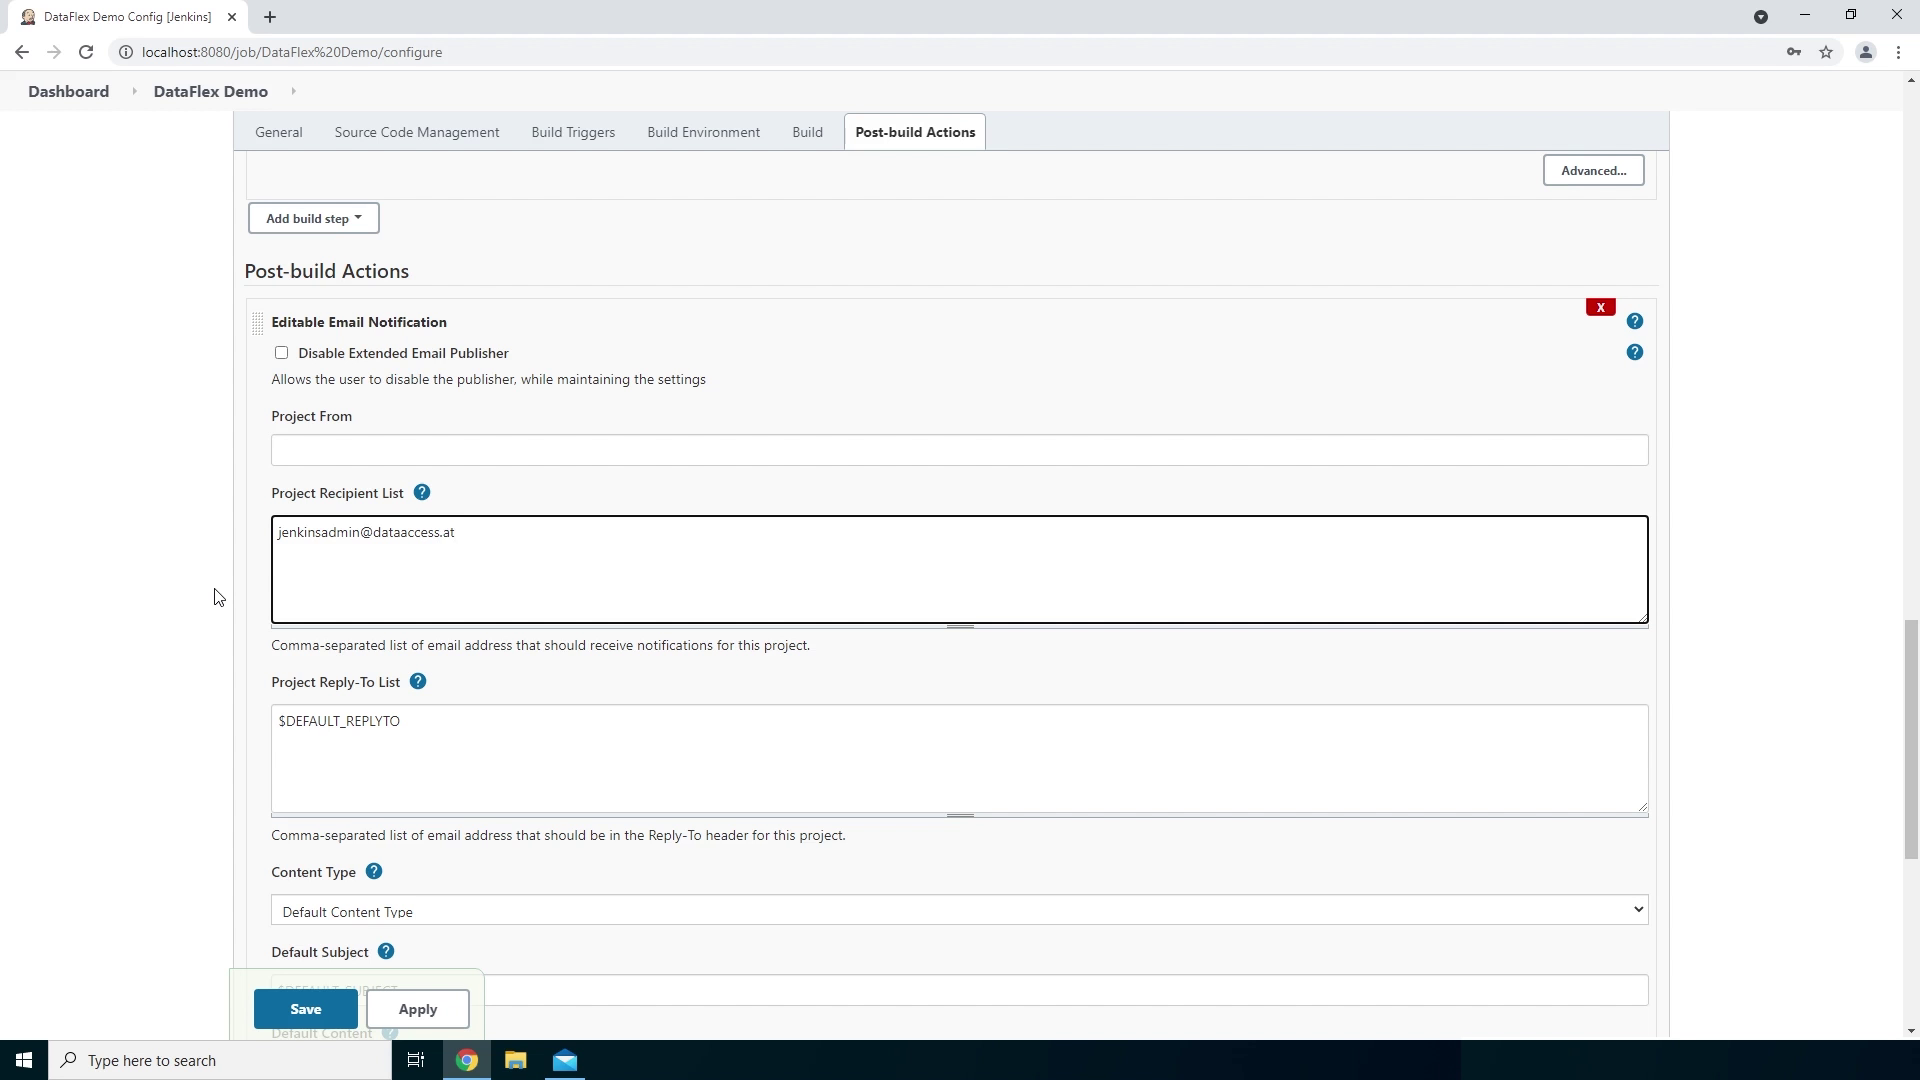
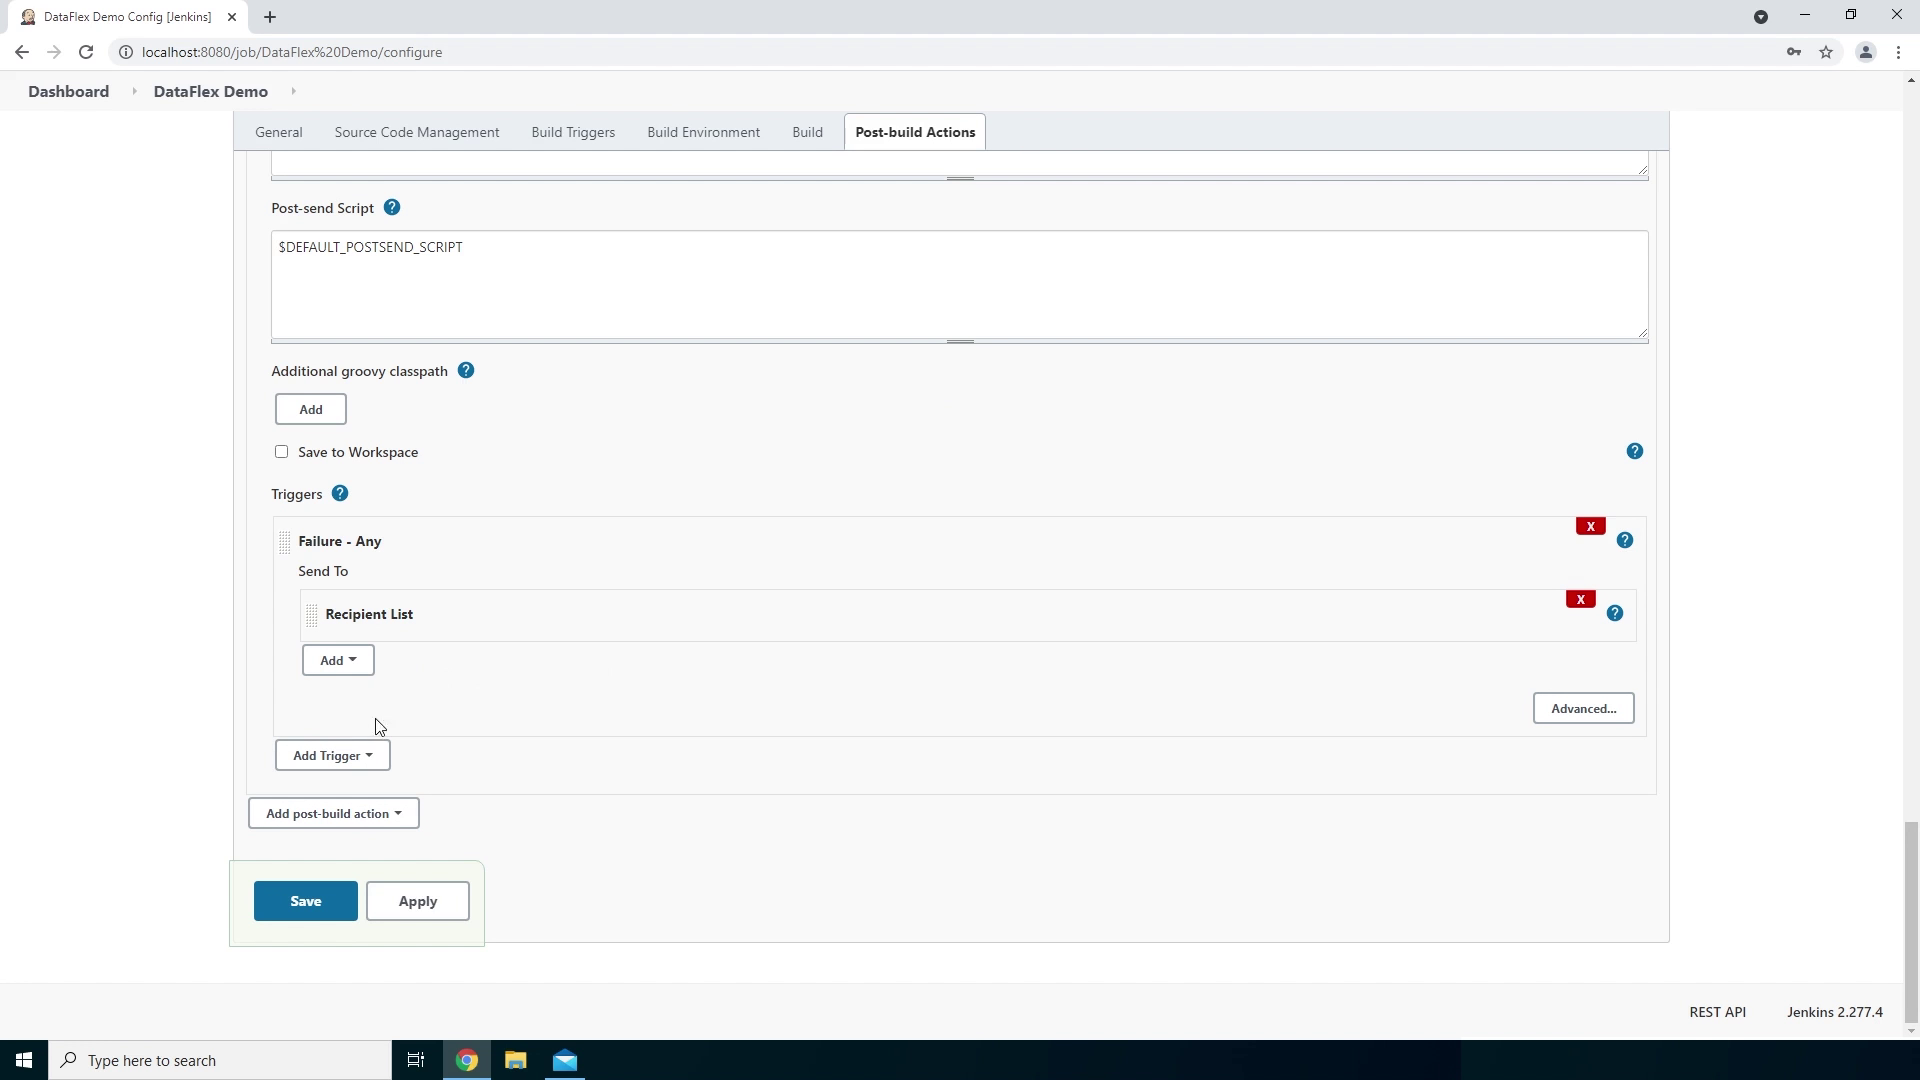
- The final step is to add a post-build action. Click on Add post-build action and then on Editable Email Notification. The first thing we want to do is add the email addresses we want to send an email to so we add them to the Recipient List. Within this example we will send an email to jenkinsadmin@dataaccess.at. We can leave the default values for the rest of the options.
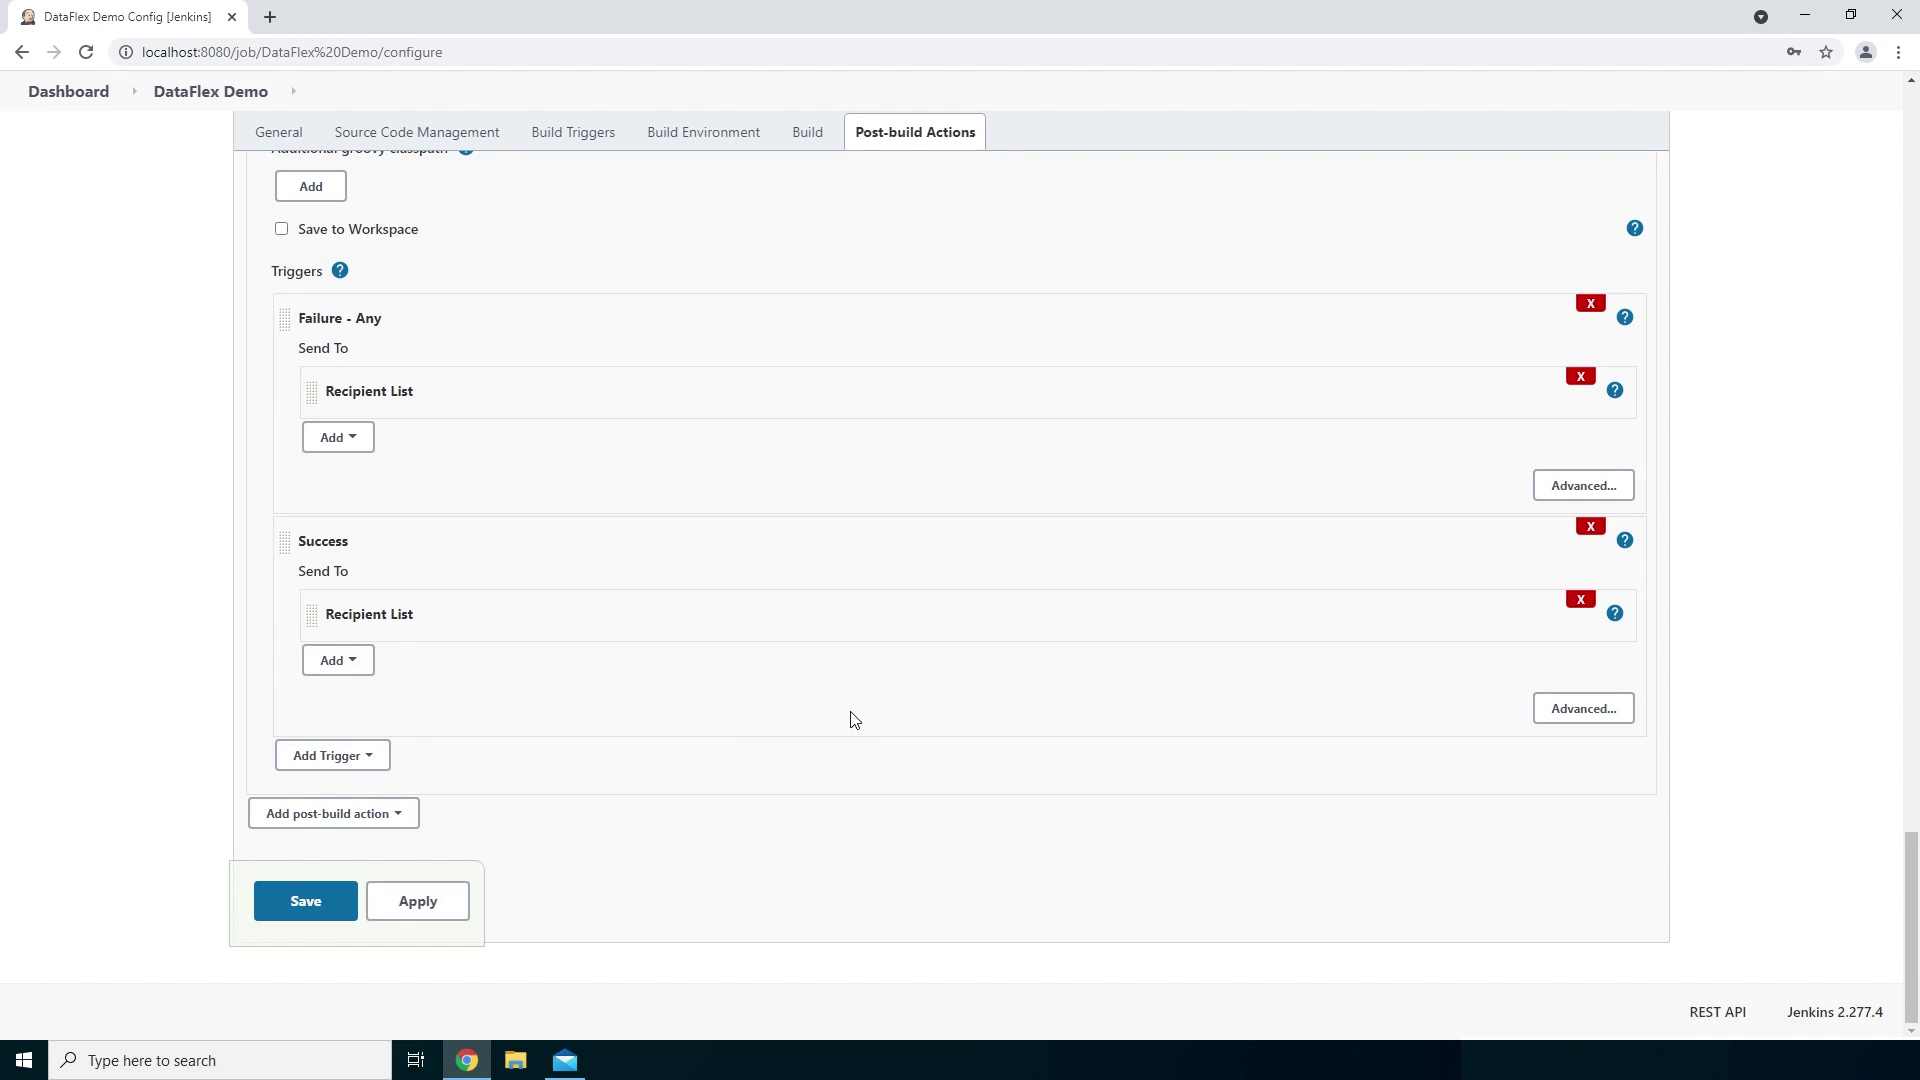
- Up next we can click on Advanced Settings to setup the email triggers. Here we select in which scenario we want an email to be sent. In this example we will sent an email on a successful and a failed build so let’s go ahead and add those. First we have to change the Send To list. We can remove the Developers and add the Recipient List we filled in earlier on.
- Up next we want to add another trigger for the successful builds. Let’s click on Add trigger and then click on Success.
- Here we can do the same thing, we can remove the Developers and add the Recipient List.
- Now we have everything setup to start our first build which will compile the JenkinsDemo workspace and then send us an email whether the build was successful or not.
- Before we start our build let's save the build project first by Clicking on Save.
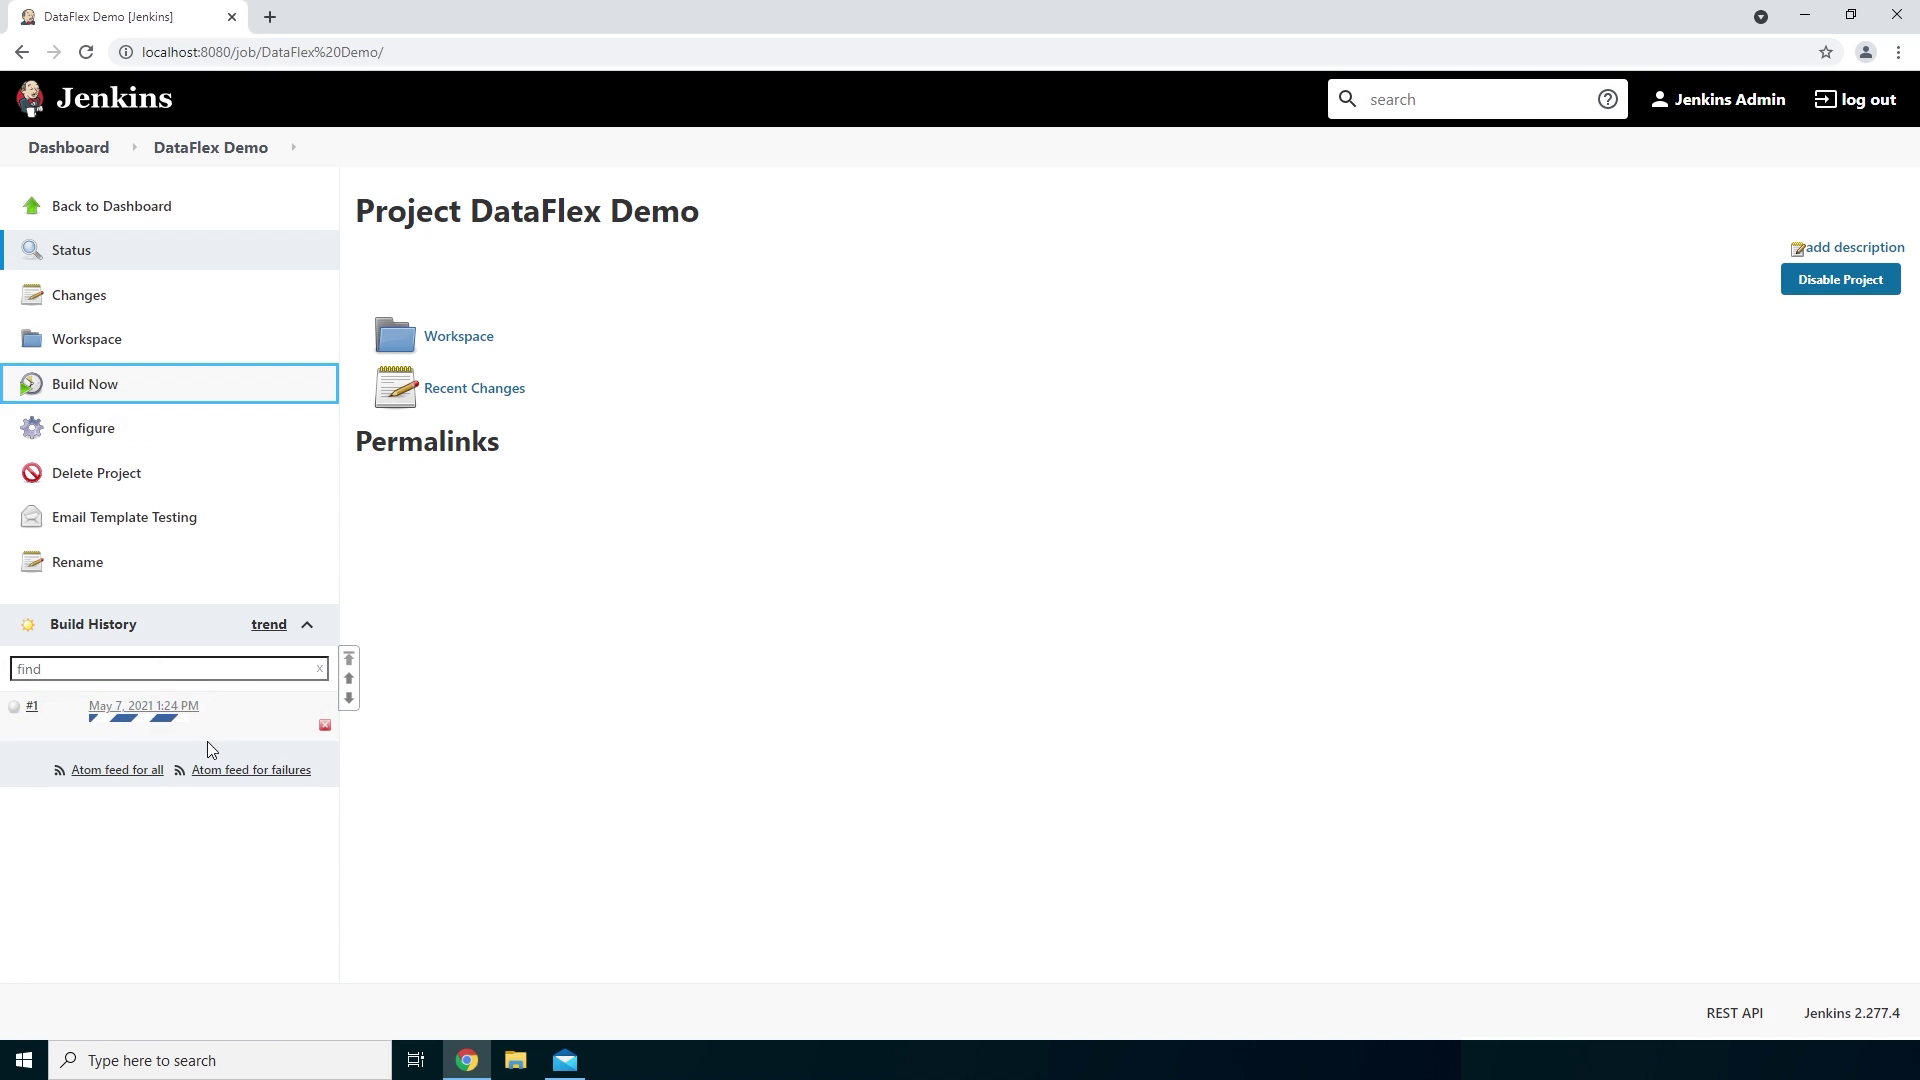
- Now let’s start our first build by clicking on Build Now. We will see the build starting.
- So right now it’s finished and it is marked Successful.
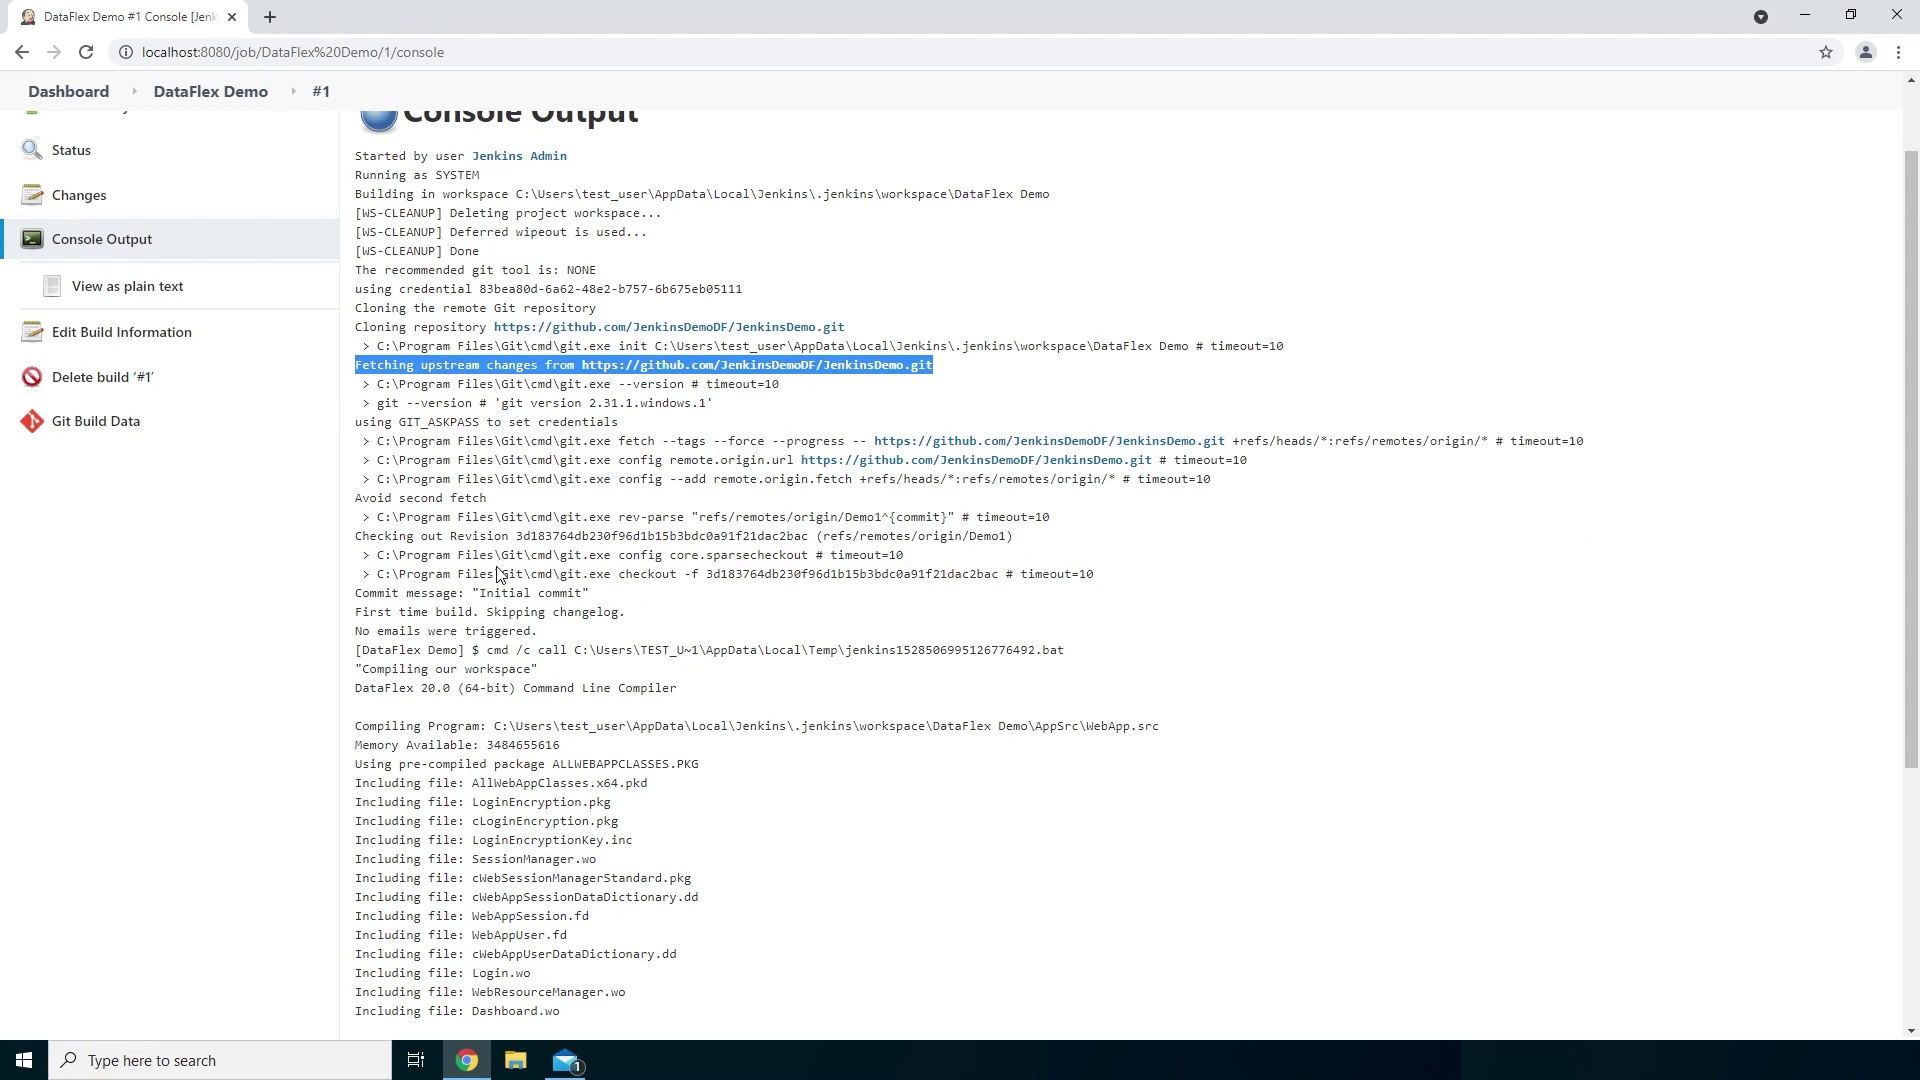
- Let’s look at the output by clicking on the build. And then click on console output.

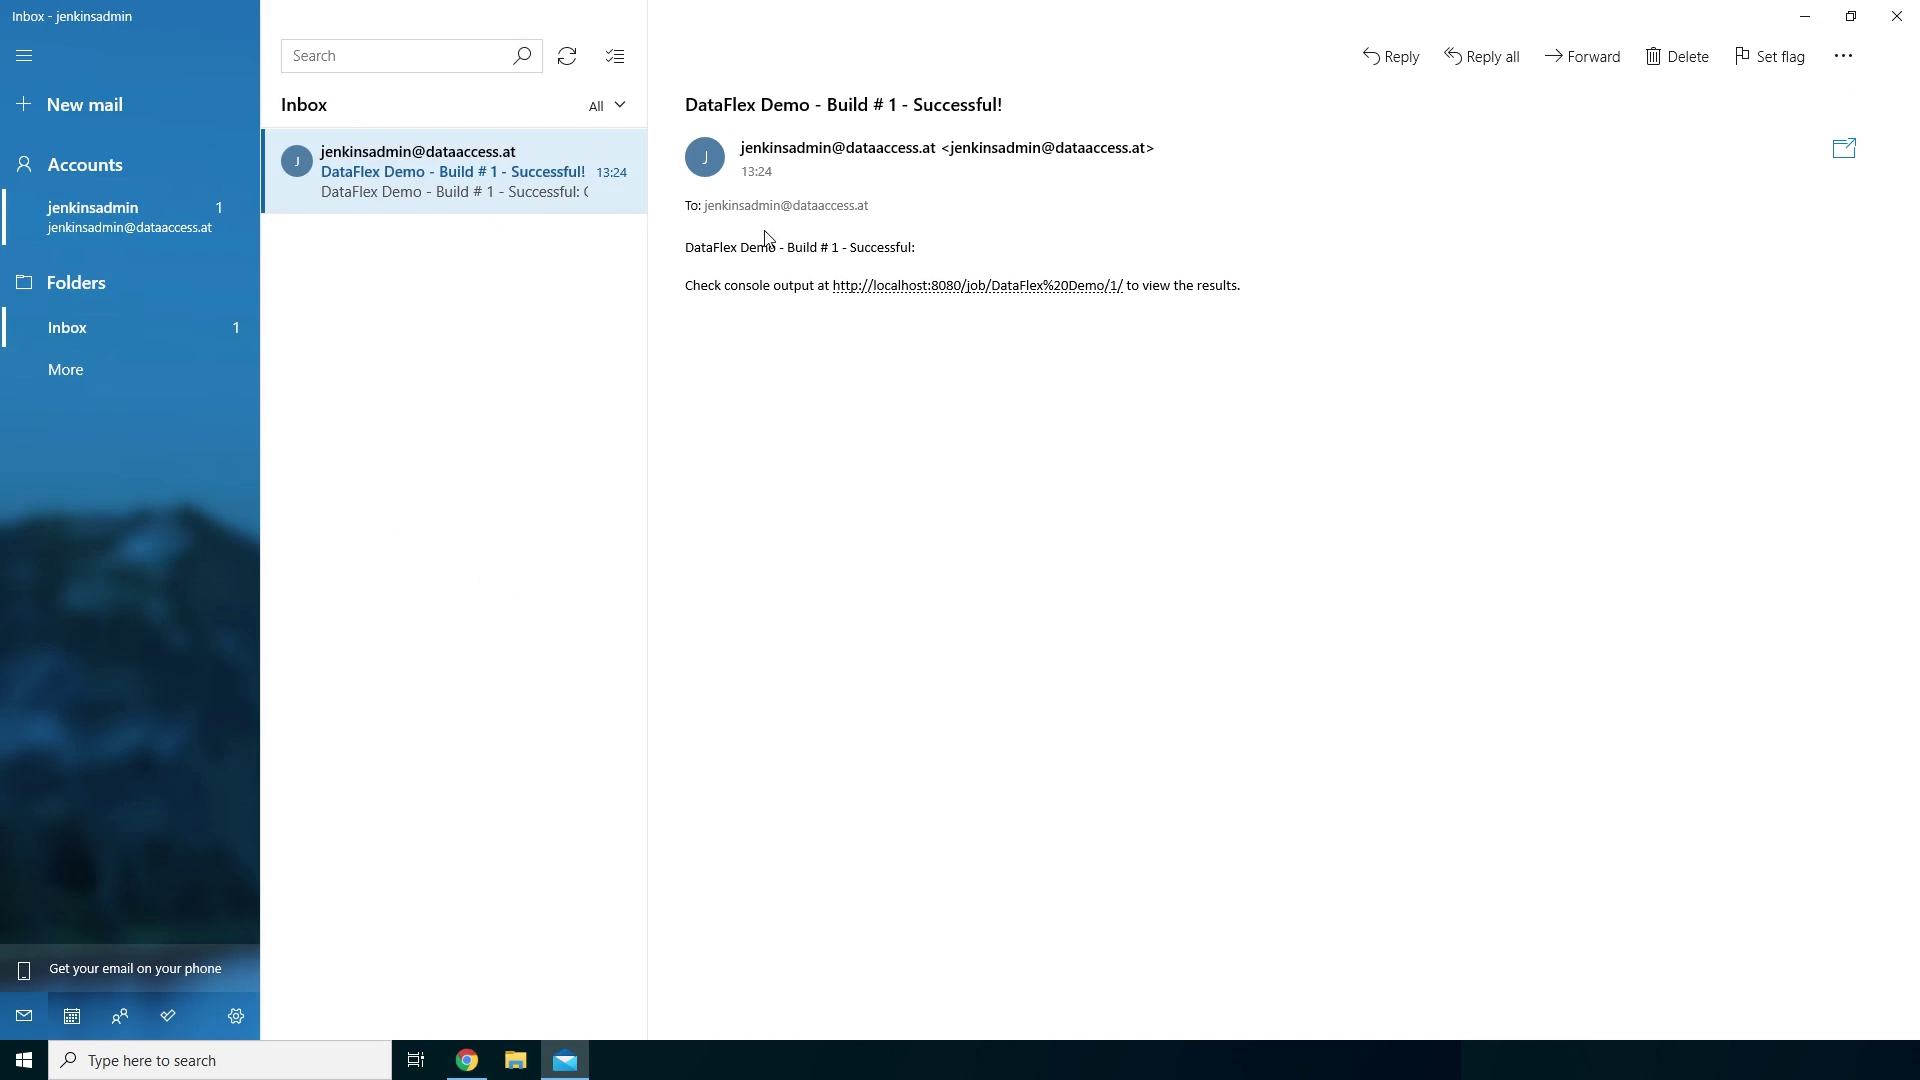
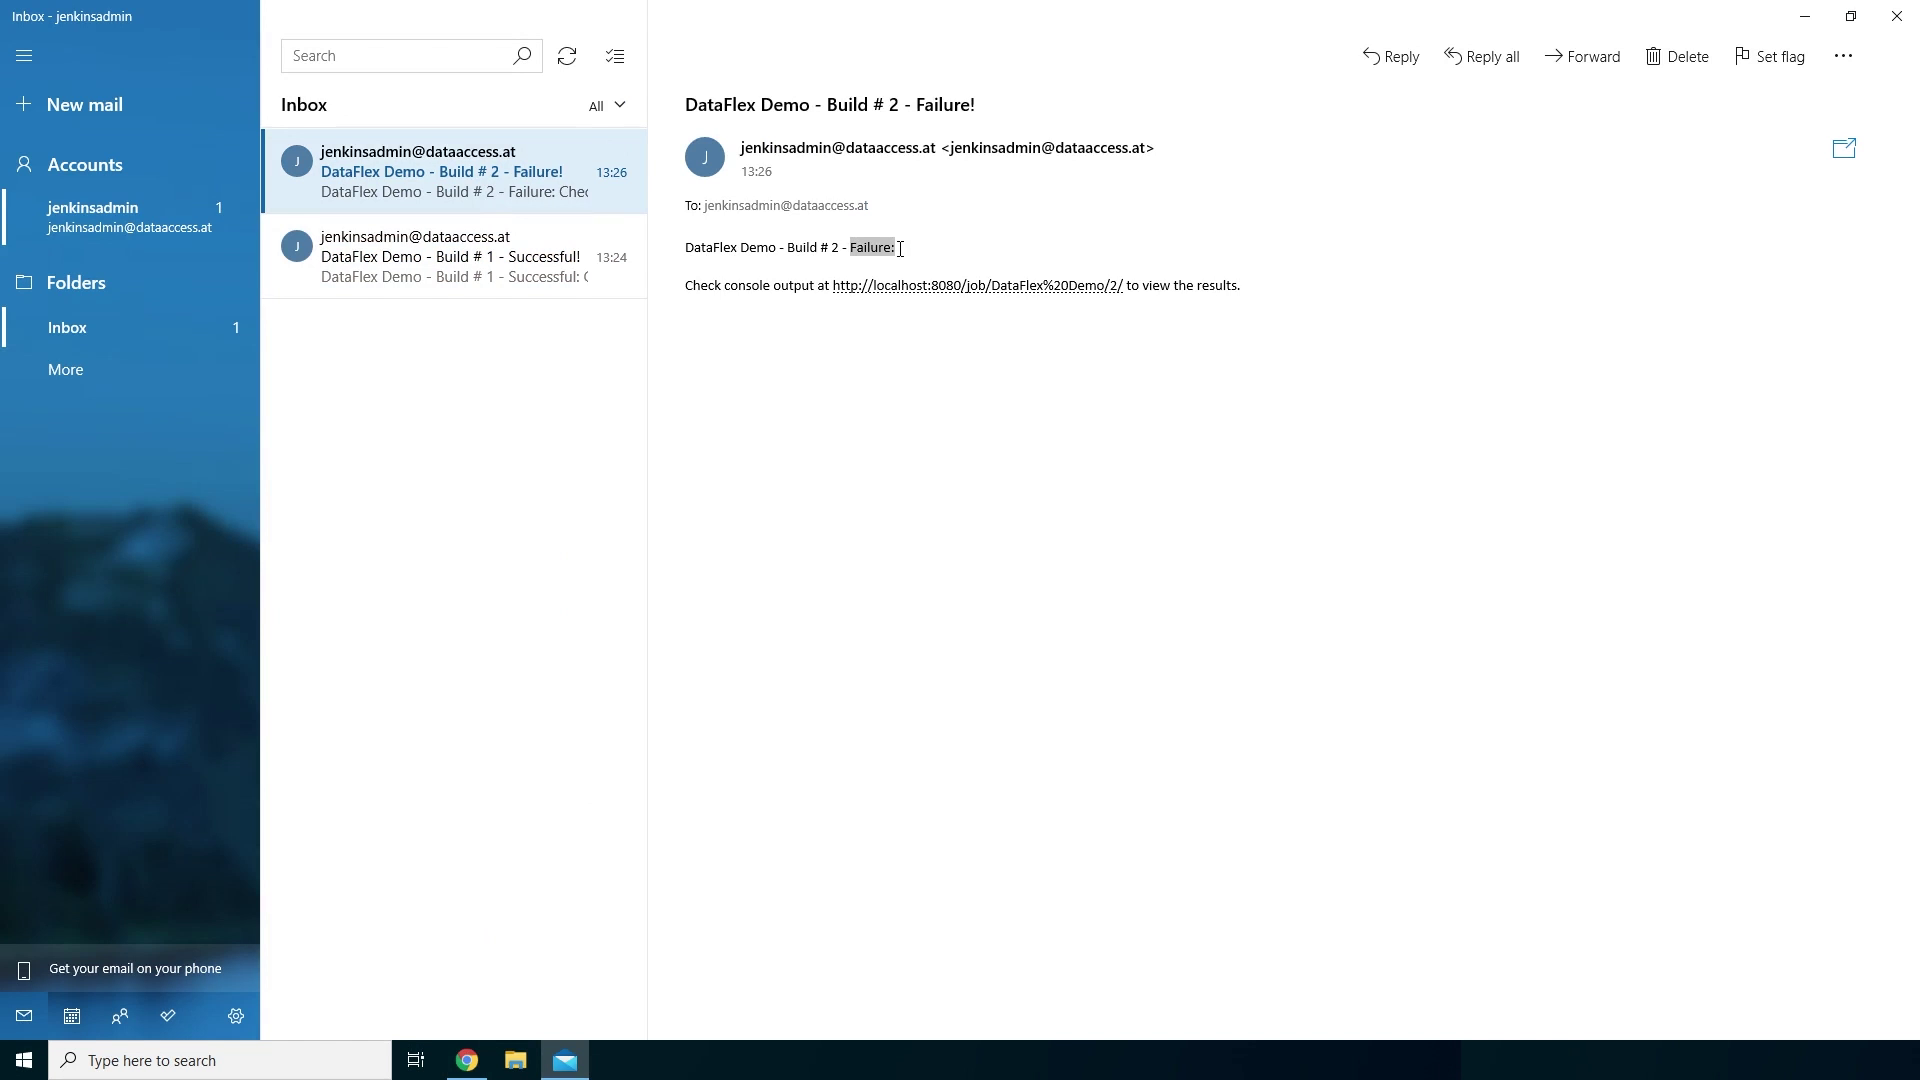
- Here we see it fetched our Git repository, then compiled our workspace using the DataFlex compiler and because it found no errors it triggered the Success email which has been sent to jenkinsadmin@dataaccess.at.
- Here we can see what the email looks like. So here we can see the build was Successful.
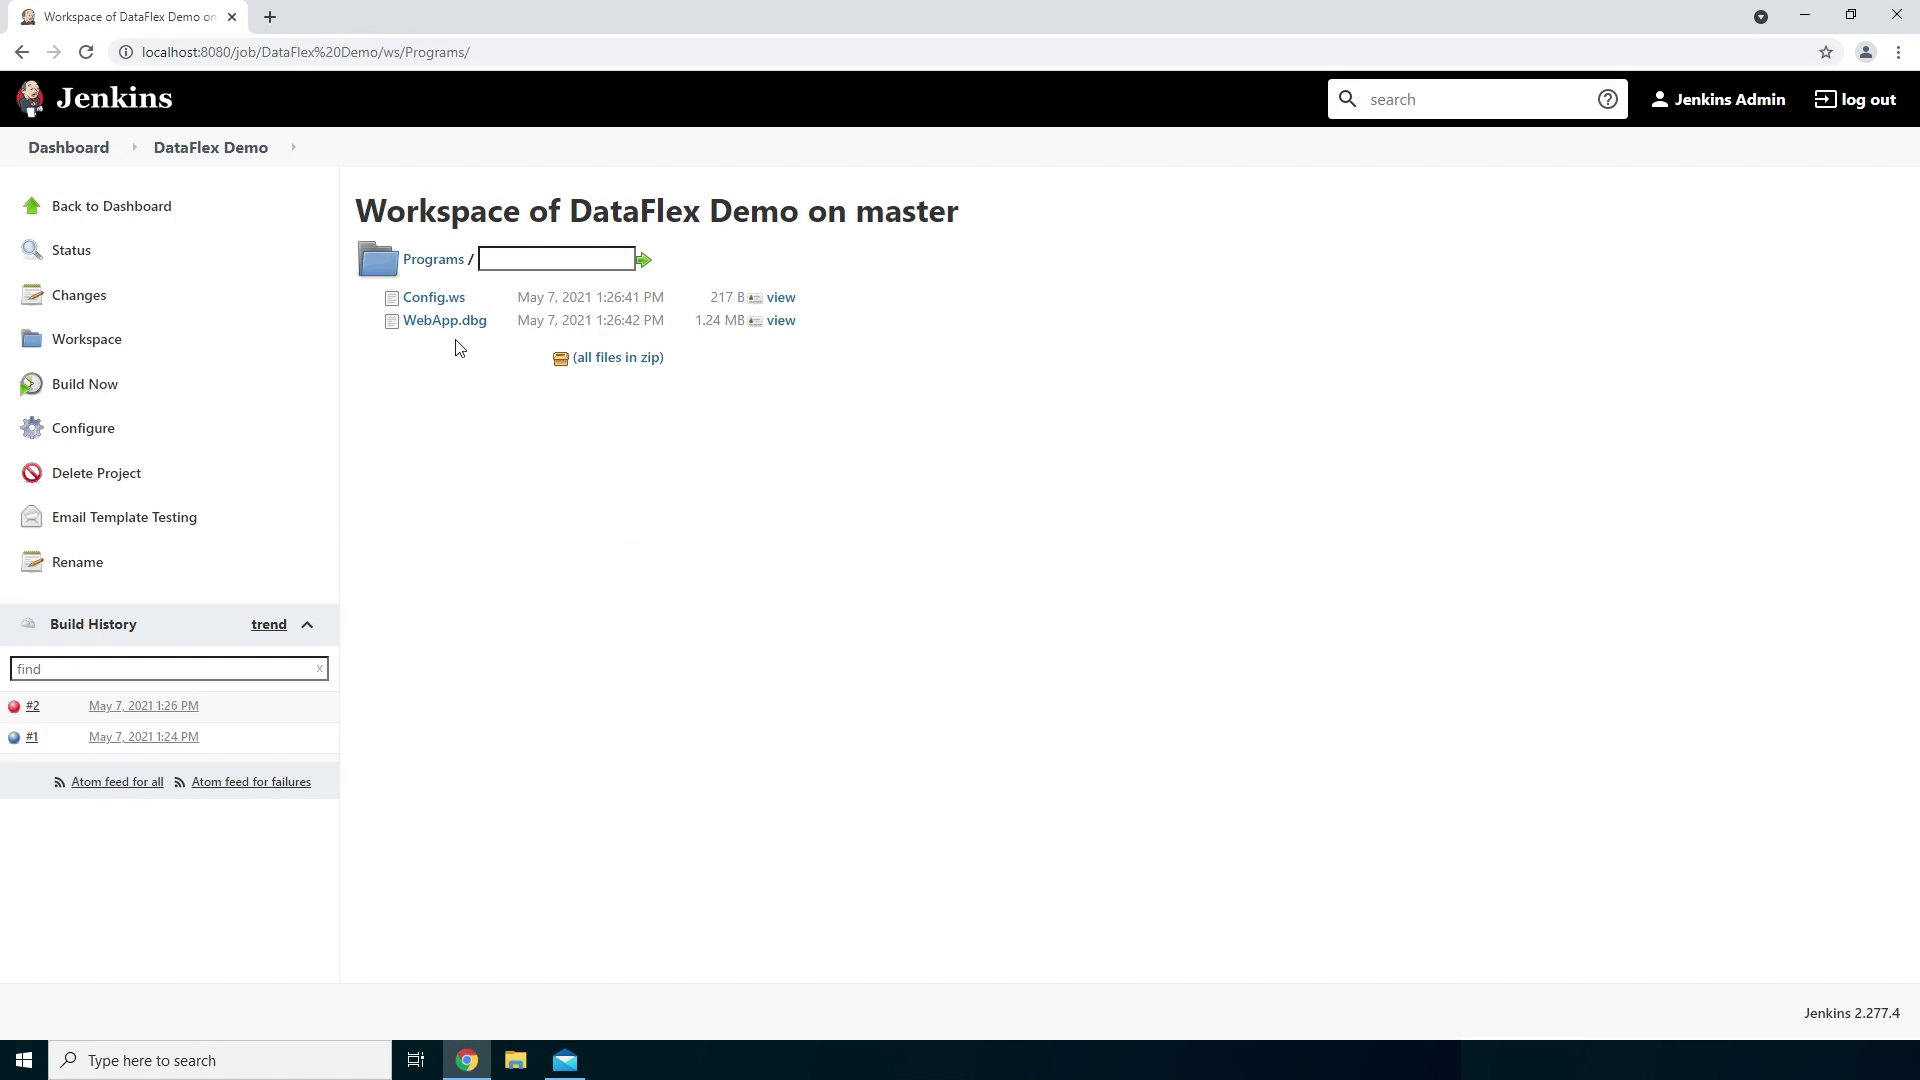
- If we go back to our build project we can take a look inside of our Workspace and see that within the Programs folder the WebApp.exe has been compiled. We can click on the Workspace, then the Programs folder and we can actually see that the WebApp executable has been compiled.

- But what if the builds fails? Let’s change our repository branch to the Demo2 branch. So let’s get back to our build project and click on Configure and then change the branch from Demo1 to Demo2.
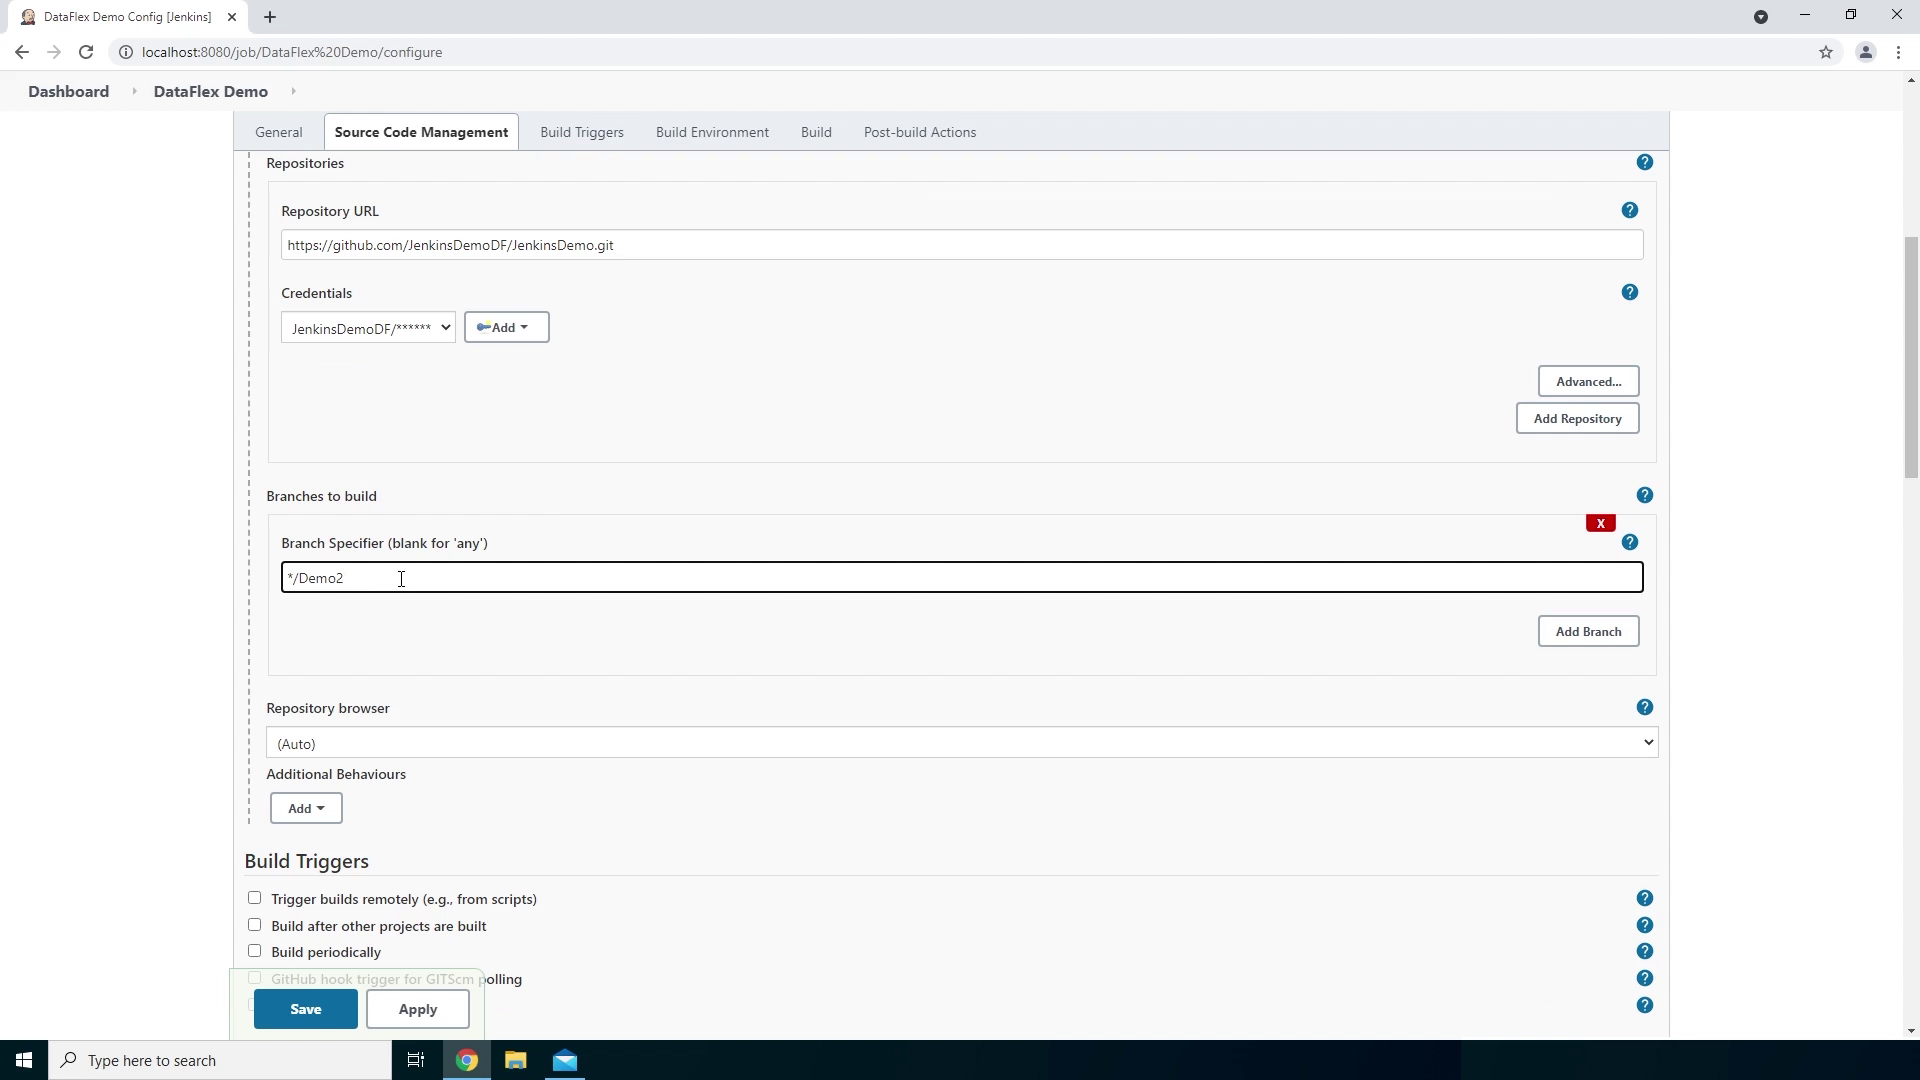
- I have changed the workspace within this branch so it creates an error while compiling. Now we can Save the project and start another build.
- Now we see the build has been marked as failed.
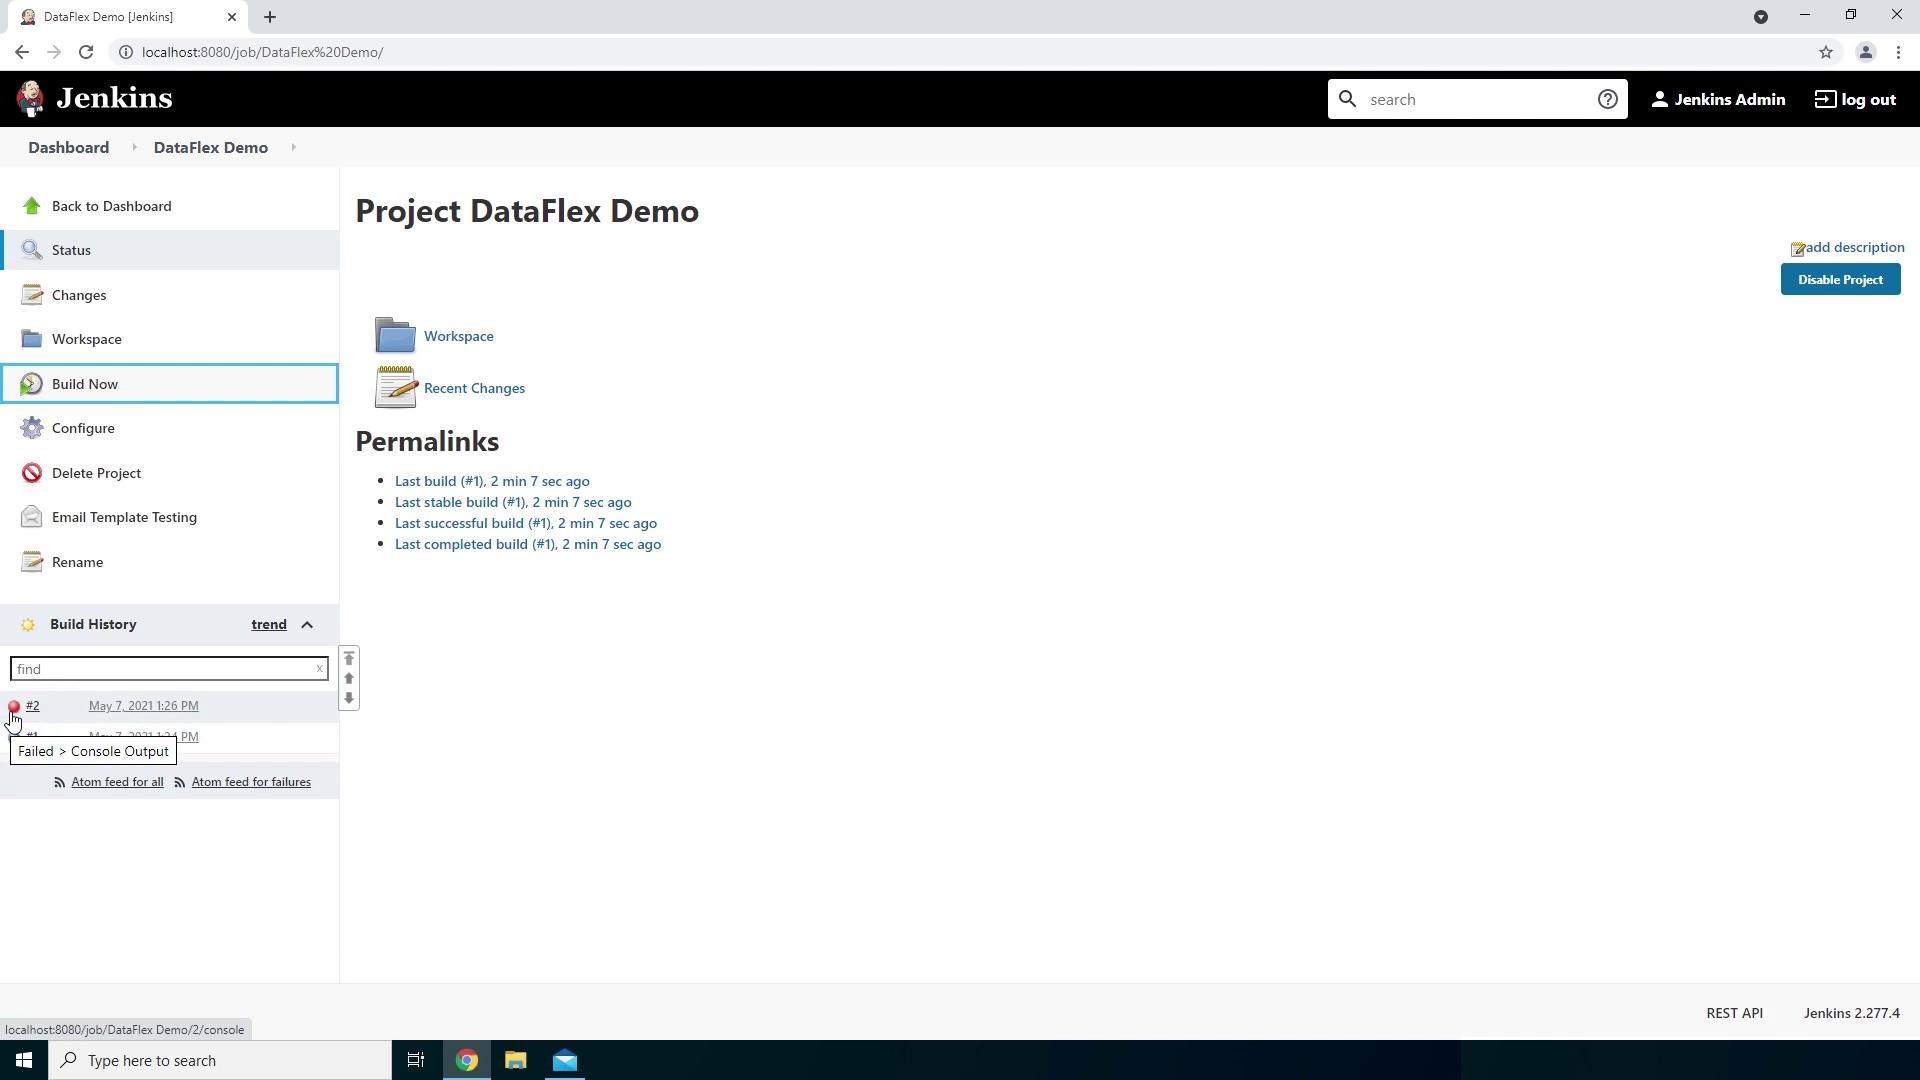
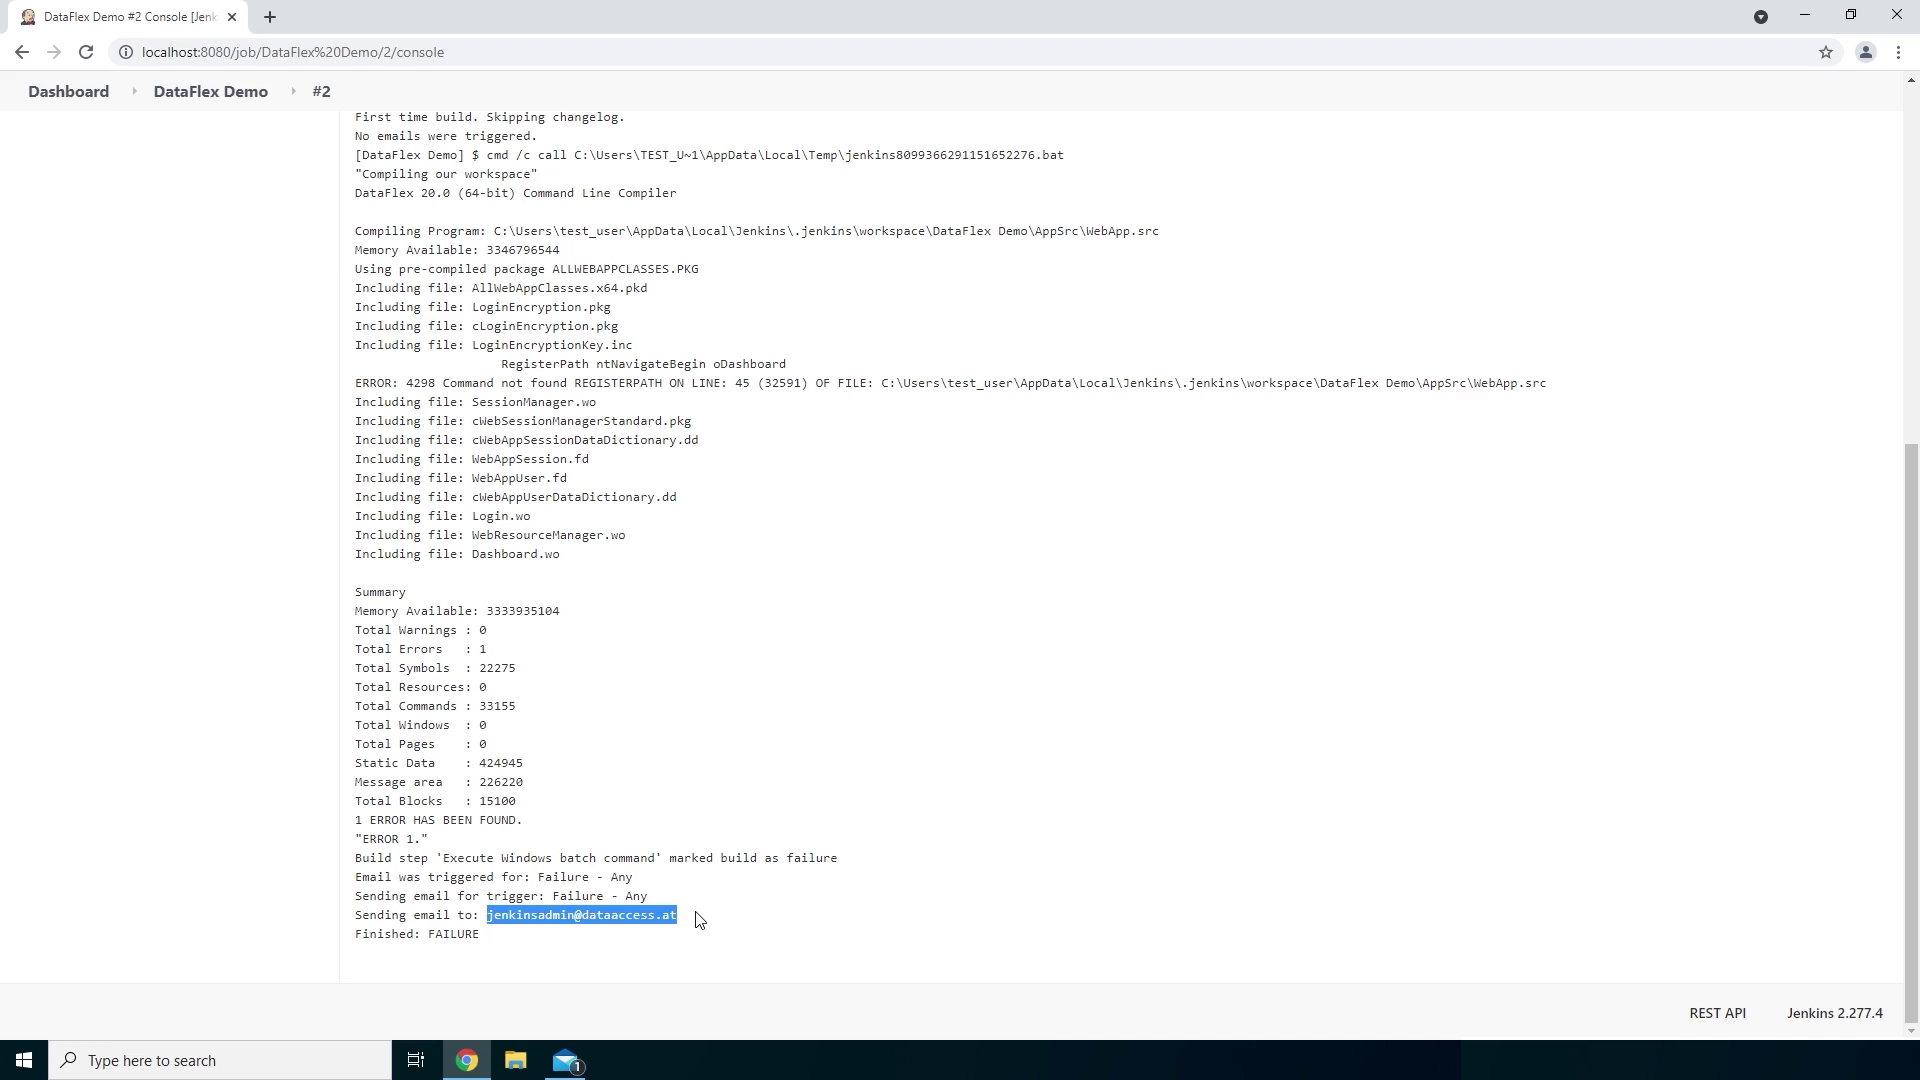
- Let’s check the build output by clicking on the build and then click on Console output. Now we see that the compiler has found 1 error and because of that it marked the build as Failed and has sent us an email saying it failed which has been sent to jenkinsadmin@dataaccess.at again. We can see we have received another email right here and it has been marked as a Failure.
- If we go back to the build project again and check out the Workspace we will now see that the WebApp executable hasn’t been created because of the compiler error.
Well, thats it. We have successfully prepared and created a build project, compiled a workspace with the DataFlex compiler and we got an email with the status of the build. Let’s go to the conclusion.
Conclusion
We have successfully installed Jenkins on our Windows 64bit system. We created a build project where we compiled a DataFlex workspace using the DataFlex Command Line Compiler and let it send us an email when a build failed and when a build succeeded.
This is what worked for us, but this example only shows a small part of what Jenkins can do. It can make use of FTP Uploads, Pipelines, nightly builds, MS Build to build Visual Studio projects and a lot of other possibilities.
To explore the endless options of Jenkins the link to the documentation.


