


In this lesson, we’ll look at how we can use the drag & drop framework to handle file dropping from your local filesystem to your Web Application.
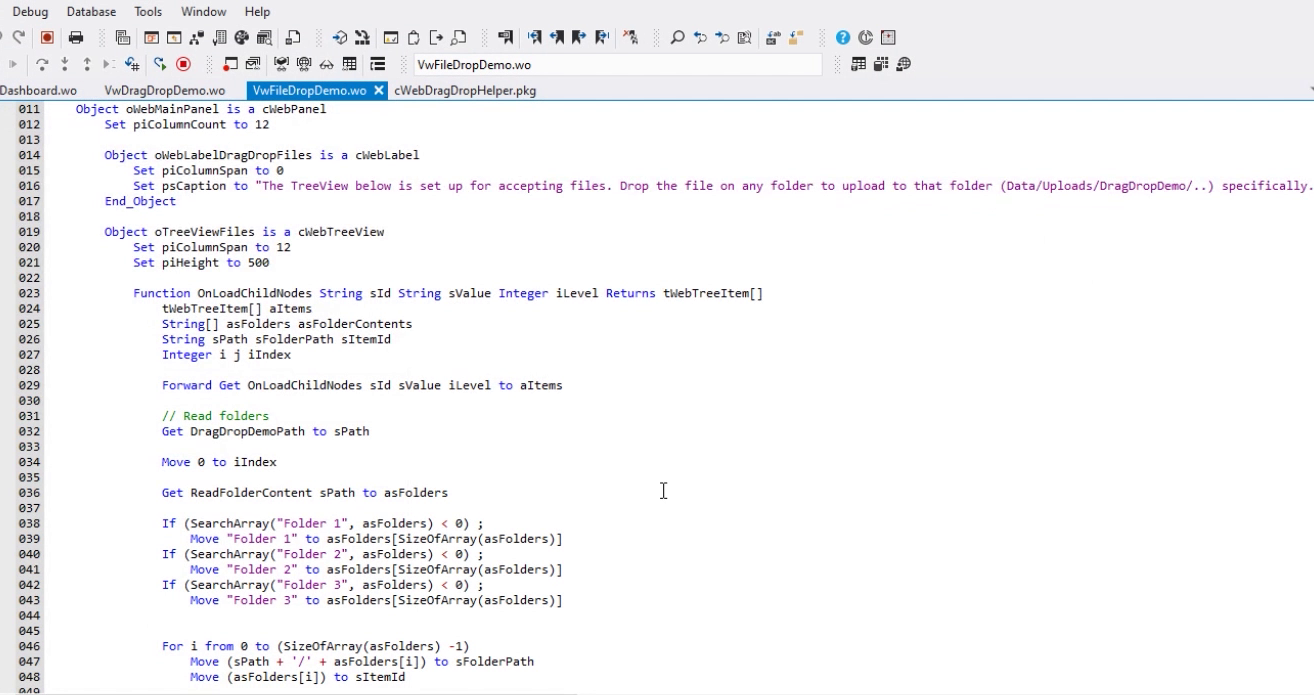
Similar to regular Drag & Drop interactions, we’ll need to add a specialized component to our view. The cWebDragDropFileHelper works exactly like the regular cWebDragDropHelper, but has additional logic to handle file dropping and - consequently – file uploading.
The steps to take are very similar. We’ll add a WebDragDropFileHelper to our view. Next we’ll add our Drop targets just like we did in the regular helper. We don’t have to add a drag source specifically for File Dragging, this is supported out of the box by the WebDragDropFileHelper. Note that the filehelper supports File Dropping on top of the logic that the regular helper supports. This means that you can also add Drag Sources to handle regular Drag and Drop actions as well.
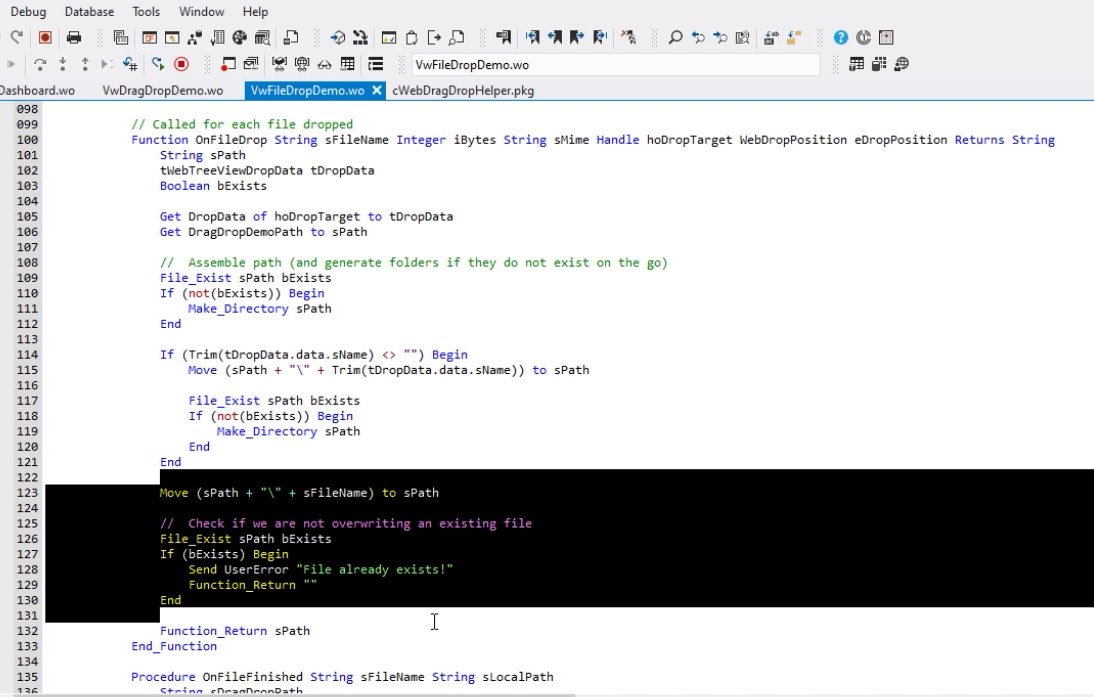
For file dropping, we’ll have to implement the OnFileDrop function. In this function, we’ll receive several parameters, the most important ones being the filename, a handle to the drop target and the drop position. Similar to the regular dragdrophelper, we can use the reference to the drop target to extract the DropData and use it in combination with the drop position to determine where exactly the file was dropped.
OnFileDrop is called for each file being dropped and should return the path to where the file will be uploaded. If we return an empty string here, the eventual upload will not take place.
Lastly is the OnFileFinished procedure. This is called after the file has finished uploading and can be used to perform actions, such as update the user interface after a file drop.
Alright, let’s put this info to use and look at an example for file dropping.
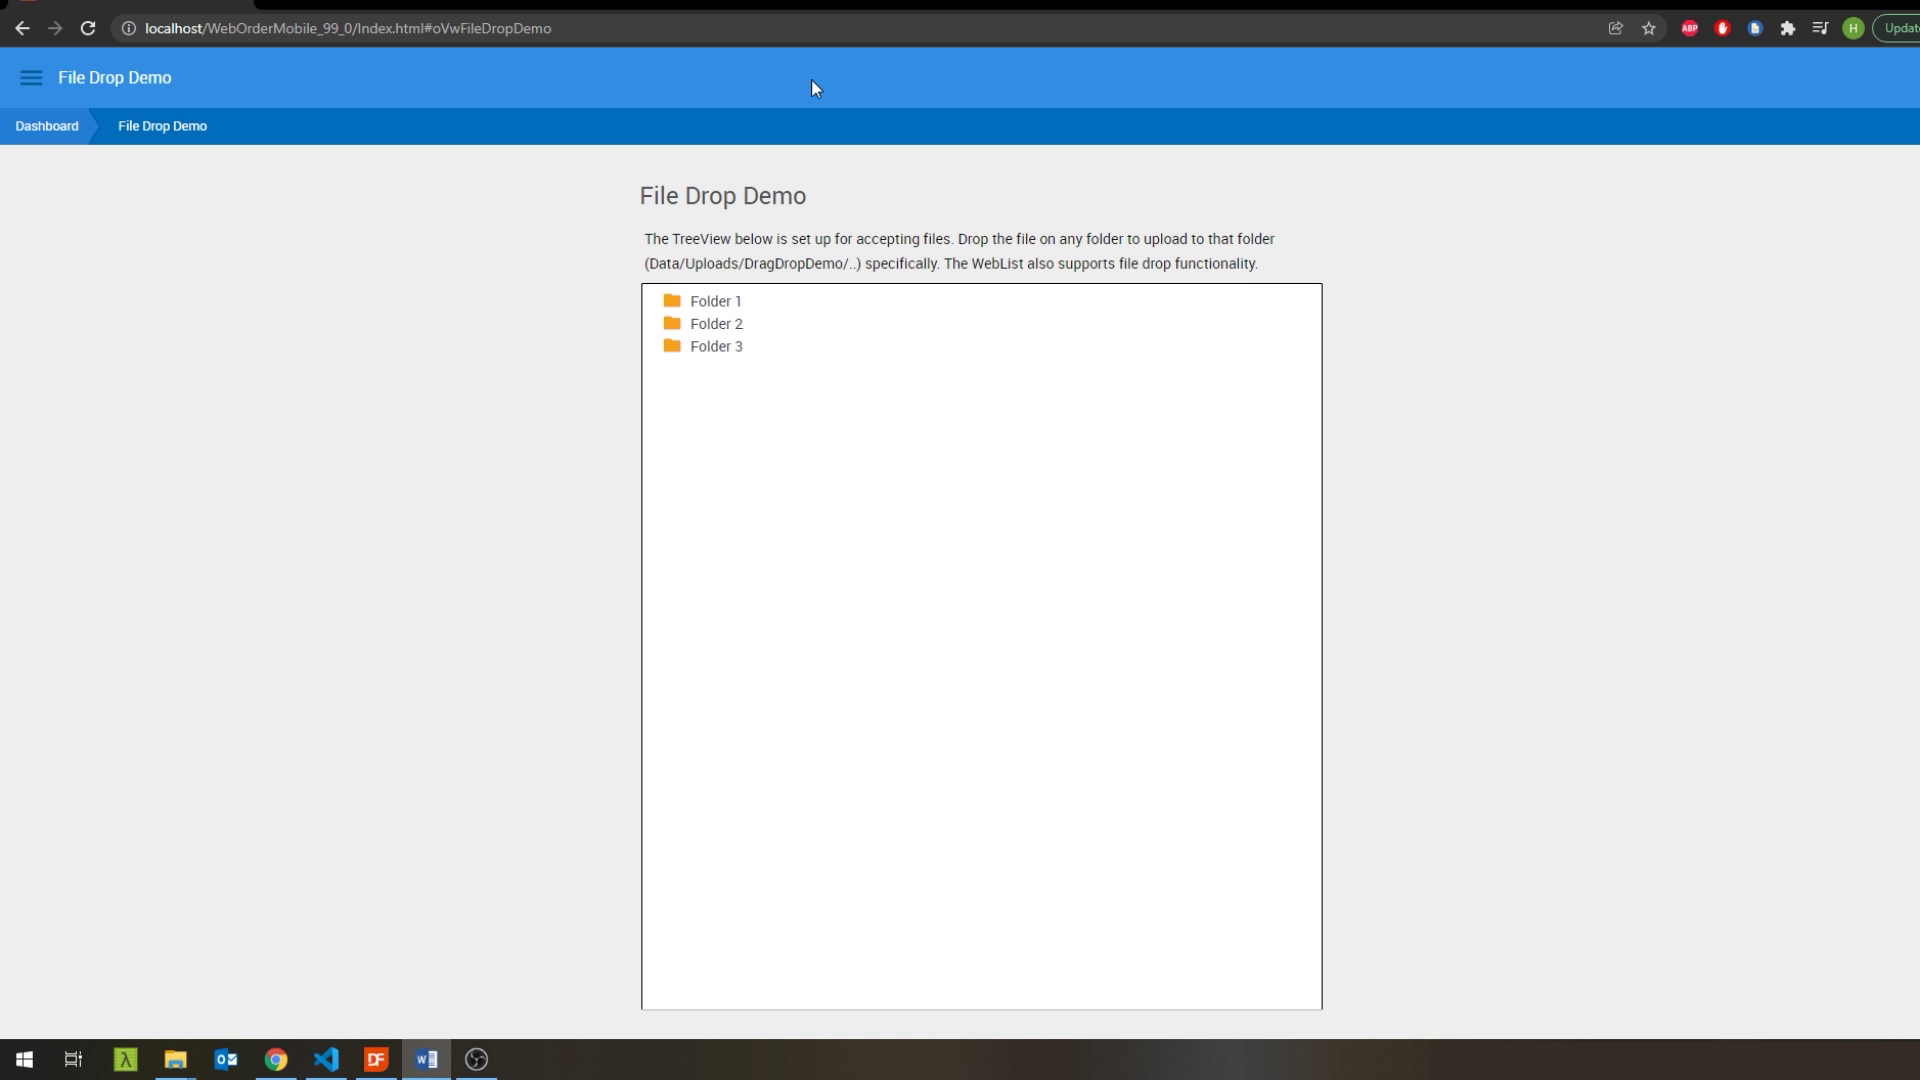
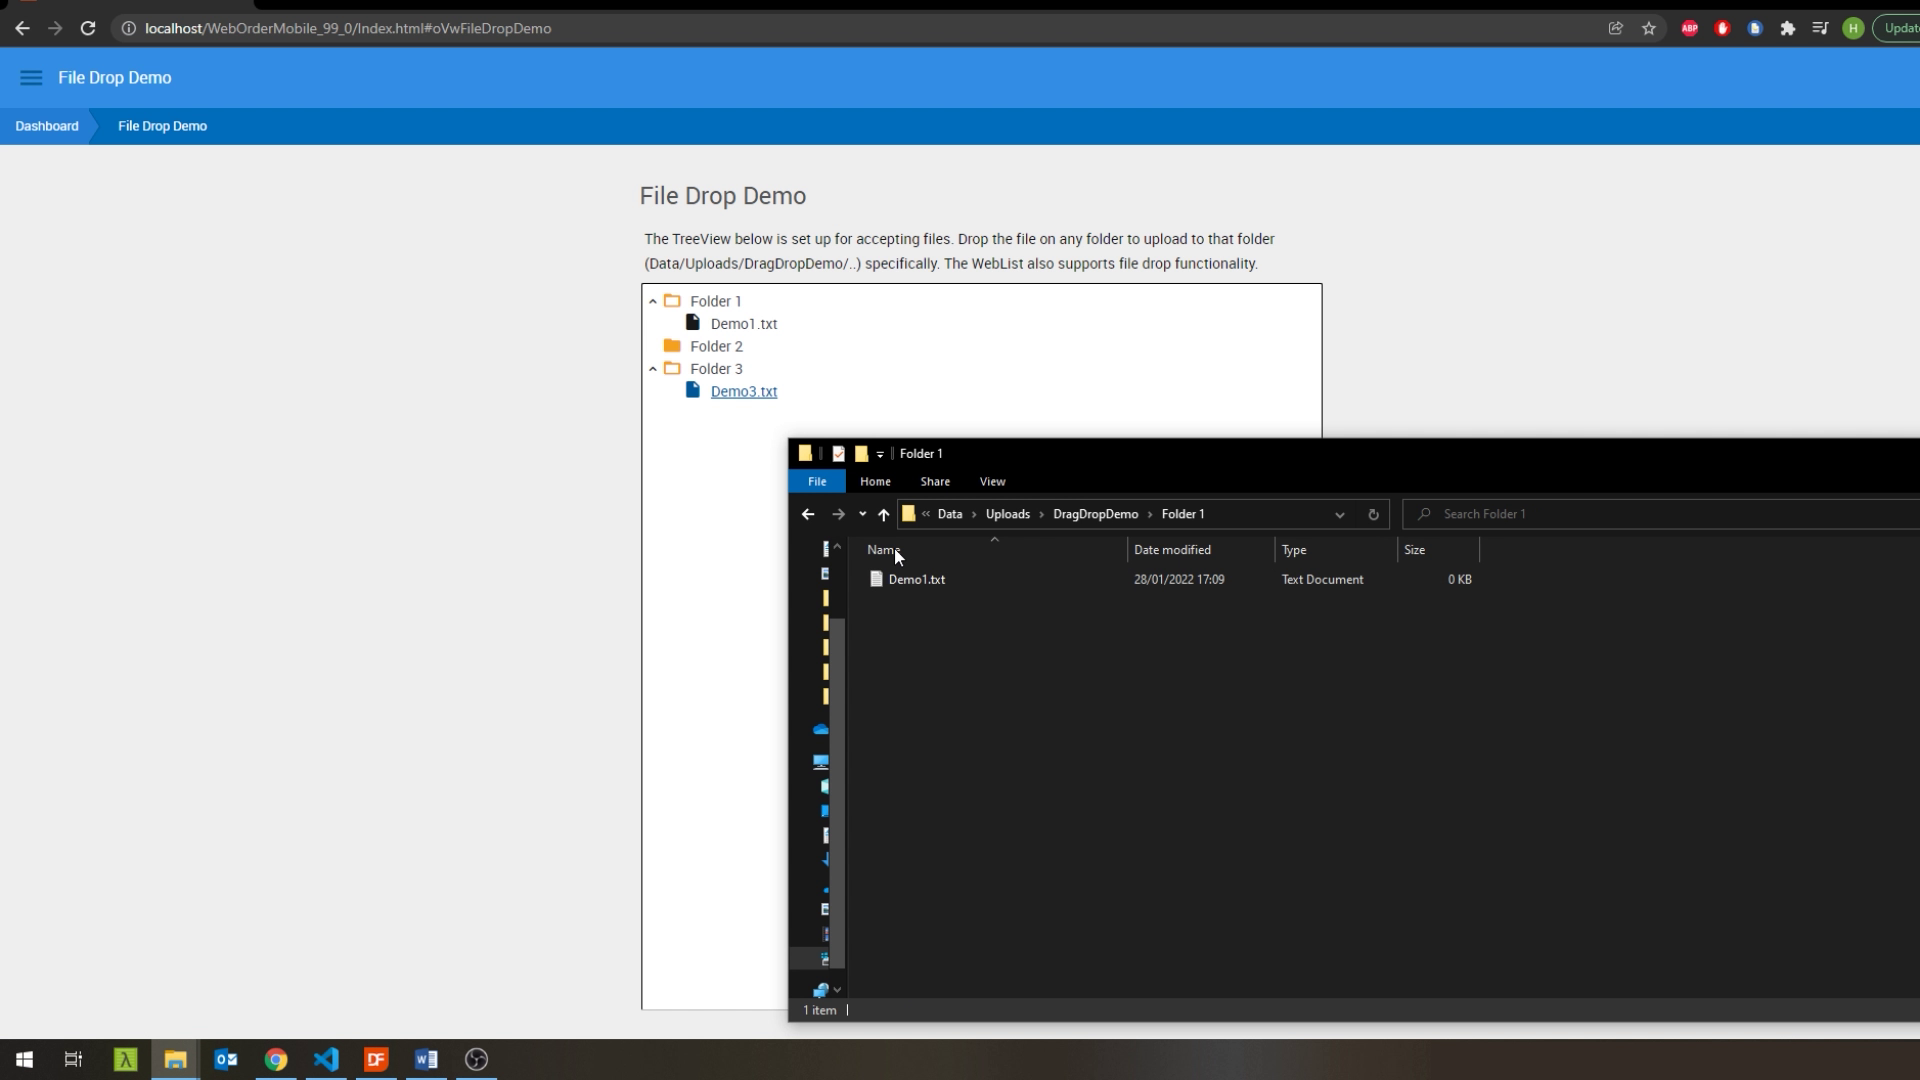
DEMONSTRATION

.png)

.png)
And that is how you can use the Drag & Drop framework to add file dropping to pretty much any control in your web application. Note that the regular WebFileUploadButton and Form still work as they used to and remain perfectly valid options for handling file uploads as well.
