The Drag & Drop Framework in DataFlex
Lesson 3 - Demonstration
In this lesson we’ll put everything we talked about in the previous lesson together. We’ll take a sample view inside our WebOrderMobile workspace with several lists and a treeview and add the Drag and Drop logic to it.
DEMONSTRATION
- Alright, so here we have a view with quite a few components in there. We have a list here on the left containing all of our customers. We have 2 lists here in the middle as well as a treeview on the right.
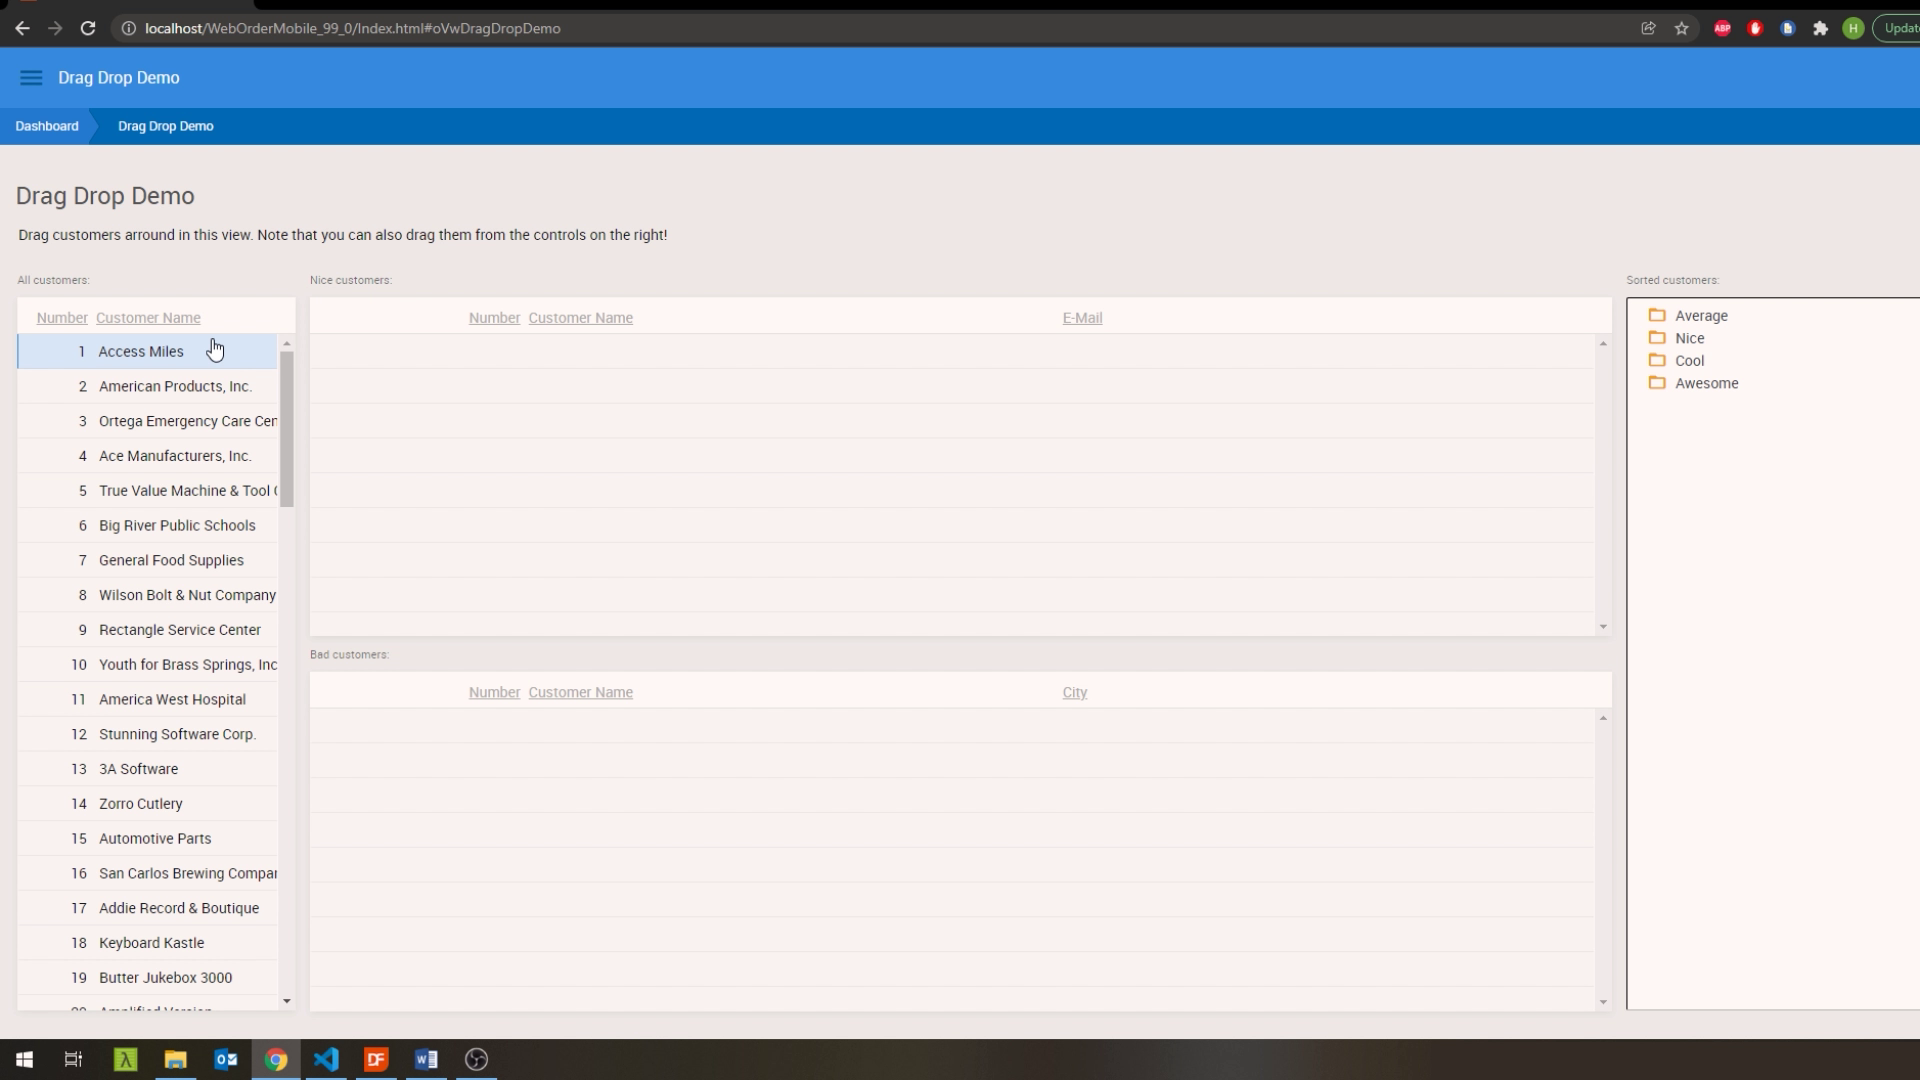
- What we would like to do is to be able to drag customers from the left list to any of the other controls to add them there. On top of that, we’d also like to be able to move them around between the other controls once we’ve dropped them into one. Let’s make that happen.
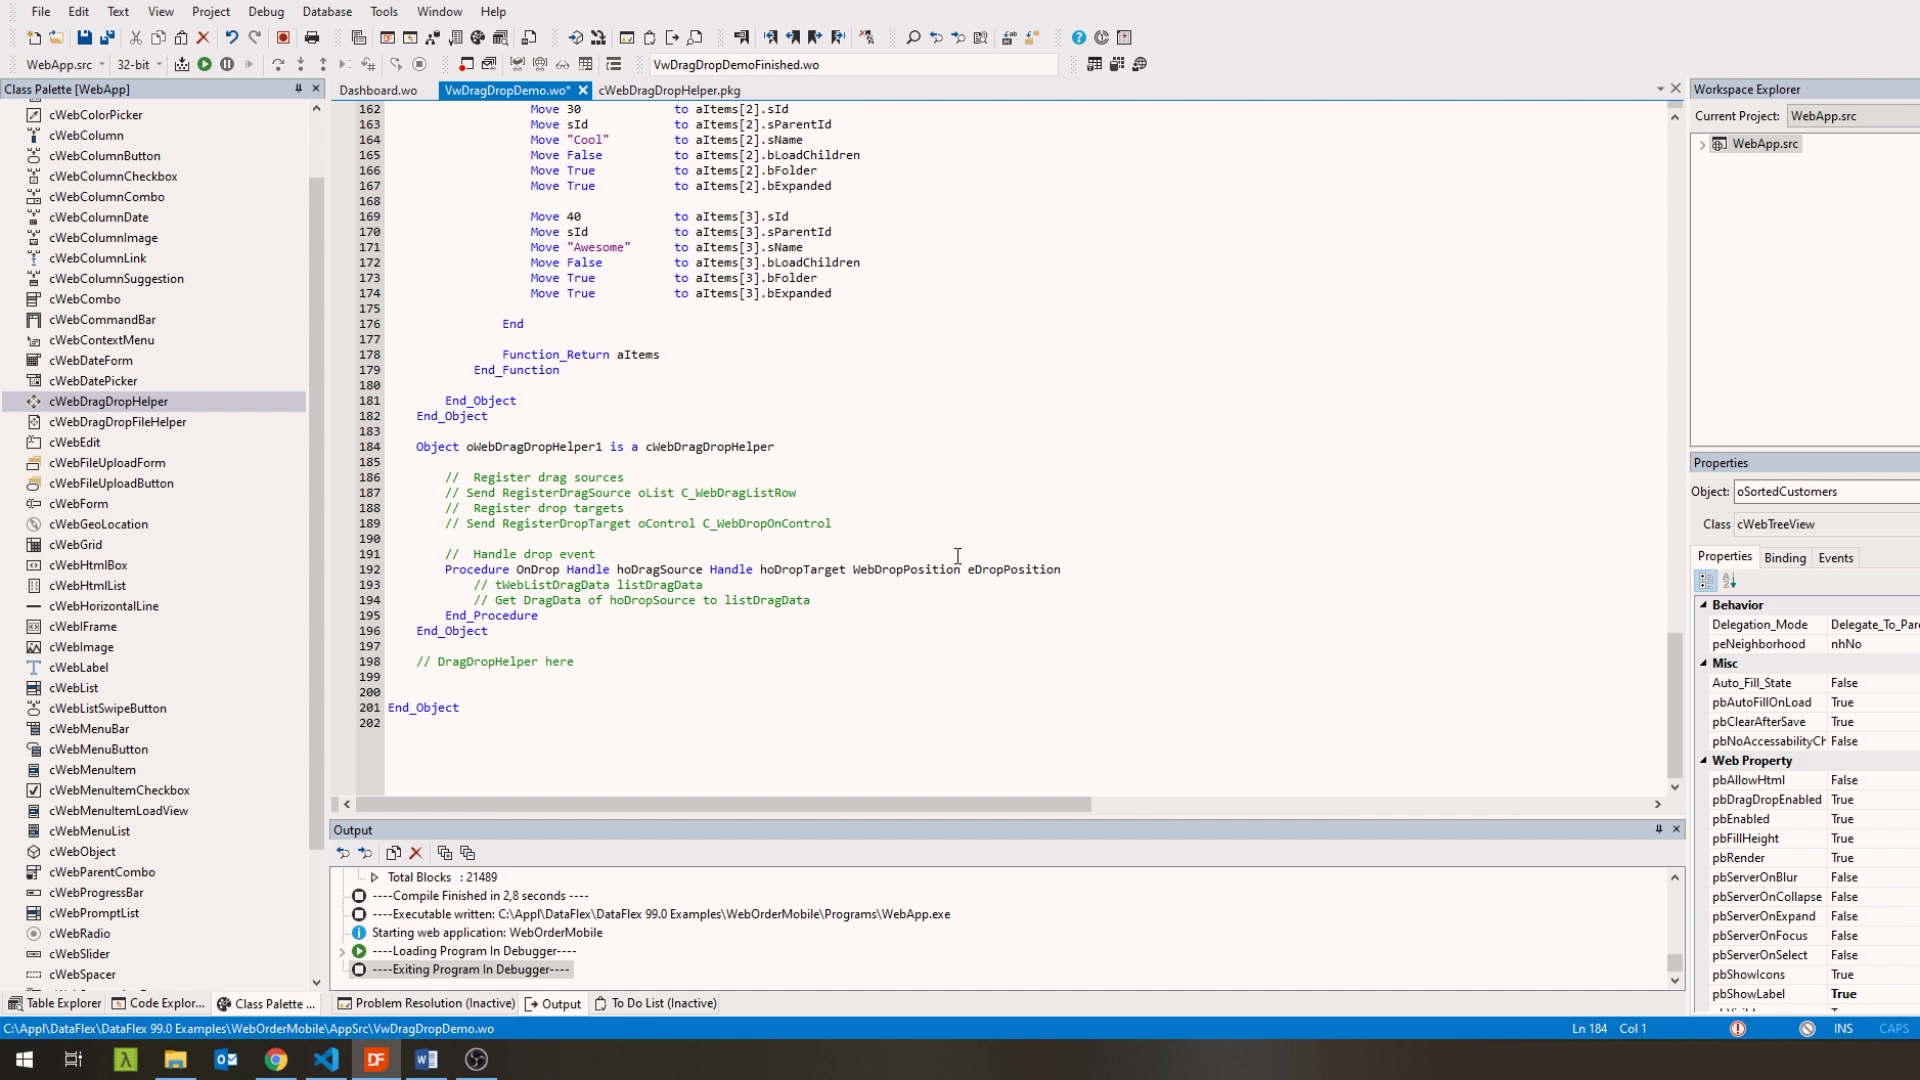
- So here’s the code for our view. As you can see we have the List containing all customers here, this list is data aware and pulls its data from the Customer table.

- The other controls are not data aware, but can contain Customer data as well, which we’ll feed it manually.
- The first thing we’ll do is add a WebDragDropHelper. We’ll go into the class palette and drag one into our view.

- As you can see, it provides us with some sample code of what we should do next.
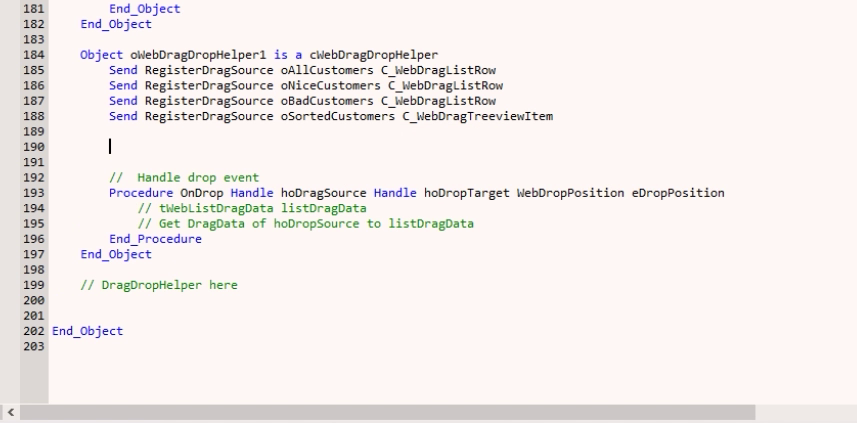
- Now let’s get rid of these few lines and add our own instructions. First, we’ll register our Drag Sources. We want to be able to drag from the original list, as well as from the other lists and the treeview. For the lists, we’ll Send RegisterDragSource, followed by the lists’ object name and pass the drag action constant C_WebDragListRow. We’ll do the same for the Tree View, but pass C_WebDragTreeviewItem here – indicating that we only want to enable dragging of items and not folders.
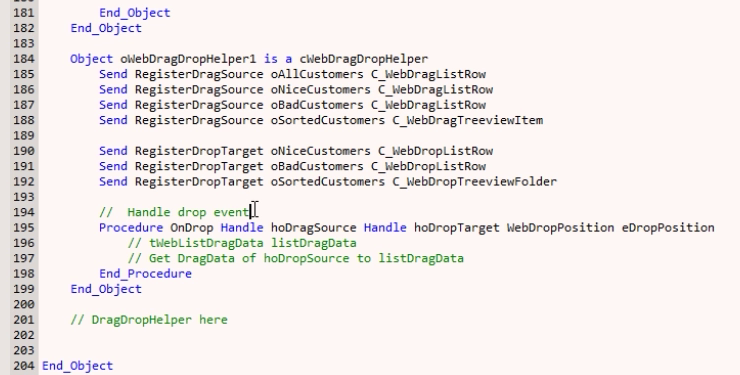
- Next we’ll add our drop targets, we want to be able to drop on any of the lists that’s not the original list as well as on the Treeview folders. For the lists, we’ll Send RegisterDropTarget, again followed by the lists’ object name and pass the drop action constant C_WebDropListRow. This indicates that we can drop within the list at a specific row. Upon a drop we’ll receive info where exactly in the list we dropped our item.
- For the treeview, we’ll also Send RegisterDropTarget. Here we’ll pass the drop action constant C_WebDropTreeviewFolder, indicating that we’ll only allow folders as a valid drop target.
- Next, we’ll implement the OnDrop event. To speed things up, I’m going to copy and paste in some code and go over it, explaining certain concepts as we go.
- So let’s copy in this first bit of code and see what we’re doing here. The general idea is that we want to look at the piece of data we got from the drag source and determine what customer was dragged. This is done in the Get CustomerFromSource instruction.
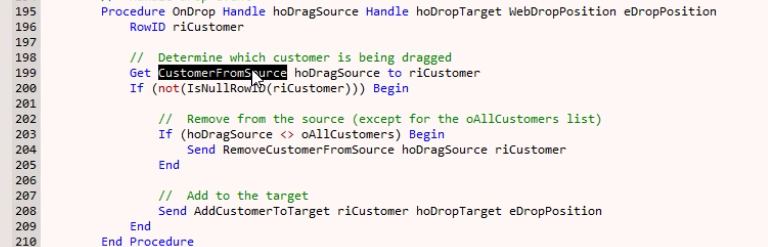
- From there, we’ll first check if we dragged it from the original list of all customers. We want to preserve this list, but for all the other controls we want to remove the customer we dragged. This is done in RemoveCustomerFromSource. Finally, we want to add the customer we dragged to the target we dropped it on. This is done in AddCustomerToTarget.
- Now let’s copy in the code for those instructions and look at each of these methods.
- In CustomerFromSource, we’ve passed the handle hoDropSource as a parameter.
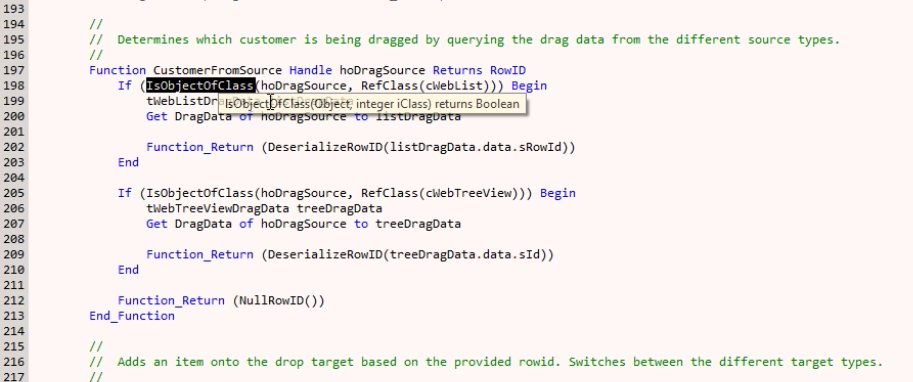
- To determine what kind of data we’re receiving, we’ll use IsObjectOfClass. If the Drop Source is a list, we’ll Get DragData to a WebListDragData struct and if it’s a treeview we’ll get it to a WebTreeviewDragData struct. From there, we’ll use the data inside the struct to get the RowID for the customer.
- In RemoveCustomerFromSource we remove the customer from the Drag Source object it came from.

- Again, we use IsObjectOfClass to determine what the object is and then we’ll either call on DataSetRemoveRow if it’s a list, or RemoveNode if it’s a TreeView.
- Now for the last and possibly most important part, adding the customer to our drop target.
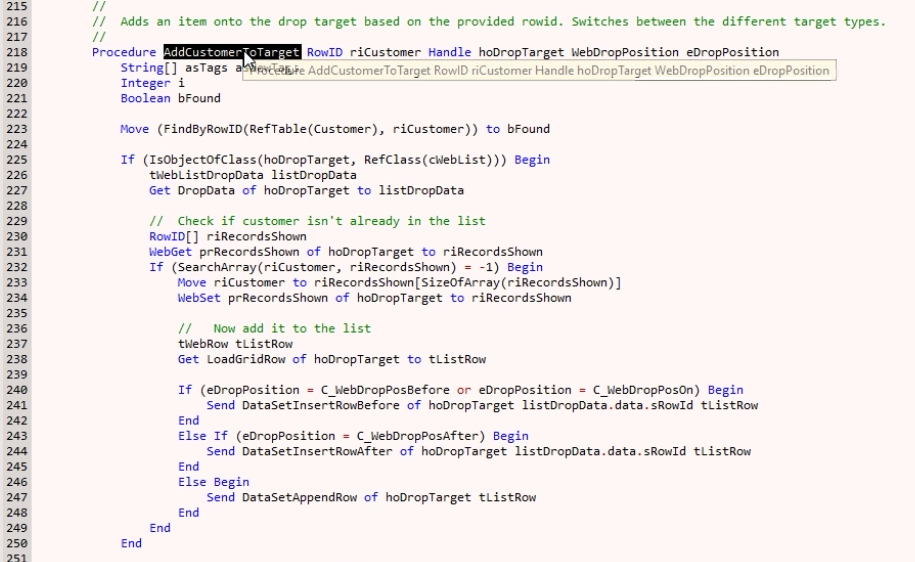
- In AddCustomerToTarget we receive the rowID which we extracted from the Drag Source earlier. We also get the Drop Target as a handle and a WebDropPosition to indicate where in the control the customer was dropped.
- Similar to the other methods, we first check what object we’re working with using IsObjectOfClass.
- Let’s first look at the List clause. The first thing we’ll do is Get DropData to a ListDropData struct. Next, we’ll look at the exact position. We know that the item was dropped somewhere on our list’s rows. The WebDropPosition tells us whether it was On, Before or After a specific row and based on what this value is we want to either Insert Before, After the target element or Append to the list if it’s still empty. Inside the WebListDropData is the rowId of the row the drop was performed on. We’ll pass this to our instruction to add the customer to our list.
- For the Treeview, we’ll Get DropData to a WebTreeviewDropData struct.
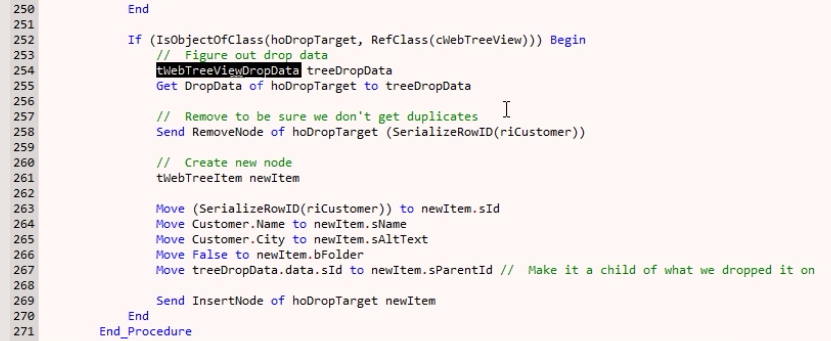
- The RemoveNode instruction here is just a precaution to avoid duplicates. Next, we’ll construct our treeview item using the Customer’s details. We’ll use the DropData to determine what folder we dropped it on and make that the parentID of our new Node. Finally, we’ll use InsertNode to add the customer to the treeview.
- Alright, that was quite a lot to go through. Let’s run this and see what happens.
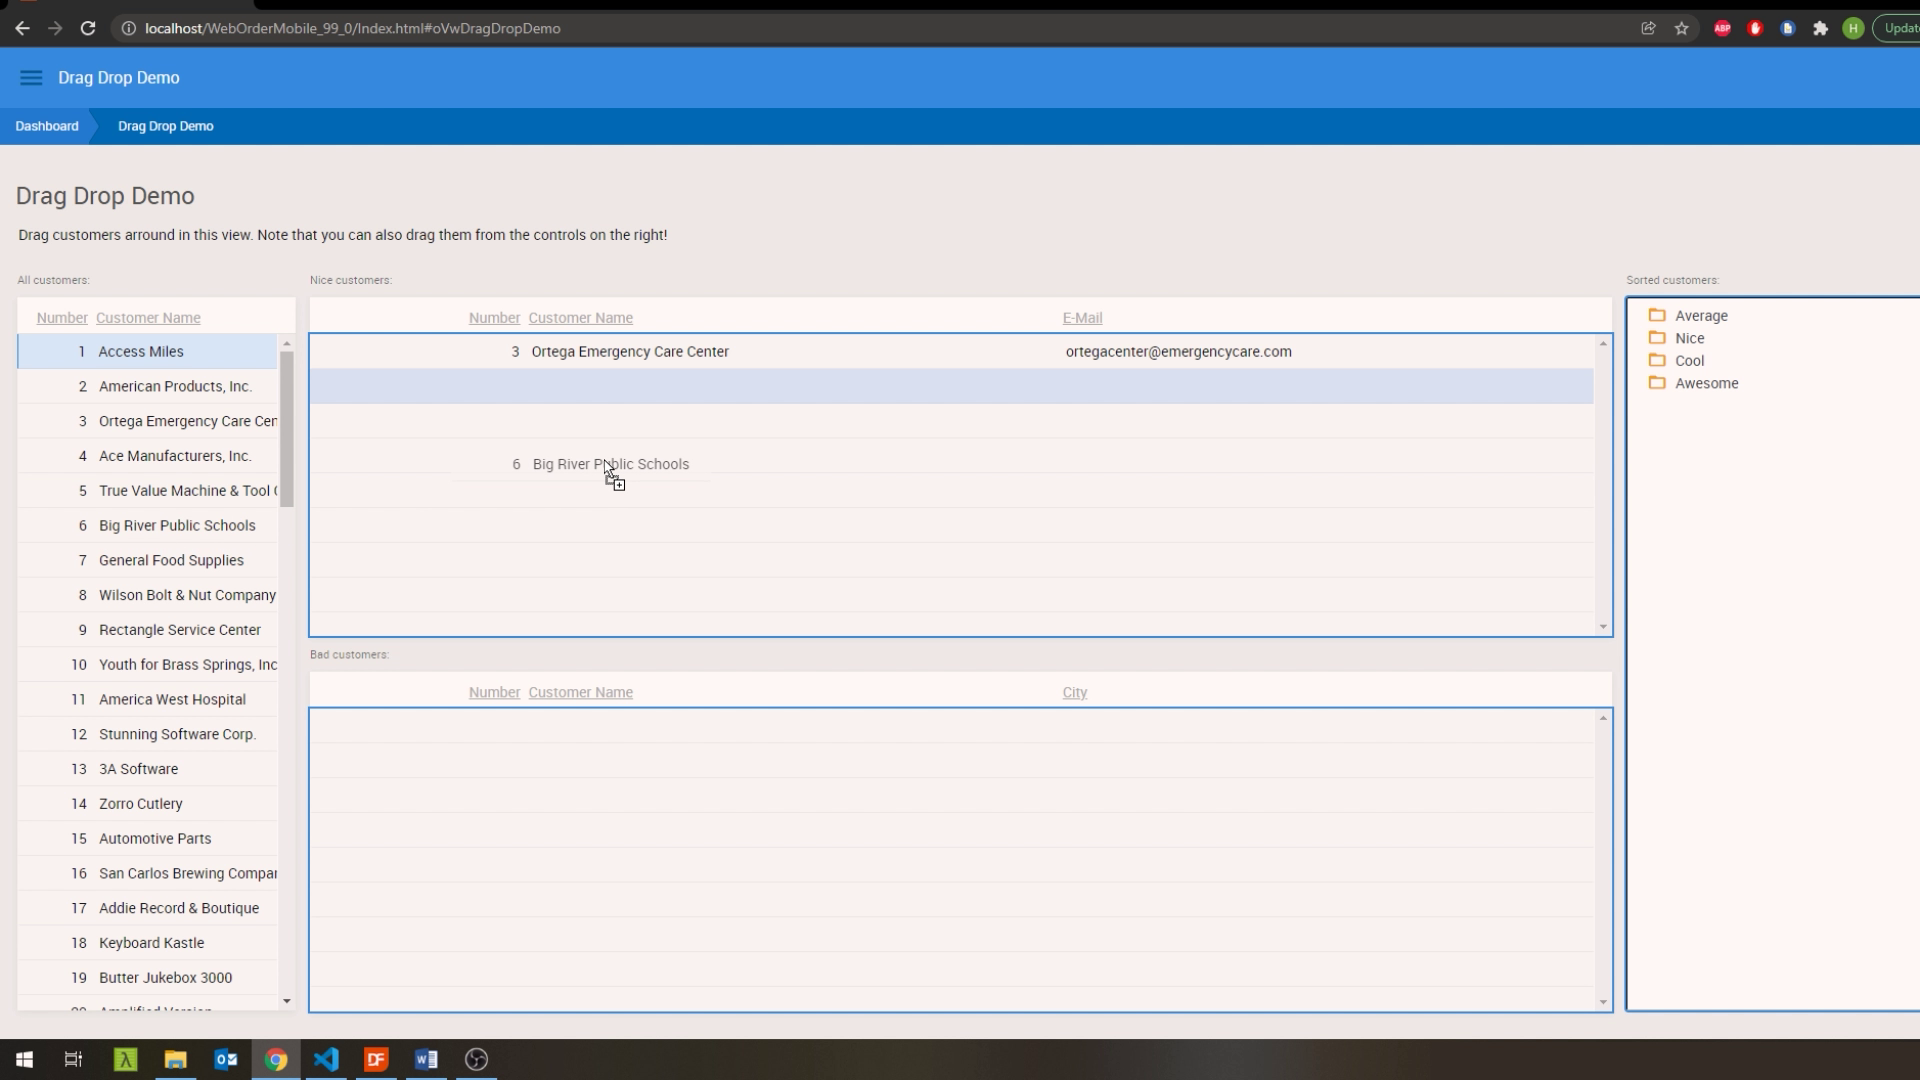
- Let’s navigate to our demo view within this WebOrderMobile workspace. Now let’s start picking up a few customers and add them to the first list. As you can see, any customer we pick up gets added to this list. They also get inserted exactly where we dropped them.
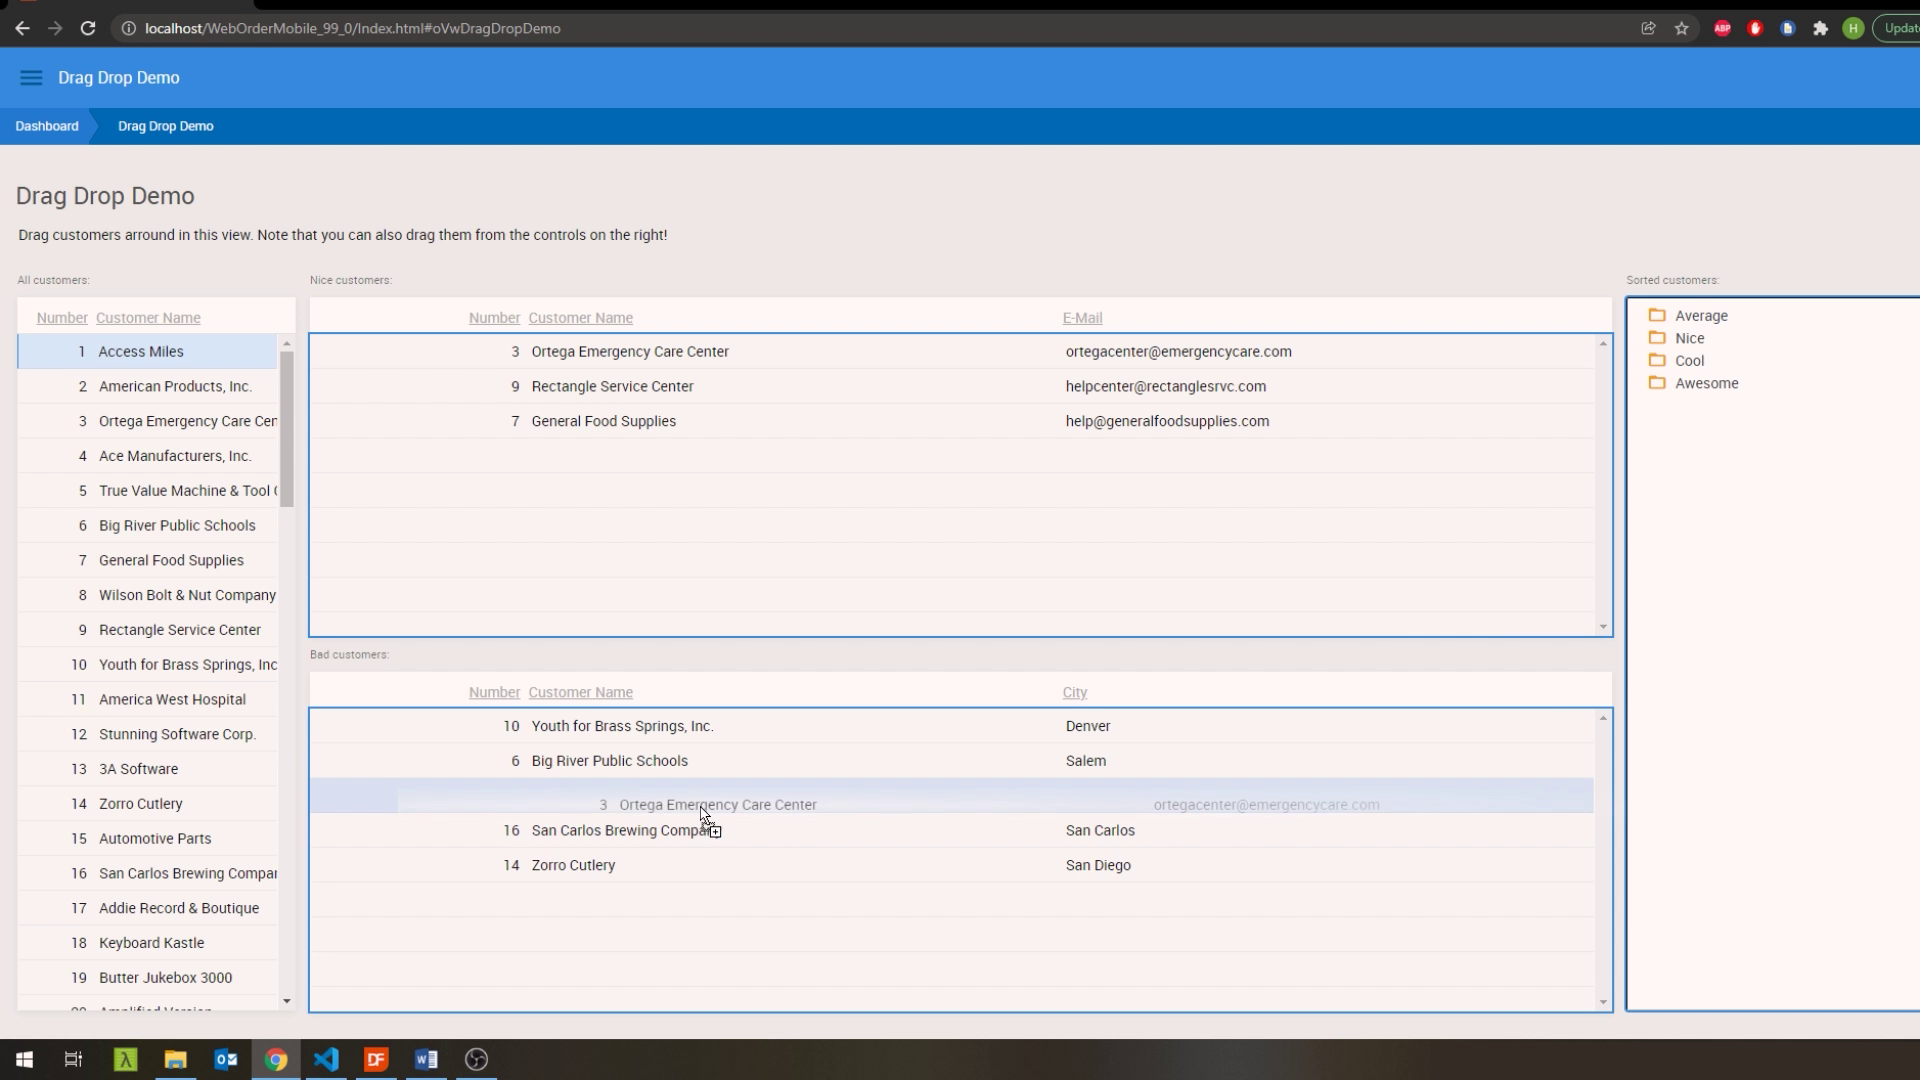
- We can also pick them up from this list to the other one, this will remove it from the Nice Customers list and add it to the Bad Customers List.
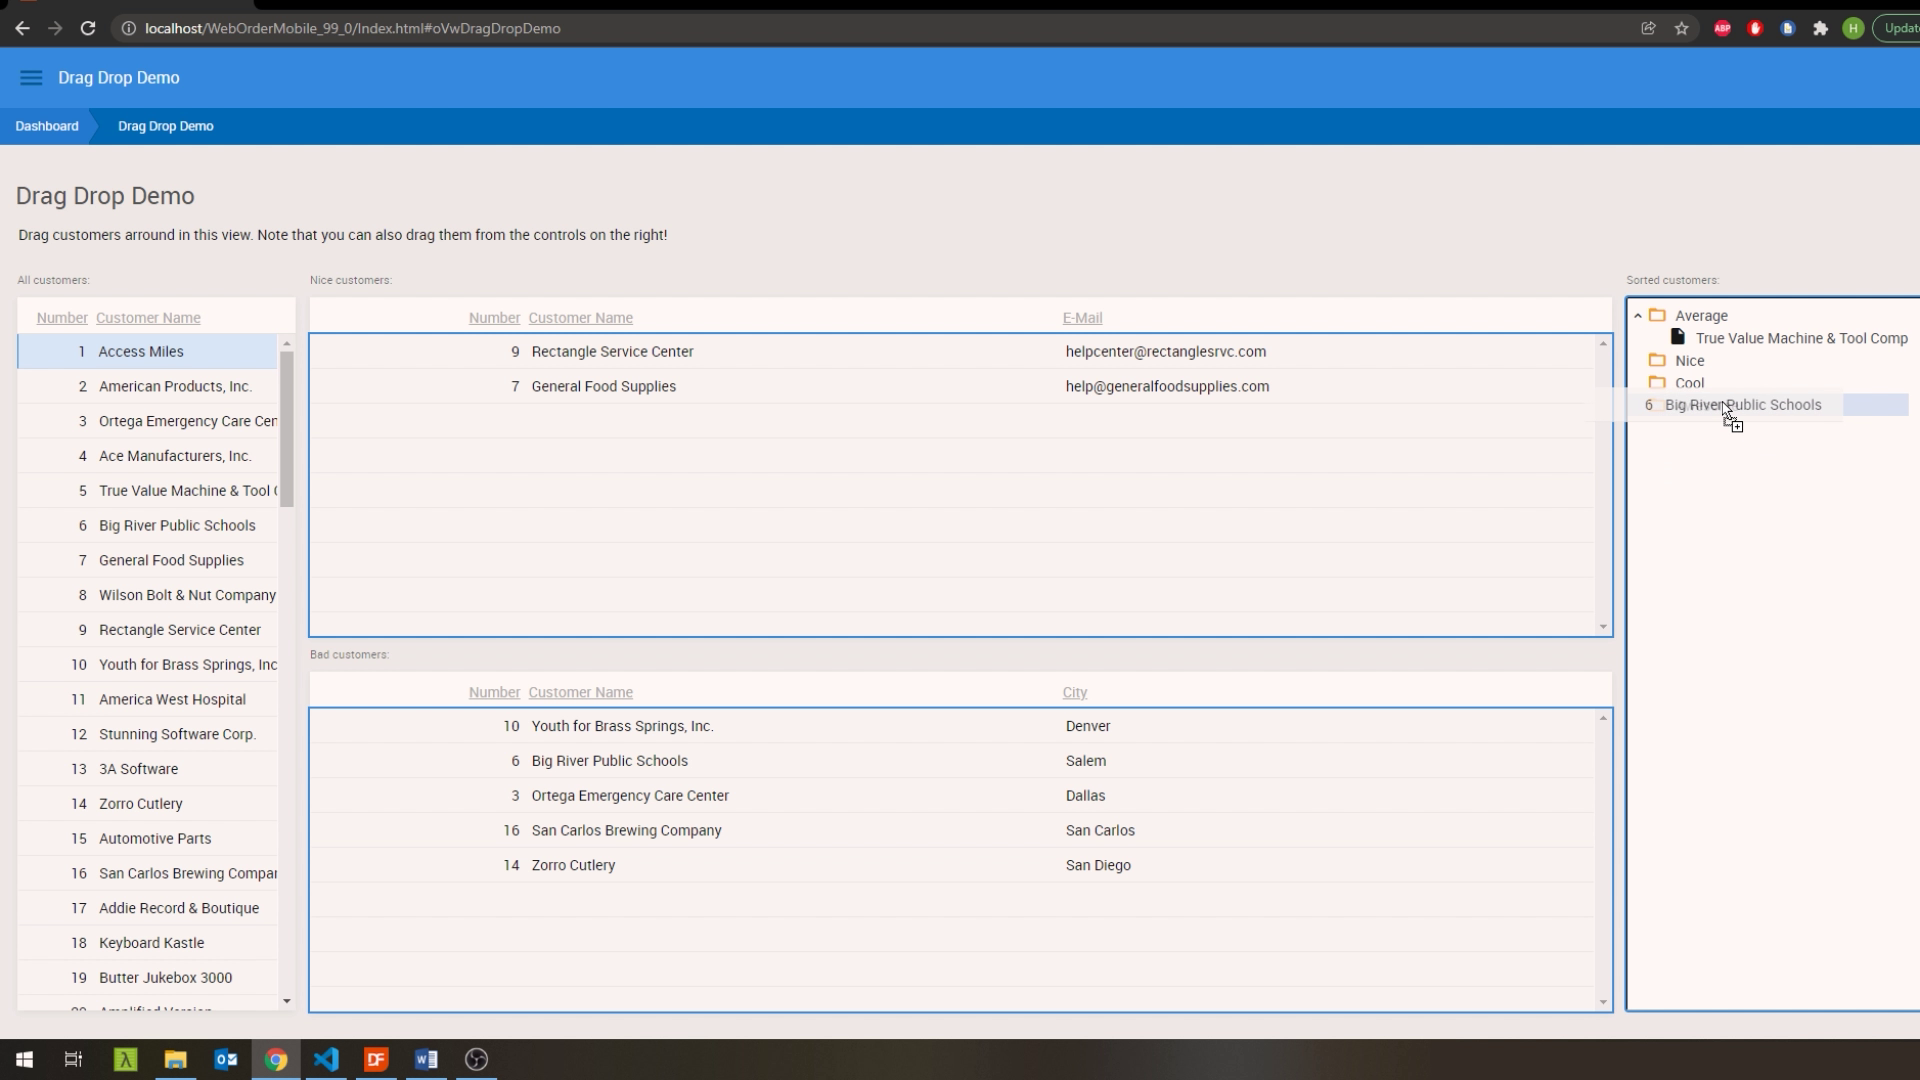
- Finally, let’s drop some on our TreeView. As you can see, they get inserted exactly in the folder we drop them on.
So that is how to add Drag & Drop functionality to your views. To quickly recap:
- We added the WebDragDropHelper to our view.
- Next we registered our Drag Sources and our Drop Targets with specific actions for each of them.
- Finally we implemented the OnDrop procedure. We used the IsObjectOfClass method to determine which objects we’re interacting with in order to get the Drag and Drop data to their appropriate structs, as well as determine what follow up actions to take on the respective controls.
- This sample was for interacting with data present in your view. In the next lesson, we’ll look at using the drag & drop framework to handle file dropping from your local filesystem.


