Security the Basics
Lesson 3: Restrict database access to your applications
In the previous lesson, two conditions were introduced that are of vital importance to restrict database access. The first being…
- Access to the data is only available through systems that enforce mitigations
This means that data must only be accessed through the applications, and that it must be secure when it is being transferred across the internet or local network. It also means that access to the database is restricted to the applications.
This lesson will focus on restricting access to the database since this is the first thing to deal with during development and deployment.
There are two ways for an application to connect to a Microsoft SQL Server…
- Windows authentication: uses a Windows user name or an active directory user to connect without entering a password. This is user friendly, but it is not secure from a data protection perspective. This allows a user to login to the database using any other software such as SQL Server Management Studio, Microsoft XL, or Database Explorer. These programs do not enforce the applied mitigations. Ironically, in DataFlex, this type of authentication is often called a “trusted connection.”
- SQL Server authentication: the user has a unique username and password to connect to the database. Once logged in, the application is responsible for applying restrictions to the user.
Demonstration
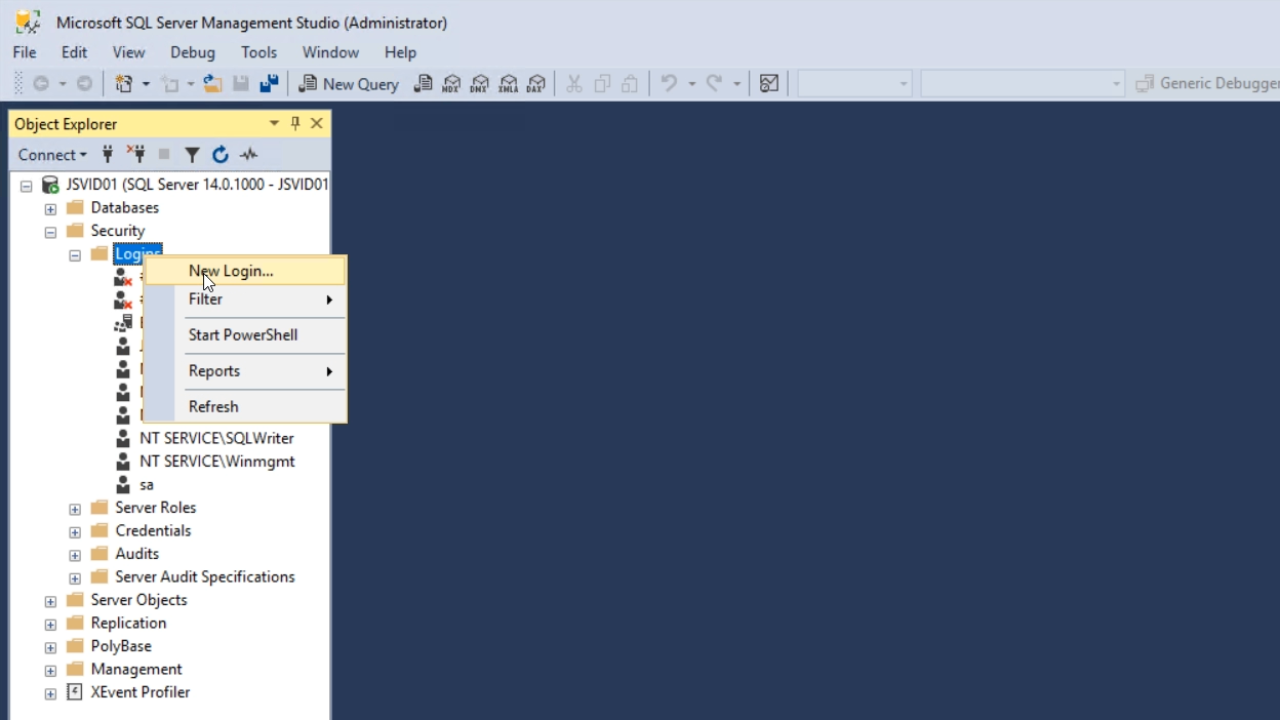
- Open SQL Server Management Studio, and from the ‘Object Explorer’ panel on the left expand SECURITY > LOGINS.
- Right click on ‘Logins,’ and select ‘New Login’
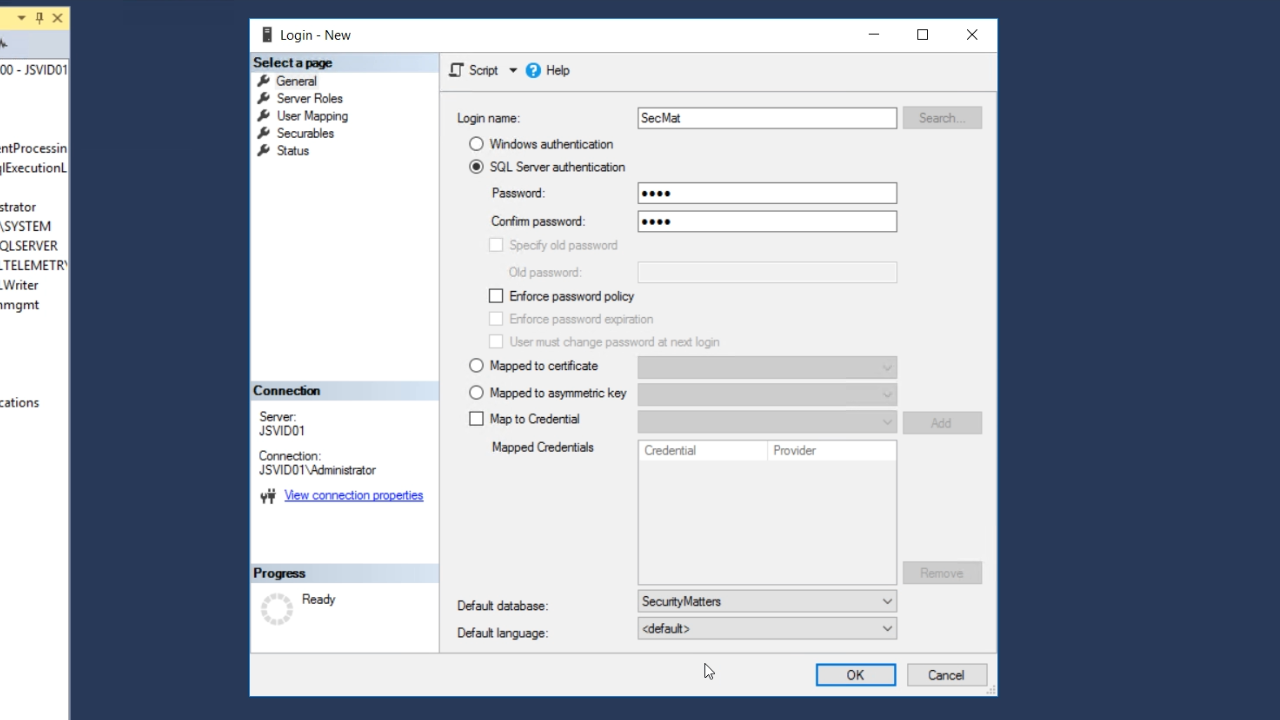
- Enter a ‘Login name’
- Select the radio button for ‘SQL Server authentication,’ and enter a strong password
- Uncheck the ‘Enforce password policy’ checkbox
- Set the ‘Default database’ to the desired database (SecurityMatters for this lesson)
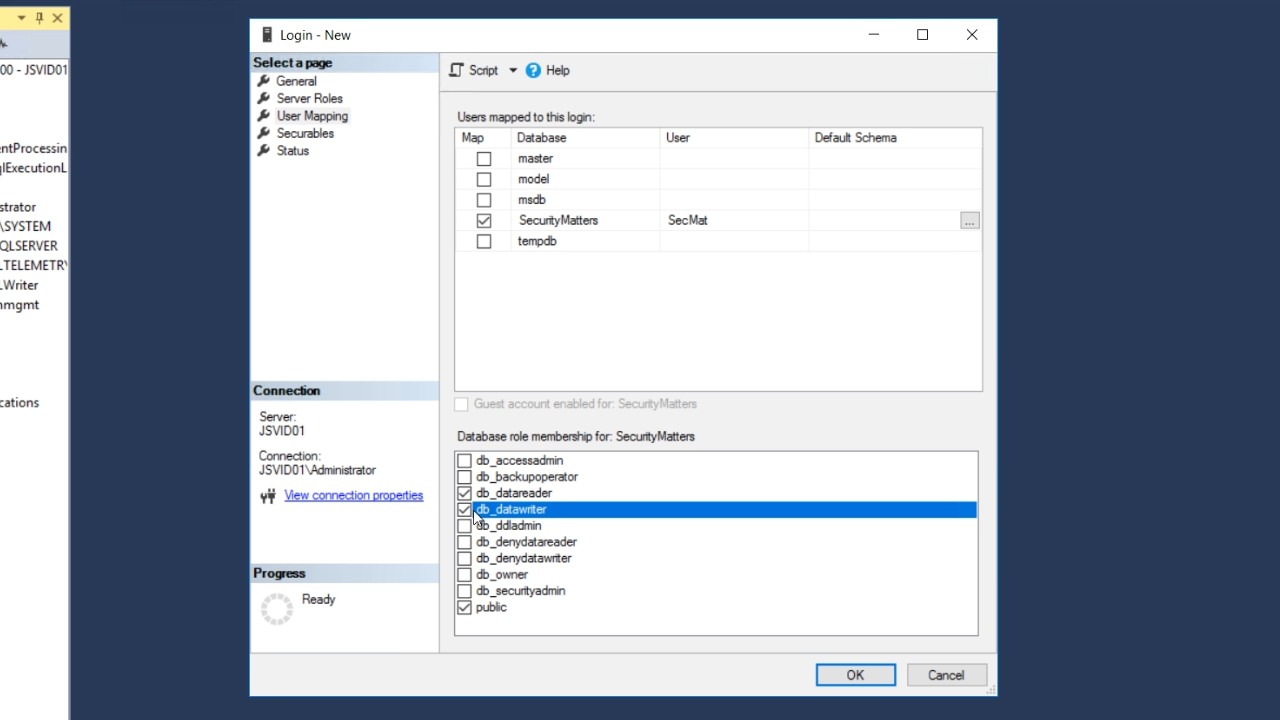
- Select ‘User Mapping’ from the ‘Select a page’ panel on the left of the window
- The user needs to be mapped to the correct database, so mark the corresponding checkbox.
- Mark ‘db_datareader’ and ‘db_datawriter’ in the ‘Database role membership for: SecurityMatters’ in the bottom section.
- Select ‘OK’
- To confirm that everything was setup properly…
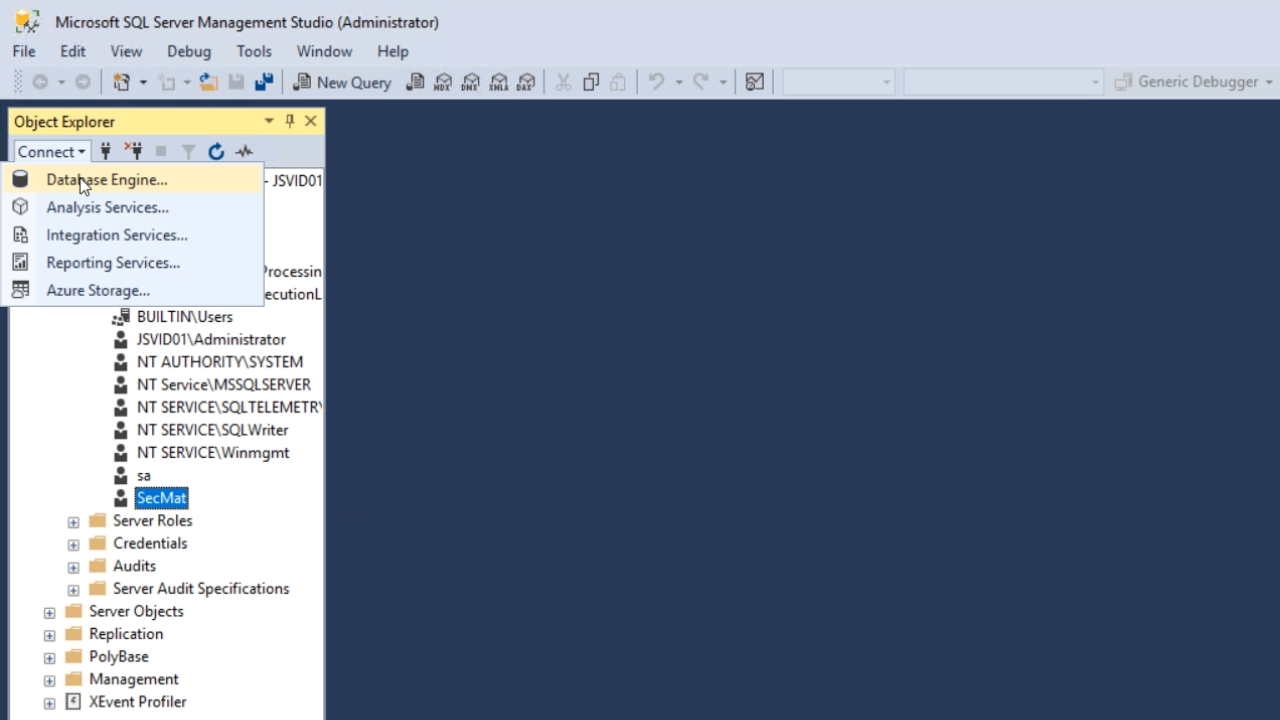
- From the ‘Connect’ pulldown at the top of the ‘Object Explorer’ panel on the left choose ‘Database Engine’
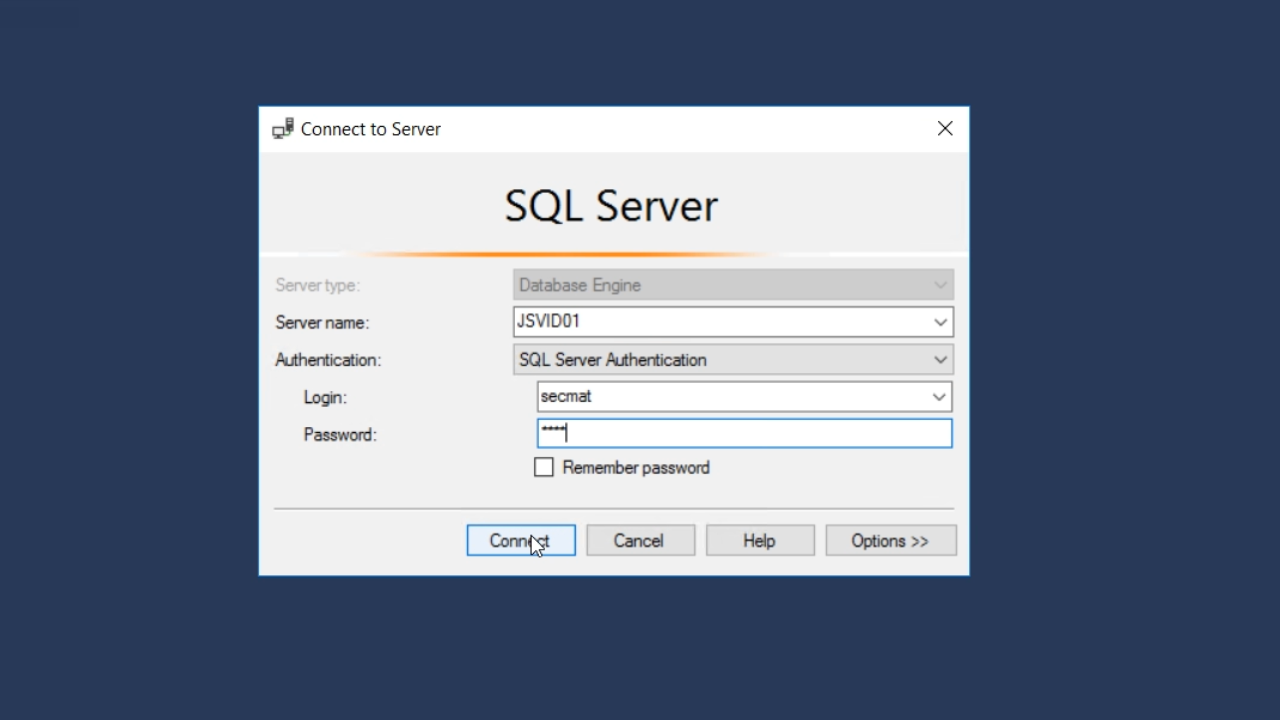
- From the ‘Authentication’ pulldown in the popup that appears choose ‘SQL Server Authentication’
- Enter the ‘Login’ and ‘Password’ that was previously created
- Select ‘Connect’ button
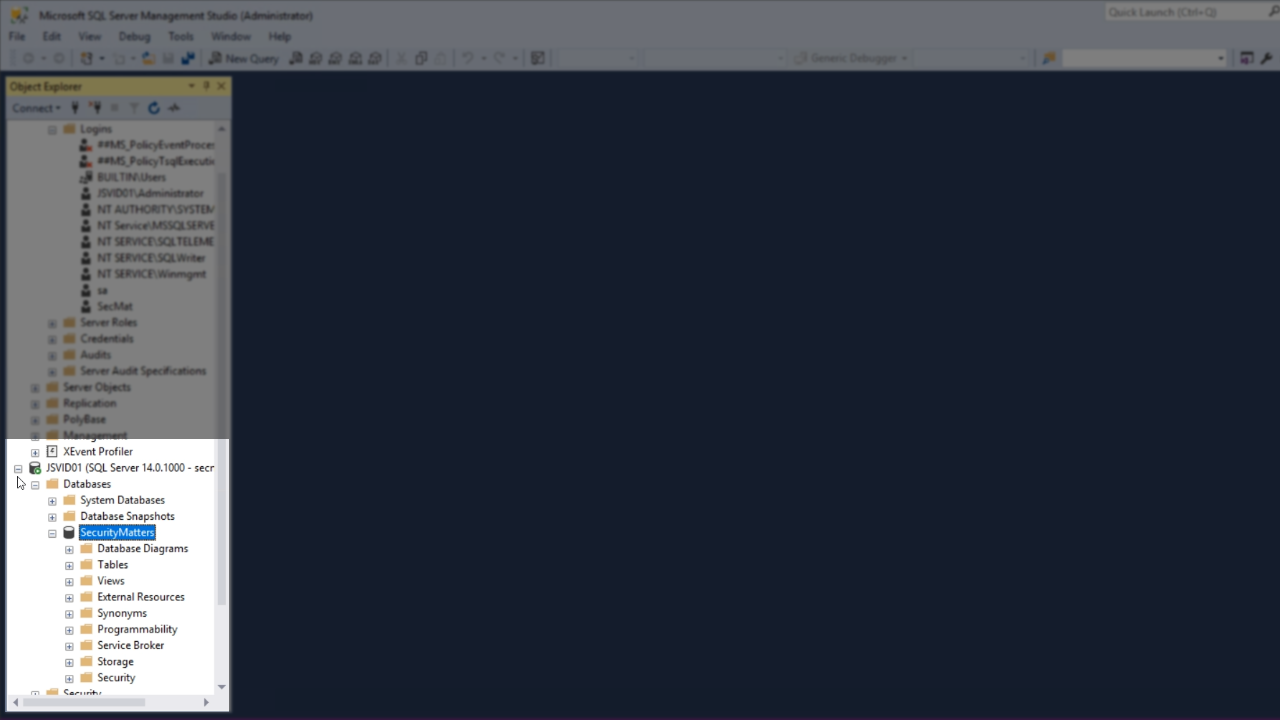
- If the connection is successful, the Database will appear under DATABASES in the ‘Object Explorer’
- Open the DataFlex Studio
- Note: In DataFlex 18.2 and older, SQL connections were stored in an inferior manner. Security was enhanced in DataFlex 19.0. Now managed connections are stored in a new file called DFConnId.ini.
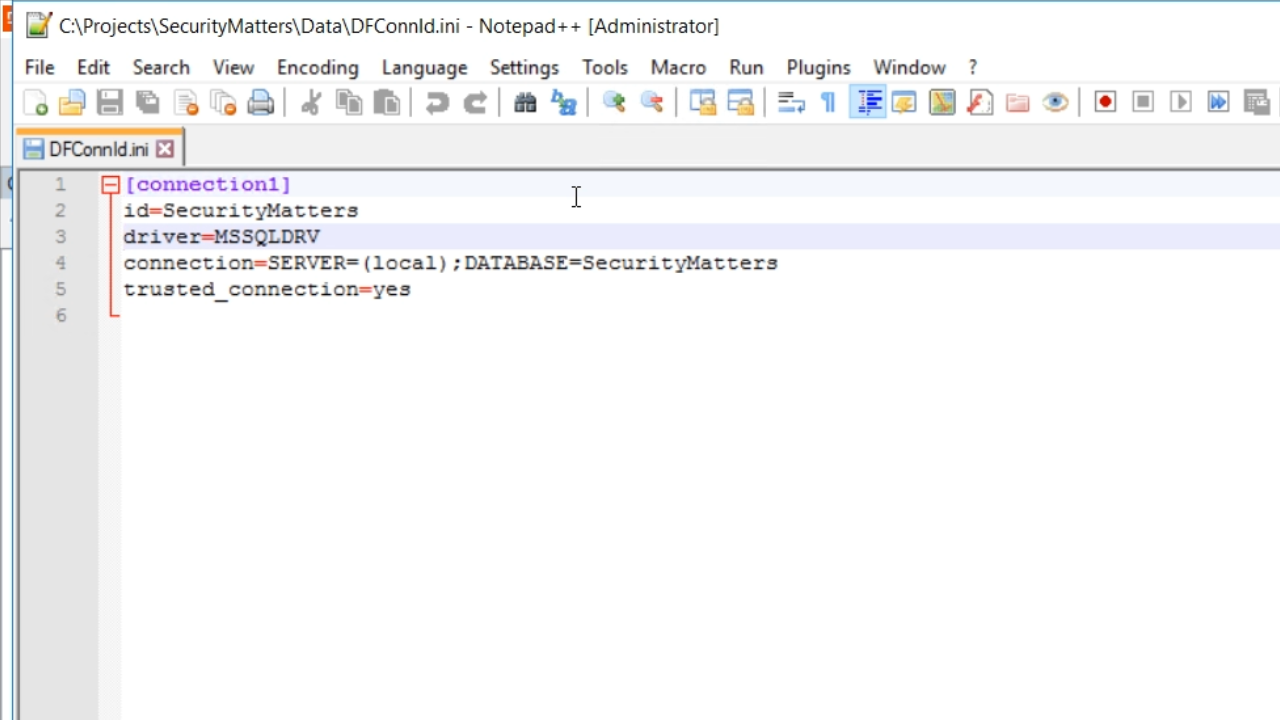
- Open DFConnId.ini from the ‘Data’ directory in the workspace’s folder to a text editor.
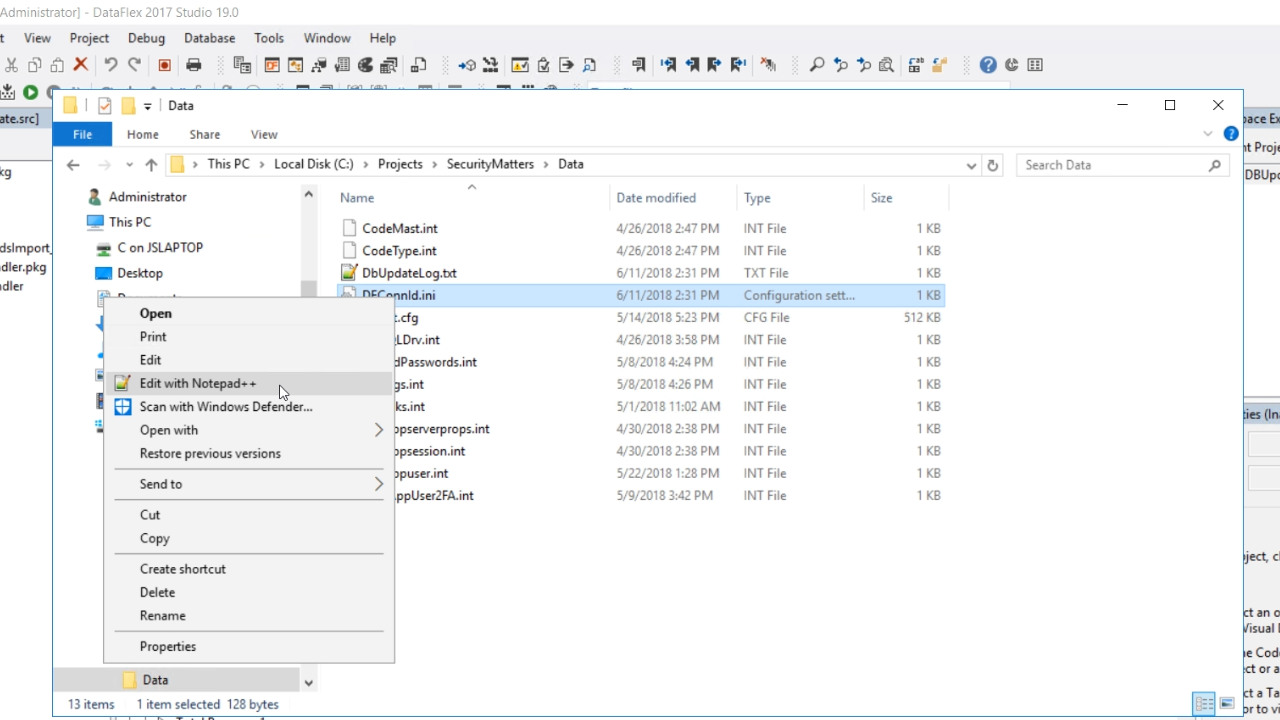
- The file shows the connection IDs, the driver, the connection string, and, in this case, it shows that the trusted connection is set to ‘yes.’
- This can be changed using the DataFlex Studio
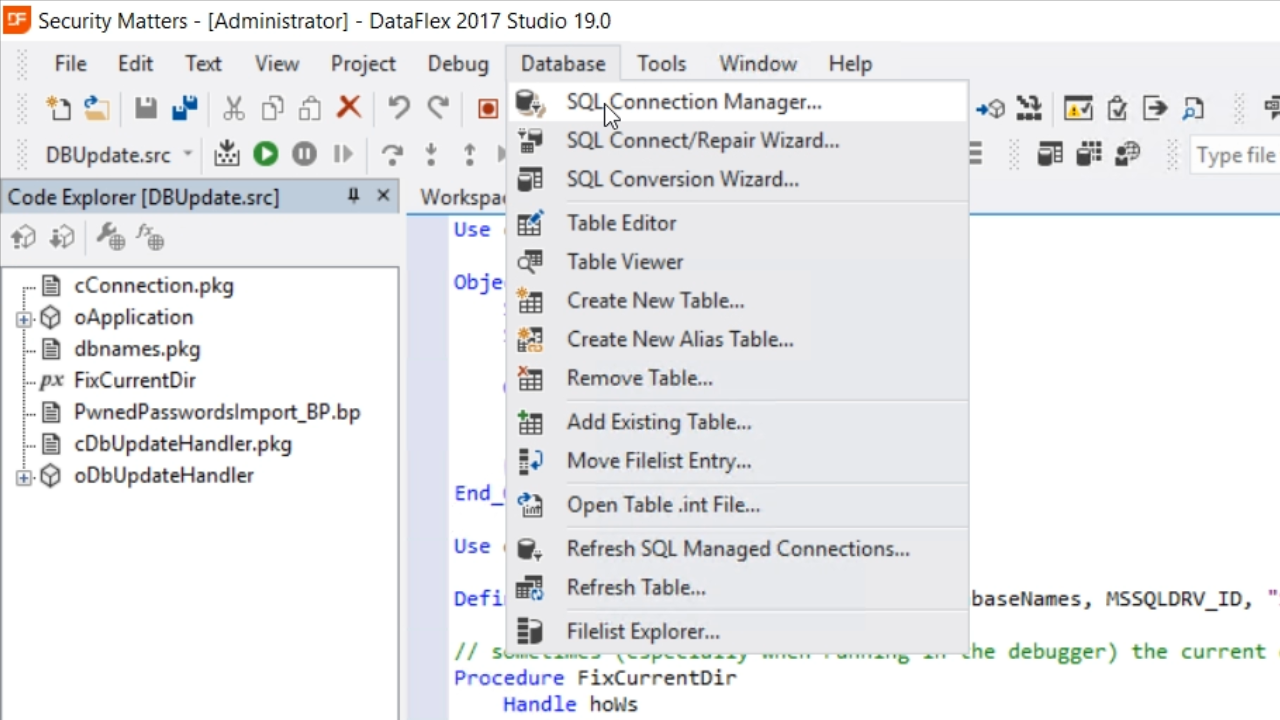
- From the Studio, select DATABASE from the top menu, and select SQL CONNECTION MANAGER
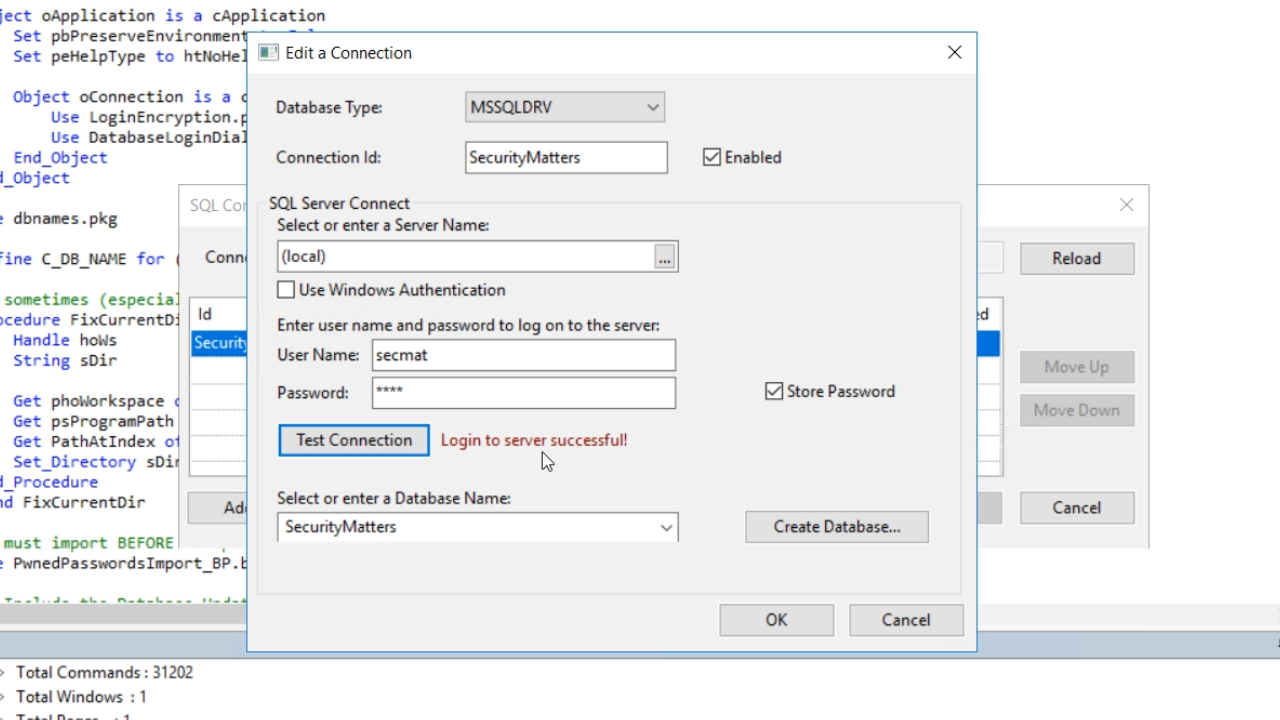
- Select the EDIT button.

- Uncheck the ‘Use Windows Authentication’ checkbox and enter the ‘User name’ and ‘Password’ that were recently created.
- Select the TEST CONNECTION button, and “Login to server successful!” should appear. Select OK, and then SAVE.
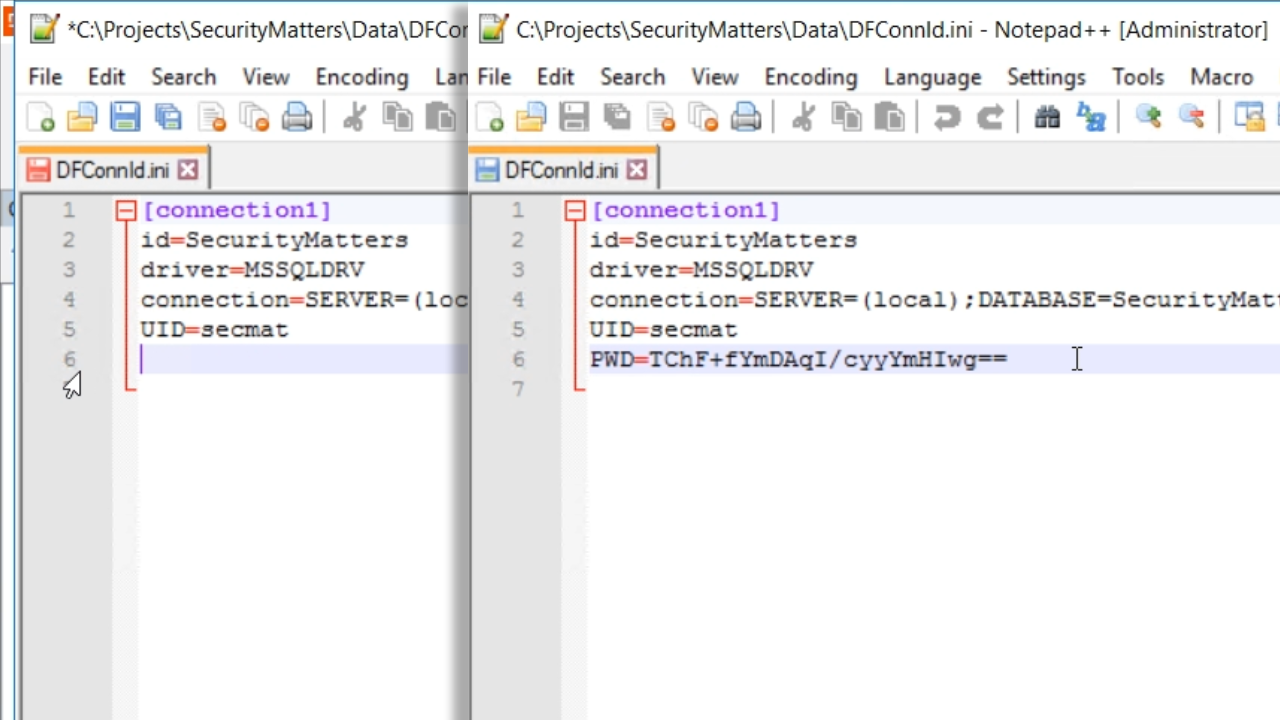
- Return to the text editor that has DFConnId.ini open, and notice that the file has changed.
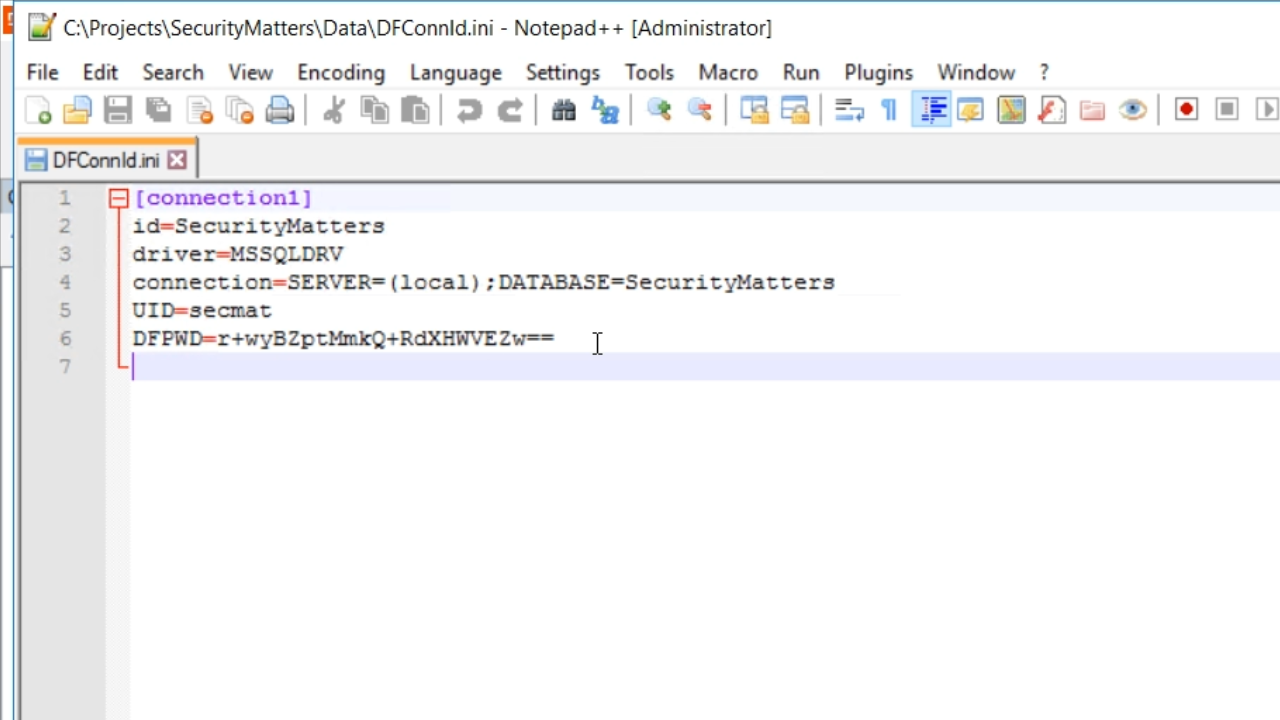
- UID=secmat
- DFPWD is something quite random that is the encrypted password used by the Studio, Database Explorer and Database Builder to connect to the database. This is not the password used by the program.
- To prove that the project does not have access to the database yet, try to run the DBUpdate program again.
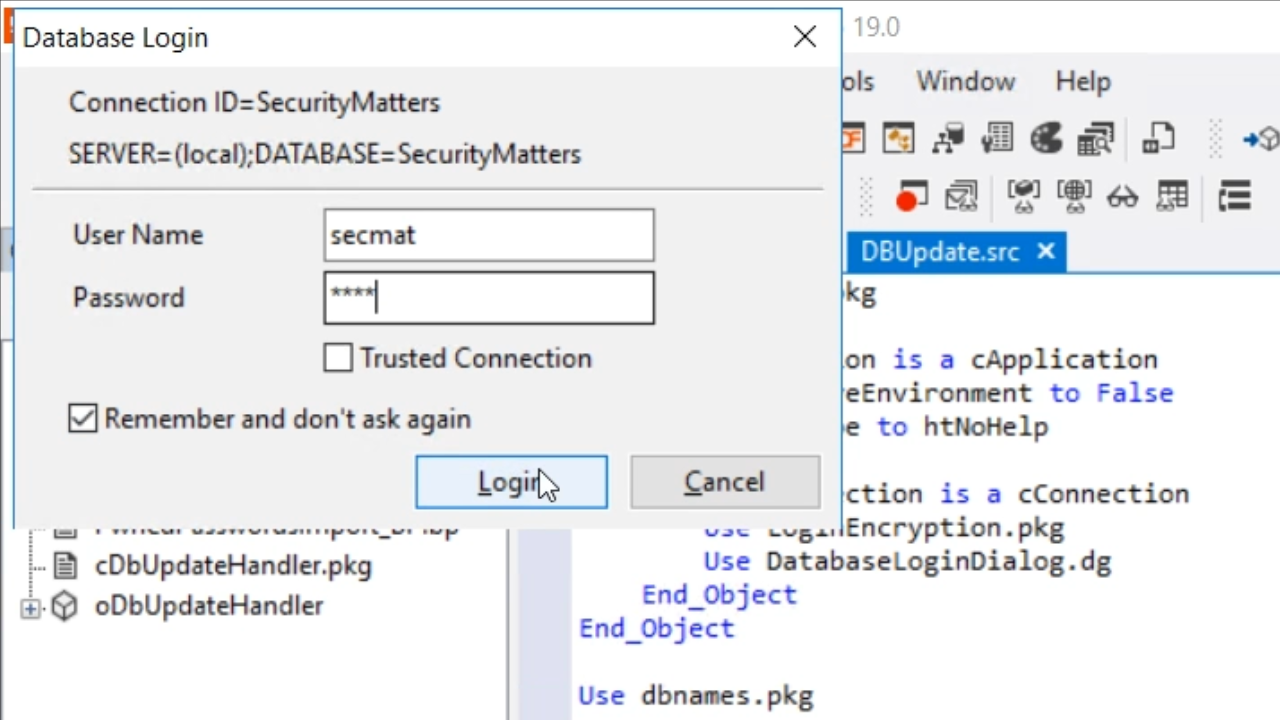
- There will be a prompt to enter a password as the “secmat” user. Entering the password, selecting for it to be remembered, and clicking LOGIN will once again change the DFConnId.ini file.
- DFConnId.ini file now shows PWD has been added with a different encrypted key.
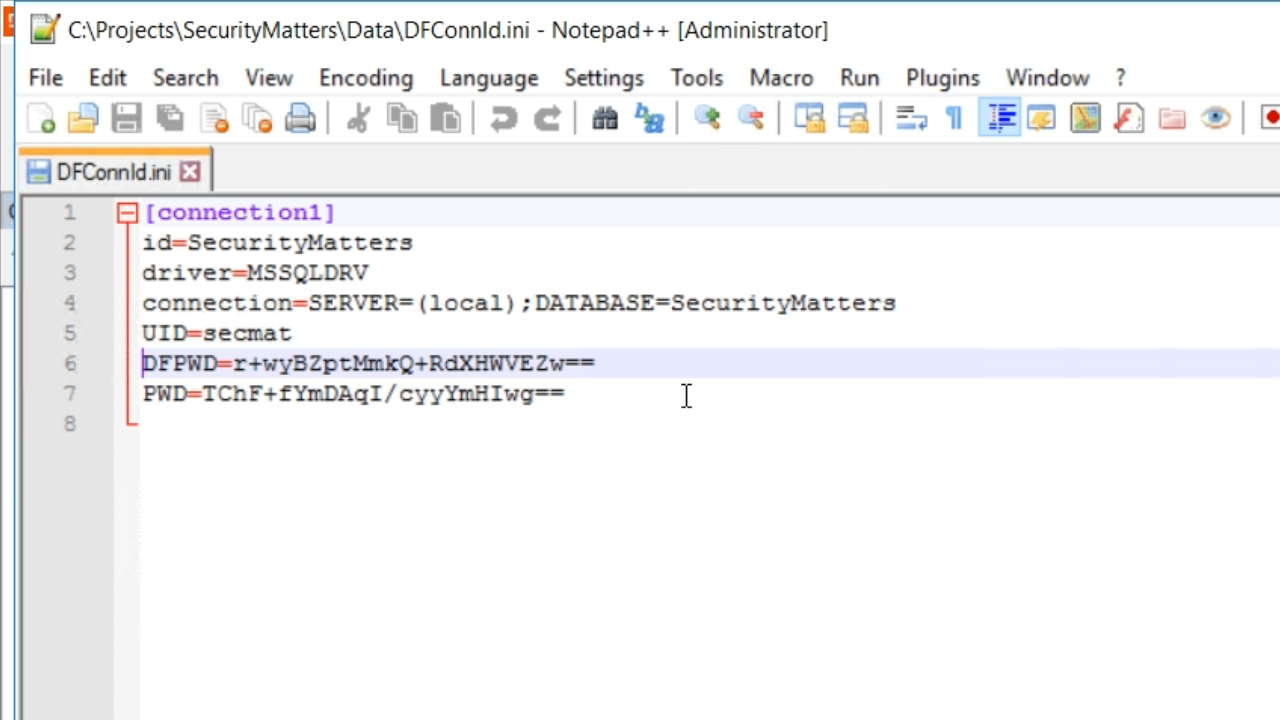
- The PWD line is used by the programs. The DFPWD is the line used by the Studio, Database Explorer and Database Builder.
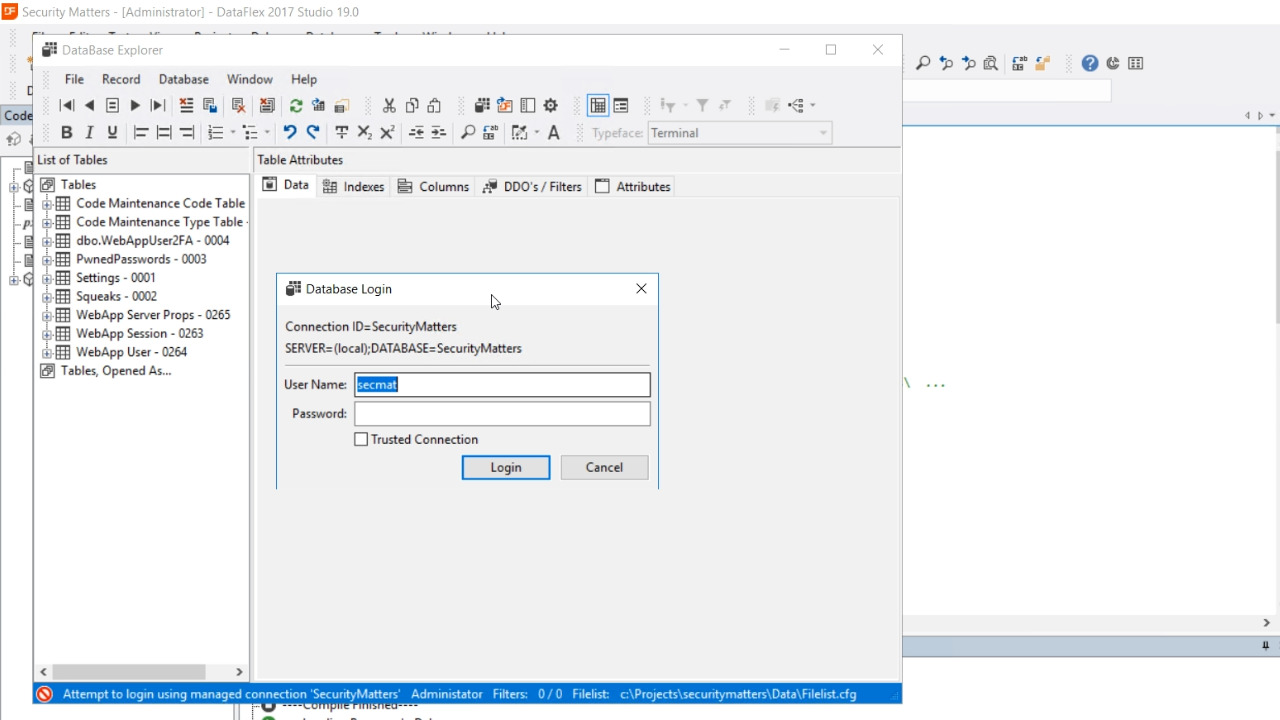
- If this line is removed from the .ini file, users will be prompted to enter the password if they try to access certain areas. For example, when opening the DataBase Explorer, a login prompt appears. It does not have an option for the password to be remembered. This is a security feature for deployment situations.
- Note: Make sure to remove the DFPWD line from the DFConnId.ini file prior to deploying an application.
- A web app does not have a user interface, so it cannot prompt a user for a password. Therefore, a new project type was added in DataFlex 19.0.
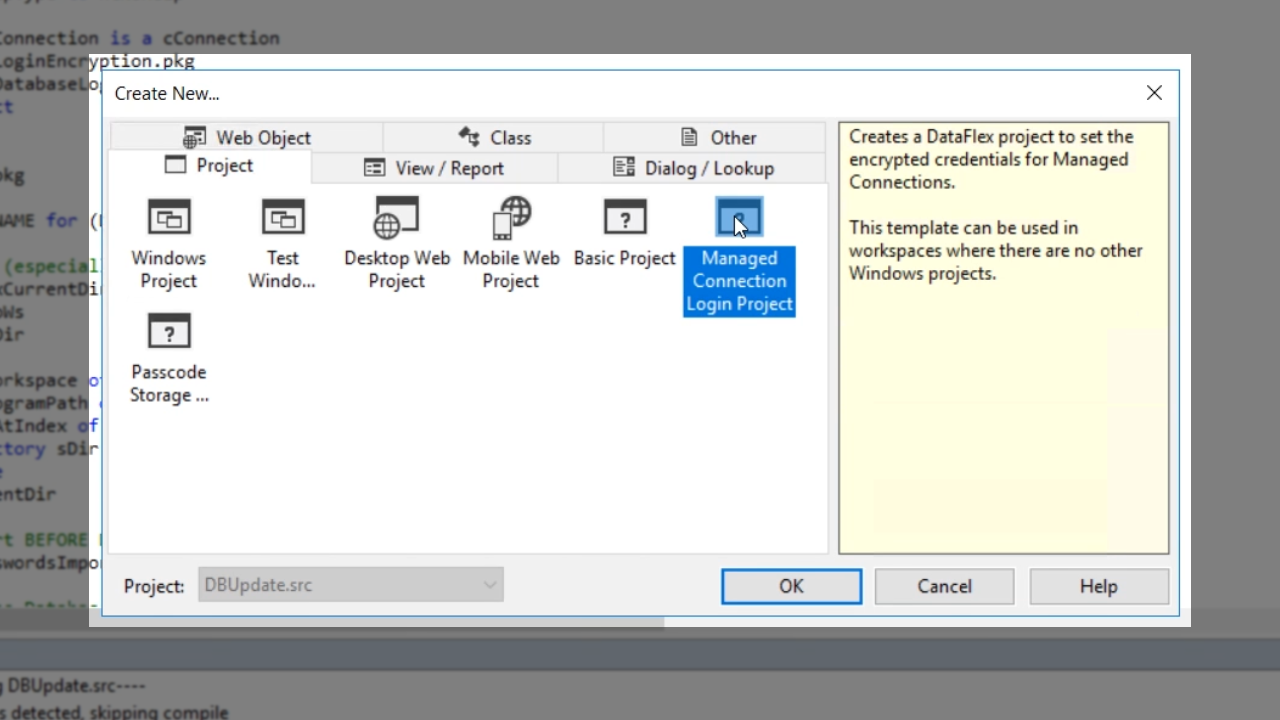
- From FILE in the top menu, select NEW > PROJECT.
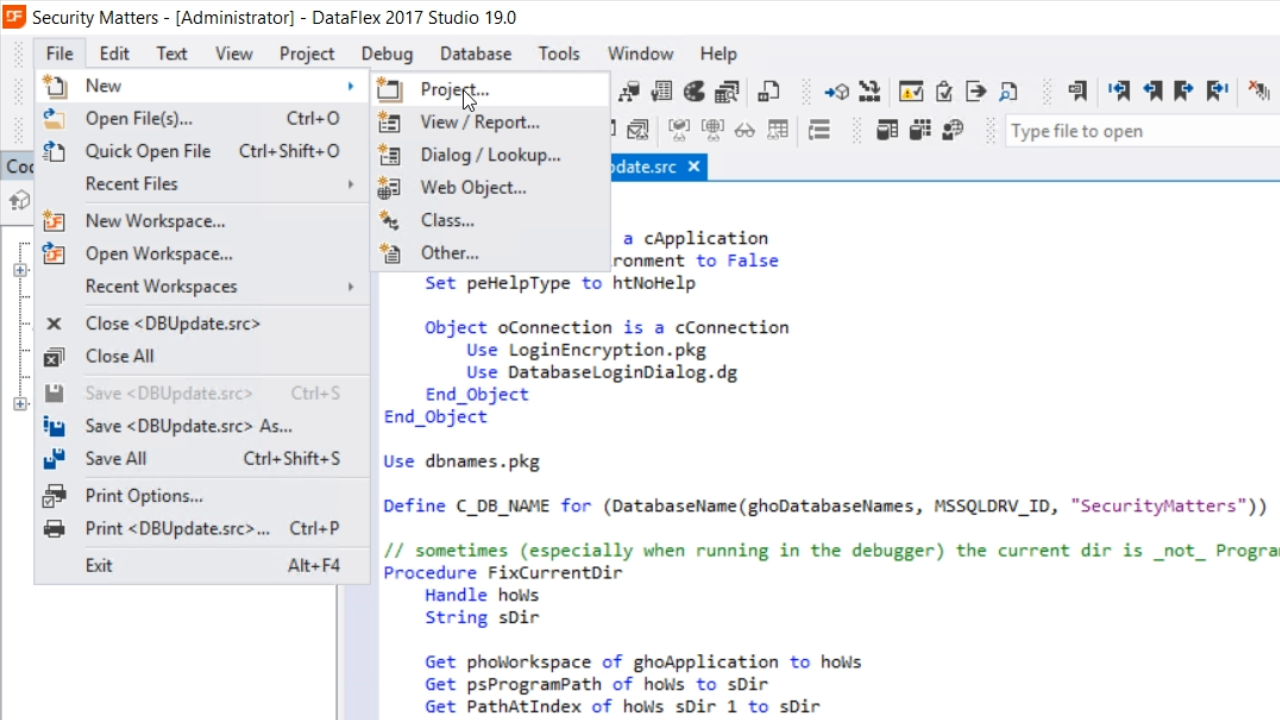
- Select ‘Managed Connection Login Project’ and press OK.
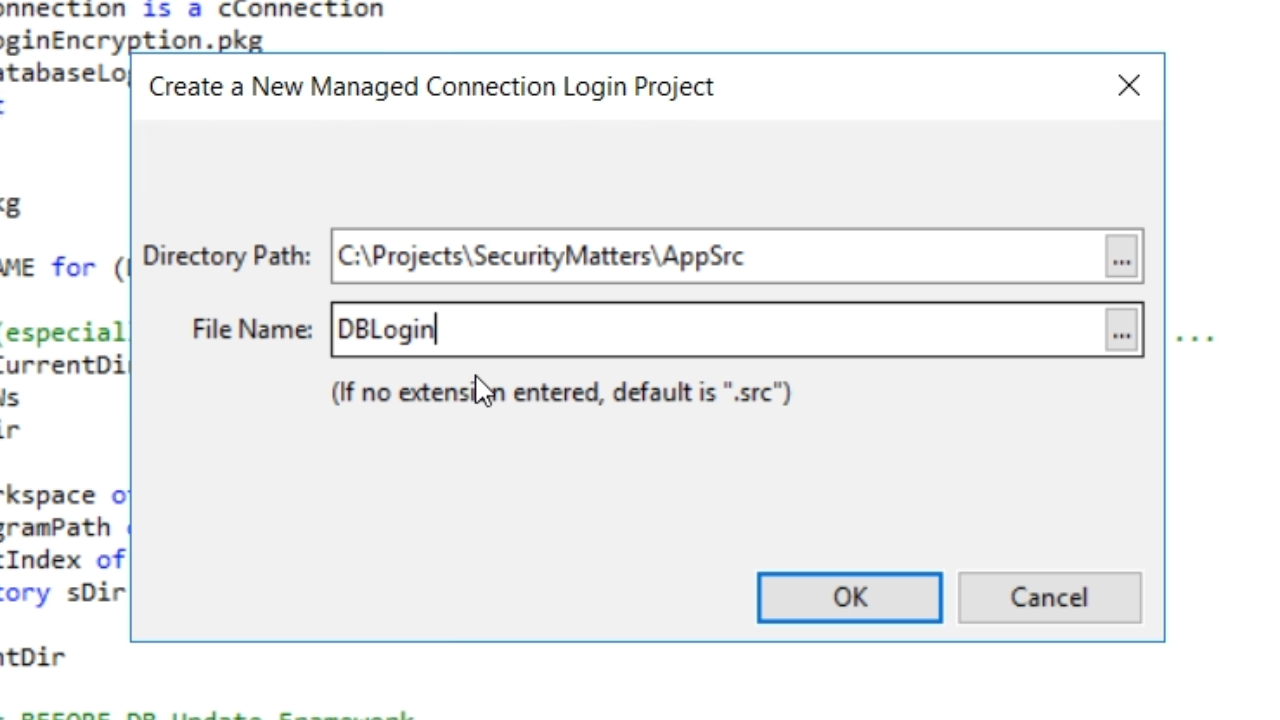
- Enter a ‘File name’ and press OK.
- Press F5 to run it and press OK on the next window.
- Remove the PWD line from the DFConnId.ini file.
- Run it again, and a window appears prompting for the password with the option to remember it. Select OK on the next window.
- Returning to the DFConnId.ini file shows that a PWD line has reappeared. The login password is now encrypted, and users will not be able to retrieve it. All access to the database is now forced through the applications.