Security the Basics
Lesson 4: Data in transit - https (Web)
This lesson will focus on making sure that data being transferred across the internet is only available to your application using HTTPS. HTTPS is very important because it encrypts the data.
- Open the IIS Manage
- Select the desired machine from the ‘Connections’ panel on the left
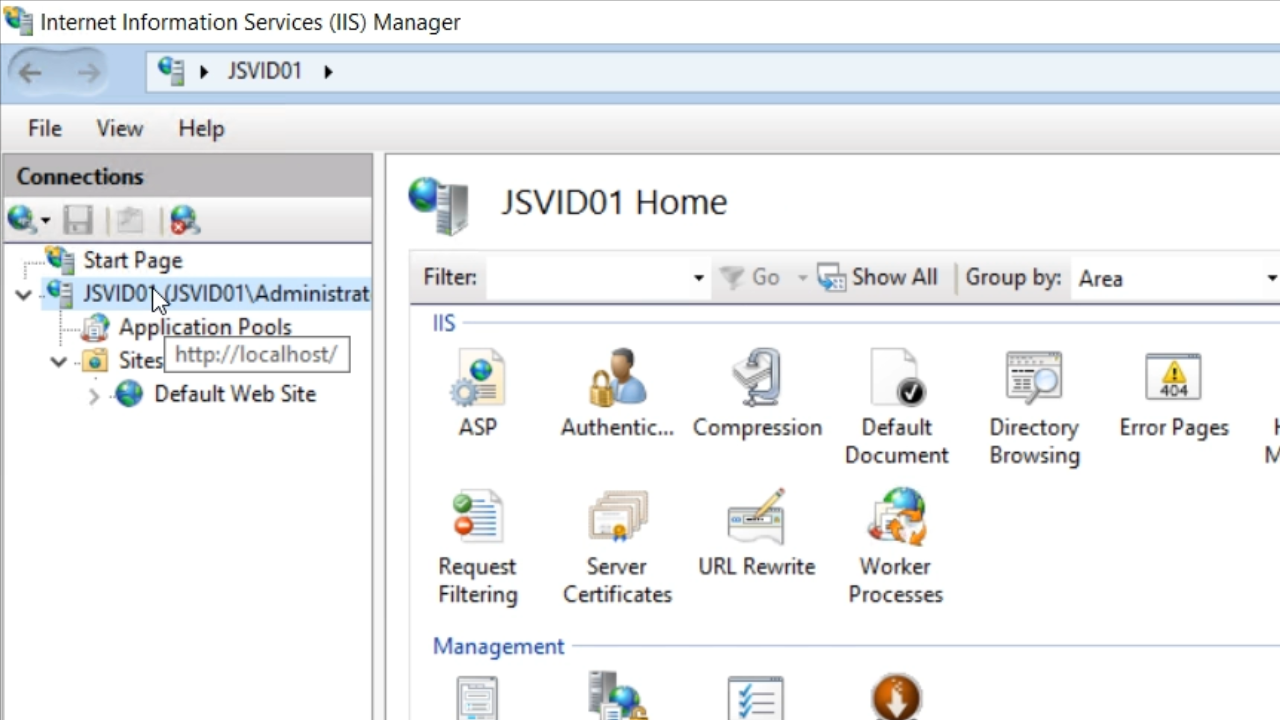
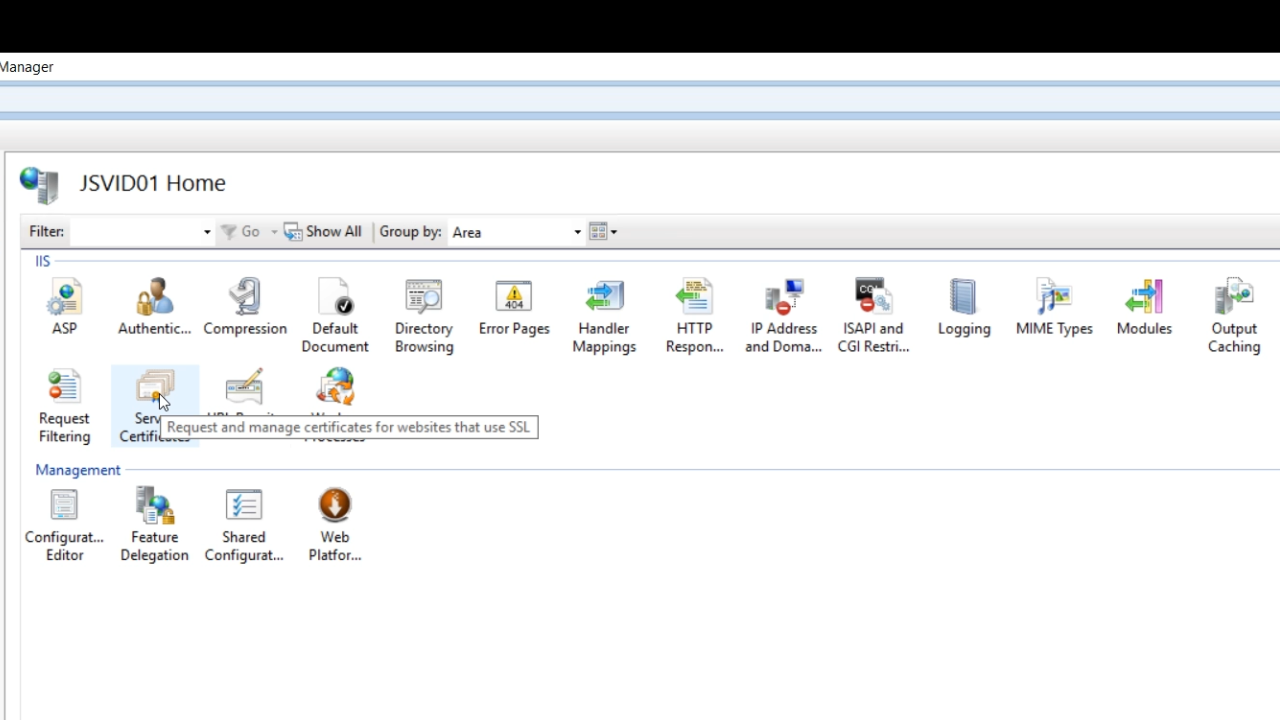
- Select ‘Server Certificates’ from the IIS section in the center.
- Click on ‘Create Self-Signed Certificate’ from the ‘Actions’ panel on the right.
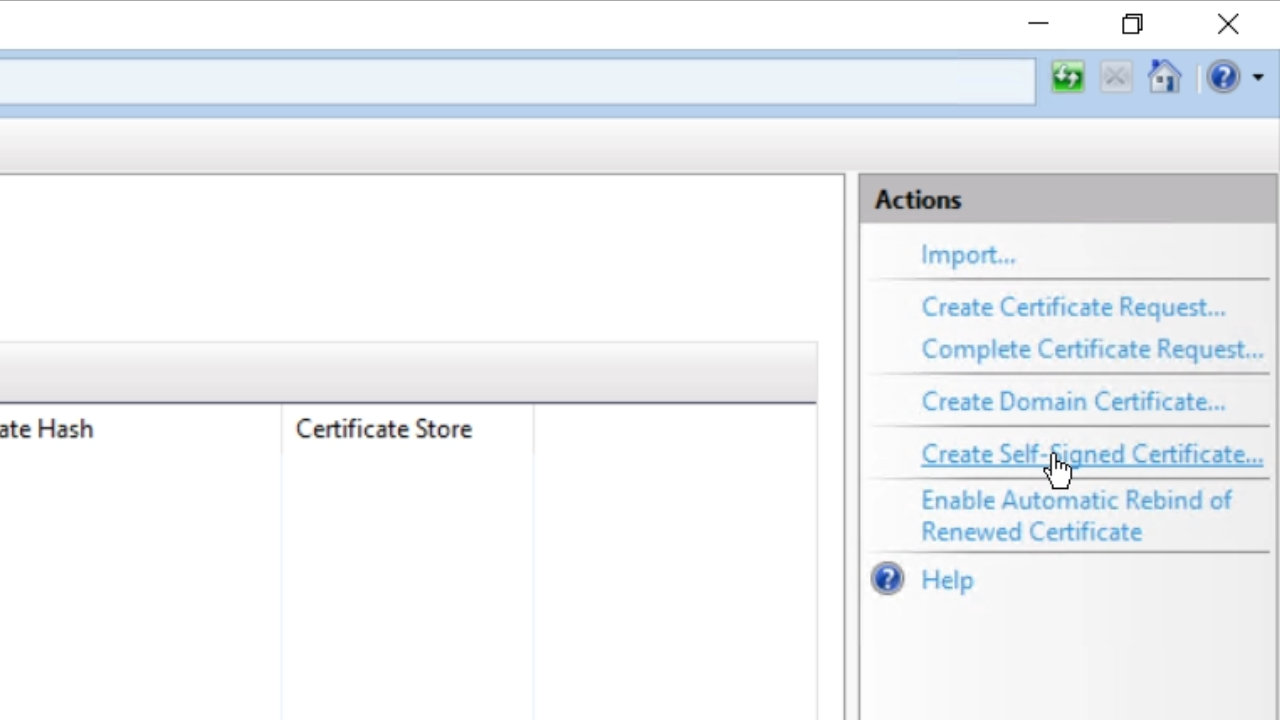
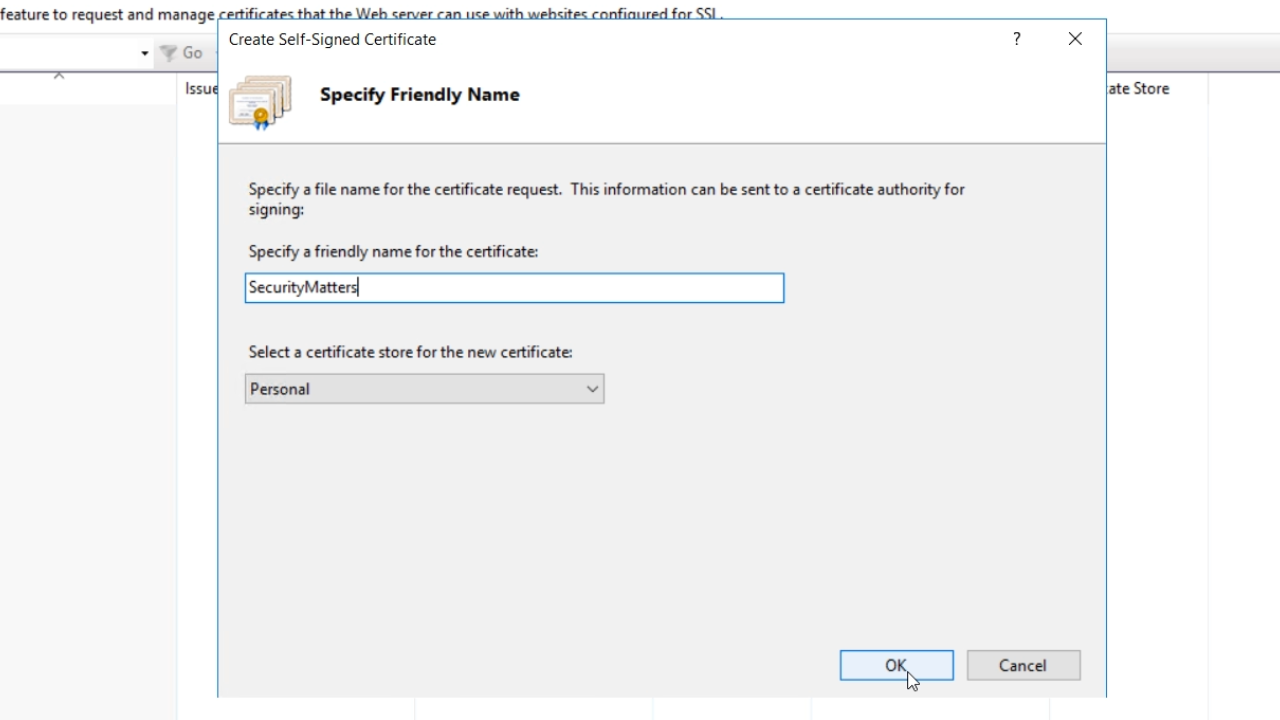
- Enter a name in the ‘Specify a friendly name for the certificate’ field. Press OK.
- Note: This certificate is just meant for testing. It is not meant for deployment.
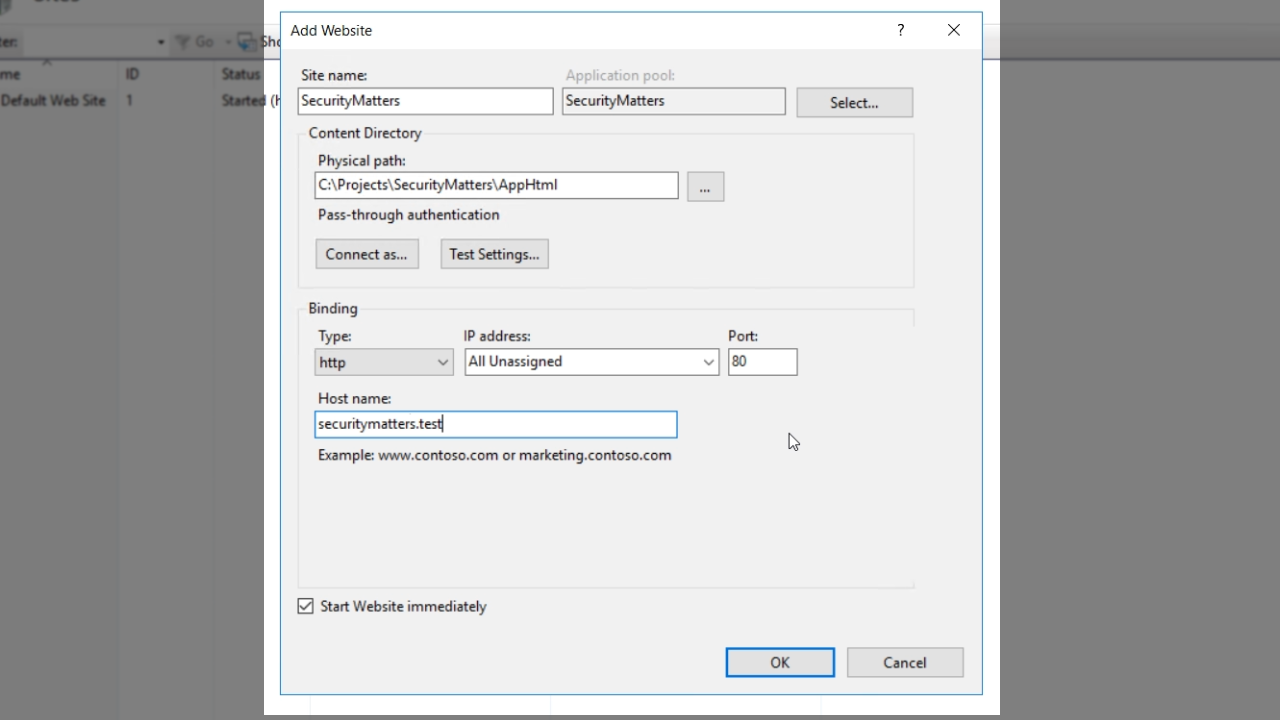
- Right click on ‘Sites’ from the ‘Connections’ panel on the left and select ‘Add Website.’
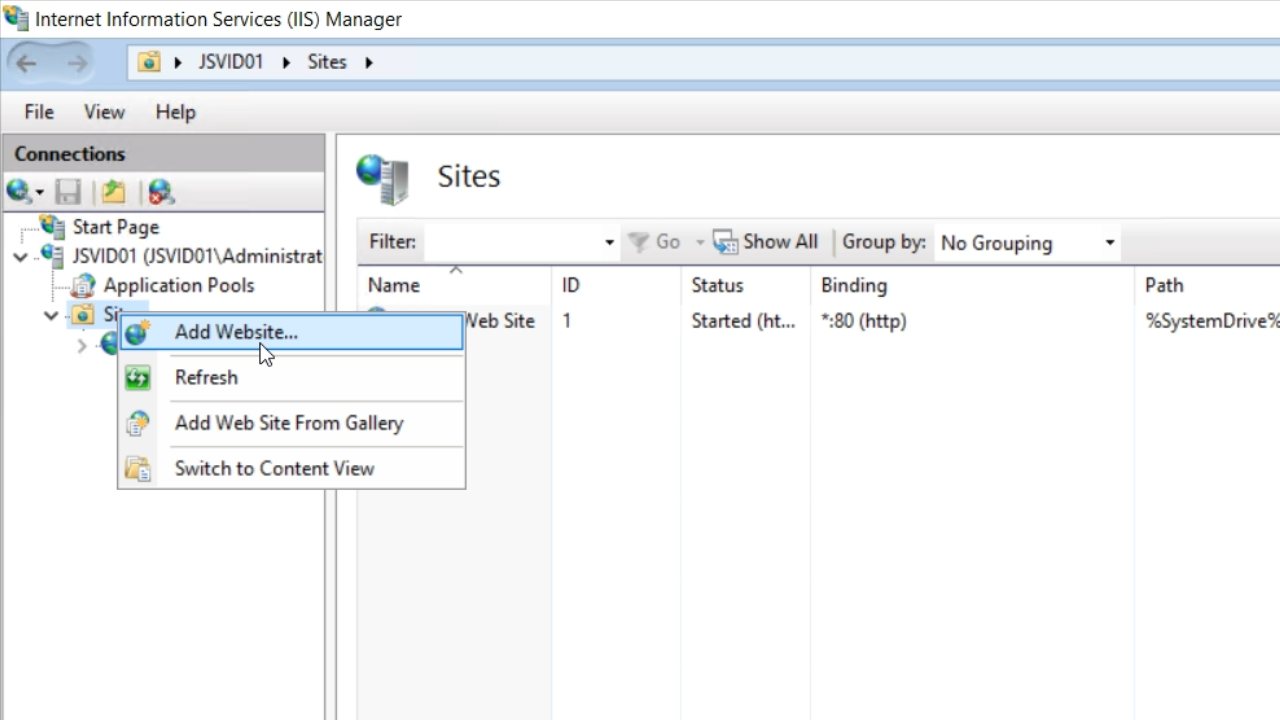
- Add a ‘Site name’
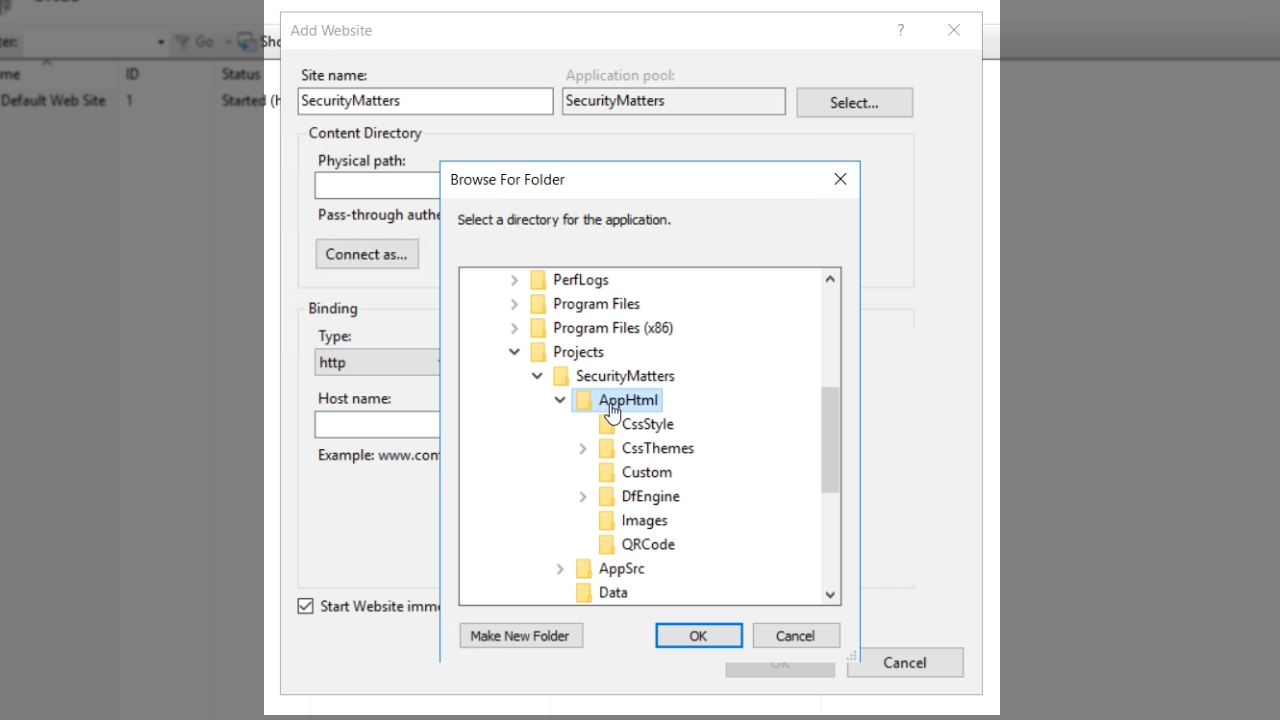
- Select the ‘Physical path,’ which is the ‘AppHtml’ folder in the workspace.
- Create a binding meaning that the website will be available on this particular binding. The first will be ‘http.’ Enter a fake ‘Host name.’ “securitymatters.test” is used in this example. The .test domain extension is unique, and specifically for testing purposes.
- Click OK
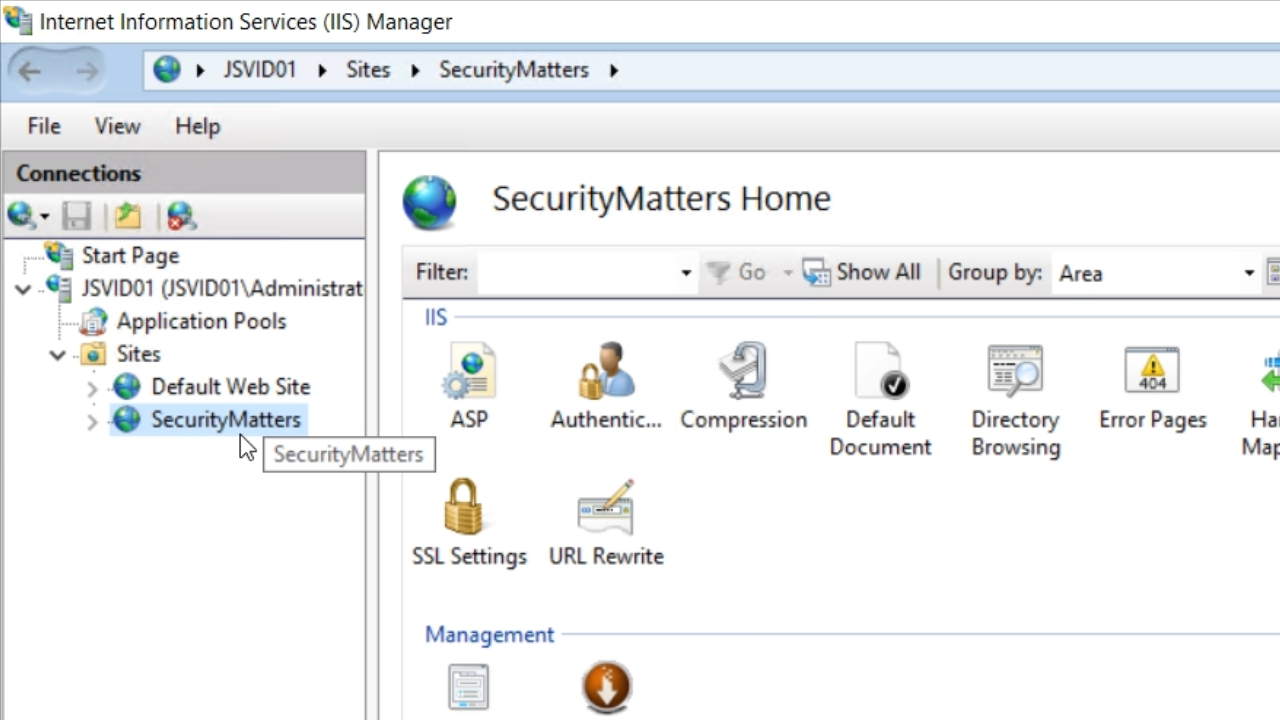
- Select the new website from the ‘Connections’ panel on the left, and then click on ‘Bindings’ in the ‘Action’ panel on the right.
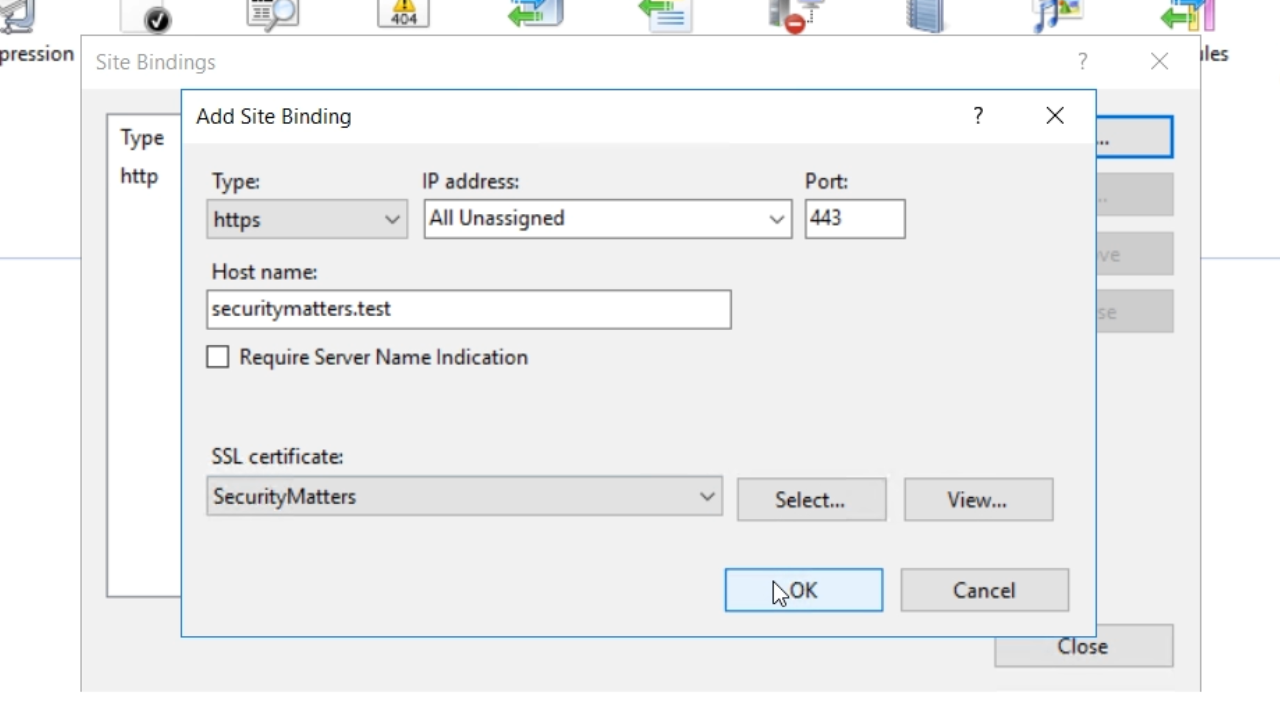
- Click the ADD button in the ‘Site Bindings’ window
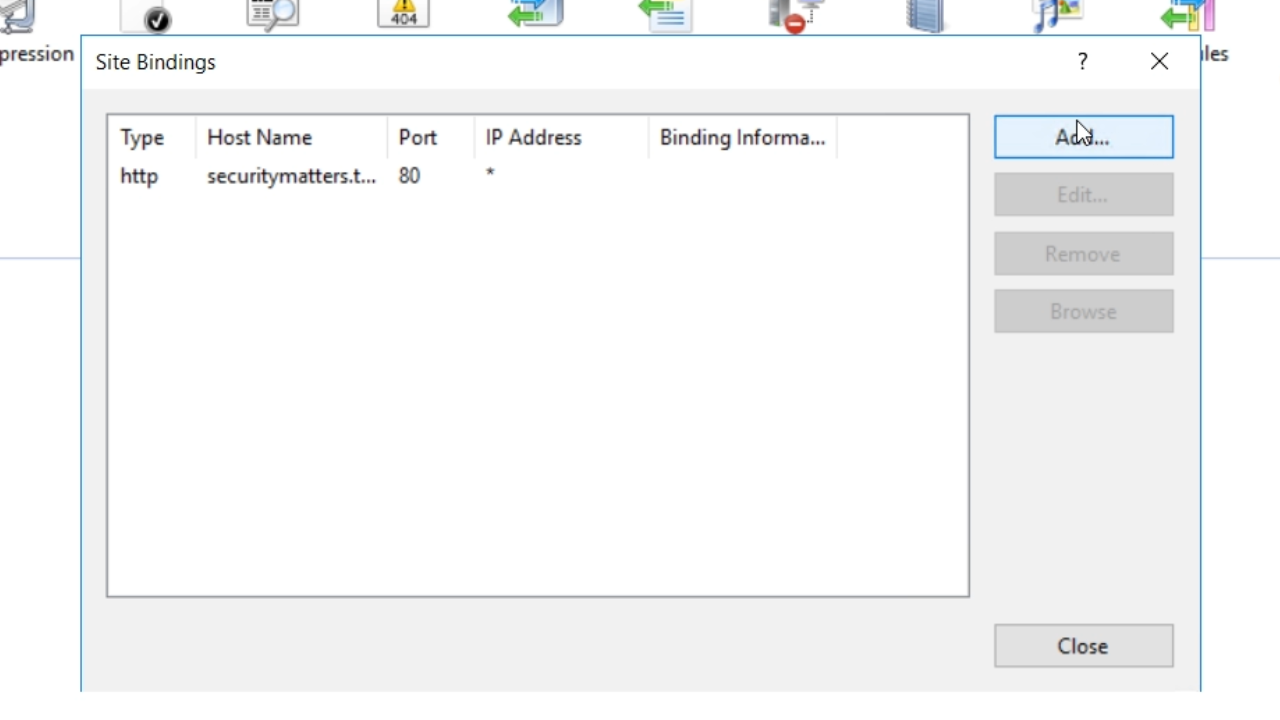
- From the ‘Type’ drop down choose ‘https’
- Enter the same host name previously used – securitymatters.test
- From the ‘SSL certificate’ dropdown choose certificate that previously created and press OK
- Select CLOSE
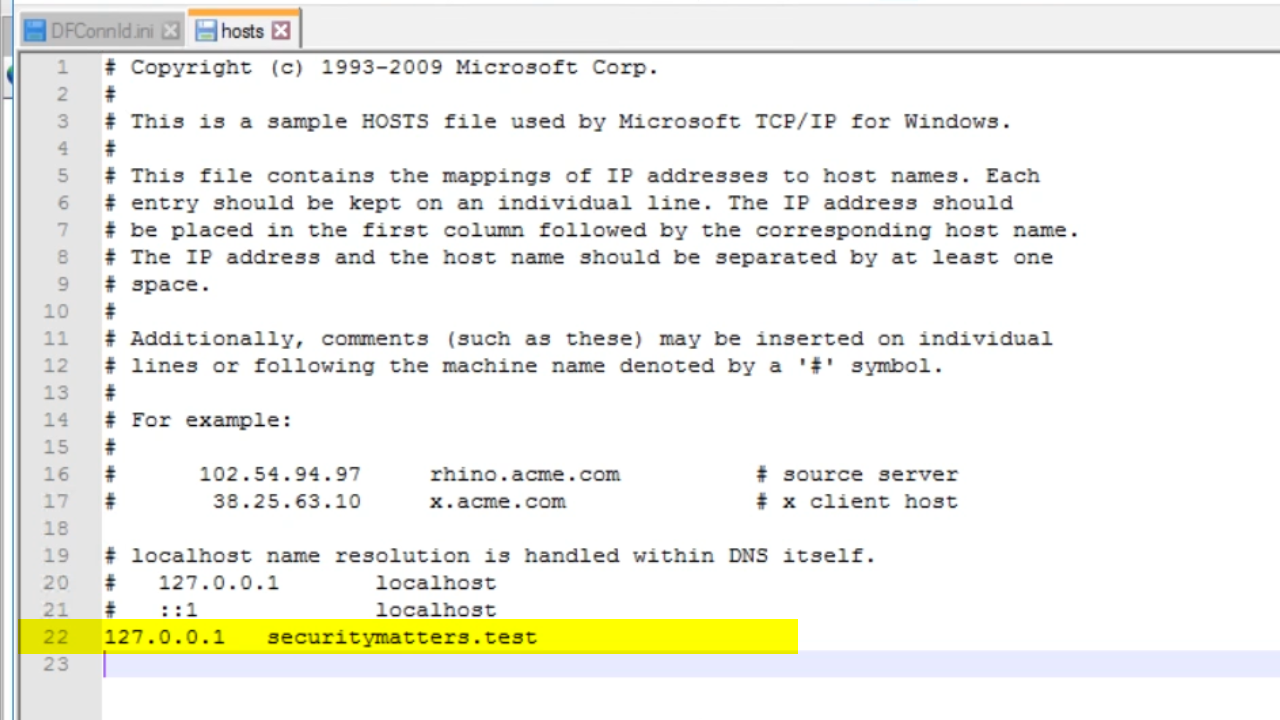
- The fake host name is not known by the computer or by the browser. The host file needs to be edited, so that Windows knows what to do with it. The host file is used to map local host to the local machine, but it will also now be used for this deployment
- Open a text editor as an administrator.
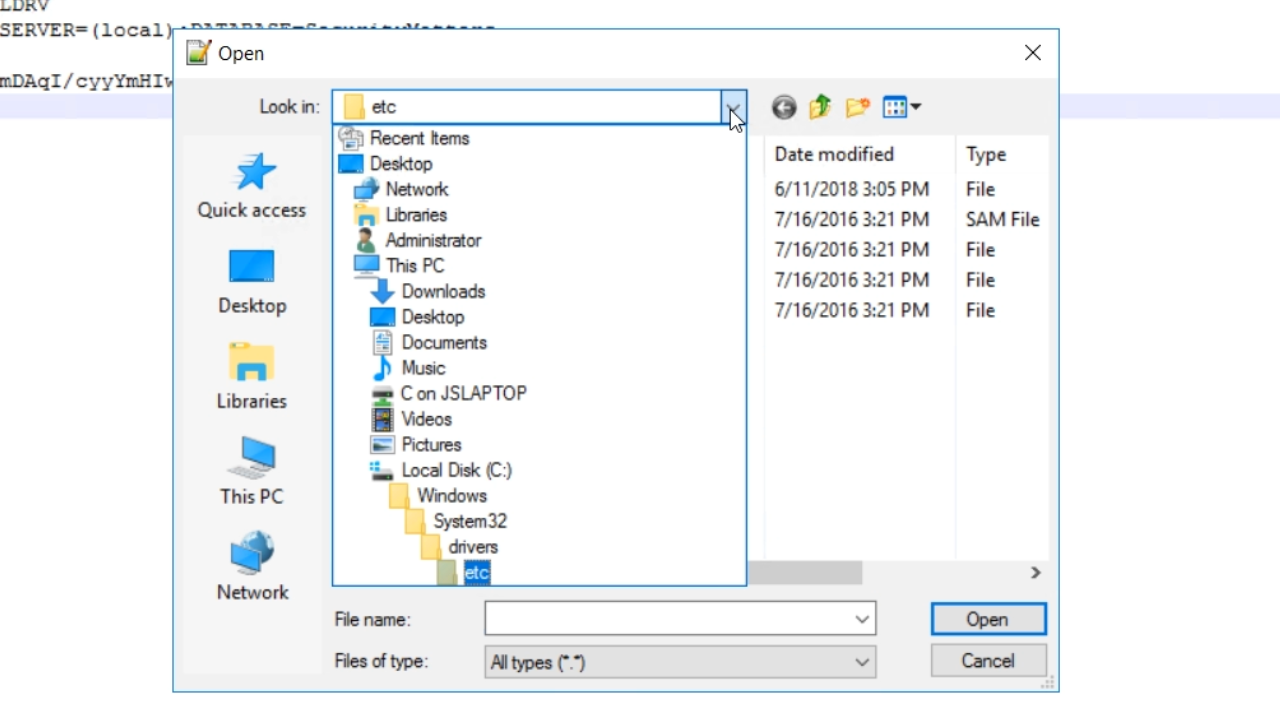
- Open the host file from >> C:\Windows\System32\drivers\etc
- If the ‘etc’ directory is not visible, enter “etc” in the ‘File name’ field to open it
- In the host file, write enter the local IP address, tab over, enter the new URL, (securitymatters.test), and then save the file
- 127.0.0.1 securitymatters.test
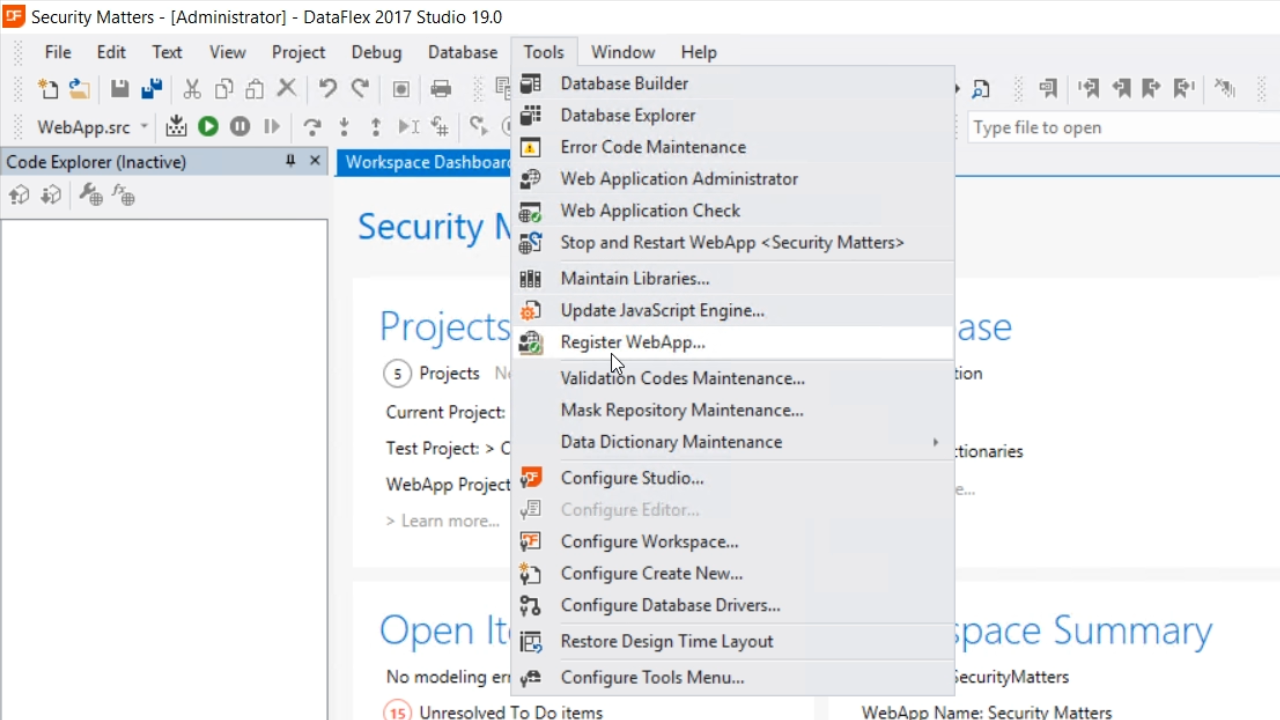
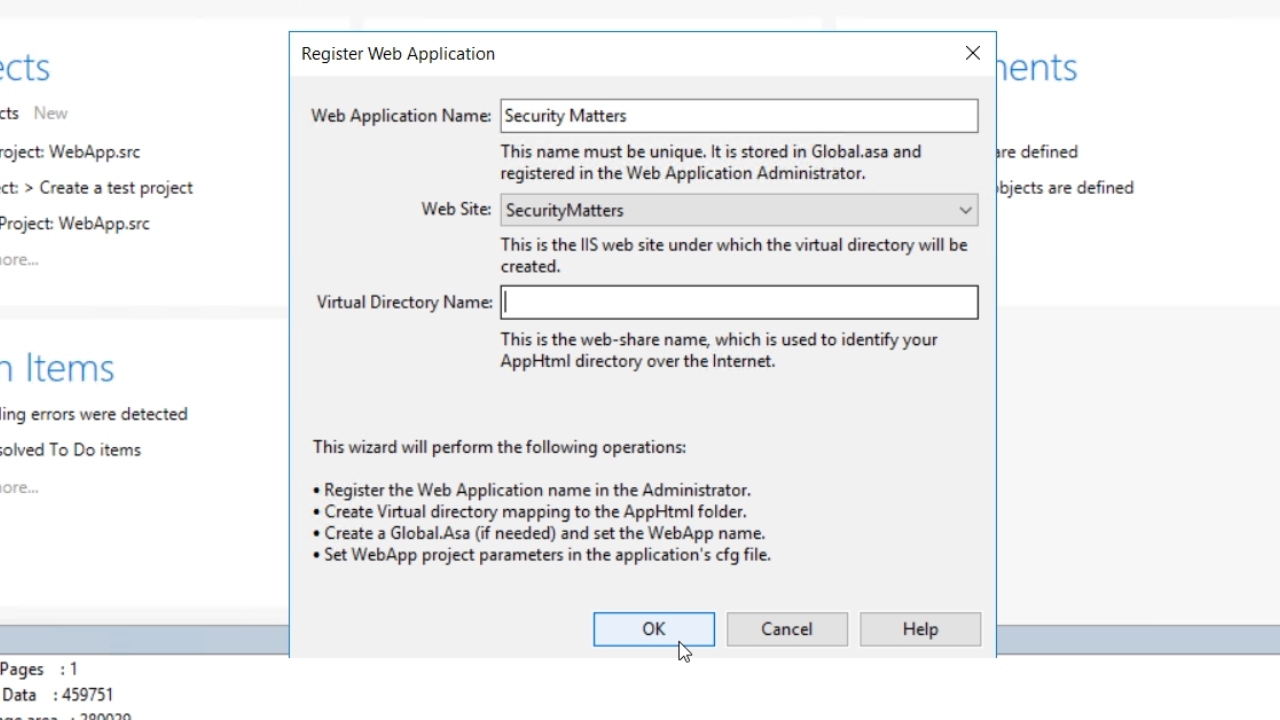
- To register the WebApp, go to the DataFlex Studio
- Select TOOLS from the top menu and select ‘Register WebApp’
- The web application name should be automatically entered
- Select the correct website from the ‘Web Site’ drop down
- The ‘Virtual Directory Name’ field can be left blank
- Click OK
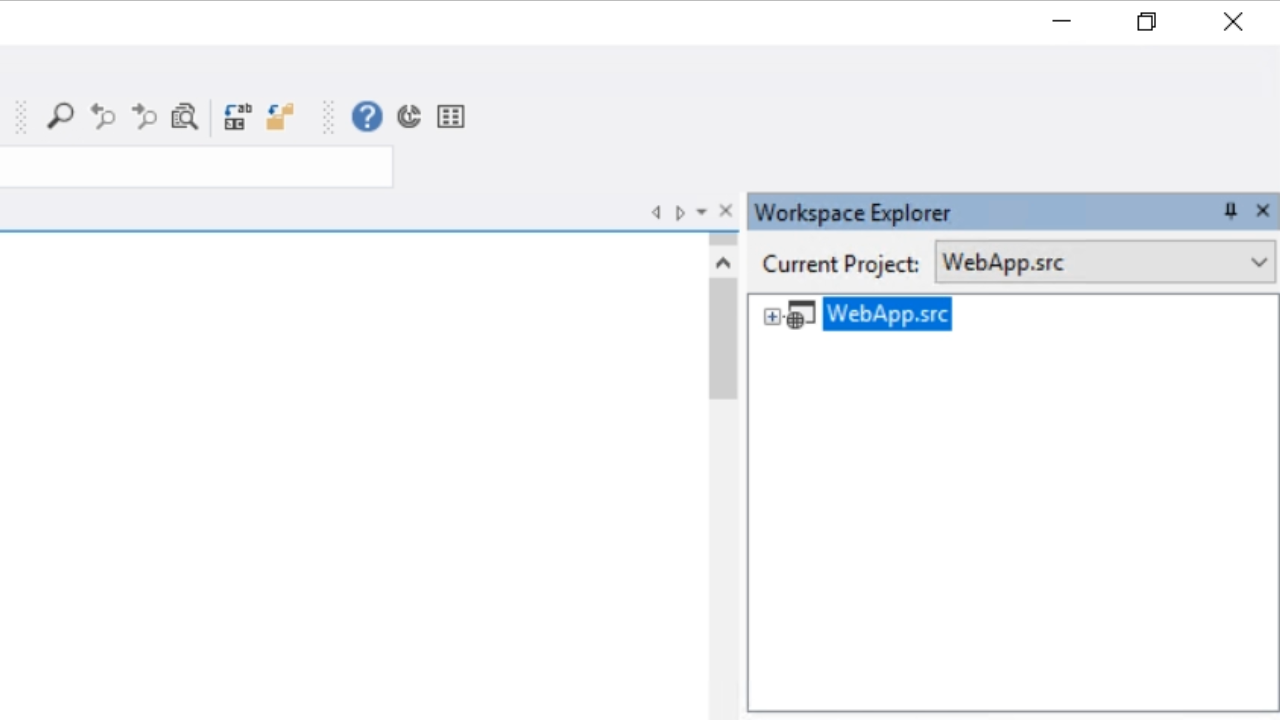
- Open the WebApp by double clicking on its name in the ‘Workspace Explorer’ on the right
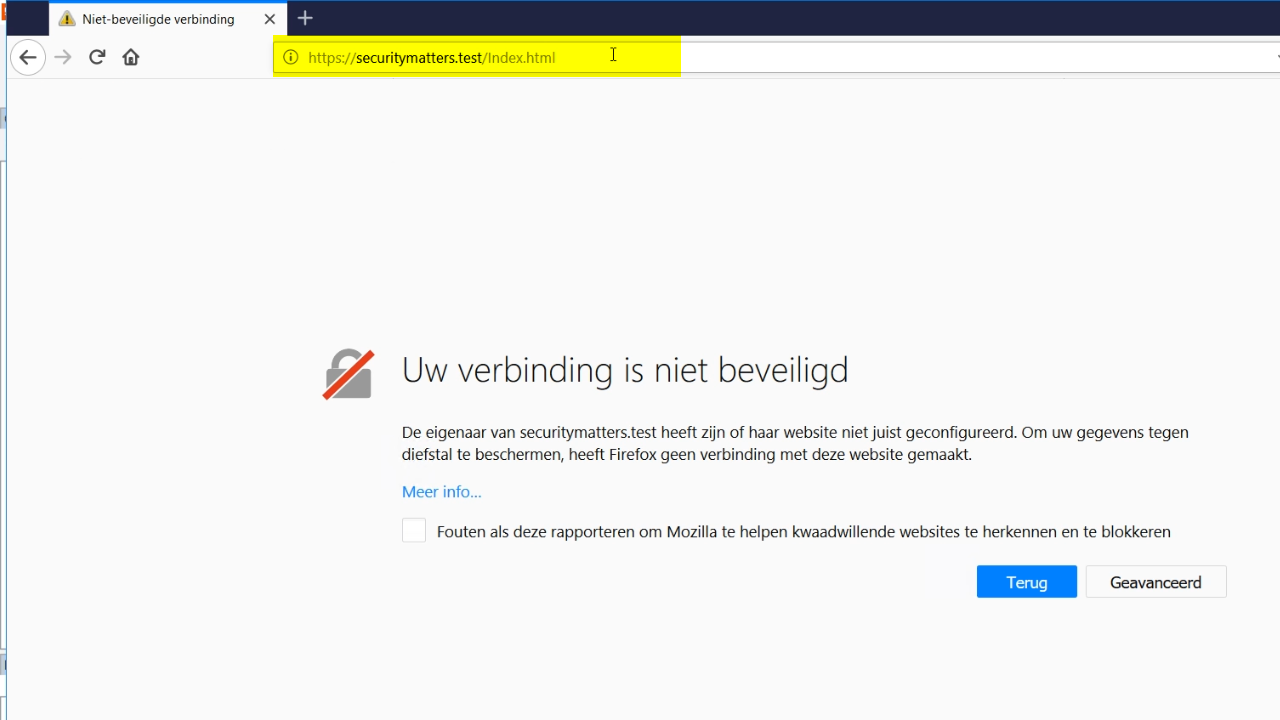
- Press F5 to run it, and the application should properly open in a browser via HTTP.

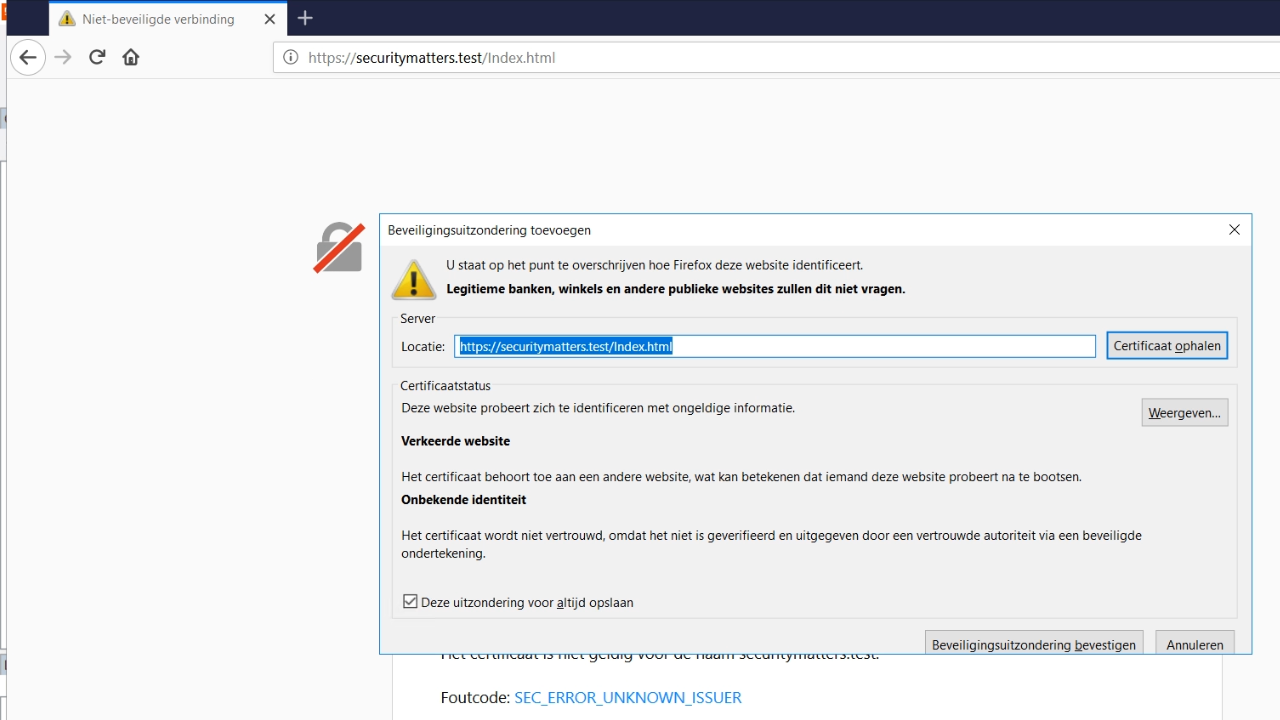
- If HTTPS is explicitly added to the front of the URL, a warning page appears stating that the site is not secure. This is a result of having a self-assigned certificate.
- Depending on the browser, the site can be added as a security exception.
- Once done, the app will be running on HTTPS
Demonstration - session hijacking
Session hijacking is when someone’s unique login session details are intercepted and used from another computer allowing a malicious user to have the rights of person from which the details were stolen.
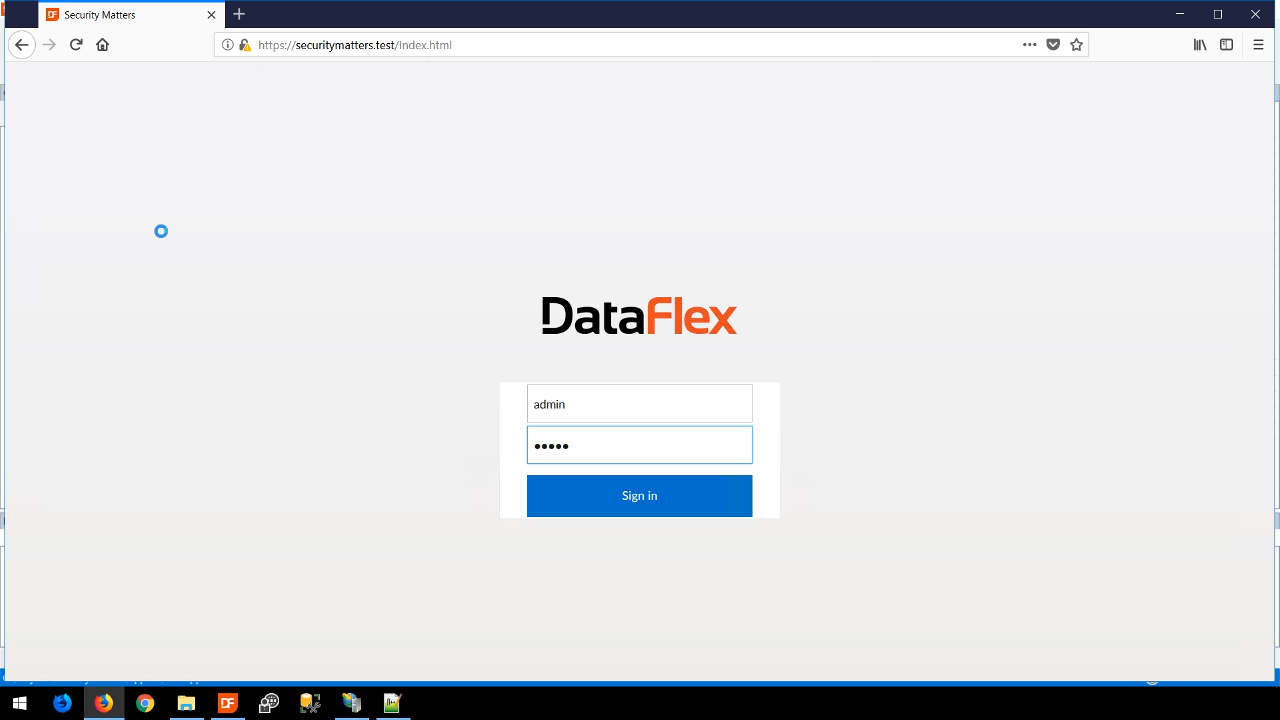
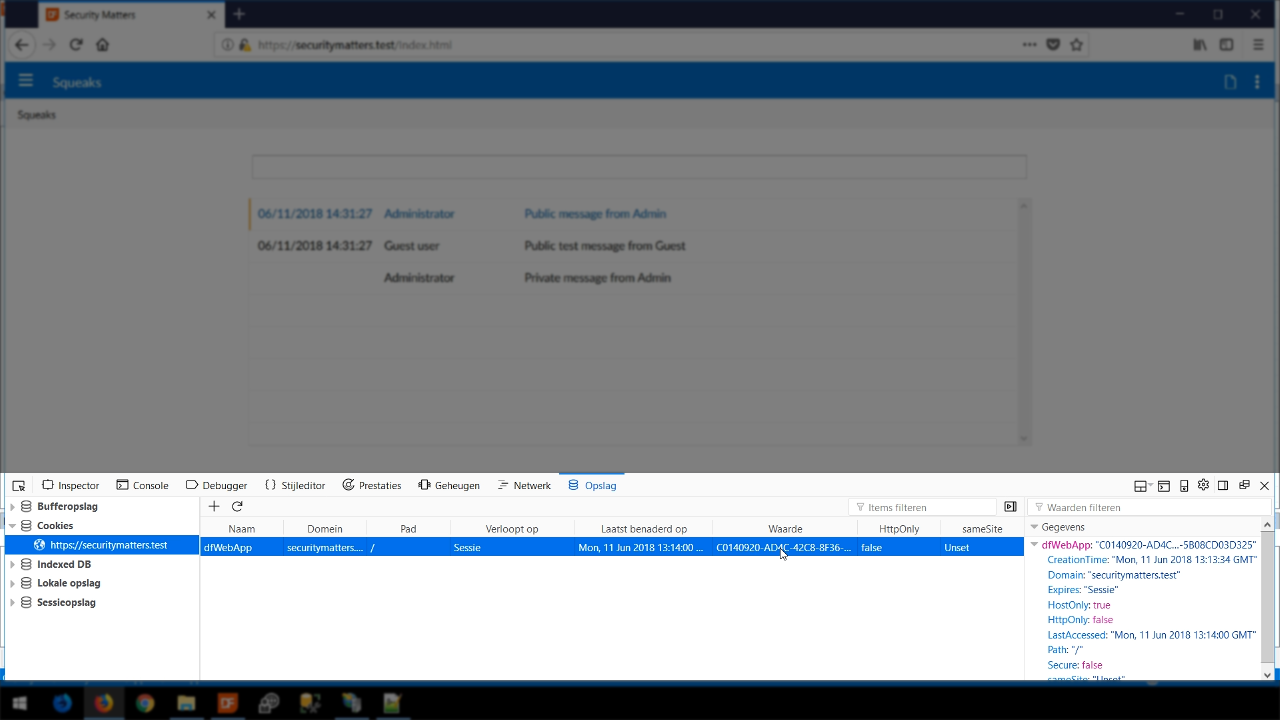
- To show this, from Firefox the WebApp is logged into using an administrator’s login credentials.
- Pressing F12 opens the development tools panel. A dfWebApp cookie is shown that contains a value of the logged in session.
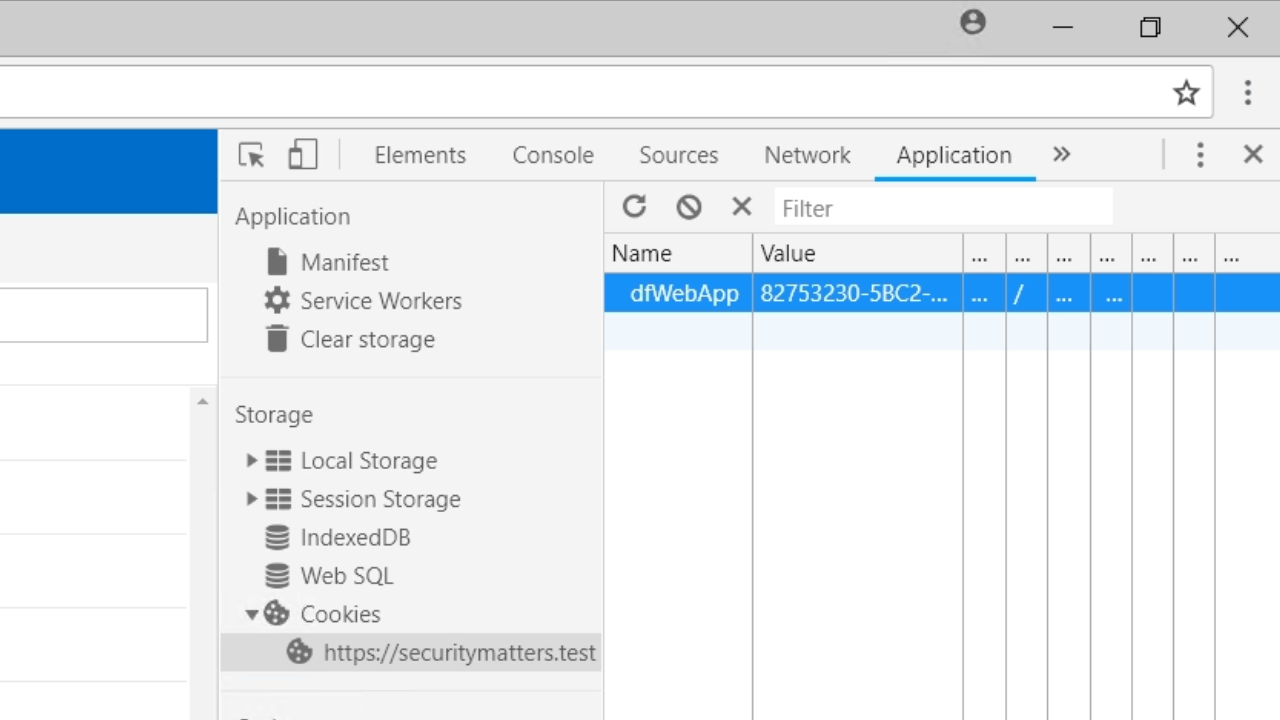
- Opening Chrome to the same website, pressing F12 to open the developer’s tools, and viewing the cookies shows a dfWebApp cookie with a different value. Note, this is currently NOT a logged in session.
- Copying the session cookie value from the logged in session in Firefox, pasting it into the cookie value field in Chrome, and then refreshing Chrome now shows the WebApp as if the user is the logged in administrator.
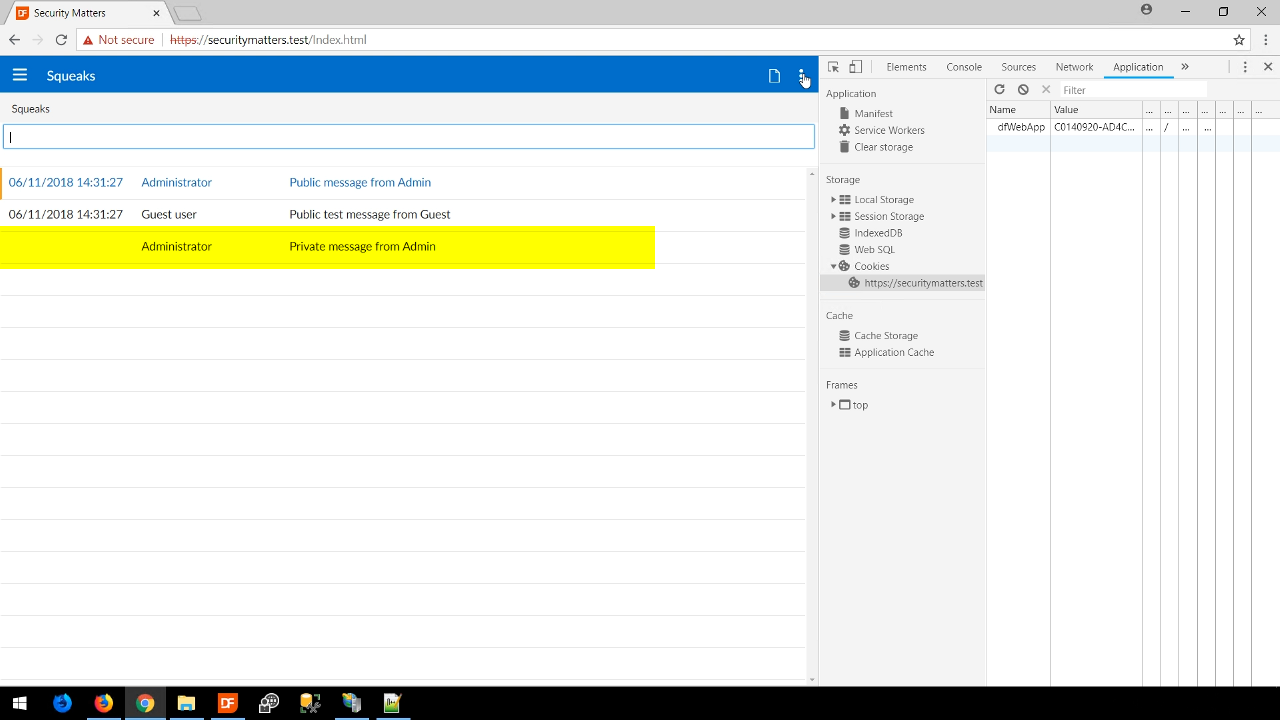
- This is one of the dangers of not using HTTPS.
- Two other risks; invalid JavaScript accessing the session details, and the session ID being leaked because the website can currently be accessed via HTTP.
- To correct these risks, open the DataFlex Studio…
- Stop the debugger by pressing the ‘stop’ icon from the top toolbar
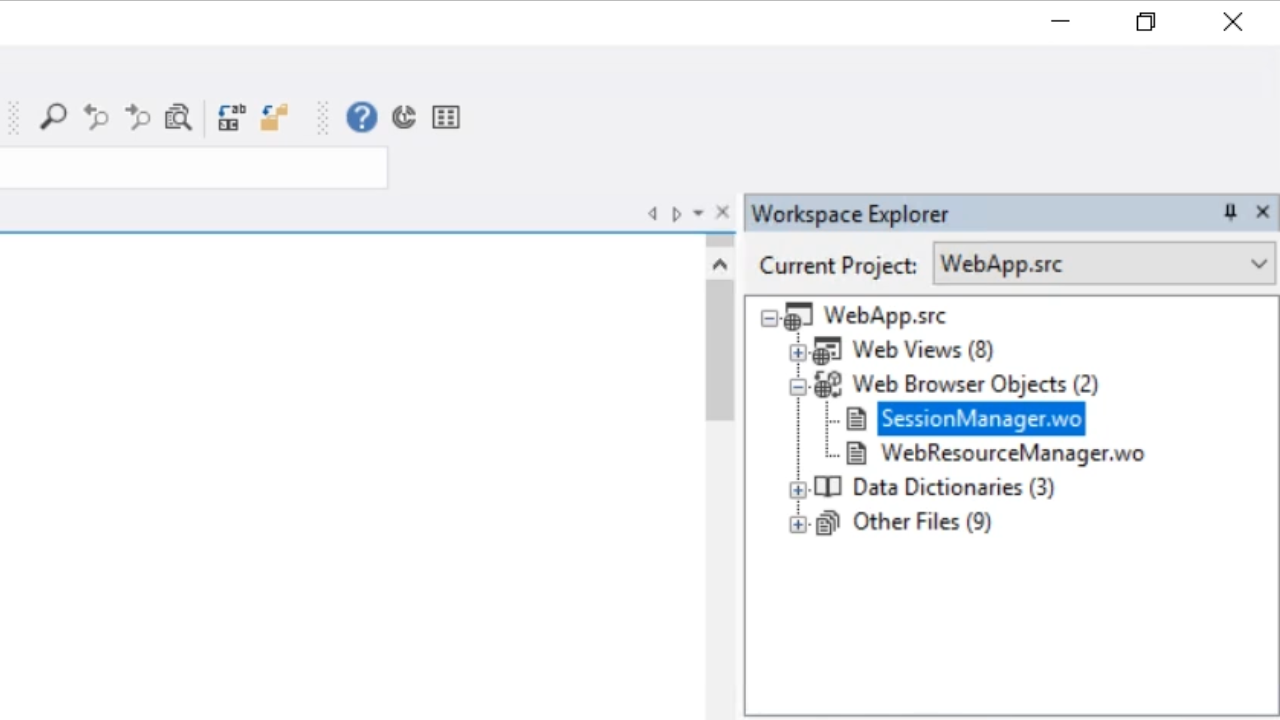
- In the ‘Workspace Explorer’ panel on the right expand ‘WebApp.src,’ and ‘Web Browser Objects,’ and double click on ‘SessionManager.wo’
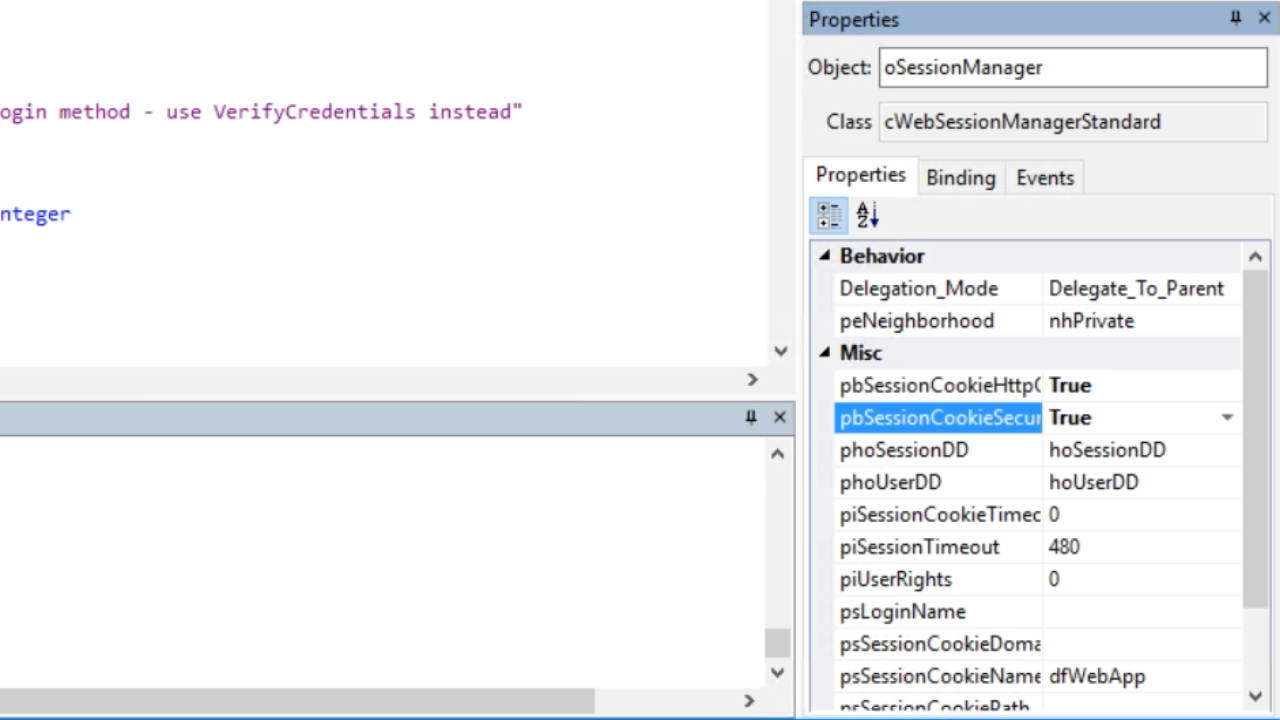
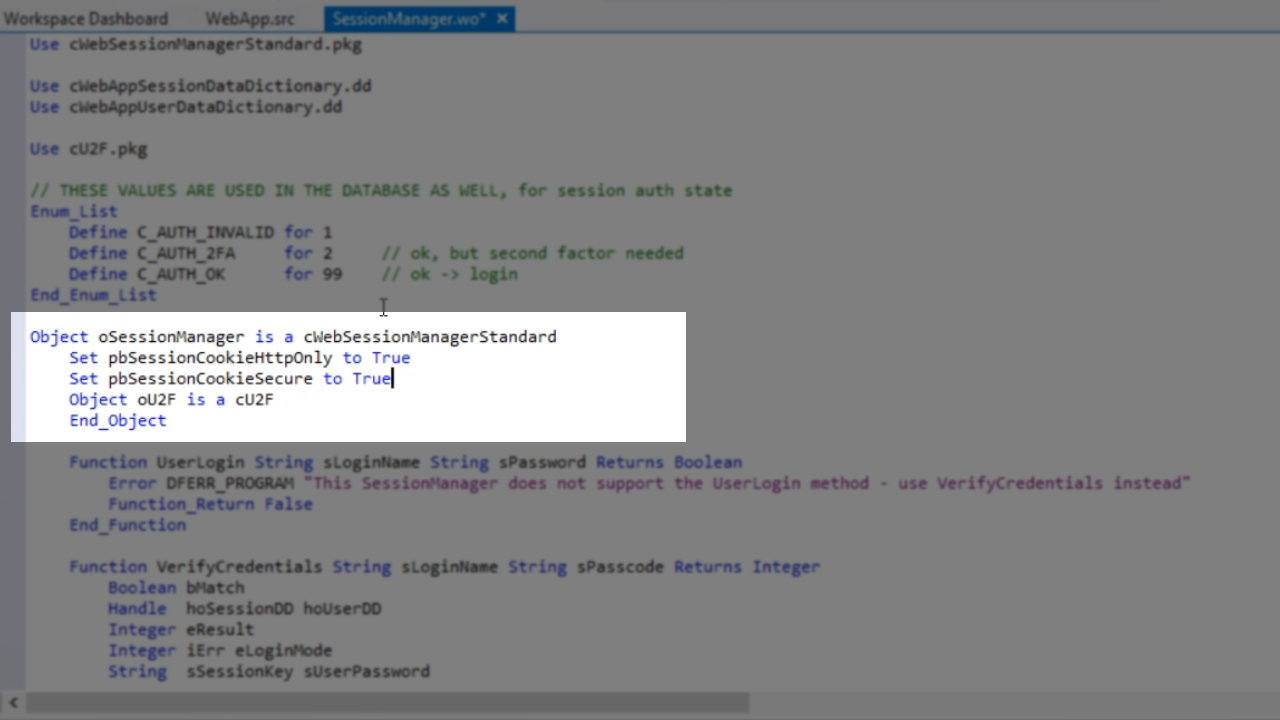
- From the ‘Properties’ tab in the ‘Properties’ panel on the right set ‘pbSessionCookieHttpOnly’ value to ‘True.’ This ensures that the web browser does not expose access to the cookie to JavaScript or any other scripting language.
- From the same panel set ‘pbSessionCookieSecure’ value to ‘True.’ This makes it so that session cookies will only be created when using HTTPS.
- A redirection can also be setup to make it so that the site is only accessible via HTTPS.
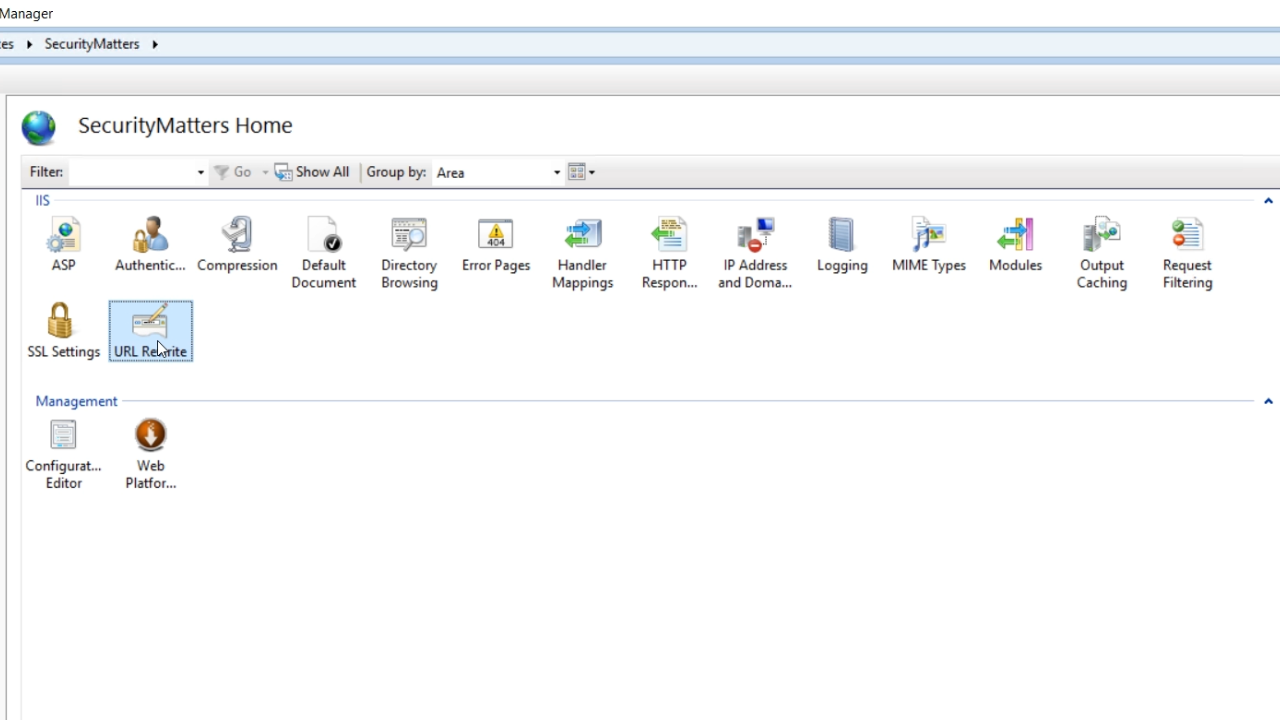
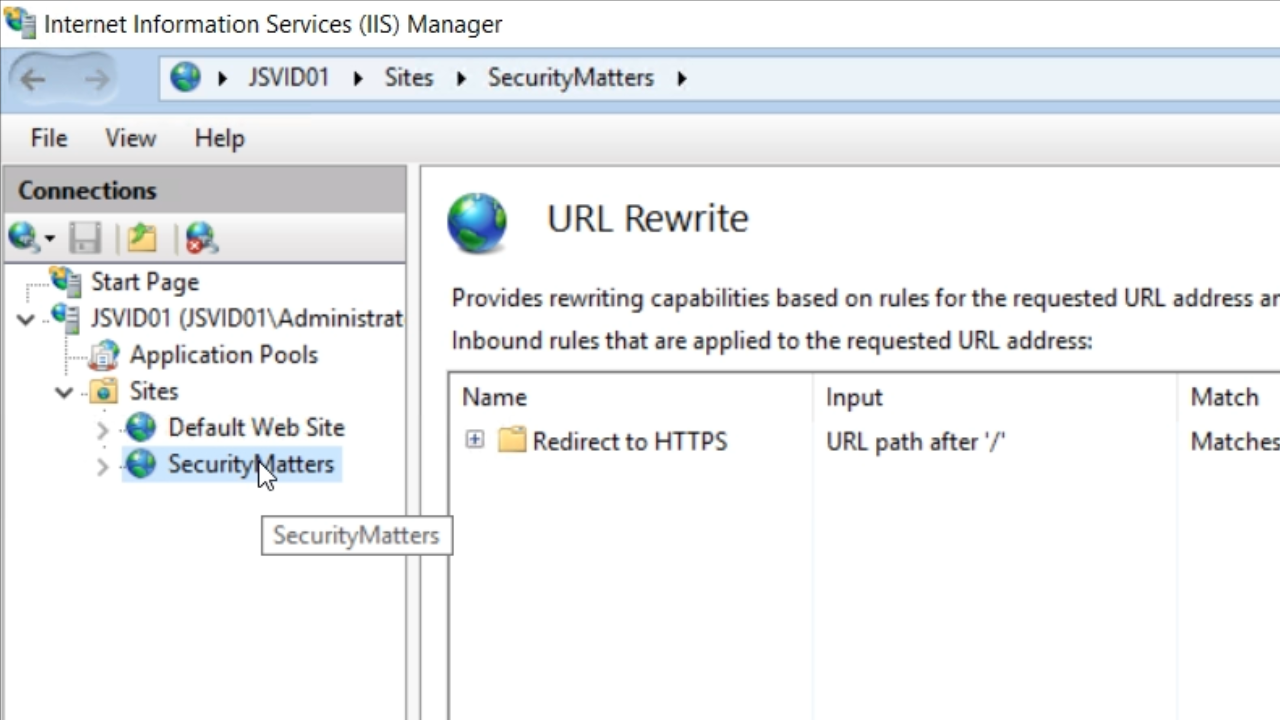
- From IIS Manager, select ‘URL Rewrite’ from the IIS section in the center
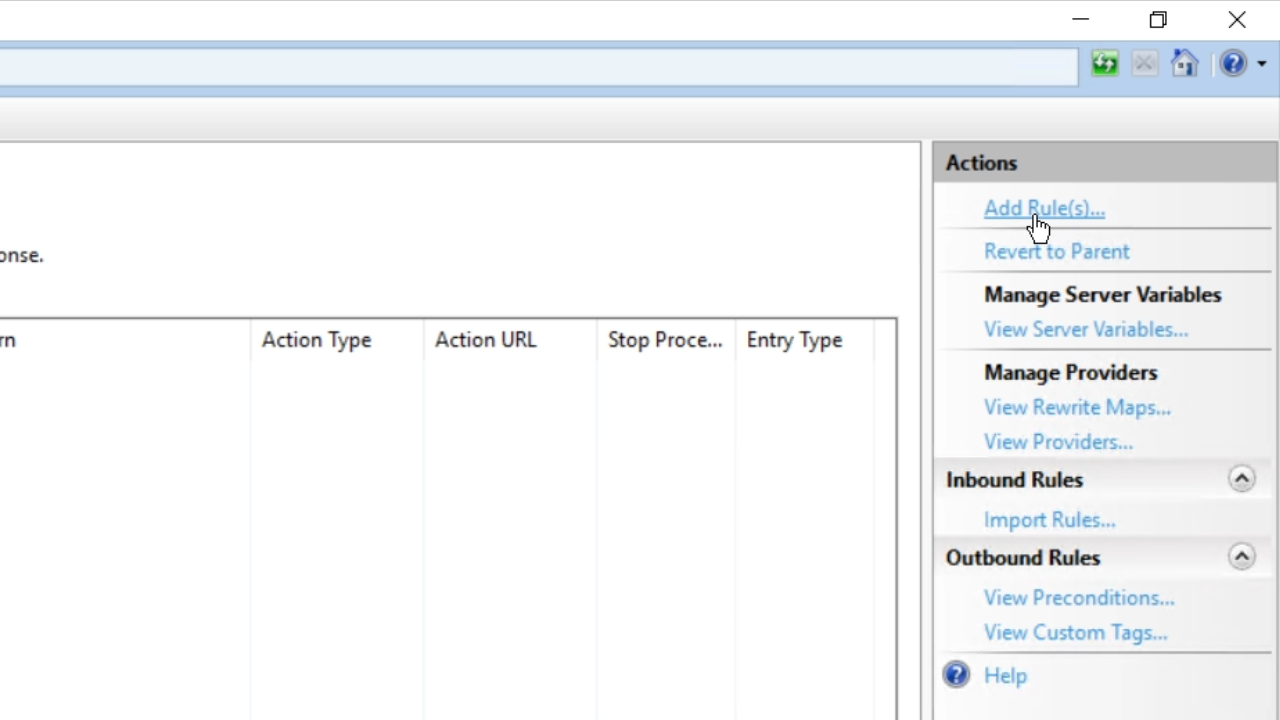
- Then select ‘Add Rule(s)’ from the ‘Actions’ panel on the right.
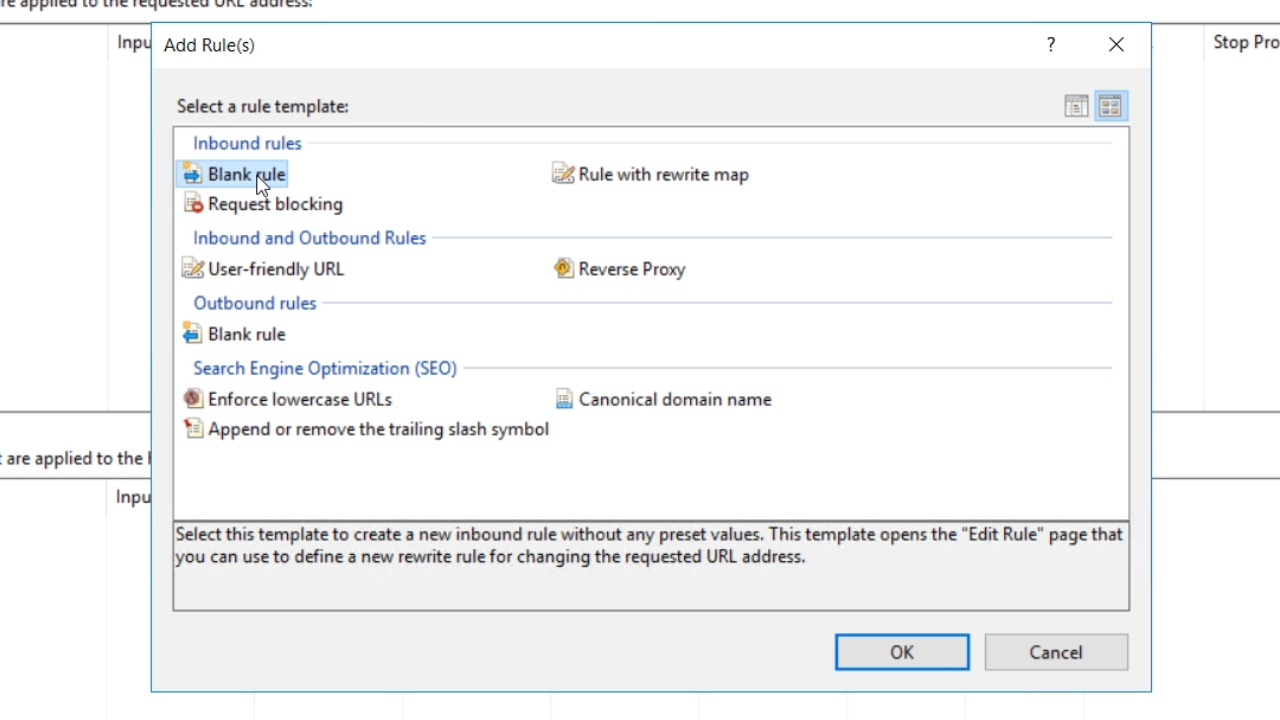
- Select ‘Blank rule’ from the window and press OK
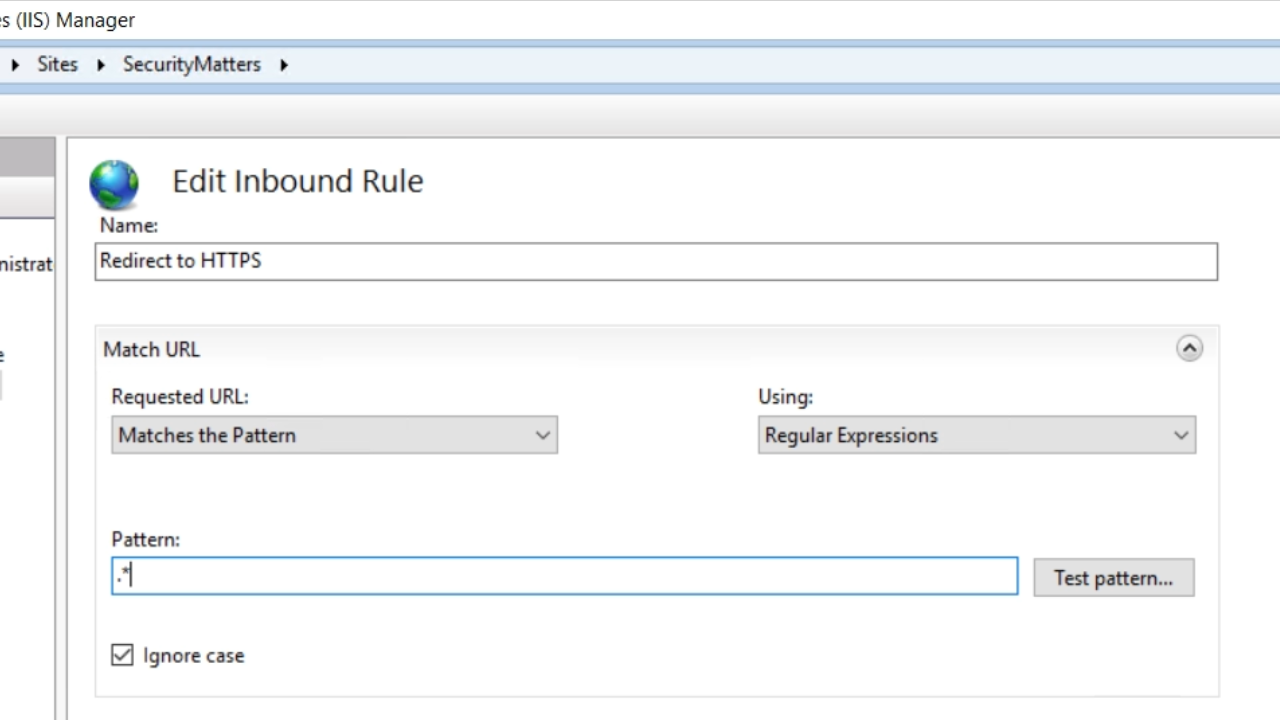
- Note: making rules can be quite complicated if inexperienced. This example will just review what is necessary for the rule that will be applied in this lesson.
- Enter a name
- The ‘Requested URL’ is set to ‘Matches the Pattern.’ Any pattern can be applied.
- .* is used for this example
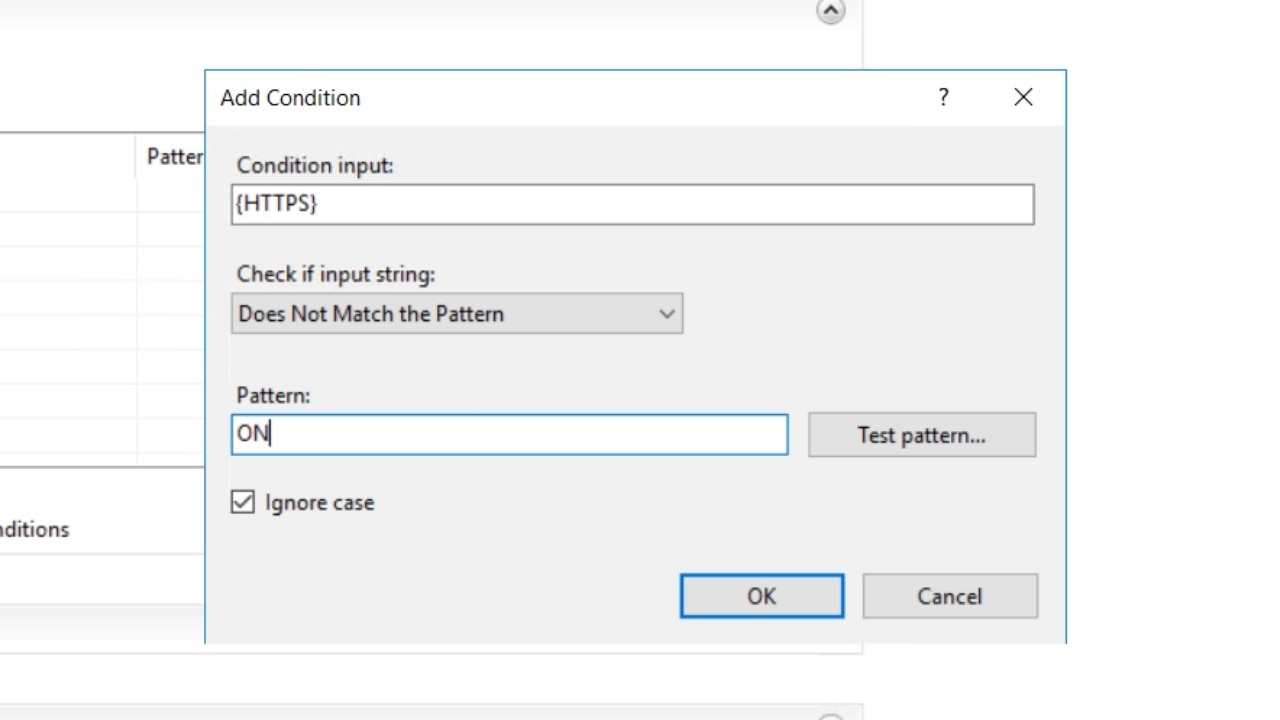
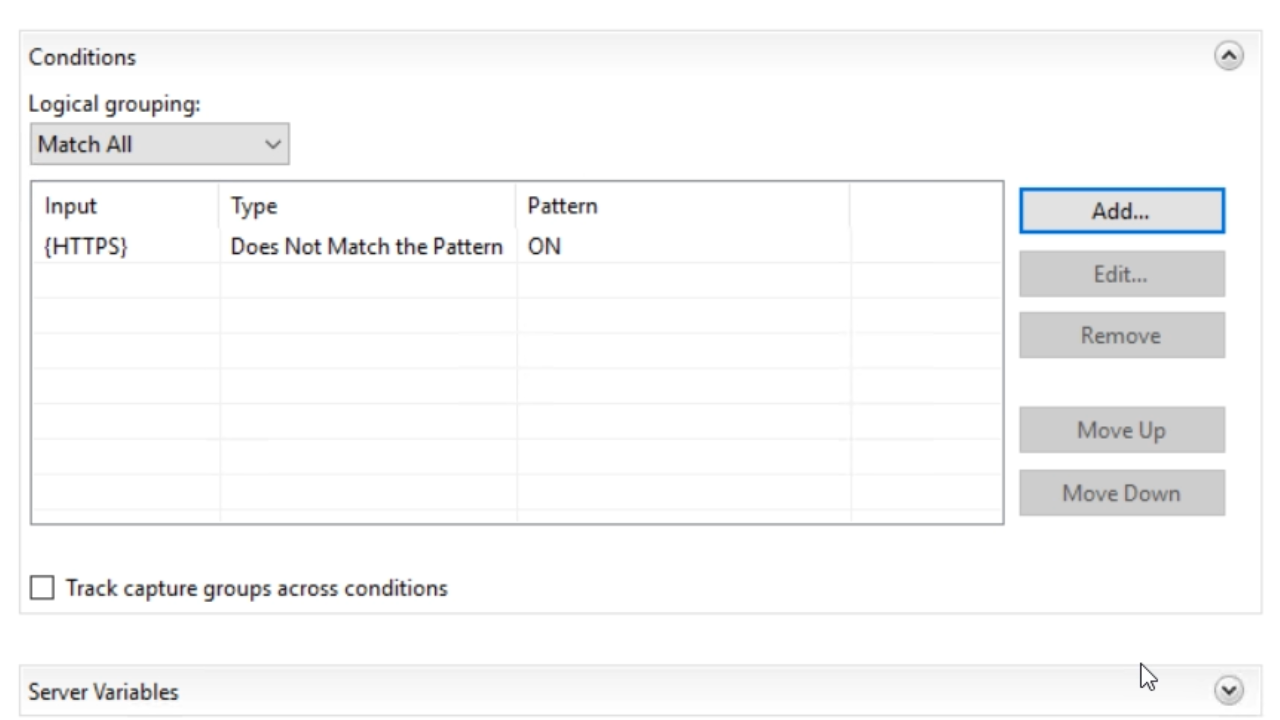
- Expanding the ‘Conditions’ section, select the ADD button.
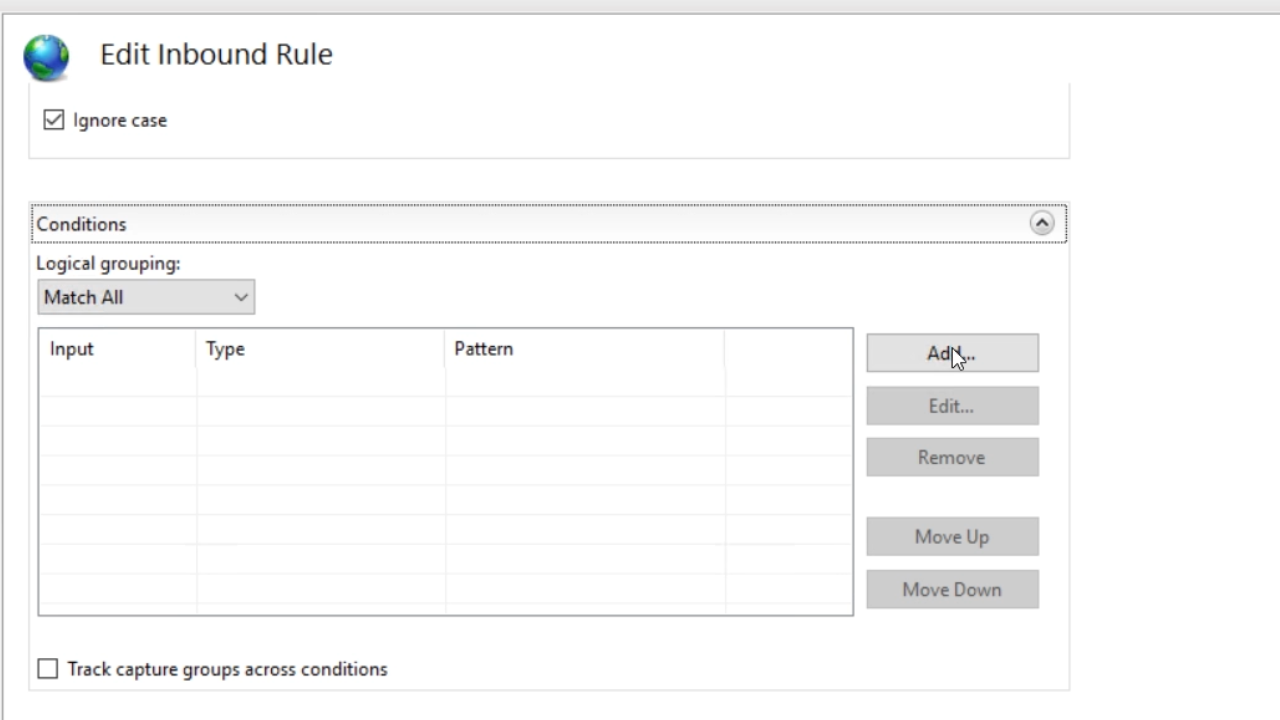
- {HTTPS} is entered as the ‘Condition input’
- From the ‘Check if input string’ dropdown select ‘Does Not Match the Pattern’
- Enter “ON” into the ‘Pattern’ field. Press OK.
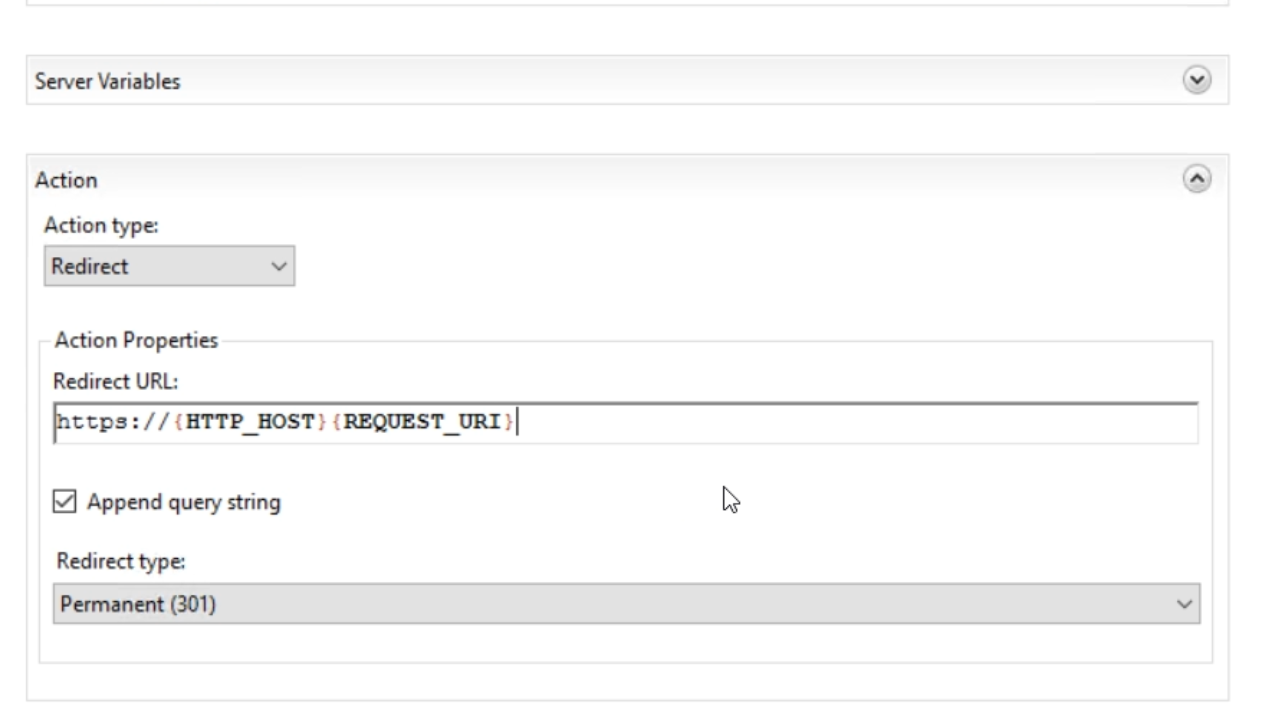
- In the ‘Action’ section…
- From the ‘Action type’ dropdown select ‘Redirect’
- In the ‘Redirect URL’ field enter https://{HTTP_HOST} {REQUEST_URI}
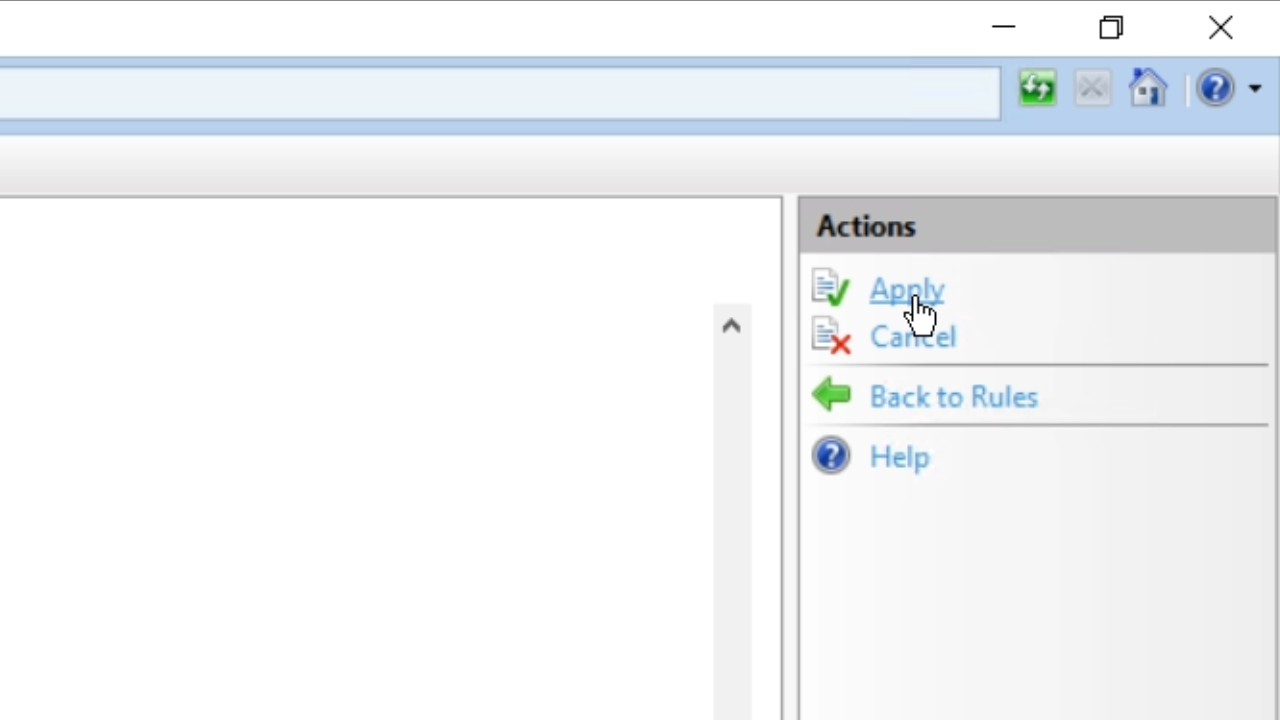
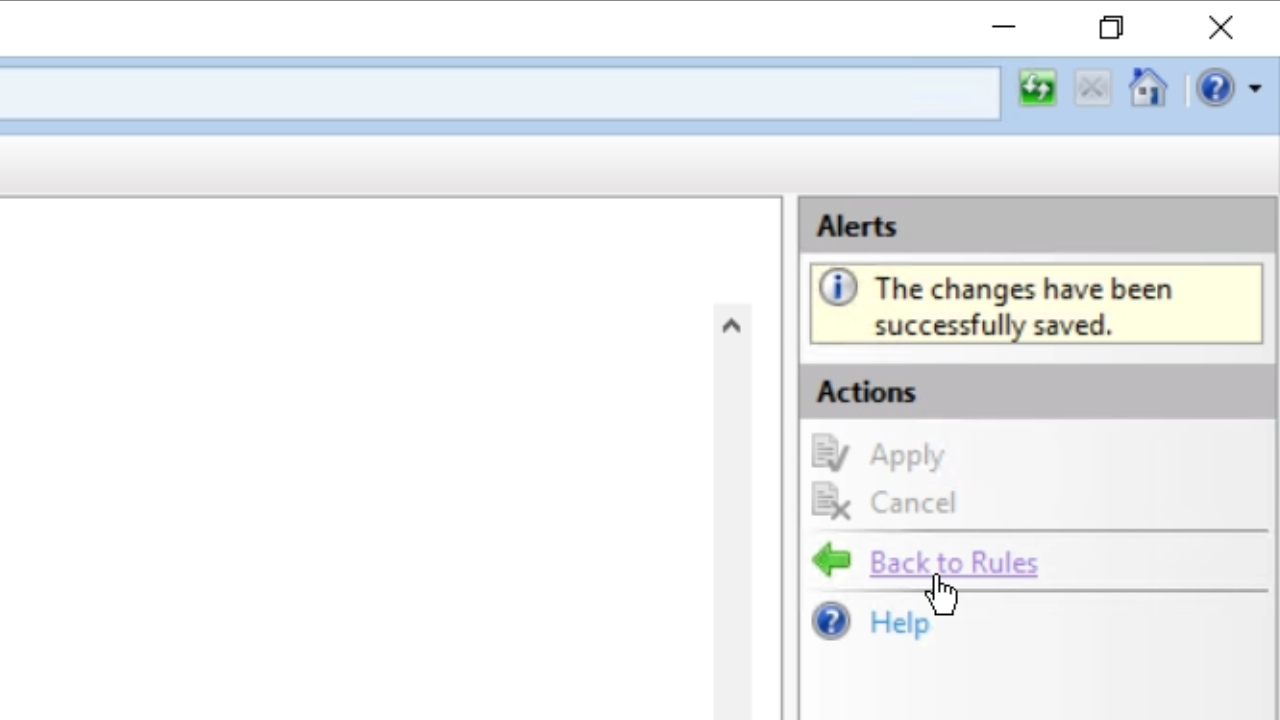
- Press APPLY and then ‘Back to rules’ in the ‘Actions’ panel on the right
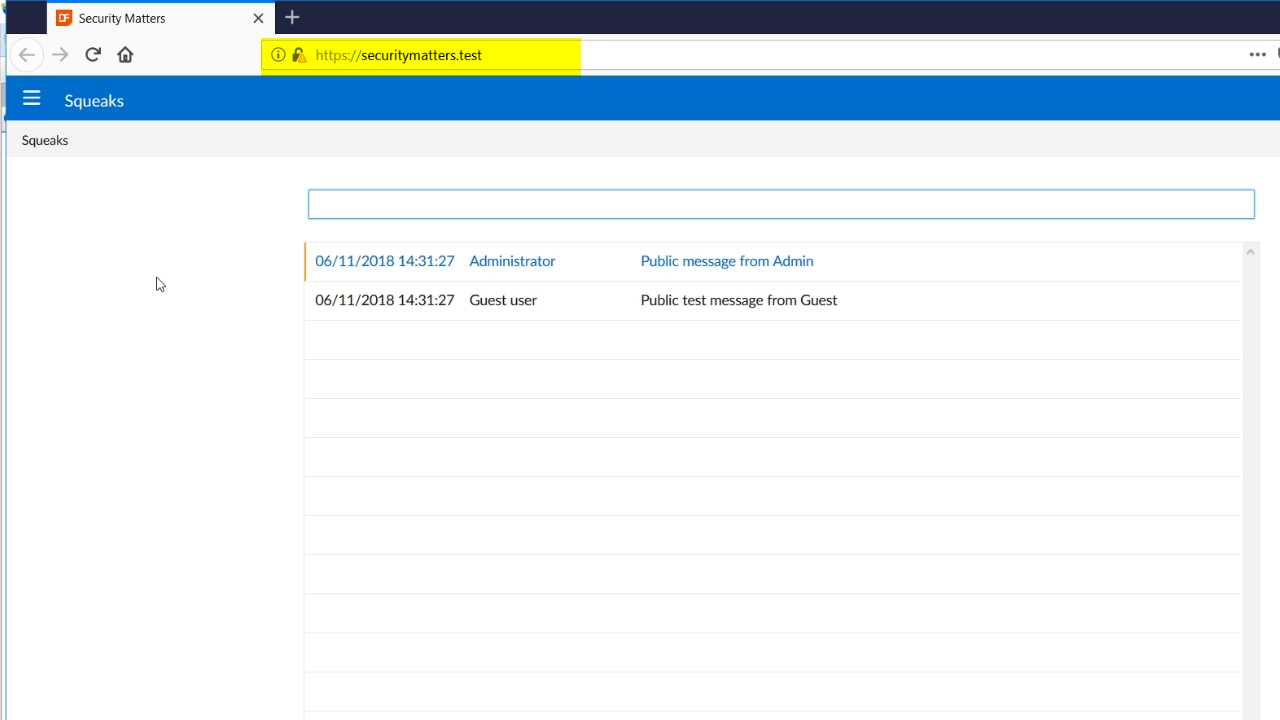
- To test the redirect, reopen Firefox
- Enter the URL without HTTPS and press enter
- The app then opens to the proper HTTPS redirect
Demonstration part 2
- There are sophisticated security attacks that can still happen. They can downgrade the connection back to HTTP, for example. There are some simple ways of mitigating them.
- Open IIS Manager
- Select the website from the ‘Connections’ panel on the left
- Select ‘HTTP Response Headers’ from the ‘IIS’ section in the center panel
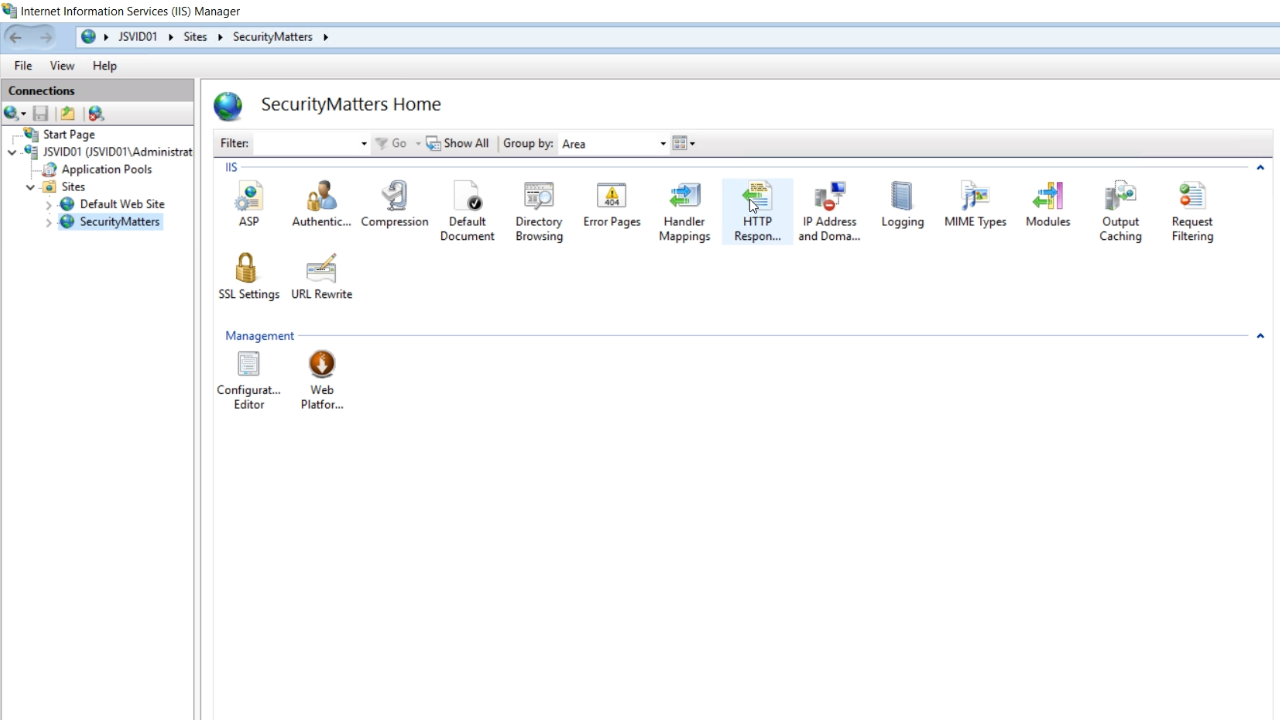
- Select ADD from the ‘Actions’ panel on the right
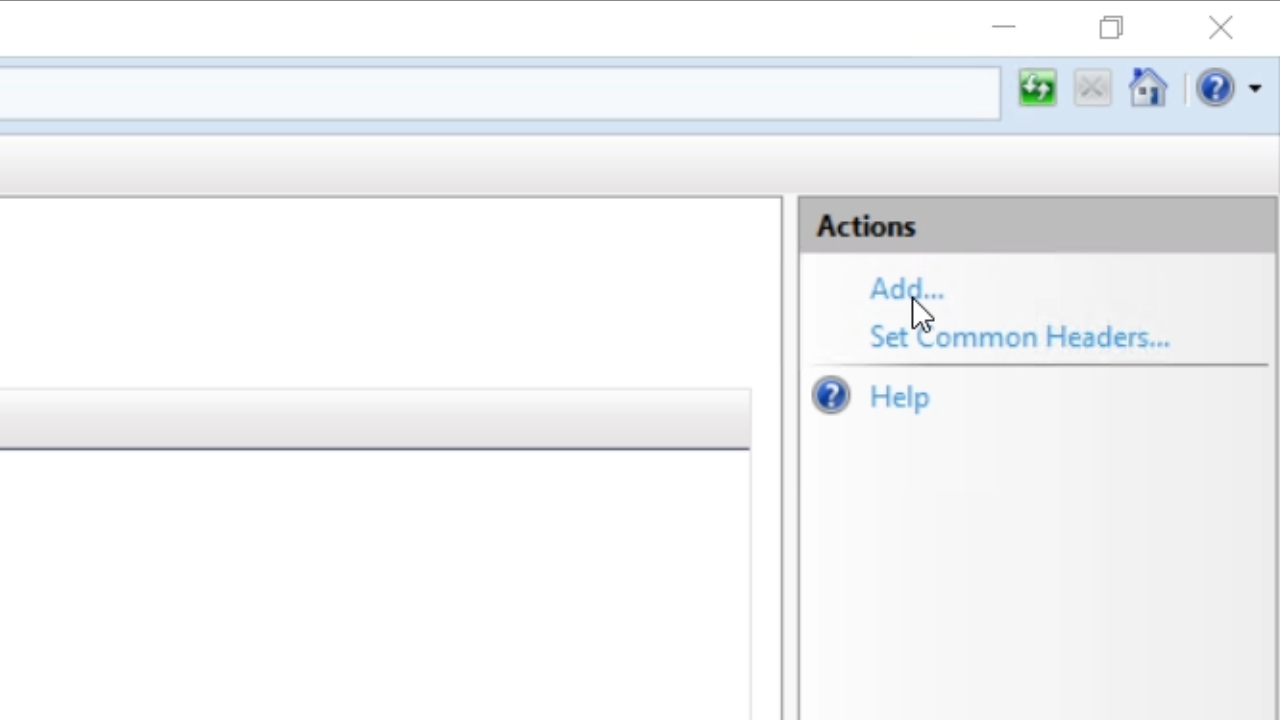
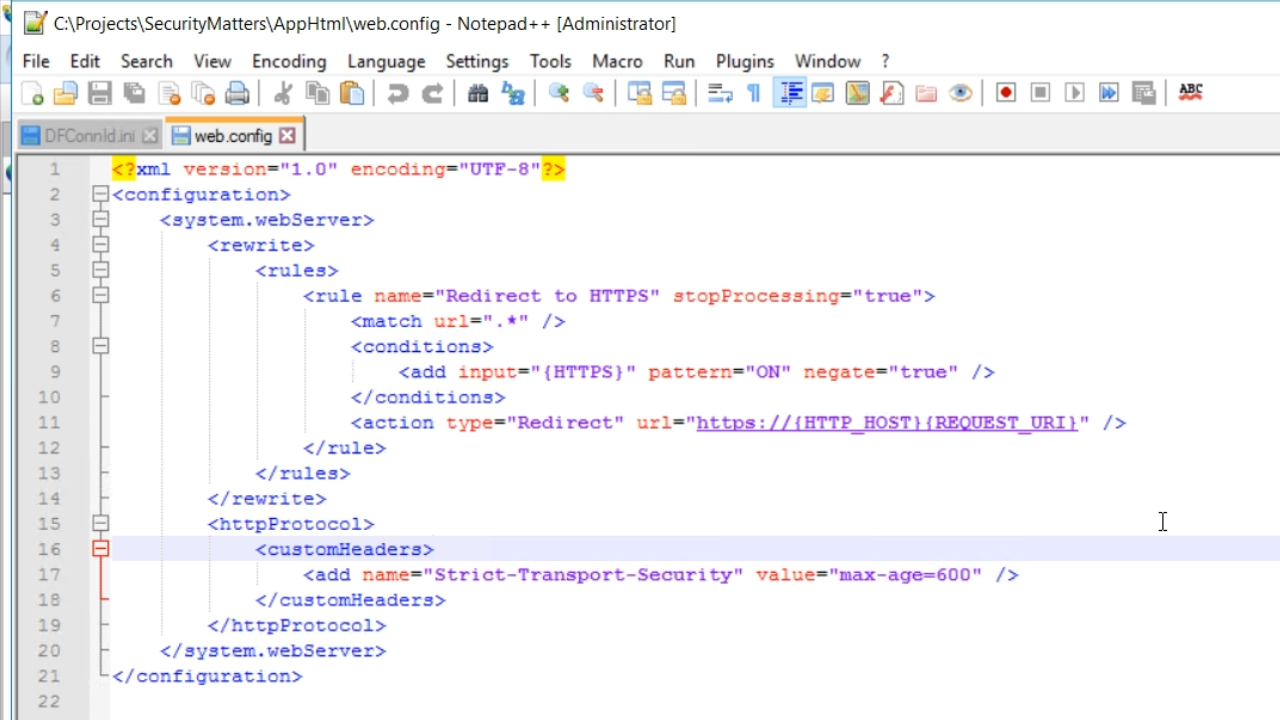
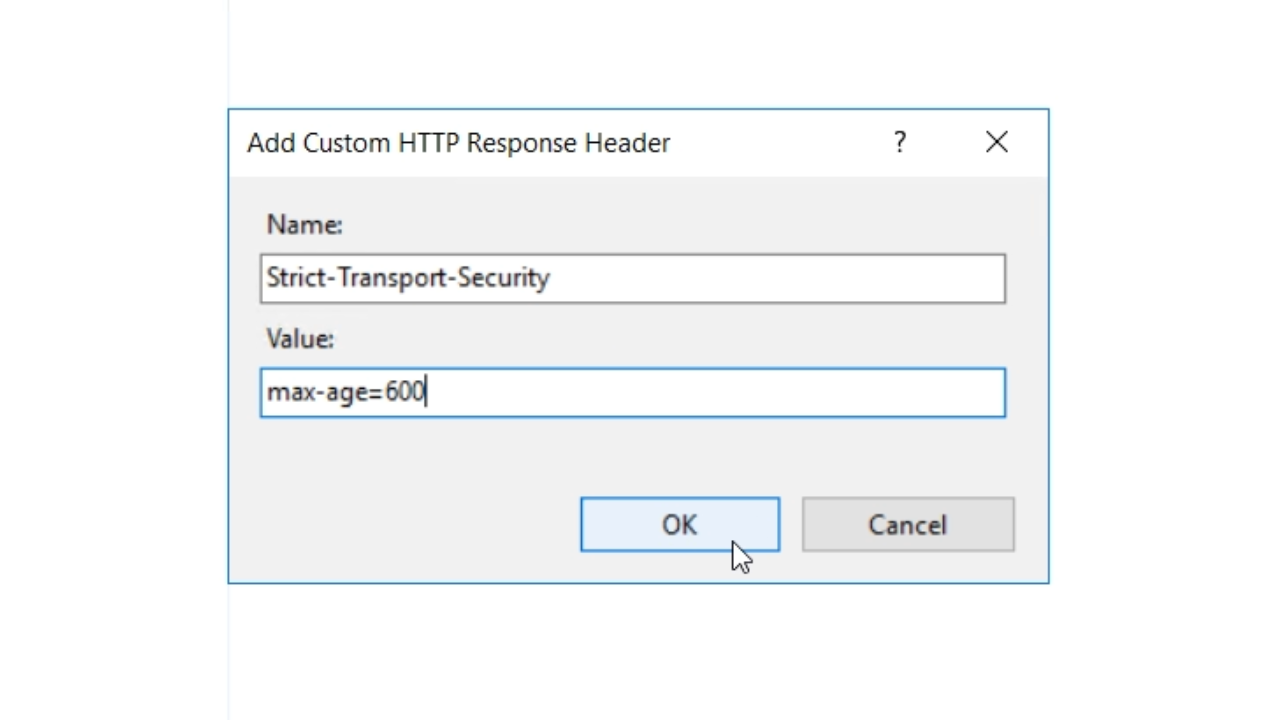
- Name the header. “Strict-Transport-Security” is used in this example.
- This header is sent with every request back to the browser, so that the browser knows to only access this website using HTTPS.
- Add a ‘Value’ to specify a certain timespan that this will be active. For testing, this example will set it to ten minutes. “max-age=600” is entered.
- This tells the browser that for 600 seconds is should not even try HTTP connections.
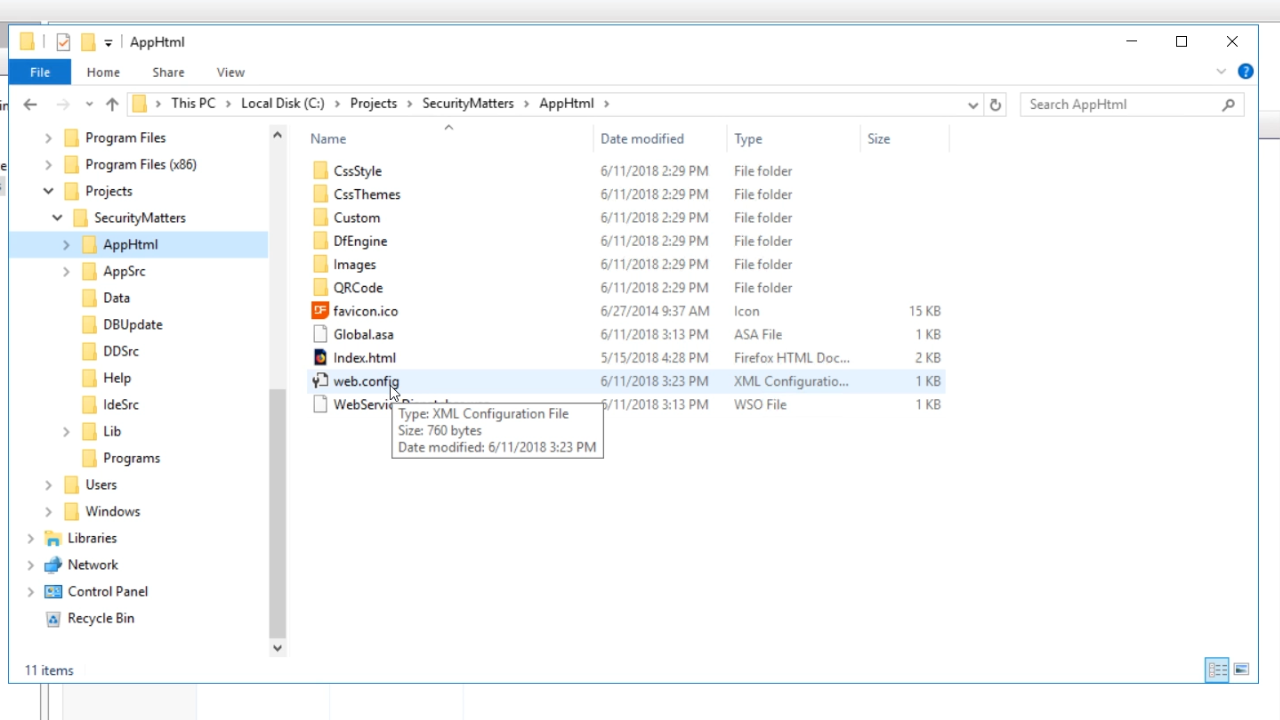
- These changes can be easily deployed to any application. Viewing the web.config file, found in the AppHtml directory in the workspace, shows all of the changes just made, and can be easily copied to other applications.