Quickstart building a web application
Lesson 5 - Create a Person Zoom View
Now that we have created a project, our database and our business rules, we are ready for this lesson, which is going to be the creation of our first zoom view. The drill down model works with select views and zoom views. The zoom view shows a single record and the select view shows a list of records. We're first going to create a zoom view and this is going to be the Person zoom view.
DEMONSTRATION
- So we're going to create new.
- Select the Mobile zoom Wizard. And click OK.
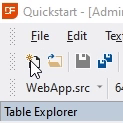
- The mobile zoom wizard comes up. First, it gives us an explanation of what this wizard does. And the next step is that we're going to enter the name of our zoom view, I name it oZoomPerson. We leave the filename as is, and we're going to change the description, which is also going to be the caption of our view, into Person.
- We're going to create a simple form.
- I'm going to select Person as the main data dictionary for the view.
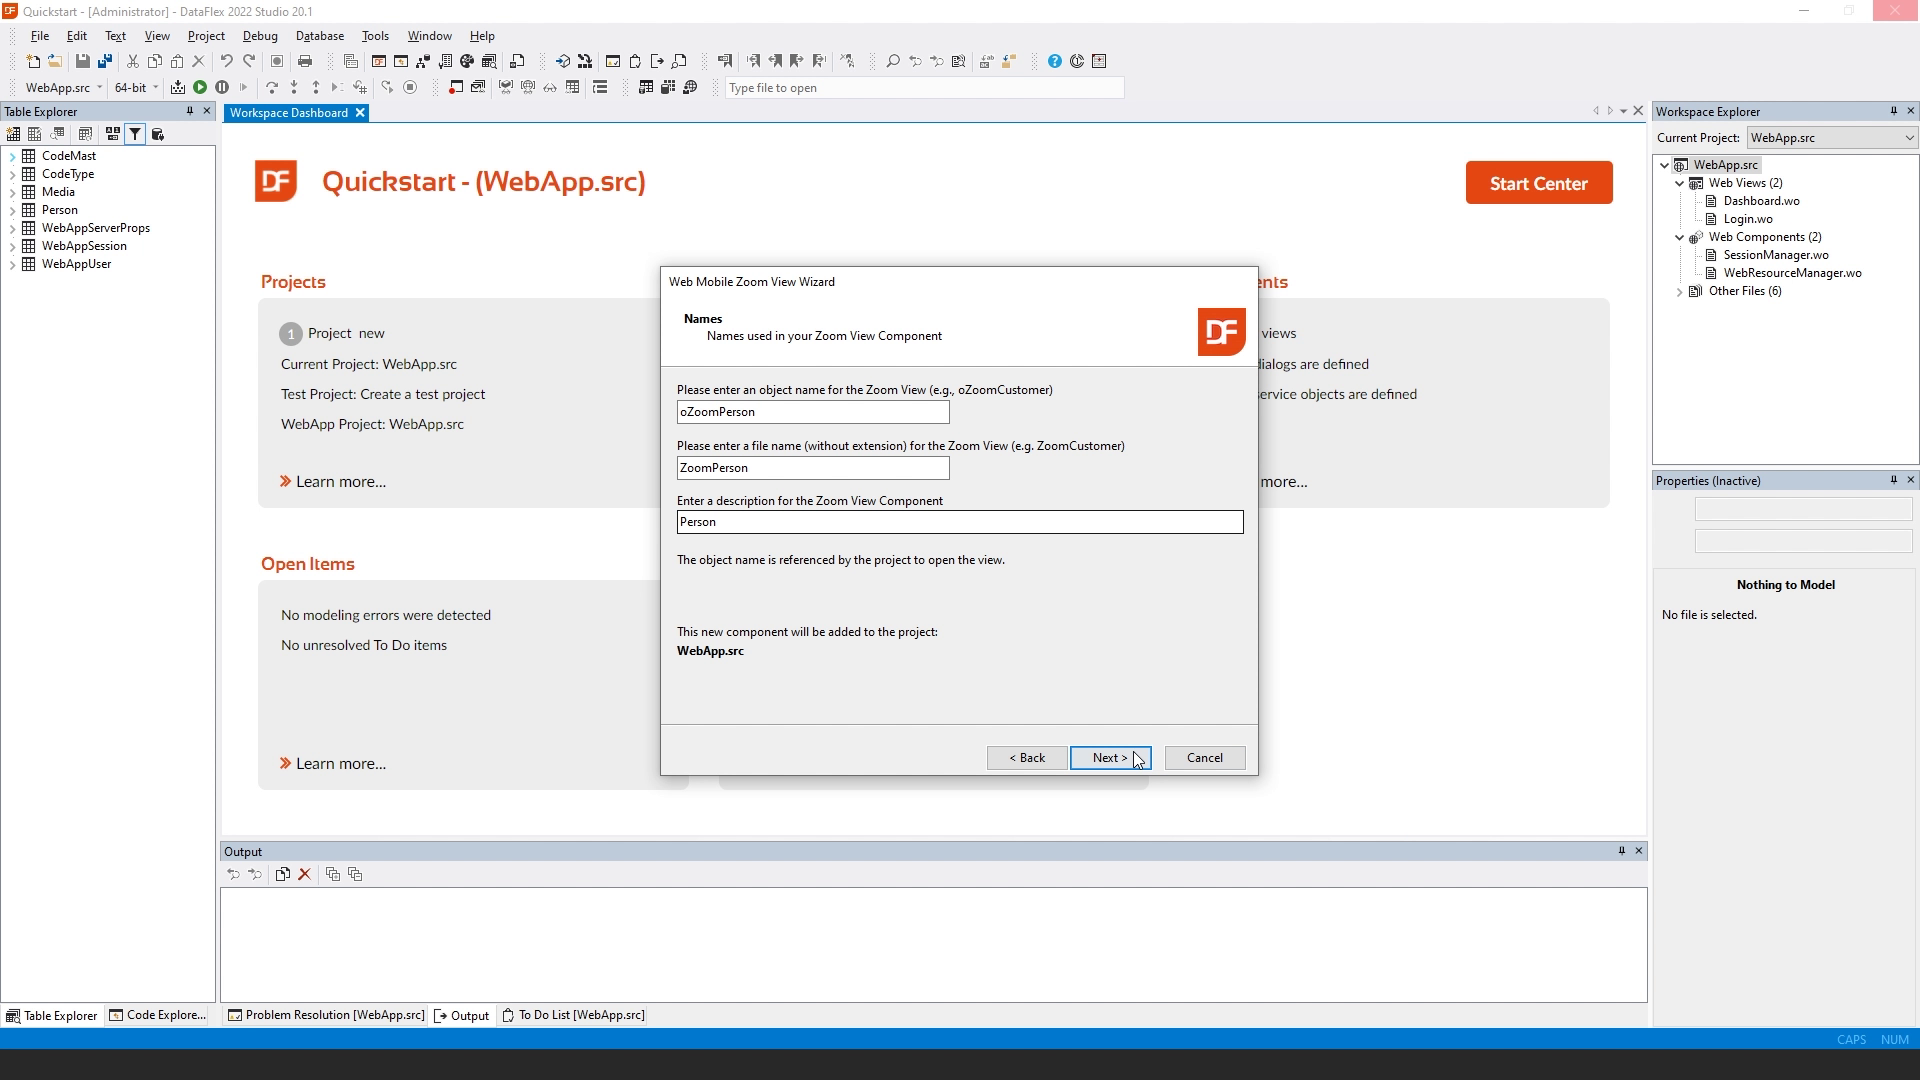
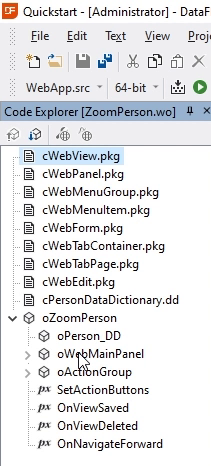
- Now we can select fields from the person table and put them on our view. We're going to add the last name, first name, the address, the zip code, city, phone, and comments. And we're going to add tab pages to our view. I'm going to click tab here, I'm going to move this up. The order determines which field is going to be on which tab page. I'm going to add a second tab for the comments field.

- When I click next, it allows me to change the labels. So I can change last name into last space name, first name into first space name and change the labels of the tab pages, to make this: Contact. And the other one: Comments.
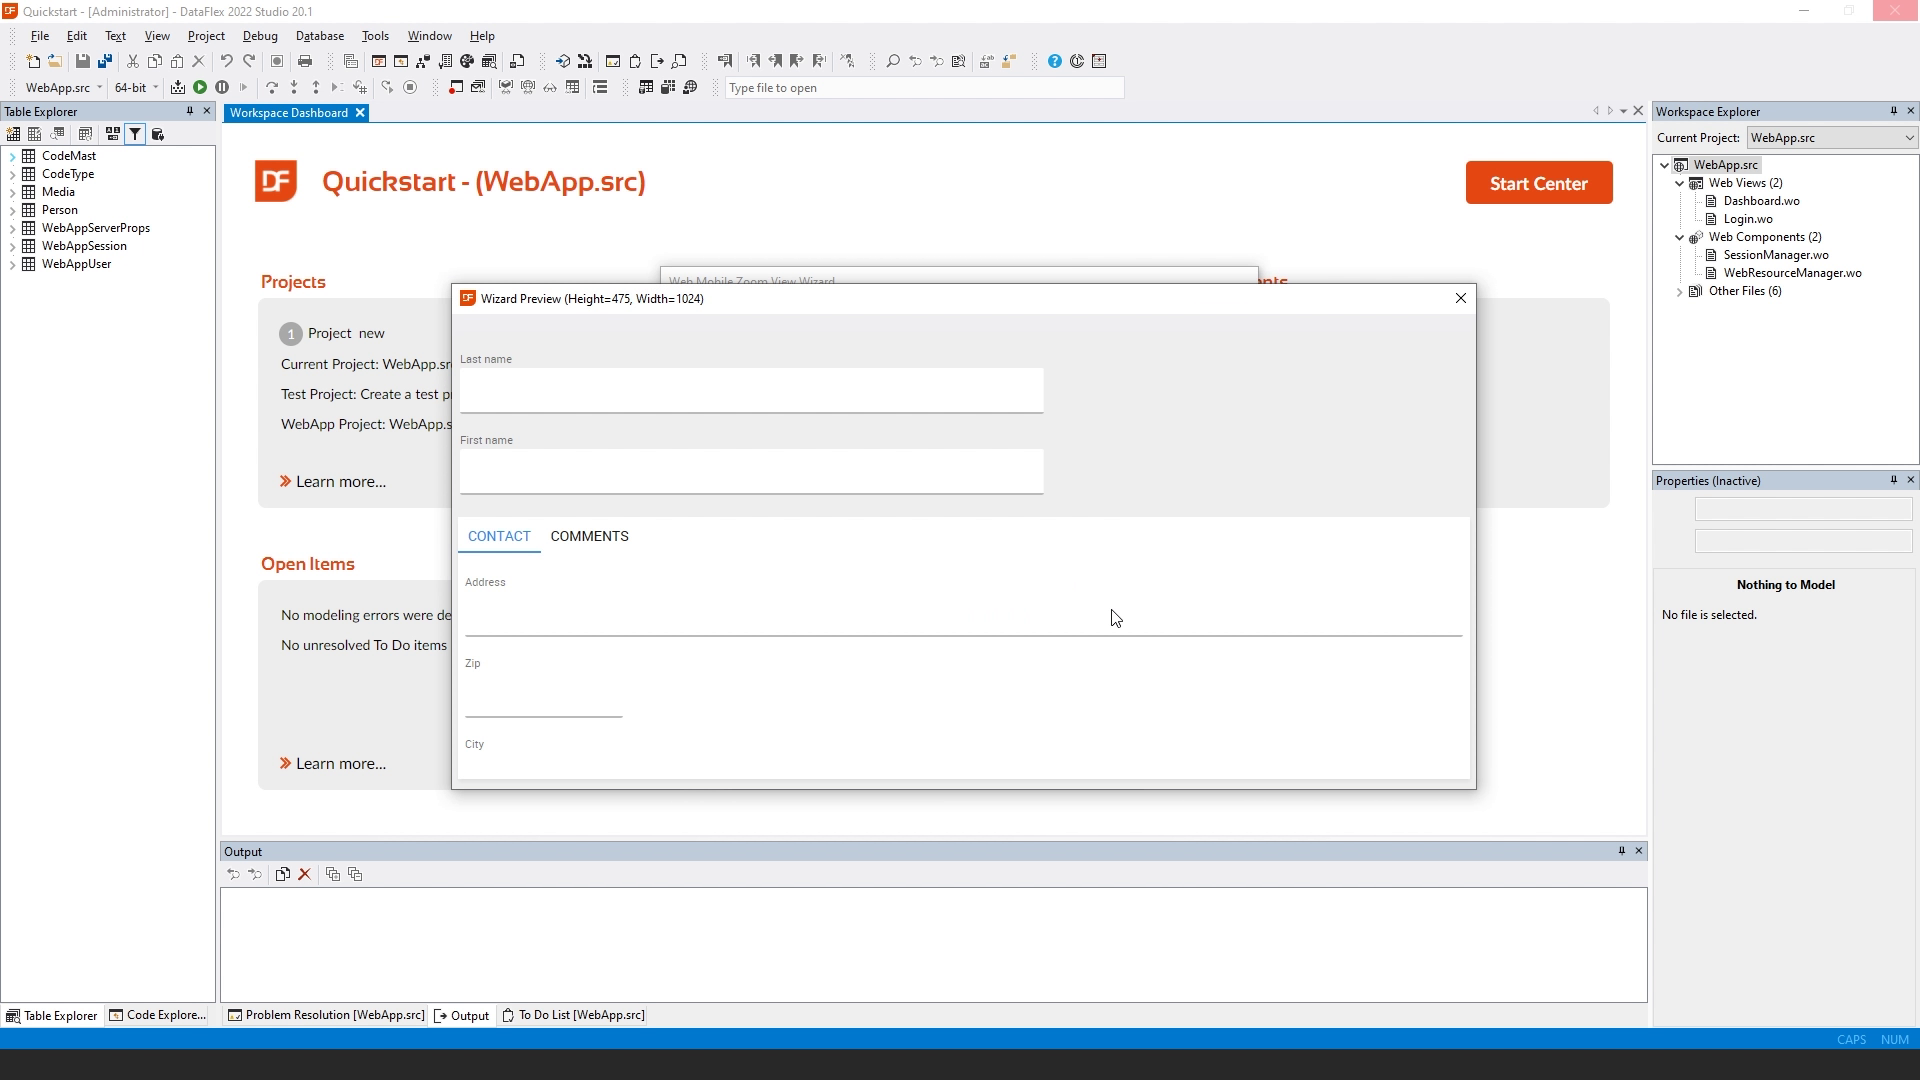
- The Adjust and display button will show a preview of what we're going to generate. So we see that it's going to generate a tab page with contact information and another one for comments. We can do more adjustments here. But we can also do them later in the designer, which is what we're going to do.
- We're going to click Next.
- It then asks if you want to assign parent prompt lookups. We don't have any parent tables right now. So we're going to skip this step.
- And we're going to click Finish.
- Now it will generate the zoom view. What I'm going to do now is first have a look at what it generated. We can do this by opening the code Explorer, which is here on the left. This shows us a tree of objects that are available within our view. So we have a view object, which is named oZoomPerson. And in this view object there is a panel. In the source code we see that it says: Object oWebMainPanel is a cWebPanel, which is a class. In the panel there is a last name and first name. In here is a tab container. The tab container has page one and page two.
- If we open the designer, we can see the visual object that belongs to this object.
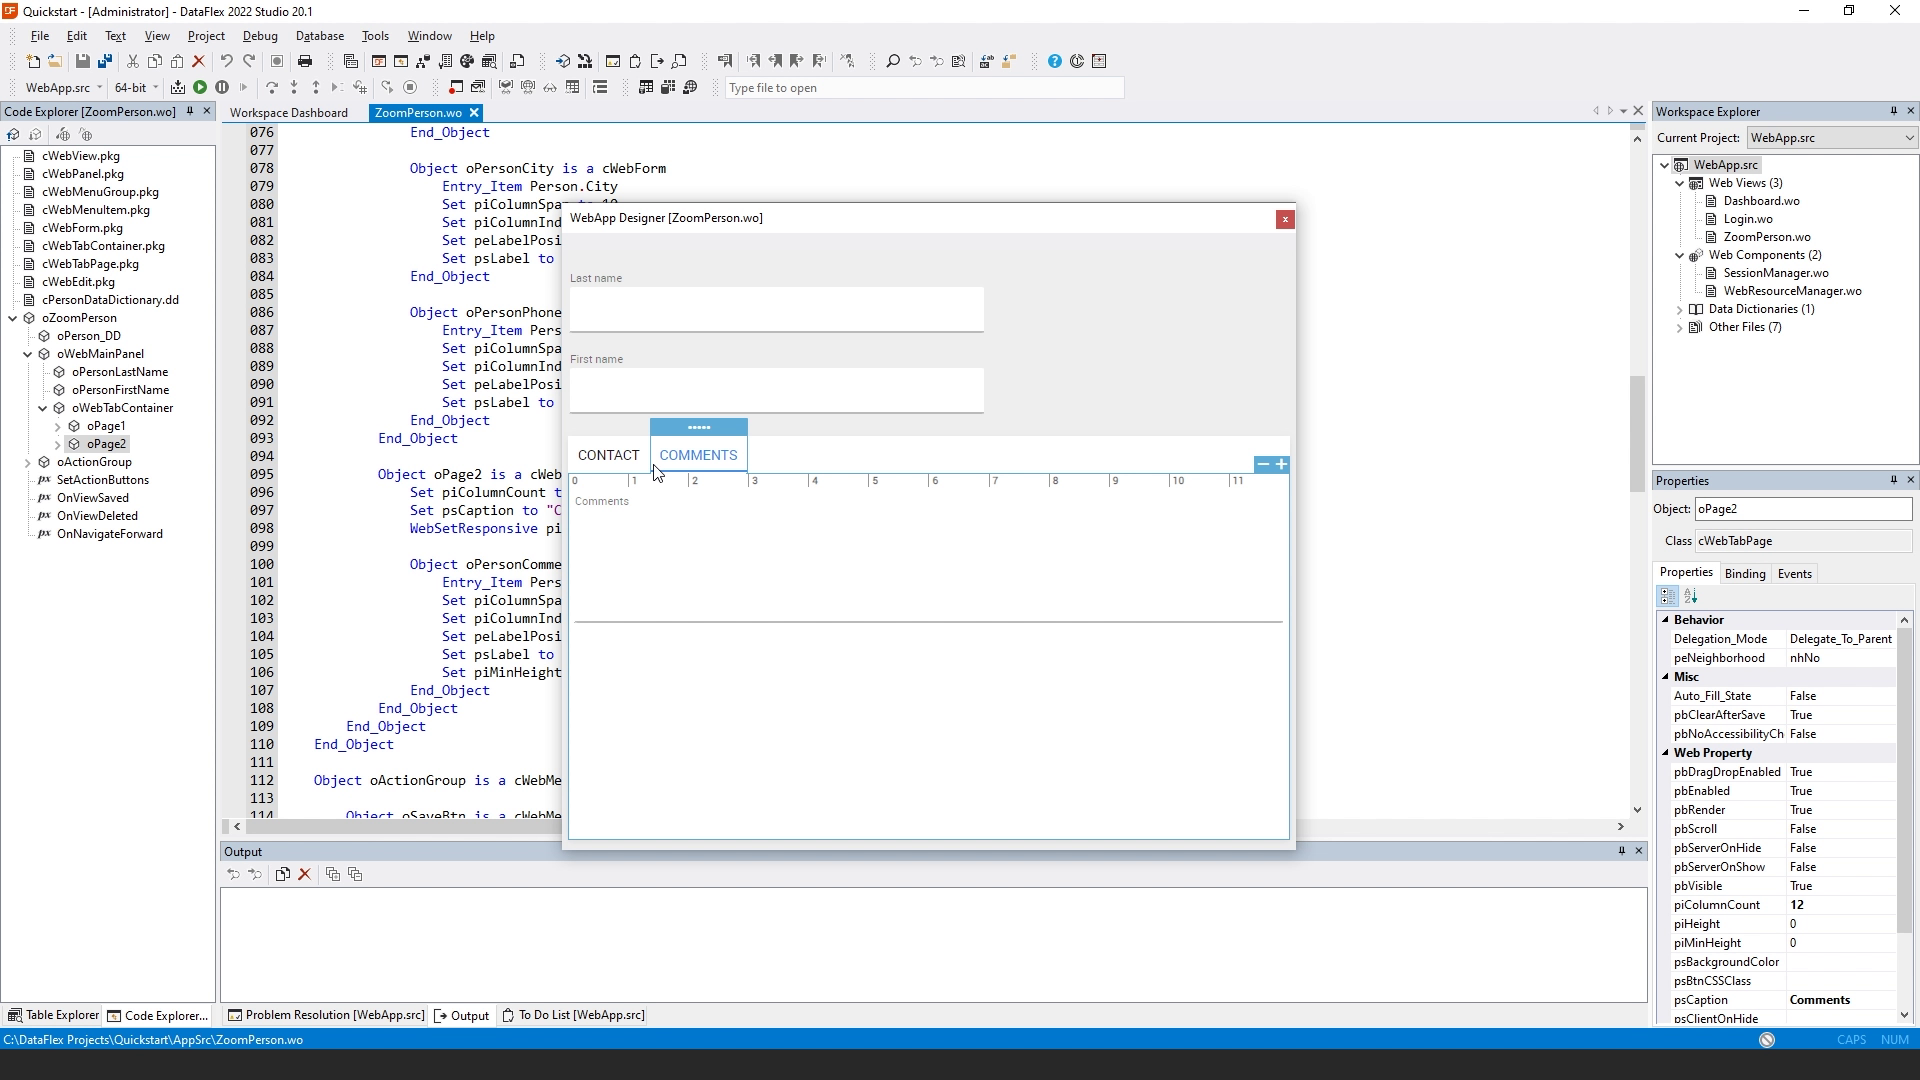
- Clicking on an object in the code explorer highlights that object in the designer. So now we see that it has selected oPage. I think the comments field is a bit too small. So I select the comments field and I’m going to the Properties panel on the right here. I'm going to set pbFillHeight to True and now we see that it stretches the full height of our view.
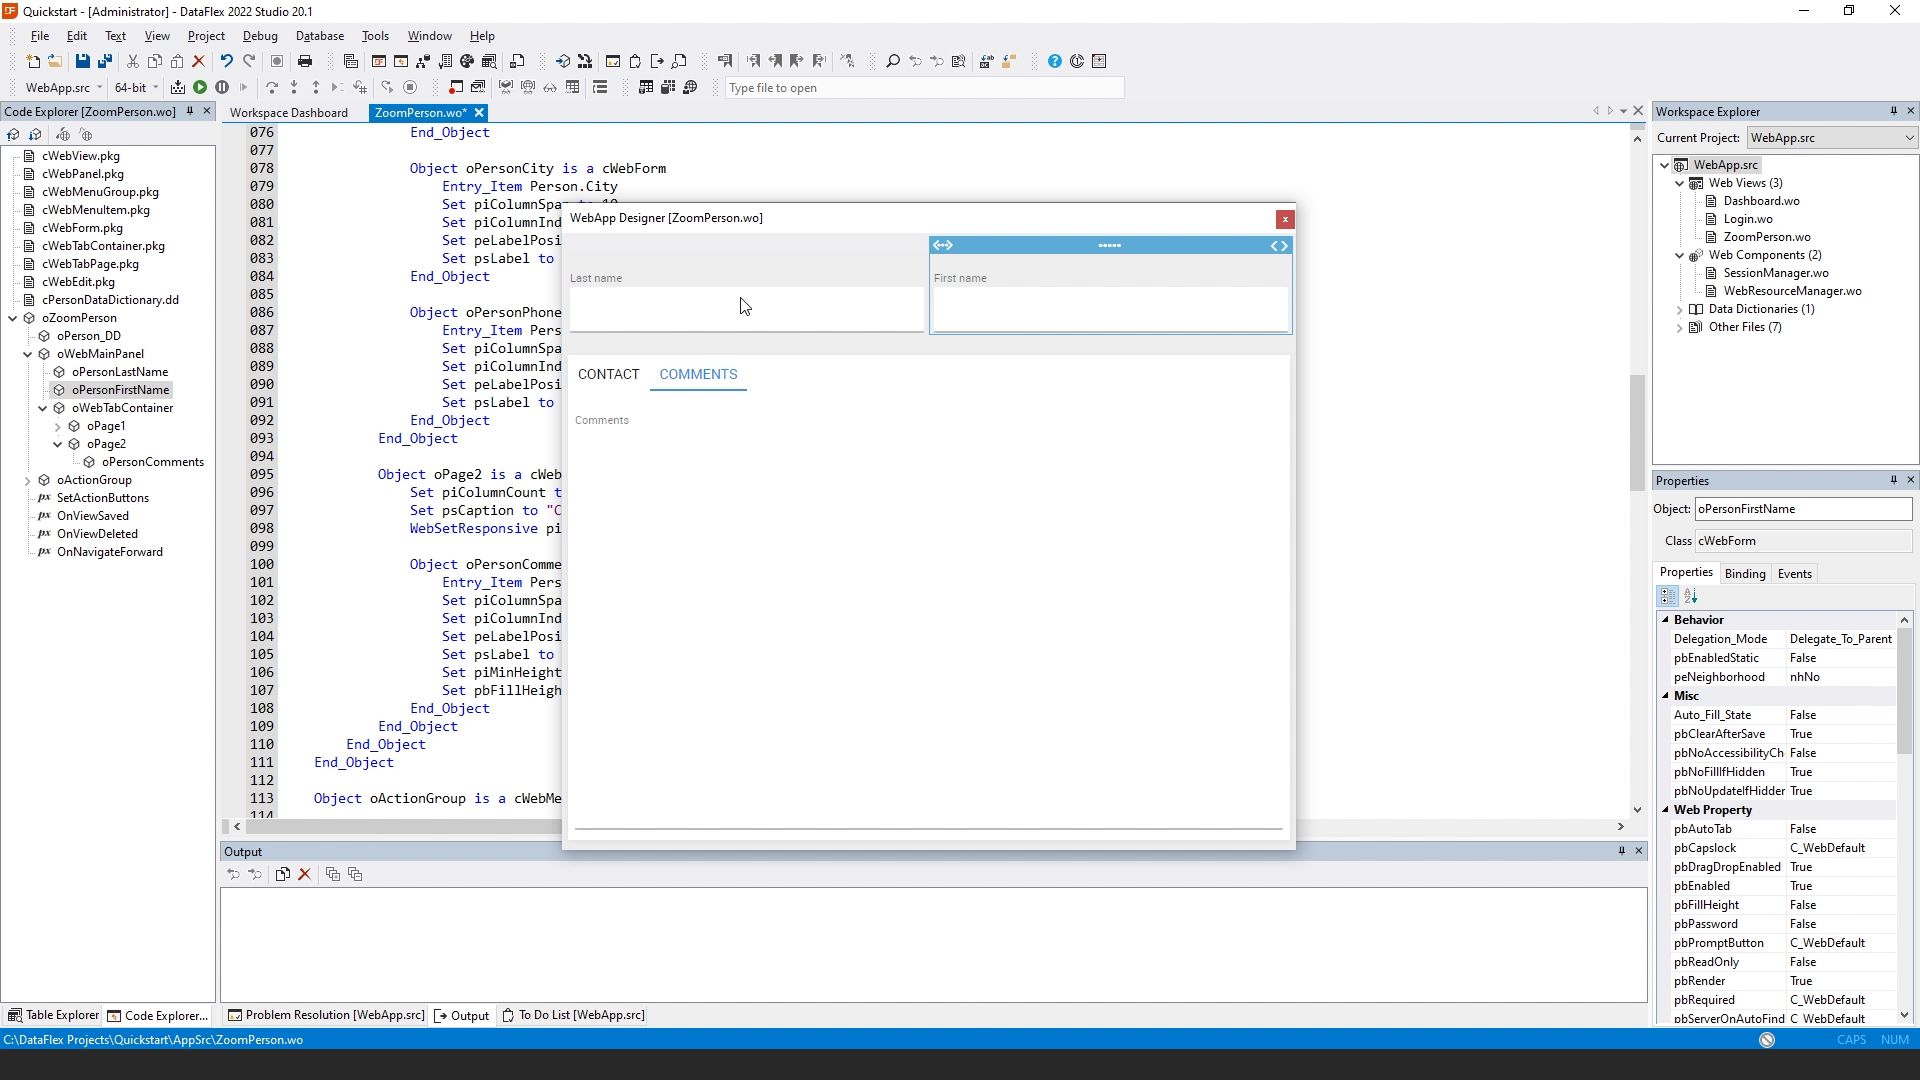
- Using the designer I can also put the first name after the last name. I want to have them side by side. I'm going to make them a little bit smaller. I put them side by side.
- So now we have finished our zoom person view and we're ready for the next lesson which is going to be the Person select view.


