Quickstart building a web application (Mobile touch)
Lesson 3 - Configuring the data dictionary
In the previous lesson, we have defined the database. Our workspace dashboard also shows us that we have created two tables. In this lesson, we're going to configure the data dictionaries. The data dictionaries contain the business rules of the application, and are a central point in our application. We're going to configure our data dictionaries per table. And we're going to start with the person table.
DEMONSTRATION
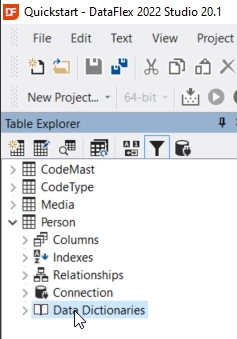
- So in the table Explorer, we expand Person. And there it shows us the data dictionaries that are available for this table.
- It has generated a single data dictionary that we're going to use and adjust. Open the data dictionary by double clicking cPersonDataDictionary, and the data dictionary modeler comes up. The data dictionary defines all kinds of business rules.
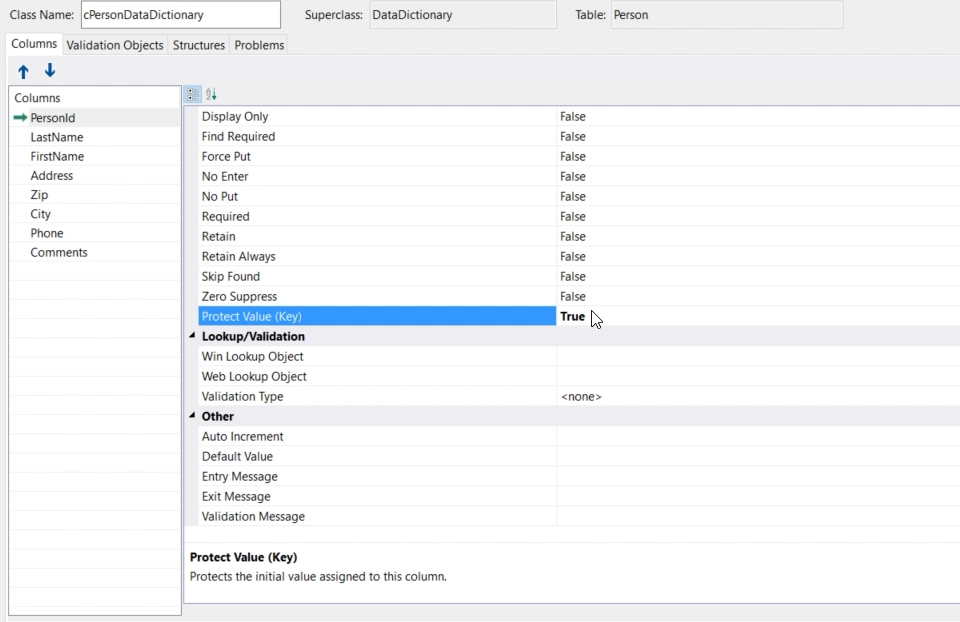
- The personID field holds a unique number. In the data dictionary we are going to set that this is a protected key value, so that it should never change this after a record has been created. You do this by setting Protect Value Key to true.
- I scroll down. You can change its value by just double clicking on the current value False.
 Another typical function of the data dictionary is to tell it which fields are required. So when a record is saved, it will validate that a value is actually entered. So for the last name, we're going to set required to true. We also do this for the FirstName.
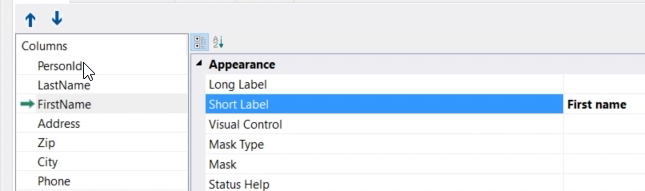
- To make the creation of our application easier later on, we're going to fill out the short label fields, which are going to be used by the wizards later on when we further create our application. So I'm going to set this to First name with a space. For the last name, I do the same. This is all we need to do for the person table.
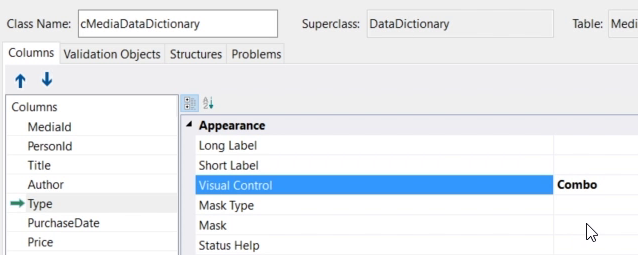
- The next step is to configure the media table. So we're going to open the media data dictionary by expanding the media table and clicking on cMediaDataDictionary. The first step again, is to set the protected key value of the ID column to True. Next, we're going to make title a required field.
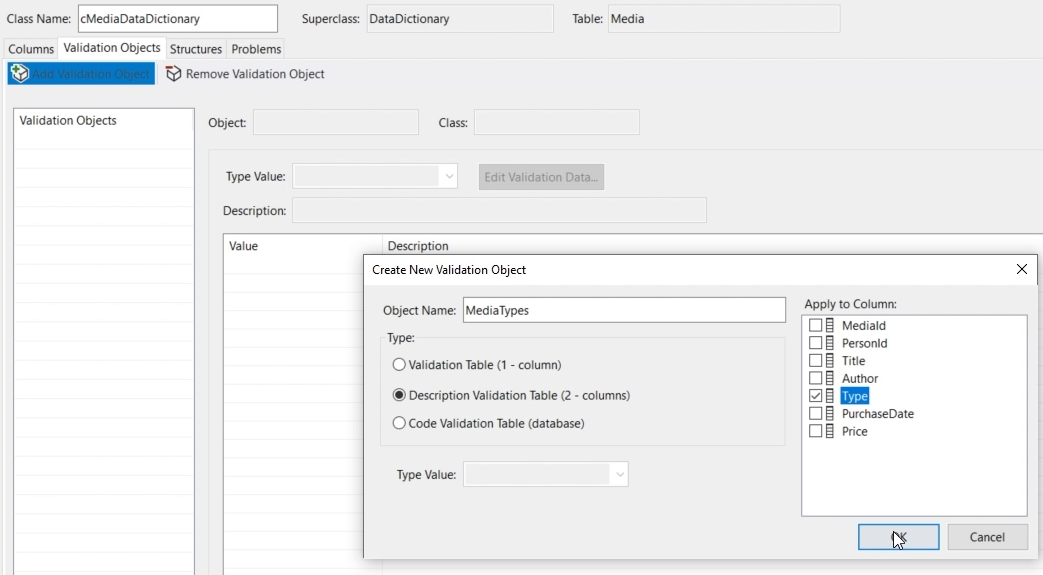
- Then, for type, we're going to create a lookup validation object. We do this on the second tab here. So we go to validation objects, we Add a new validation object and we're going to make this a description validation table, which has two columns, a value and a description. The object name is going to be media types. I select the Type column here, I click OK and this is going to create the object.
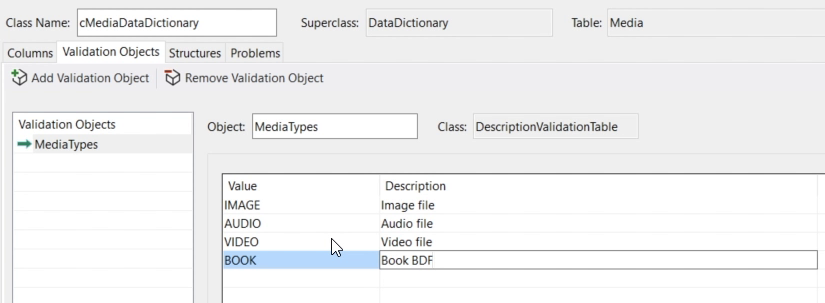
- And now I can enter the values that are possible for this field. So you can have image here, and set “image file” as description. Audio, audio file, Book, book PDF and Video as a video file.
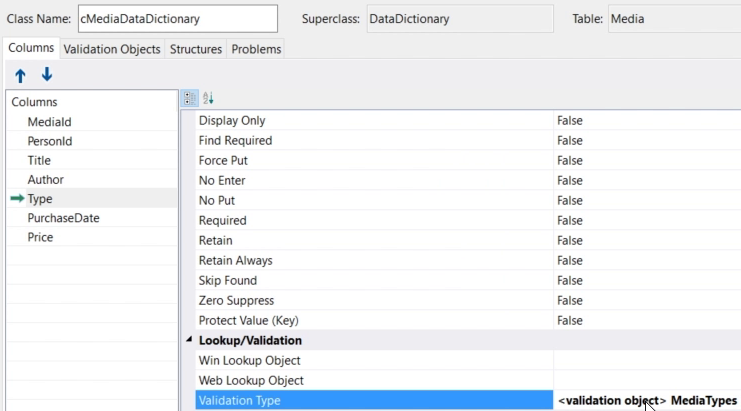
- Now we go back to the columns Tab page, and look at the type column, we see that it has filled out the validation type and it says validation object media types, the one we just created.
- I want to show this field as a combo form. So in our data dictionary, we can also configure the visual control, and in this case we're going to choose combo You can also choose Checkbox, Edit, Form and Spinner. It basically just determines what the wizard will generate for this for field.
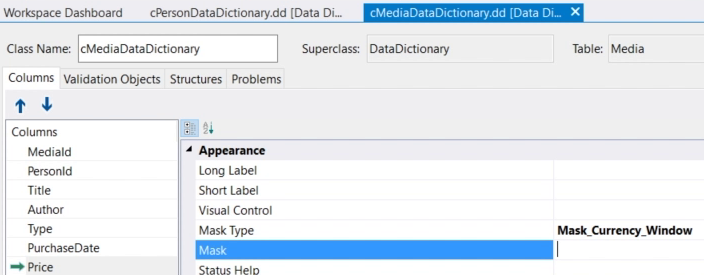
- For purchase date, we're going to use at a short label. And for price, we're going to configure a mask. A mask determines which characters can be entered, but it also determines how a value is shown within the application. In this case, we're going to choose a default currency mask by selecting mask type, and setting it to “Mask_Currency_Window”. Now that we have defined our business rules by configuring the data dictionaries. The next lesson is going to be the creation of the web project.