Multi Tenancy
Lesson 5: Multiple database strategy
In the previous lesson it was shown how to switch based on a URL. Using the same example, it will now be shown how to switch between different databases. Instead of having all the tenant data in a single database, a different database will exist for each tenant.
- Opening the Microsoft SQL Server Management Studio, extend ‘Databases’ to show that there exists a unique database for the various tenants. In addition, ‘ChinookShared’ is shown, and it contains shared tables.
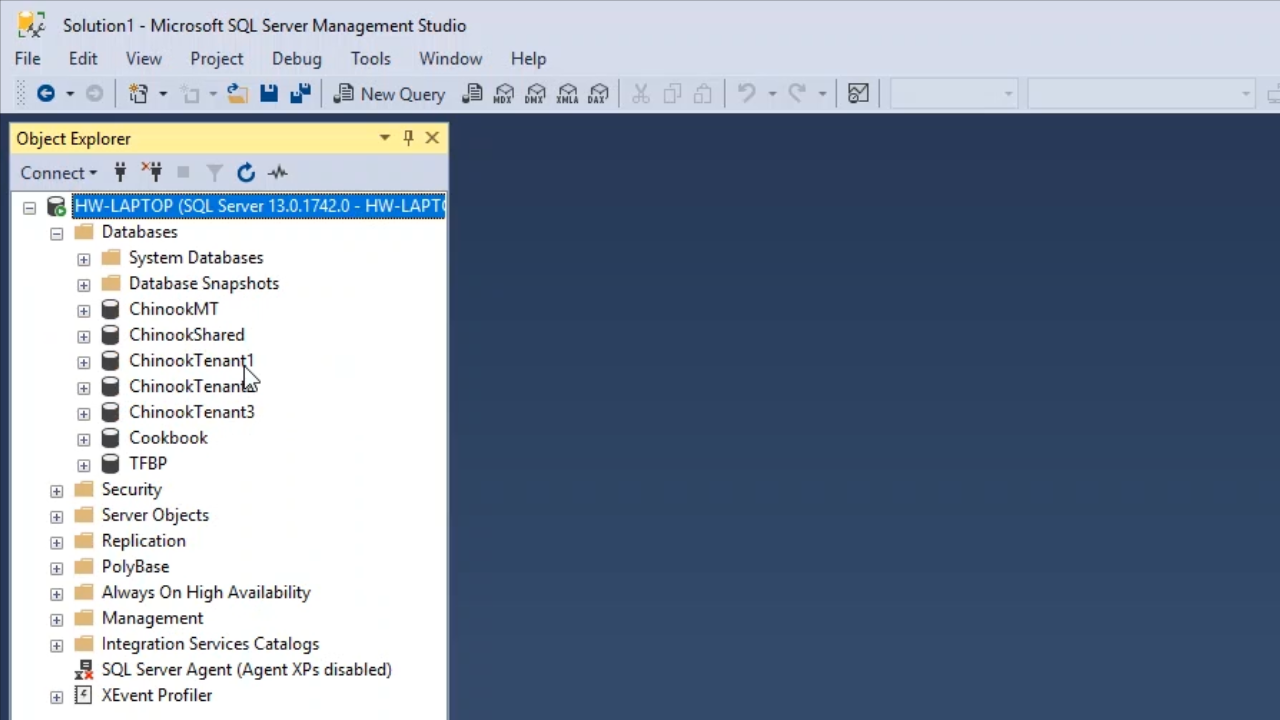
- Each of the tenant databases have the same structure, which is important because they will be switched between in a running process.
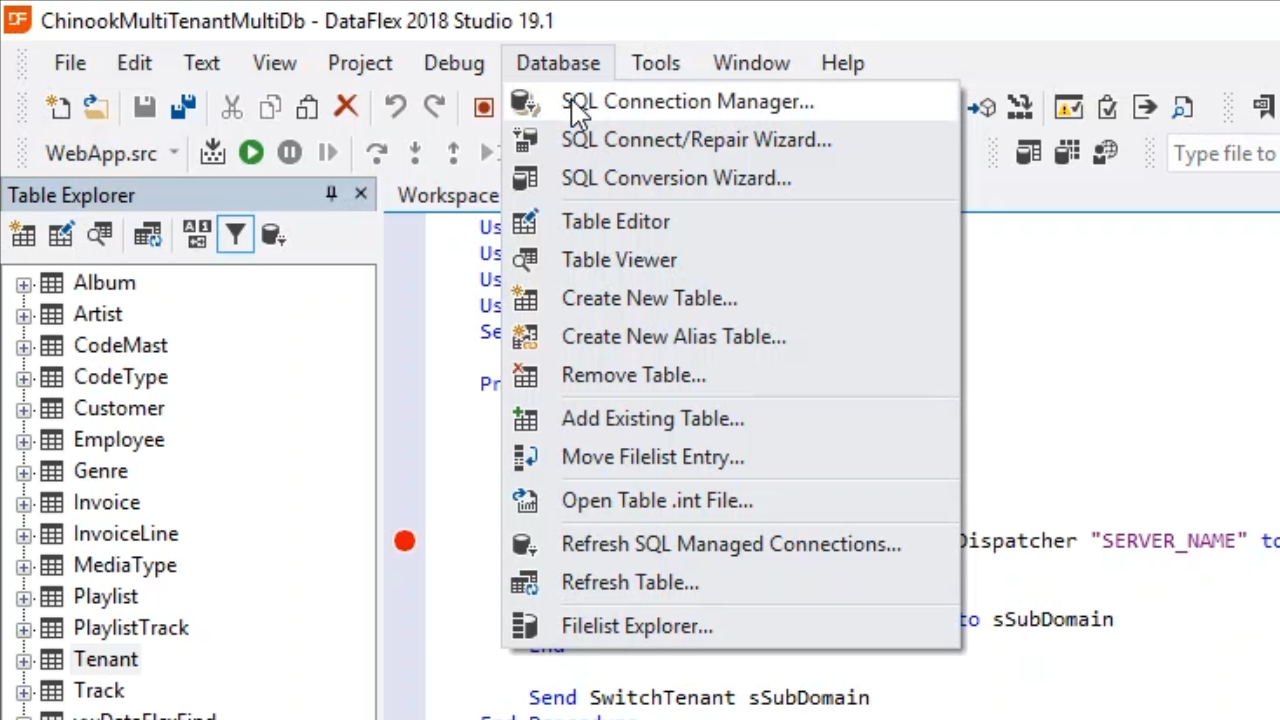
- From within the DataFlex Studio, two connection IDs have been defined. To see them, go to ‘Database’ on the top menu, and select ‘SQL Connection Manager.’
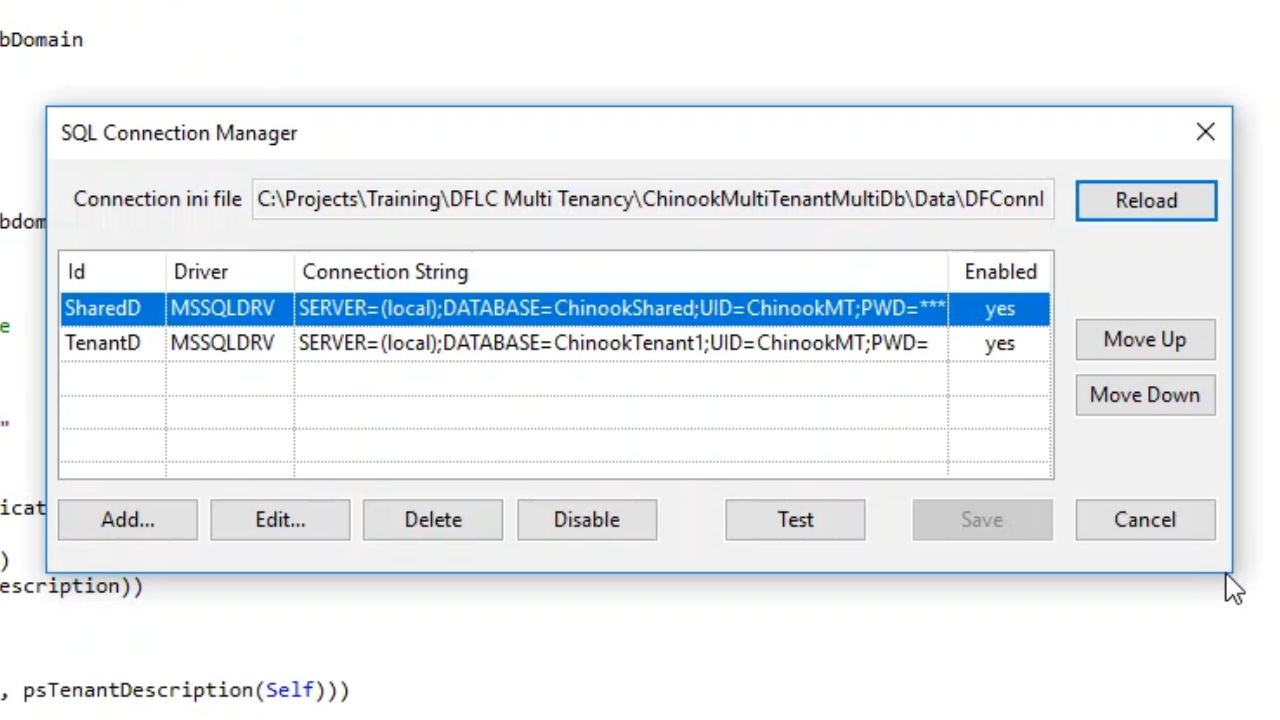
- “SharedData” points to the ChinookShared database, and “TenantData” points to “ChinookTenant1” database that is used during development.
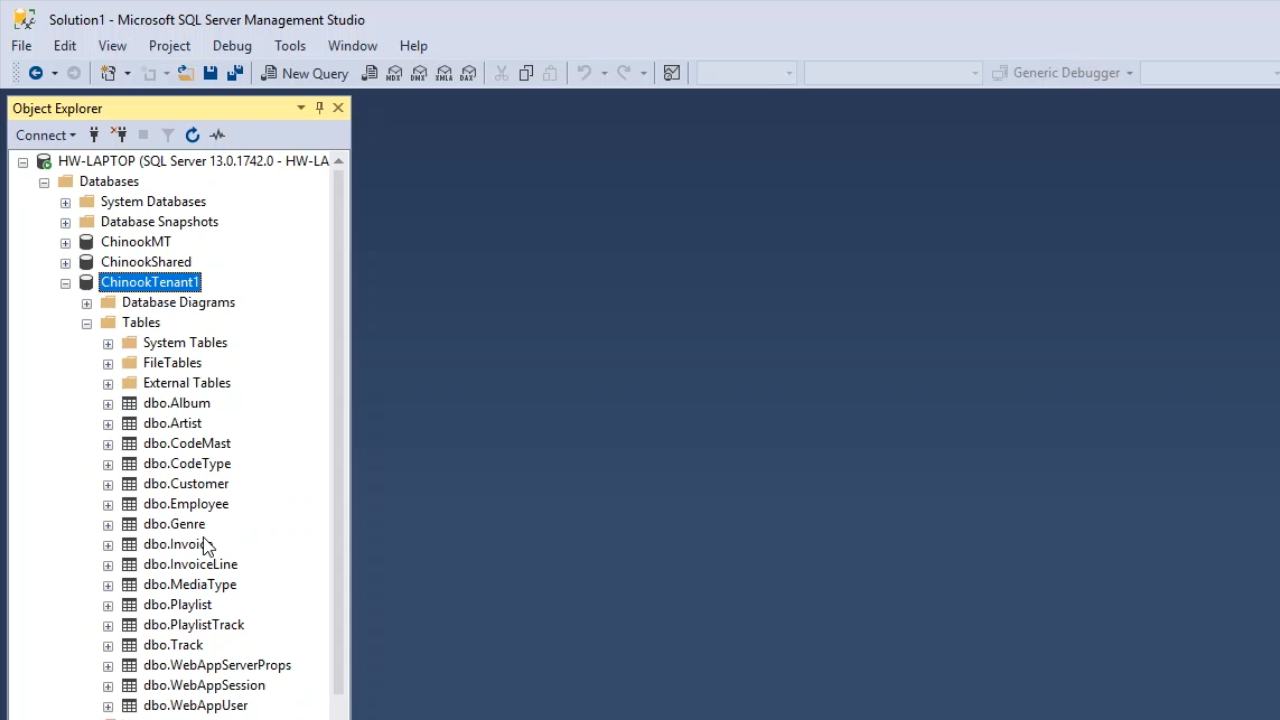
- Expanding the ‘Track’ table from the Table Explorer on the left, and then expanding ‘Connection’ shows the Track Table is part of the TenantData connection so it points to the ChinookTenant1 database.
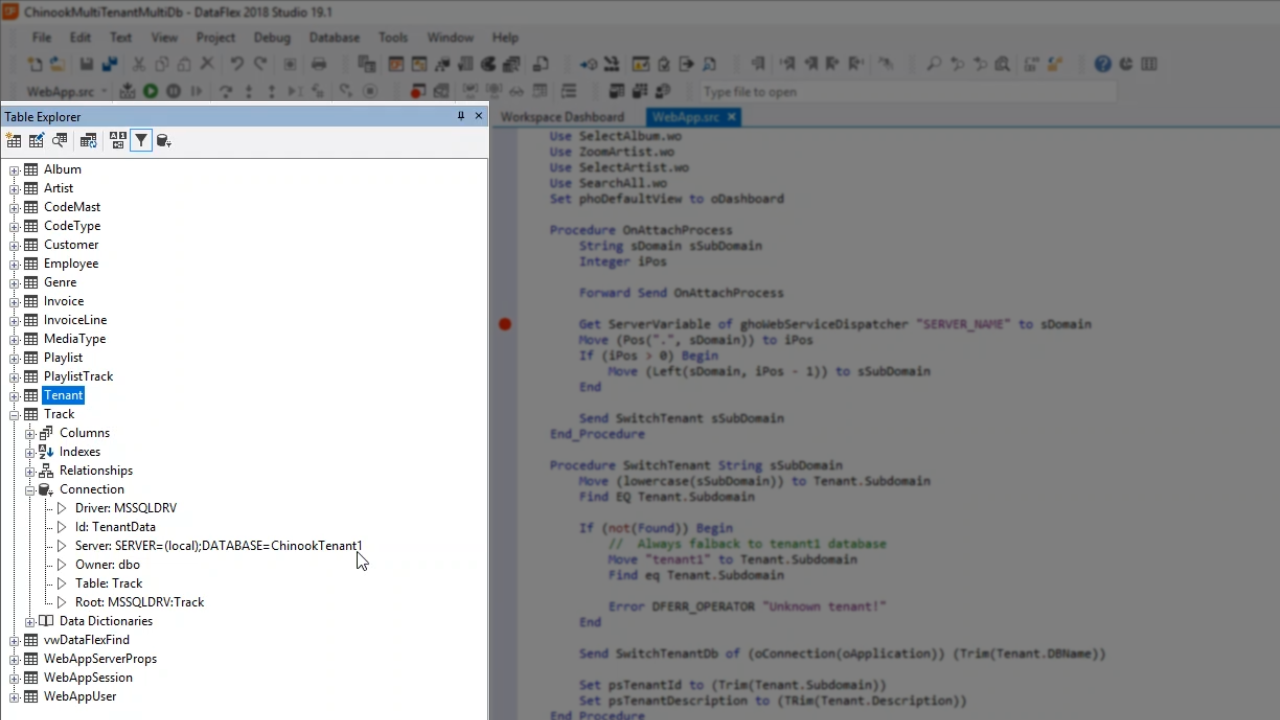
- Doing the same for the ‘Tenant’ table it shows that it is part of the SharedData connection, and that it points to the ChinookShared database.

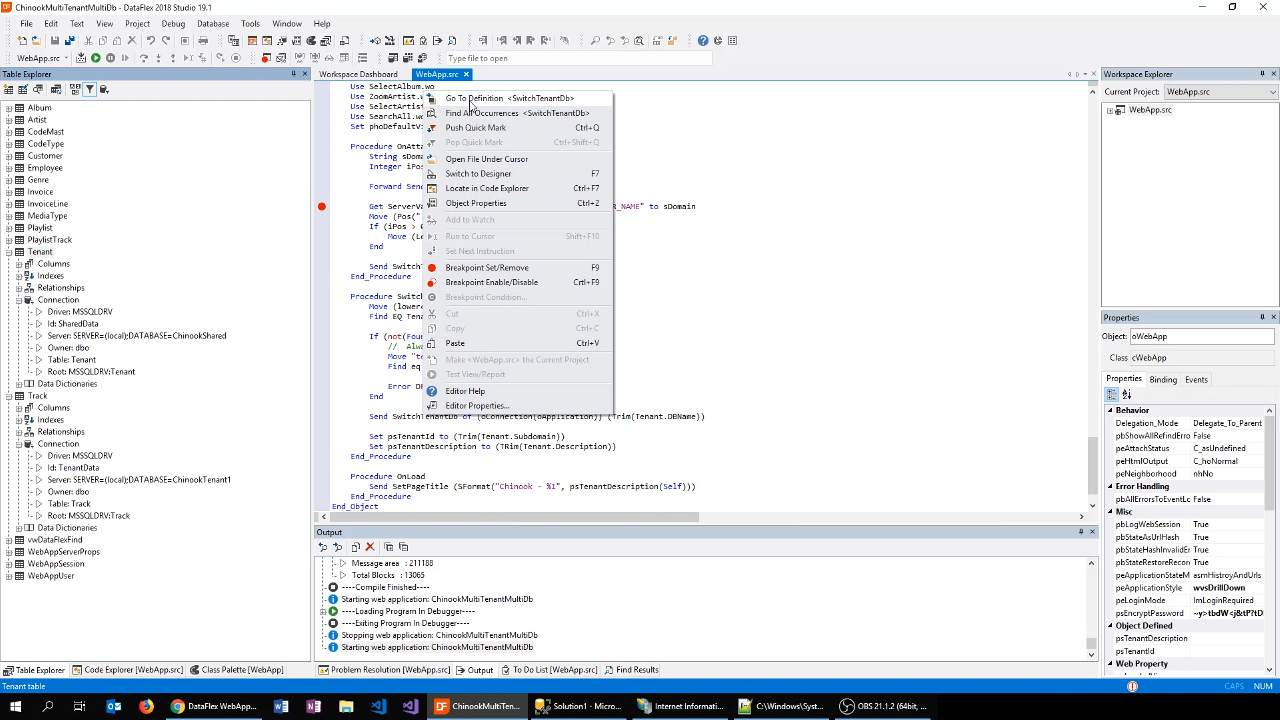
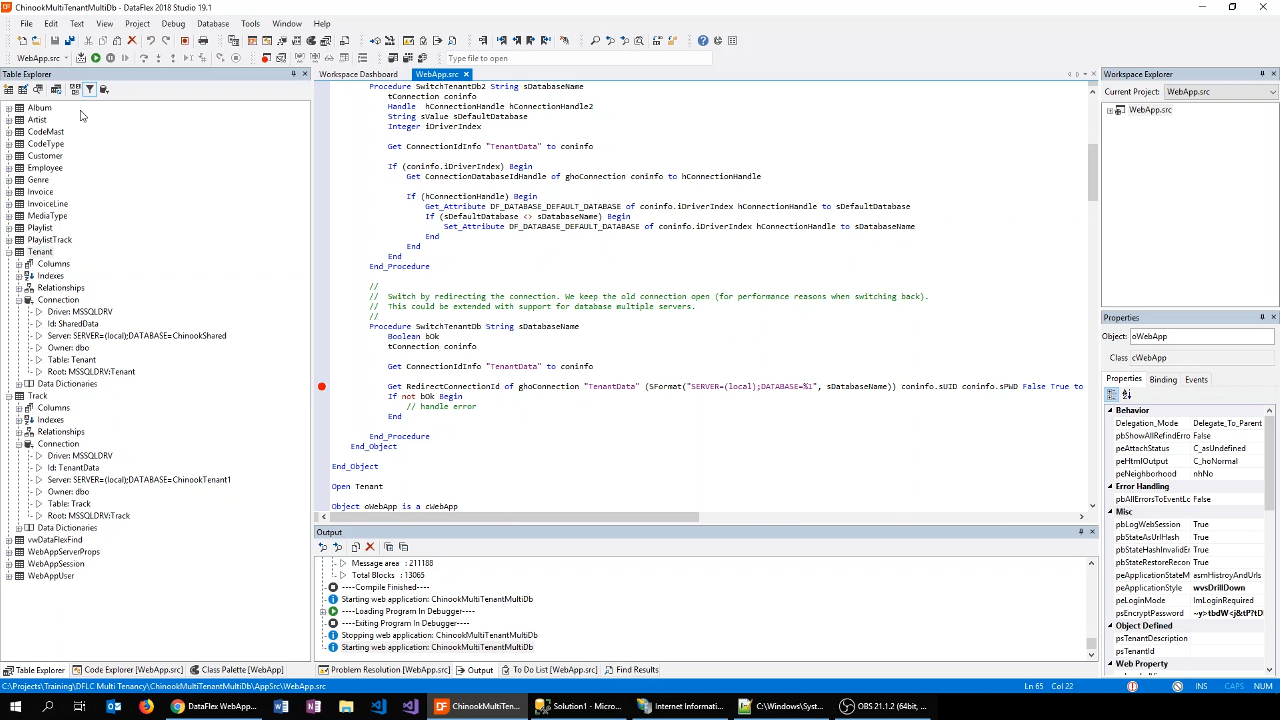
- There are multiple ways to switch the entire connection to a different database, but only two methods are going to be shown.
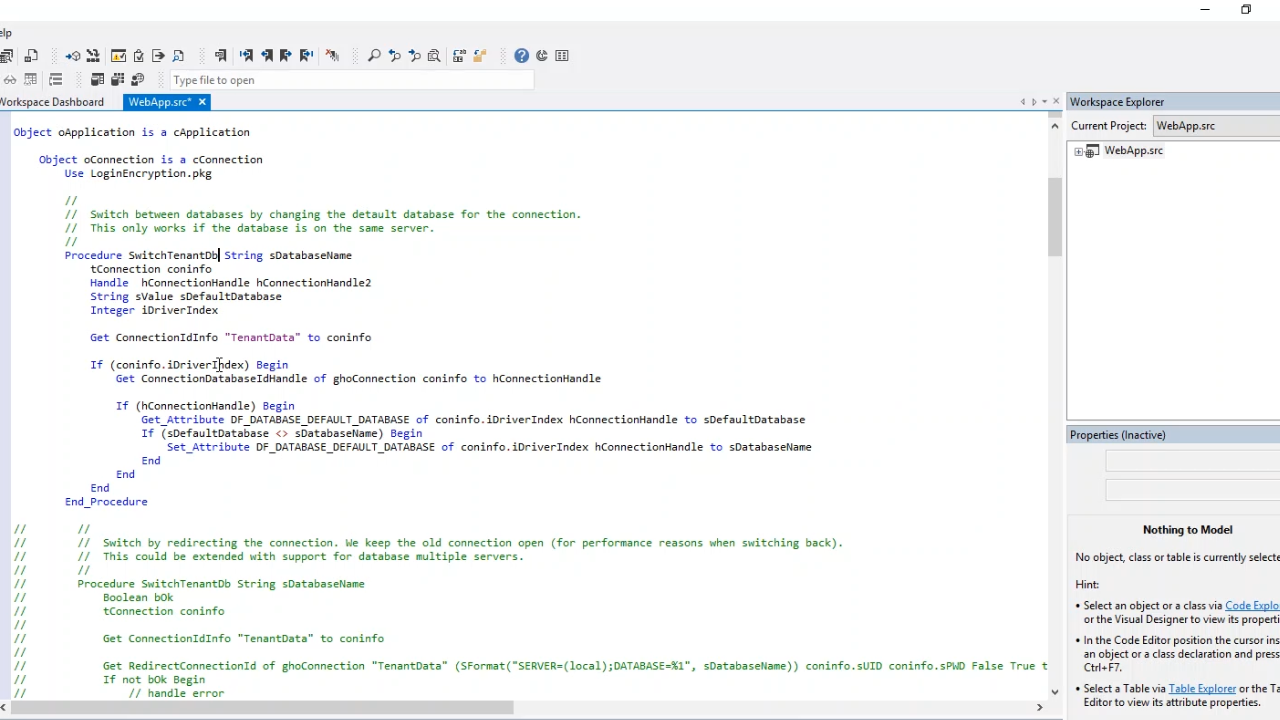
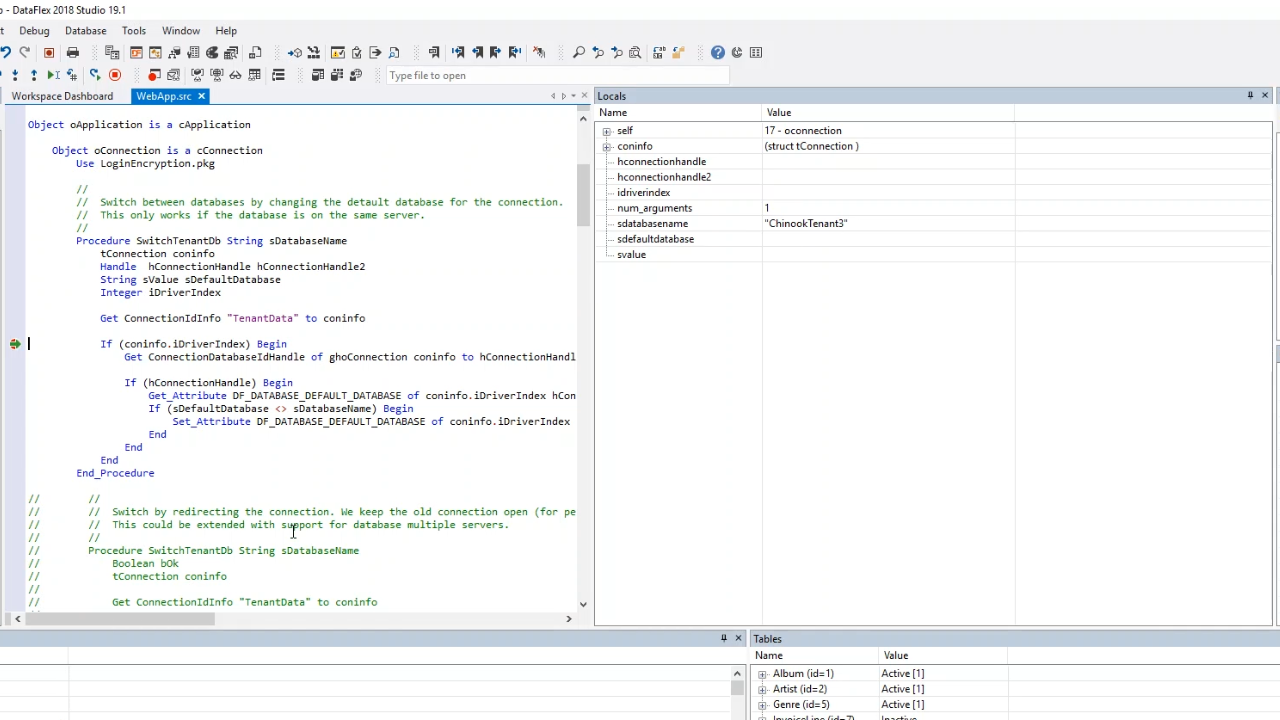
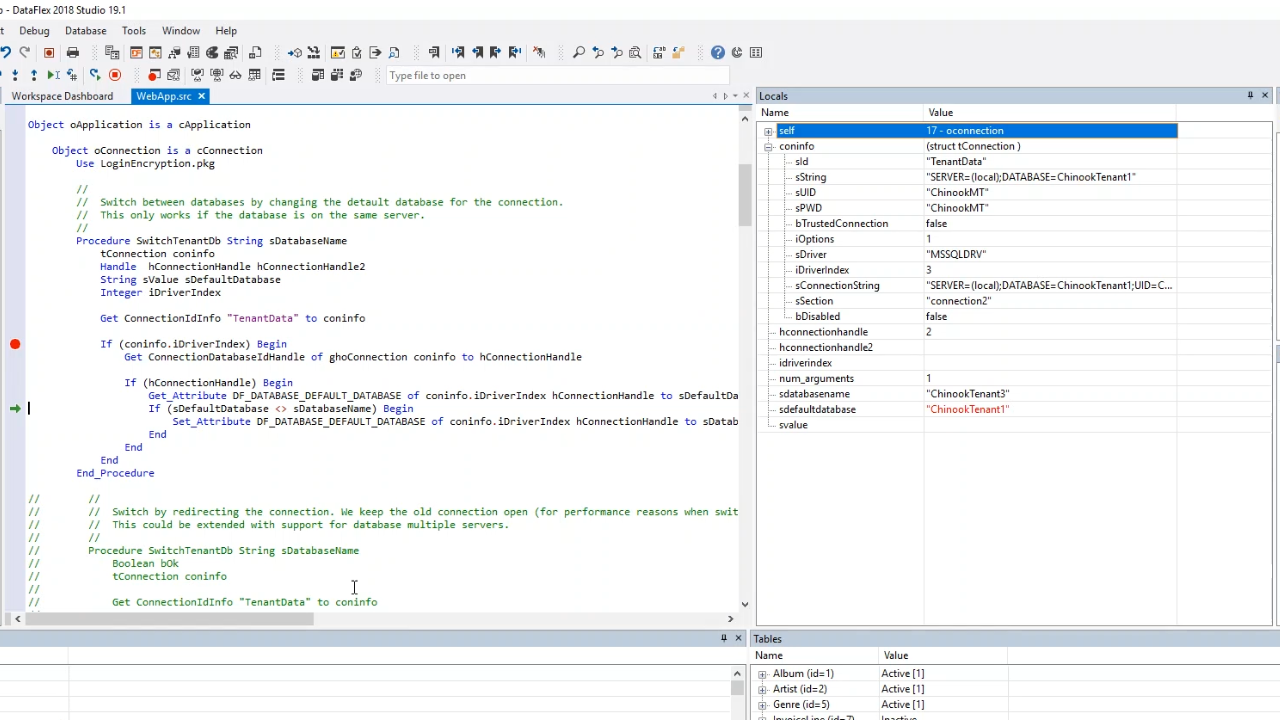
- The first is inside the ‘SwitchTenantDb.’ Right click on it and select ‘Go To Definition.’ Inside SwitchTenantDb it shows that the database name is fetched as a parameter.
- RedirectConnectionID is used to redirect the connection to a different location. There is also the option to switch to a different server or a different login. For this example, however, the ‘local’ server will be used, but basically a new connection string is generated. To do this, the information of the existing connection is queried.
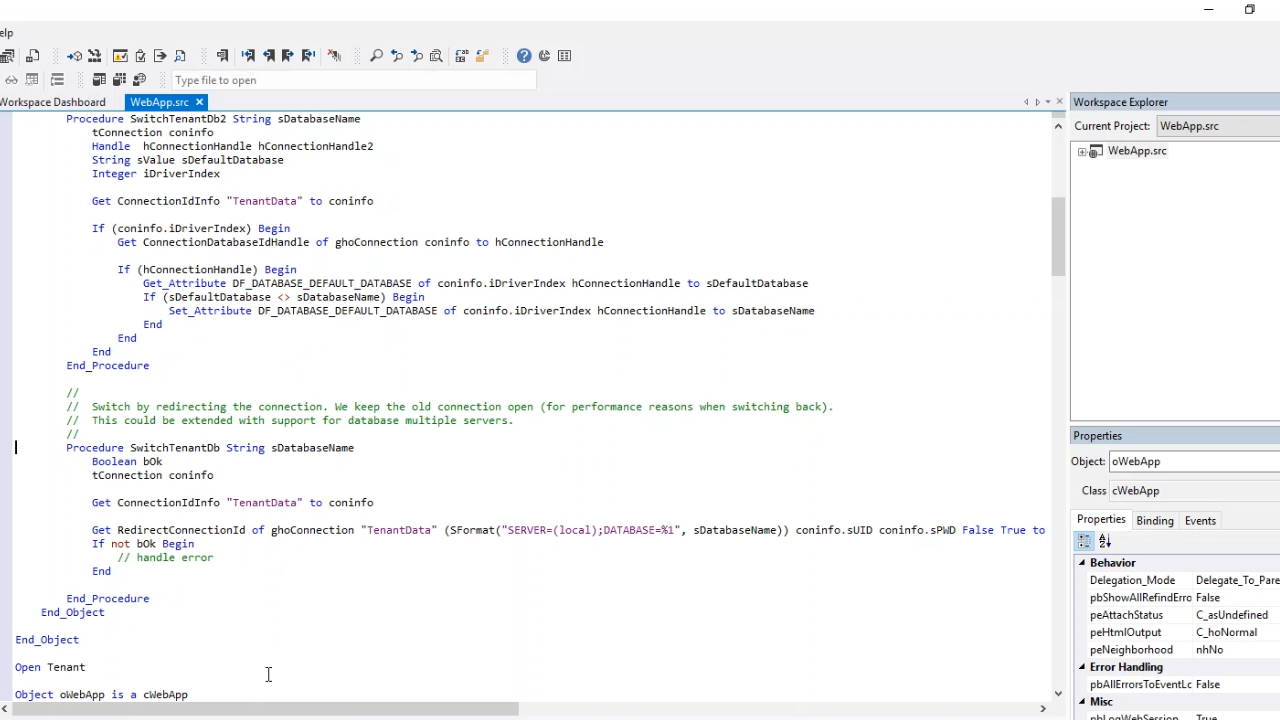
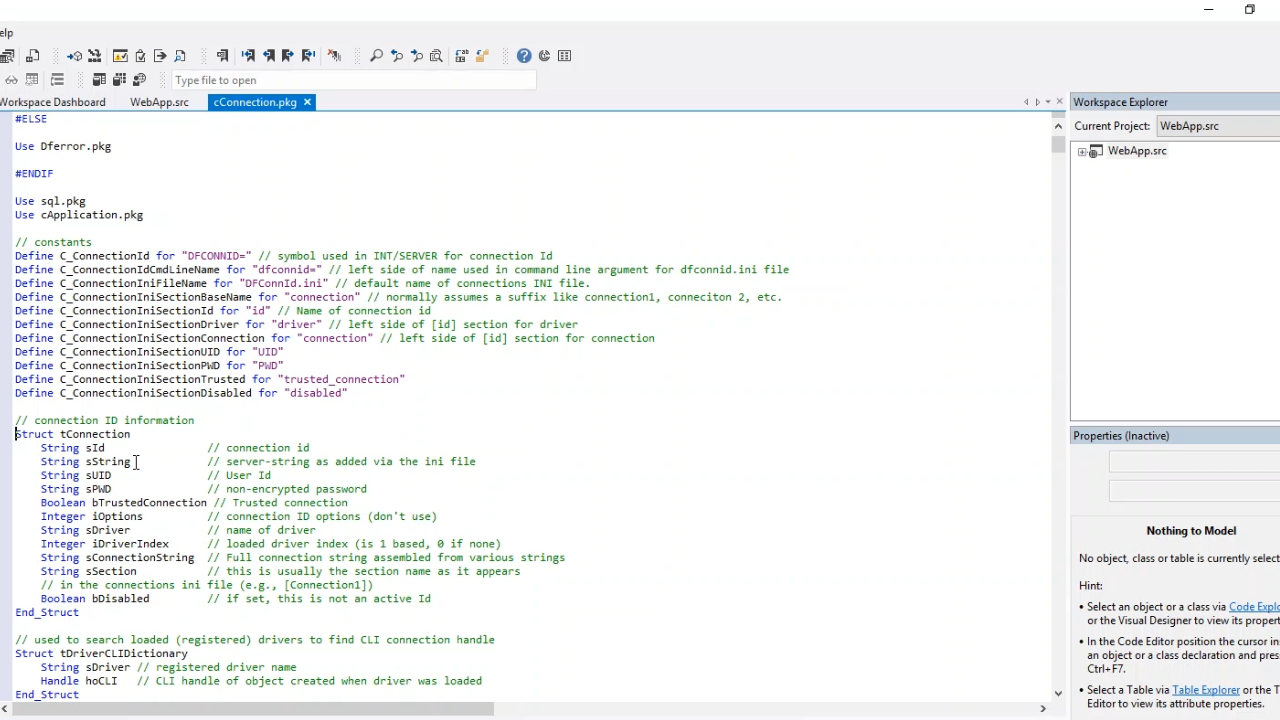
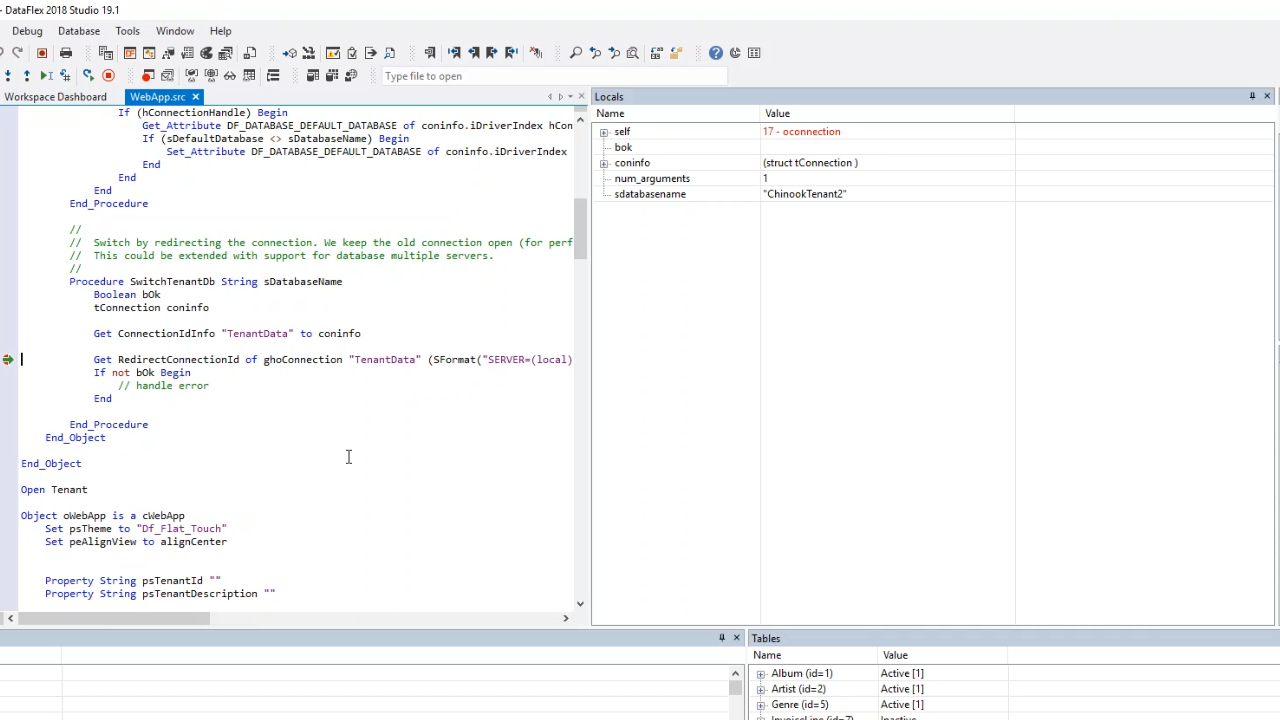
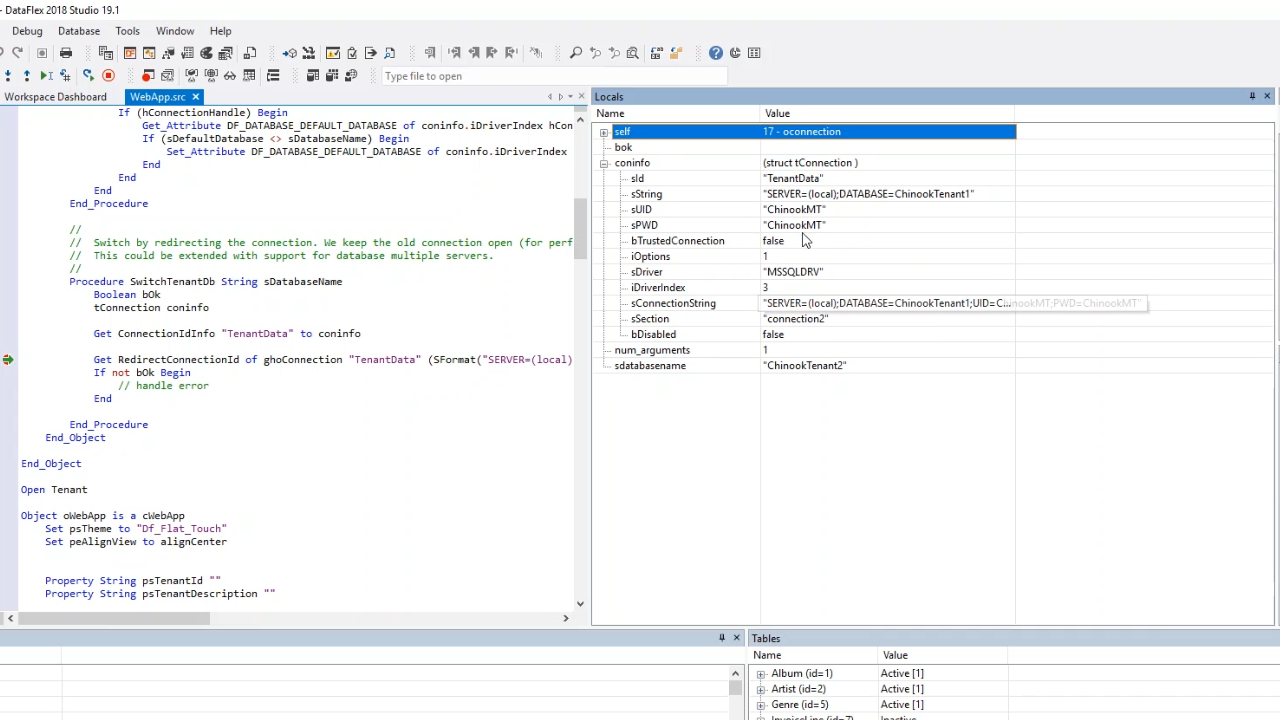
- ‘Get ConnectionIdInfo’ is used, which gets a struct called ‘tConnection.’ This contains info about the struct. Going to its definition it shows that it contains several items such as user ID, password, and trusted connection. This struct is used to basically reuse the login information. This is done because the password is stored encrypted in the connection ID.
- When using ‘RedirectConnectionID’ it is important to pass “True” as the last Boolean. It stands for ‘bKeepOpen,’ which keeps the old connection as a new connection is opened. This is to improve performance.

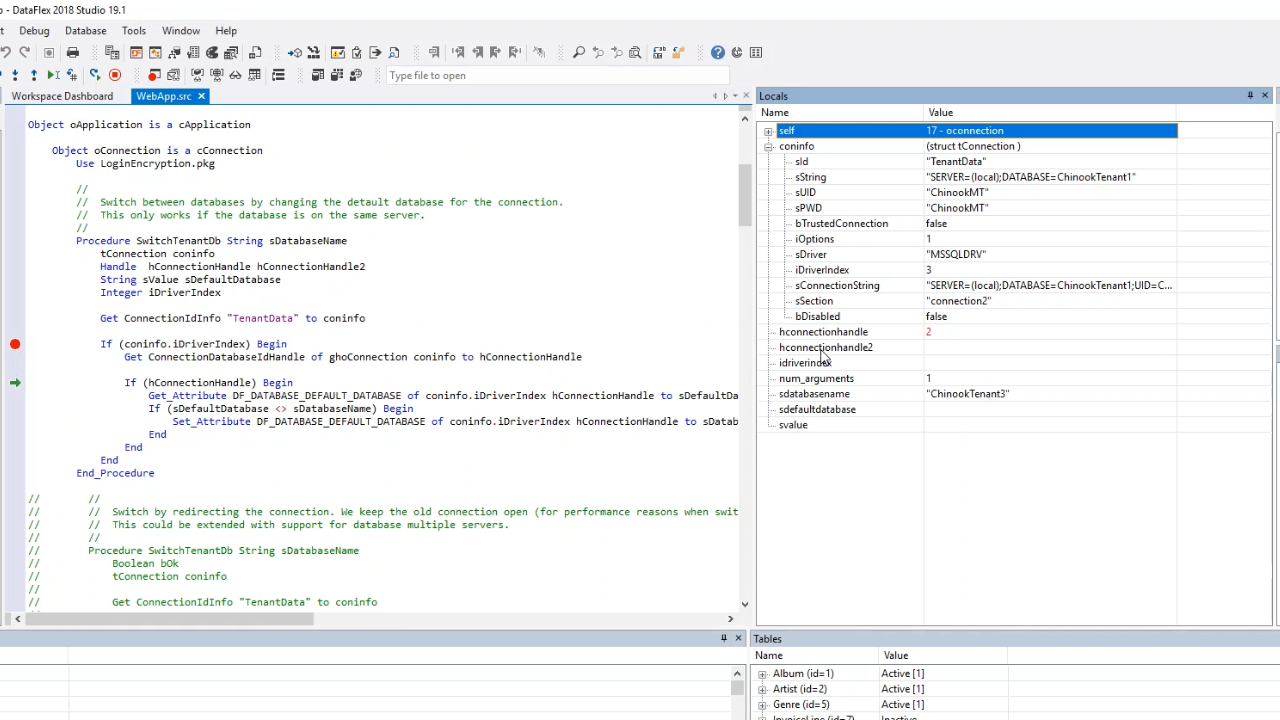
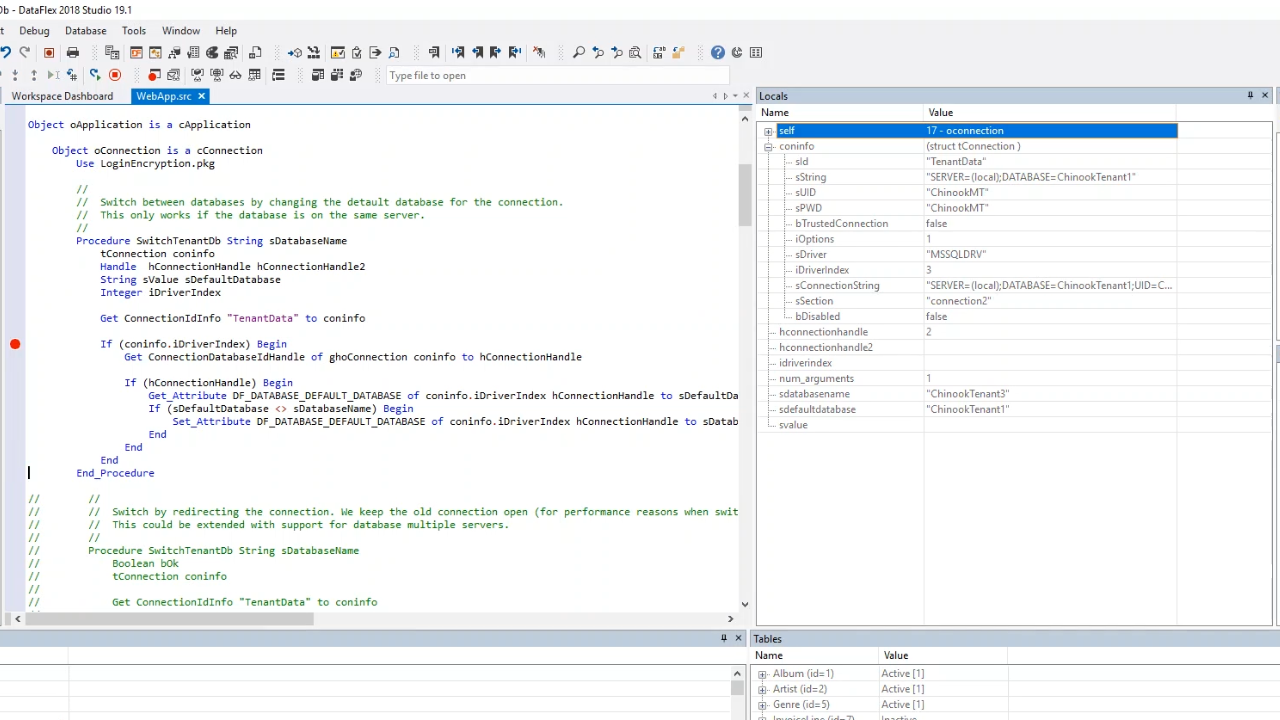
- Placing a break point by ‘RecirectConnectionID,’ running the application, and trying to do an action in the application triggers the Studio’s debug mode.
- “ChinookTenant2” is shown under Locals on the left side as the database. The connection string is being rebuilt based on the existing connection info. The previous request was from Tenant1 and is being switched to Tenant2. Items are also showing that the password is being decrypted.
- If the preference is to not login in again and the database is on the same server there is an alternative way for switching that is a little faster. That is by using the ‘sDefaultDatabase’ attribute. This is an attribute of the diver that requires the use of “Set_Attribute” to pass the driver ID and a connection handle, and then it needs to be set to a specific database name. This switches the database on the existing connection. To do this, some information needs to be queried first: “ConnectionIdInfo” and “ConnectionDatabaseIdHandle.” Following the default database is queried. If it is a different database then the switch is performed by calling “Set_Attribute DF_DATABASE_DEFAULT_DATABASE.”
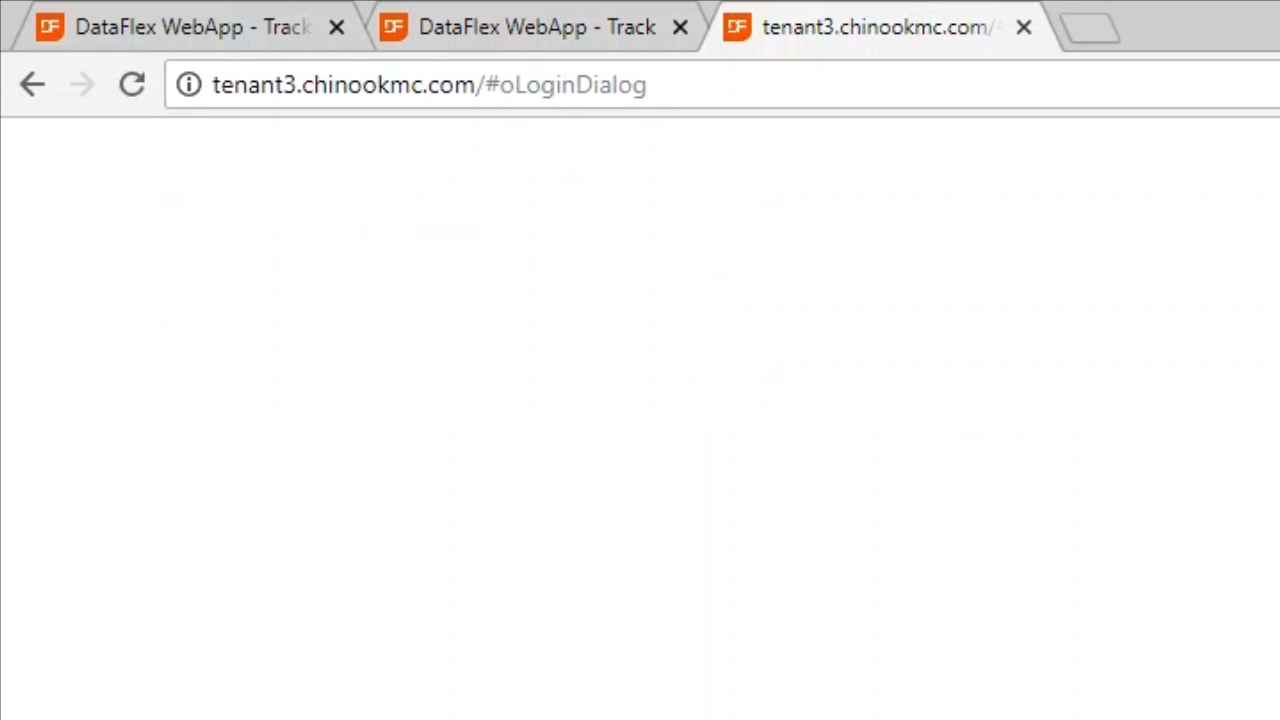
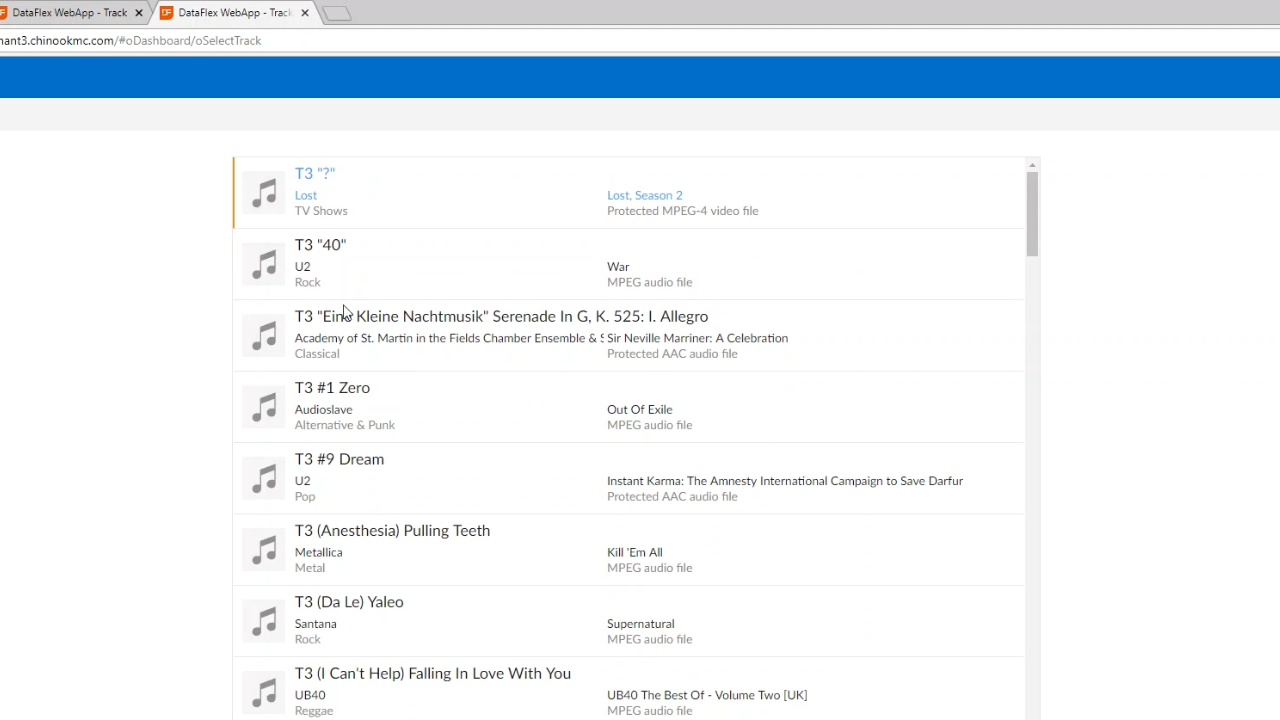
- Placing a stop next to the information query, running the application, and opening the app to tenant3 (tenant3.chinookmc.com/#oLoginDialog).
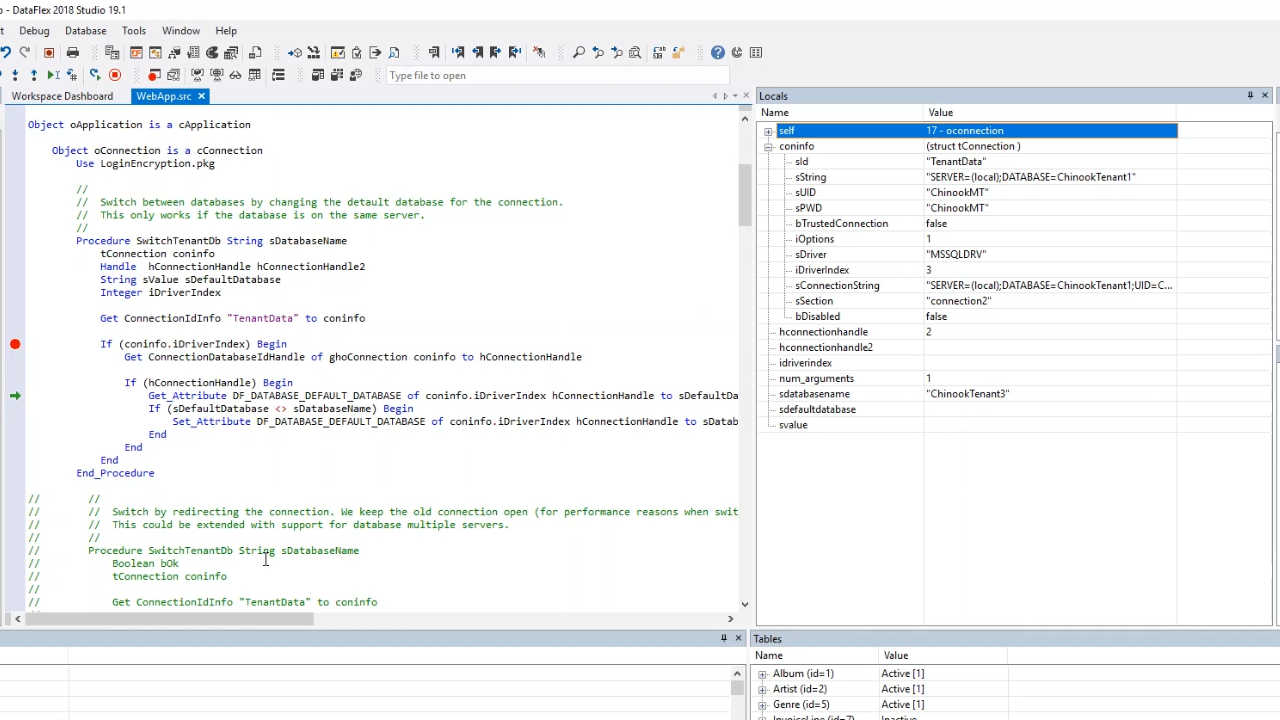
- the stop is automatically hit and debugger in the DataFlex Studio shows that the database, “ChinookTeant3,” has been called.
- Walking through the code, the connection info is shown, the field connection info struct, and connection handle is also shown. Next it checks to see if there is a handle, and the default database is pulled (ChinookTenant1). Next Set_Attribute is called, and the default database is changed. Then the data of the new database, ChinookTenant3, is used. The switching happens for each request. Logging into the application as Tenant3 will now show the data of Tenant3.
- Note that when switching between databases the buffers must be cleared manually. Usually the framework will do it for web applications. When there are system files they are not cleared because they are not part of the DDO structure. They need to be re-find programmatically. That is for both the constrained and the switch database version. For SQL, it is recommended not to use system files. SQL identifier logic is also better for performance.


