Label Reports can be used to print multiple records horizontally side-by-side. It’s very useful for printing address or price labels.
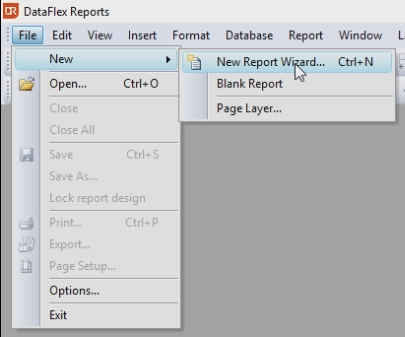
Click on File, New, New Report Wizard…
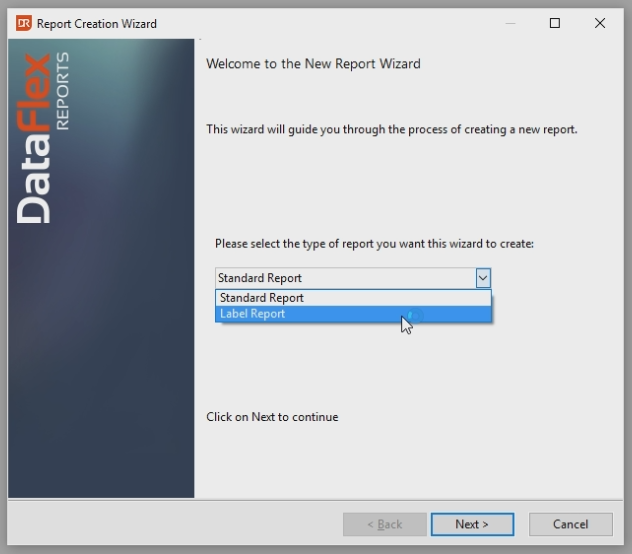
Choose the Label Report.
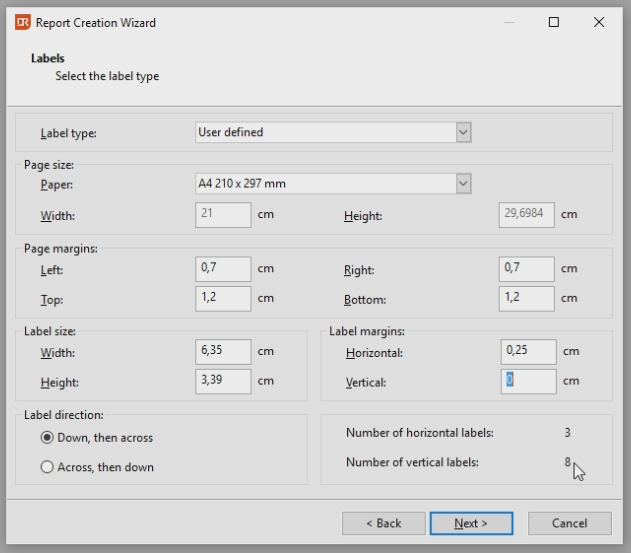
Define the values of the Label Reports. In this example: - Page margins Left: 0.7 cm - Page margins Right: 0.7 cm - Page margins Top: 1.2 cm - Page margins Bottom: 1.2 cm - Label size Width: 6.35 cm - Label size Height: 3.39 cm - Label margins Horizontal, 0.25 cm This screen of the wizard also shows how mow many labels will fit a page. In this case 3 x 8.
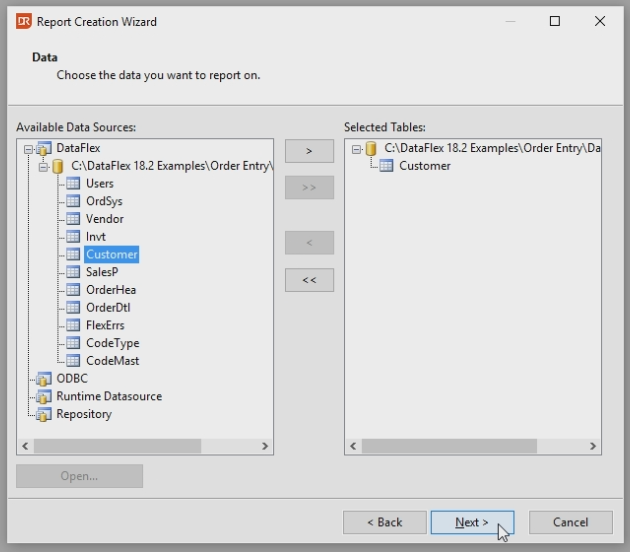
Double click the DataFlex Data source.
Select the Order Entry Sample.
Expand the database and double click the Customer table.
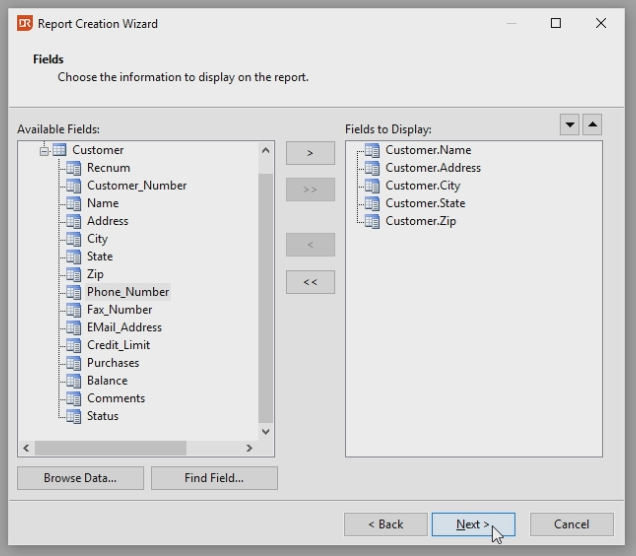
Select the Fields: - Name - Address - City - State - Zip
Skip the page about the filters.
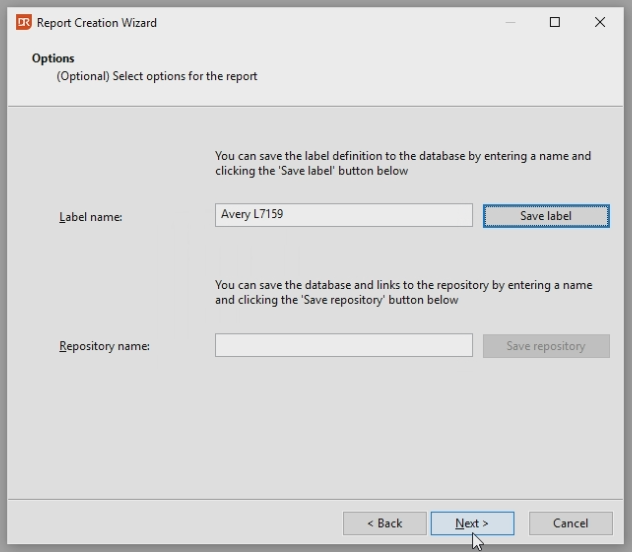
The labels can be saved, so the same format can be used later on. Enter the name Avery L7159 and Save the Label.
Finis the wizard.
Click the preview button or press CTRL + R. to preview the Labels.
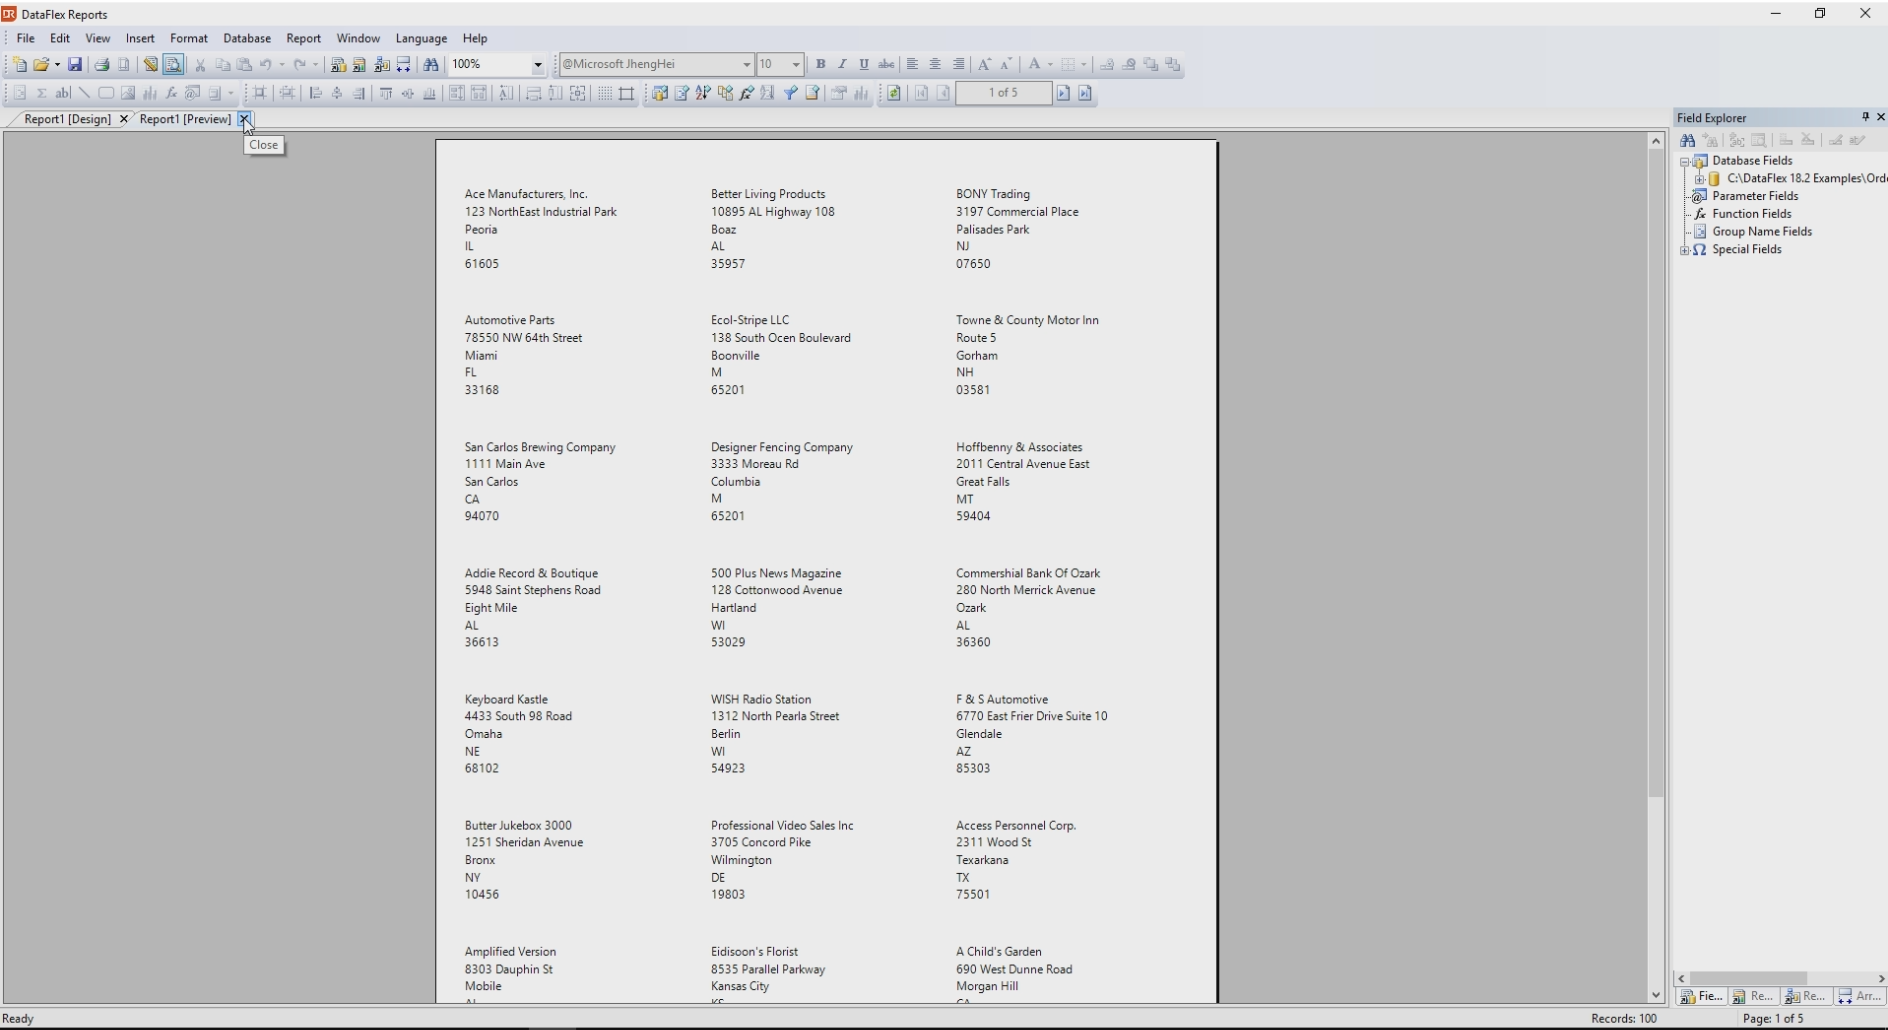
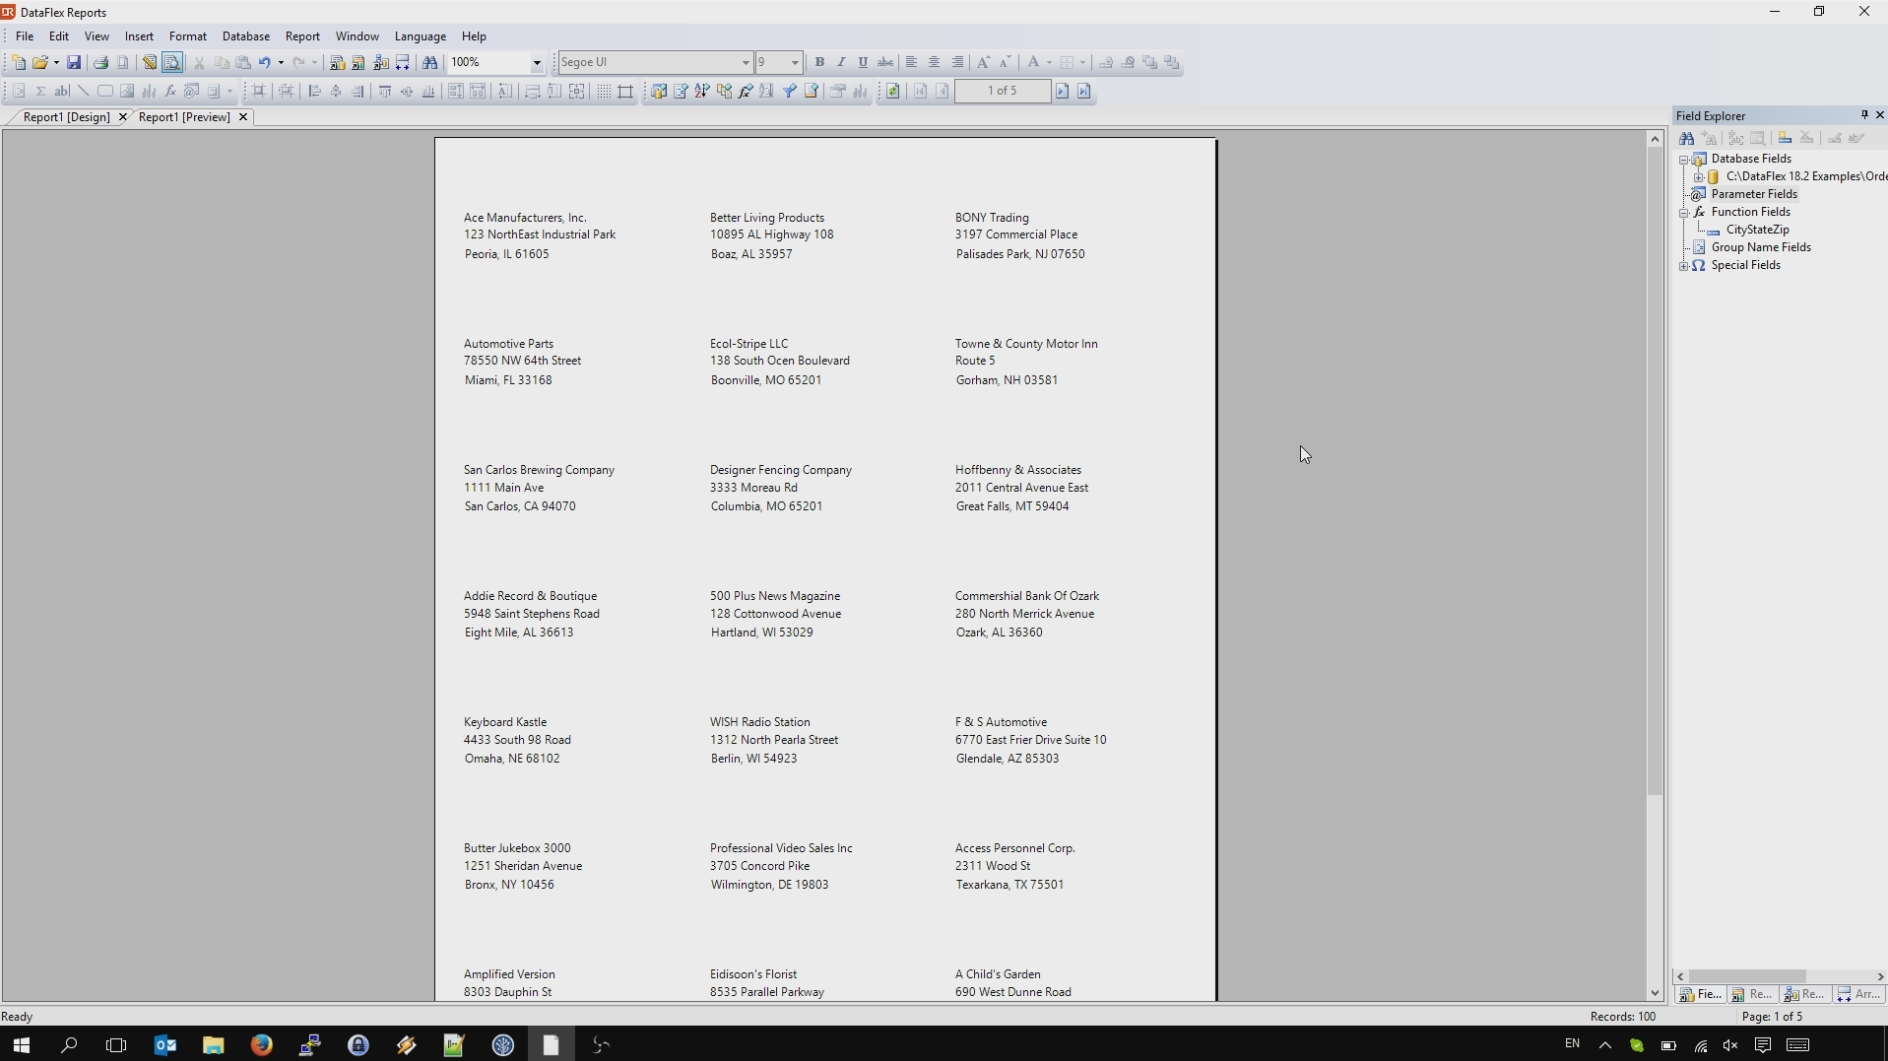
The preview shows.
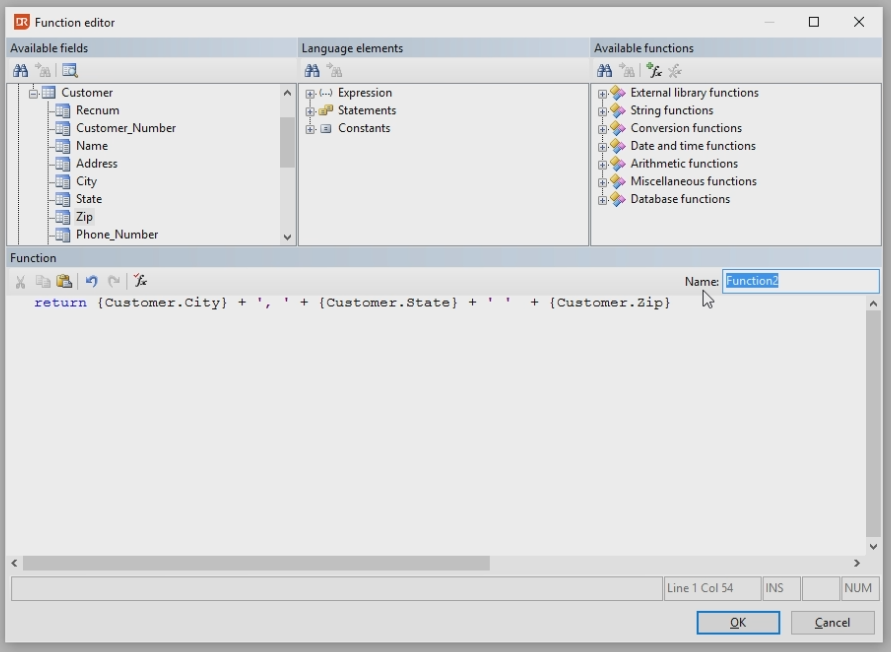
Let’s design this a bit. Click Function Fields in the Field Explorer and click the Add a Function Field button.
Create the function field: - Type: return - Select the City, State and Zip Fields - Change the name to CityStateZip It should look like this:
Press OK
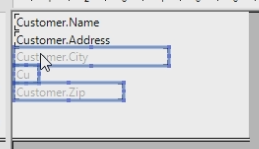
Select the fields City, State and Zip in the Label and delete them.
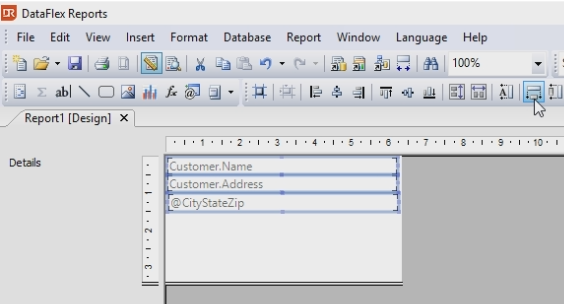
Drag the Function Field CityStateZip onto the Label.
Resize the different rows by selecting them and click the highlighted button in the image.
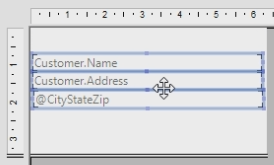
Drag them to the middle of the Label.
Click the Preview button again to see the preview.