To continue with this content, please log in with your Data Access ID or create a new account.
Cancel Data Access ID
You may not be authorized to see this content. Please contact Data Access Europe for more information.
Cancel Data Access Europe
You are not authorized to see this content.
Cancel Data Access Europe
Next lesson:
The Flow of Data and Conclusion
Cancel

How to work with the WebTagsForm

Lesson 1: Setting up and simples use case

In this lesson we’ll be setting up the webtagsform for initial use. 

Do keep in mind that for this lesson I expect you to already have your database tables set-up. If you didn’t do this yet, or if you created a new project specifically for this course; I suggest you create a simple table with one ‘Value’ column of the varchar type. 
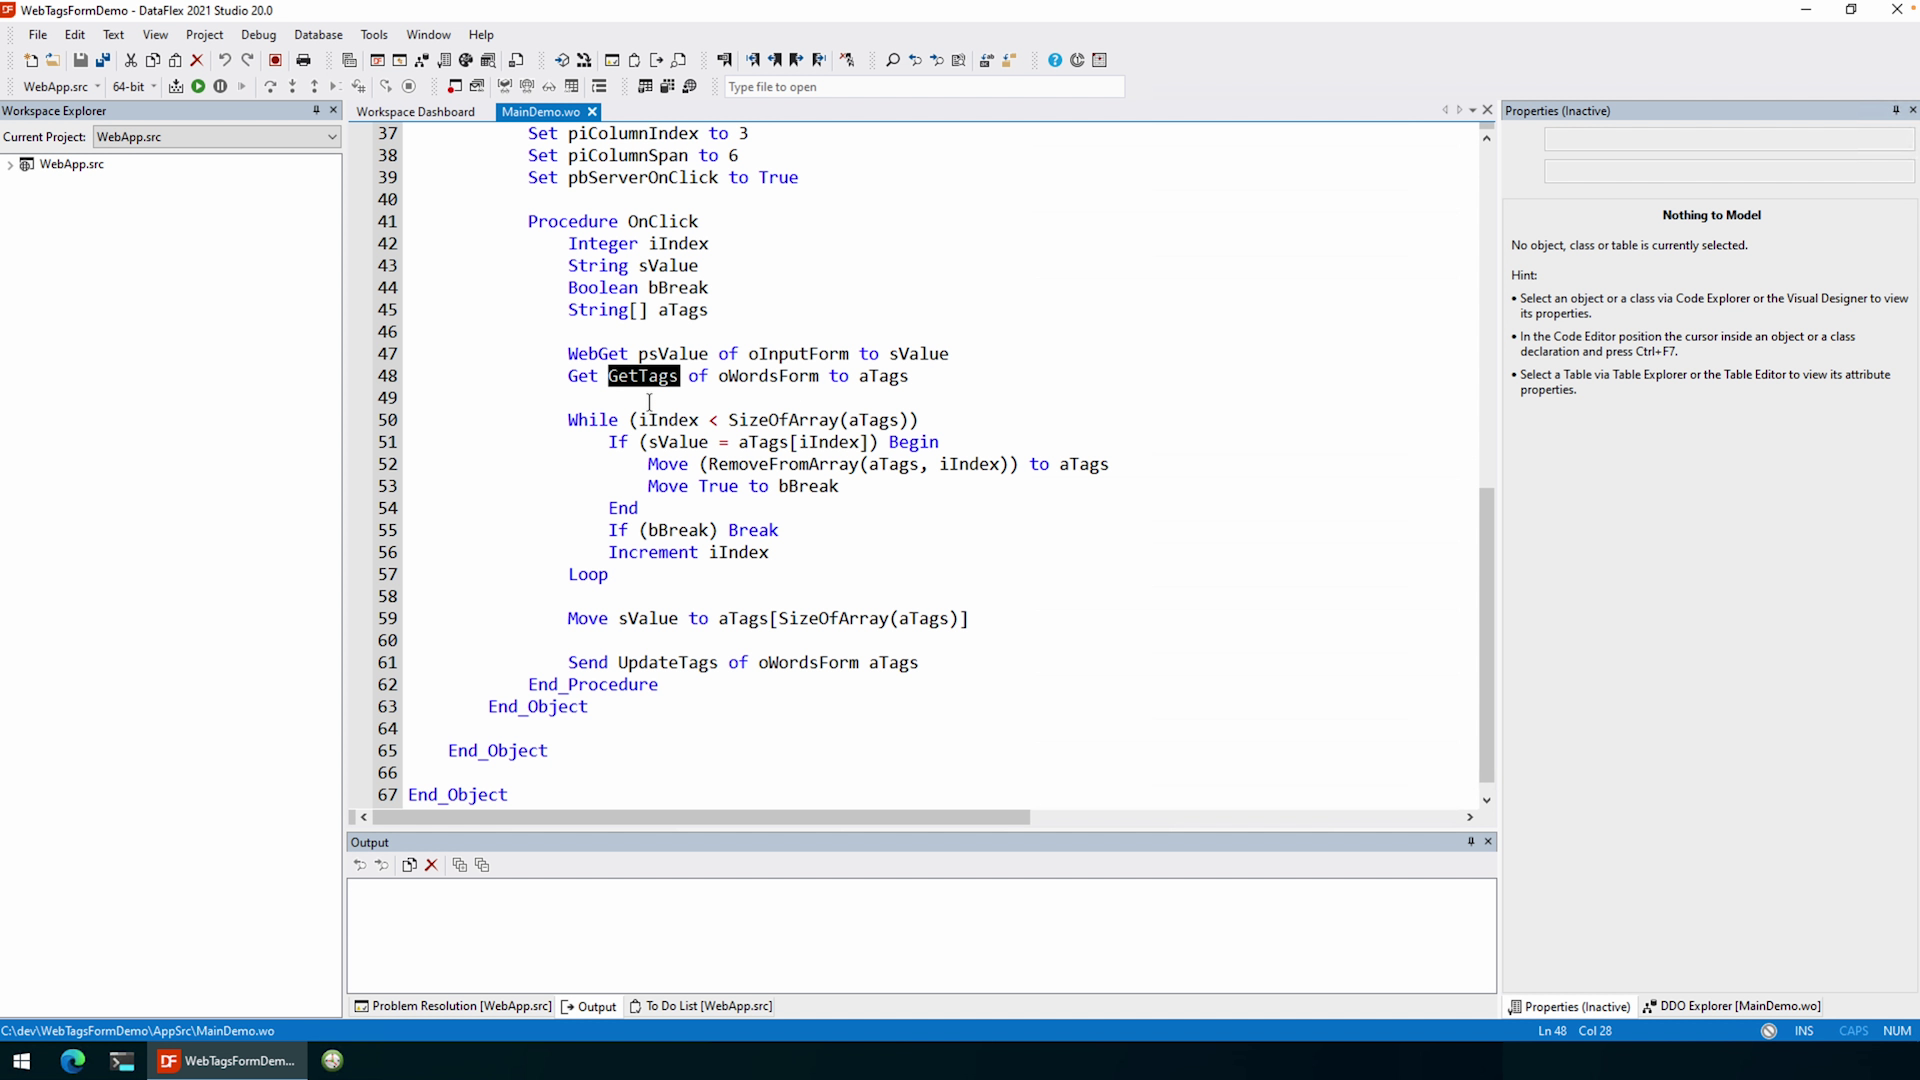
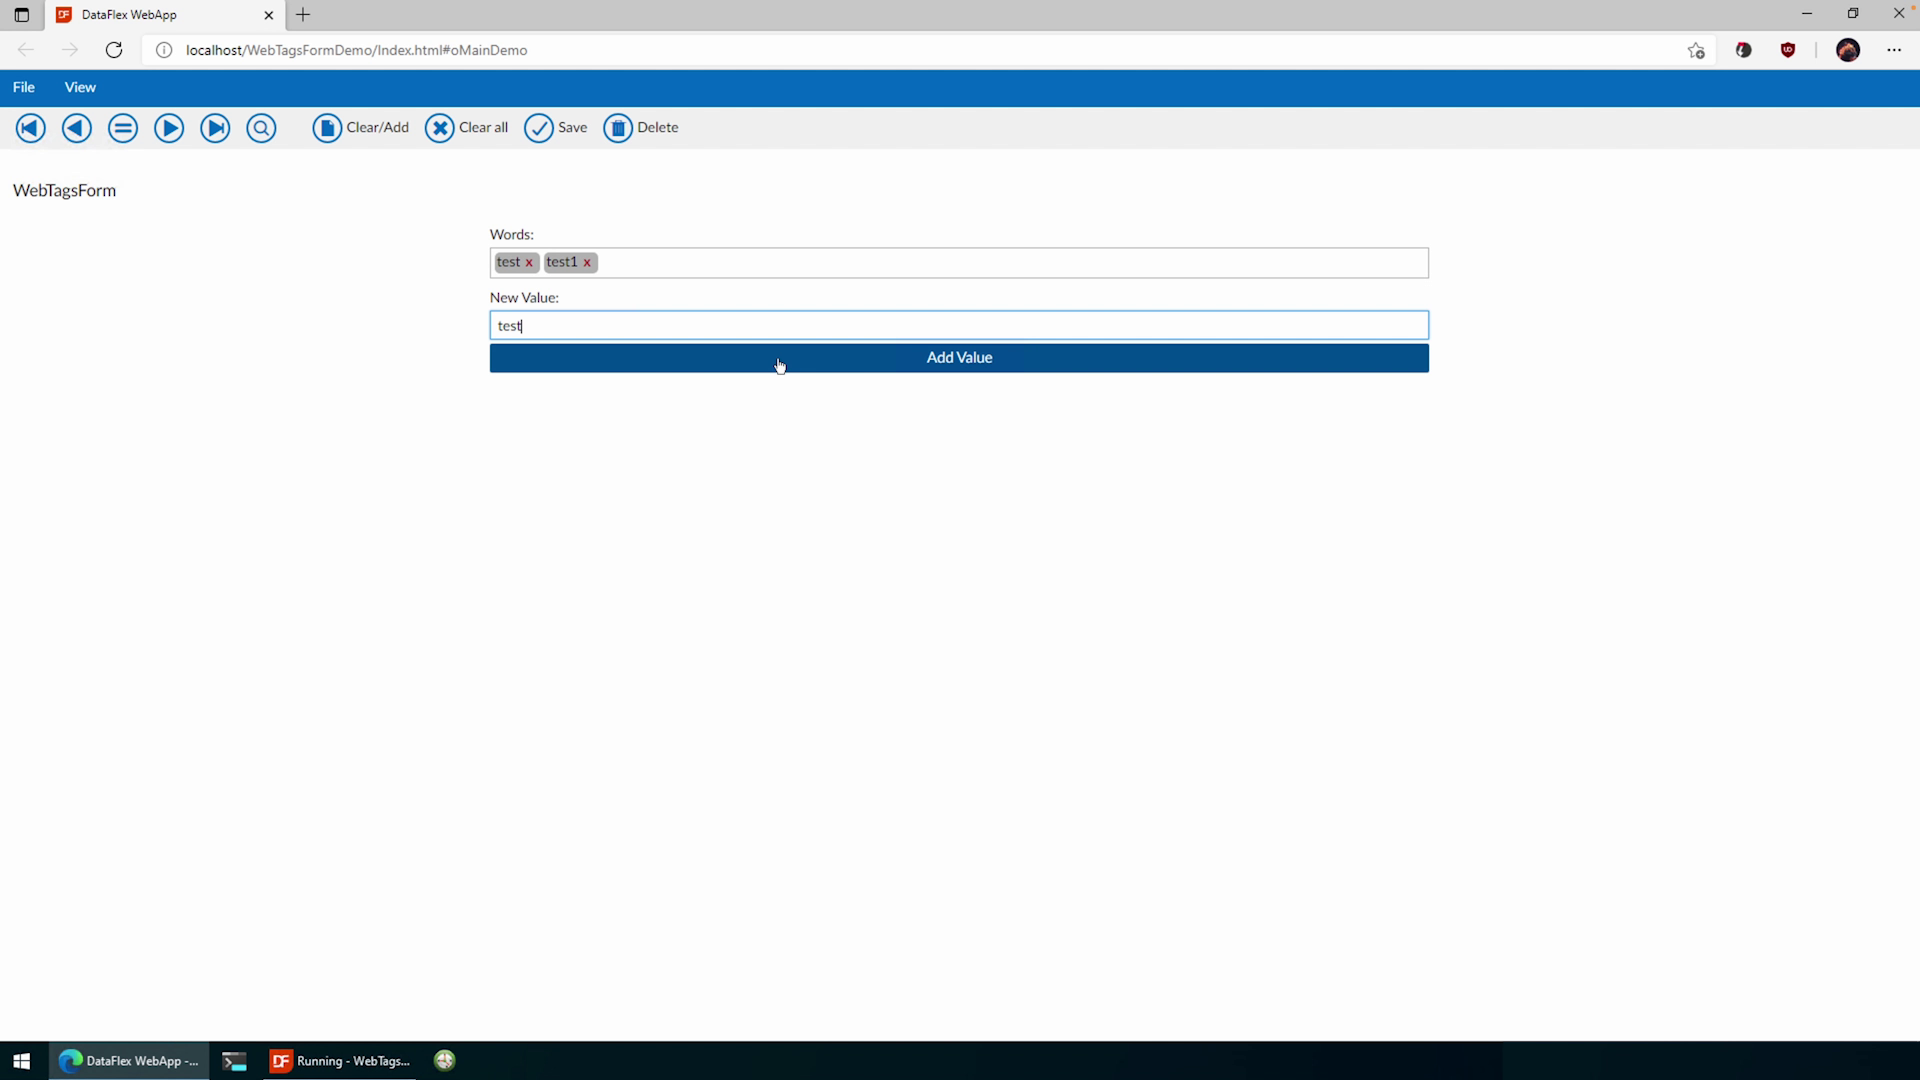
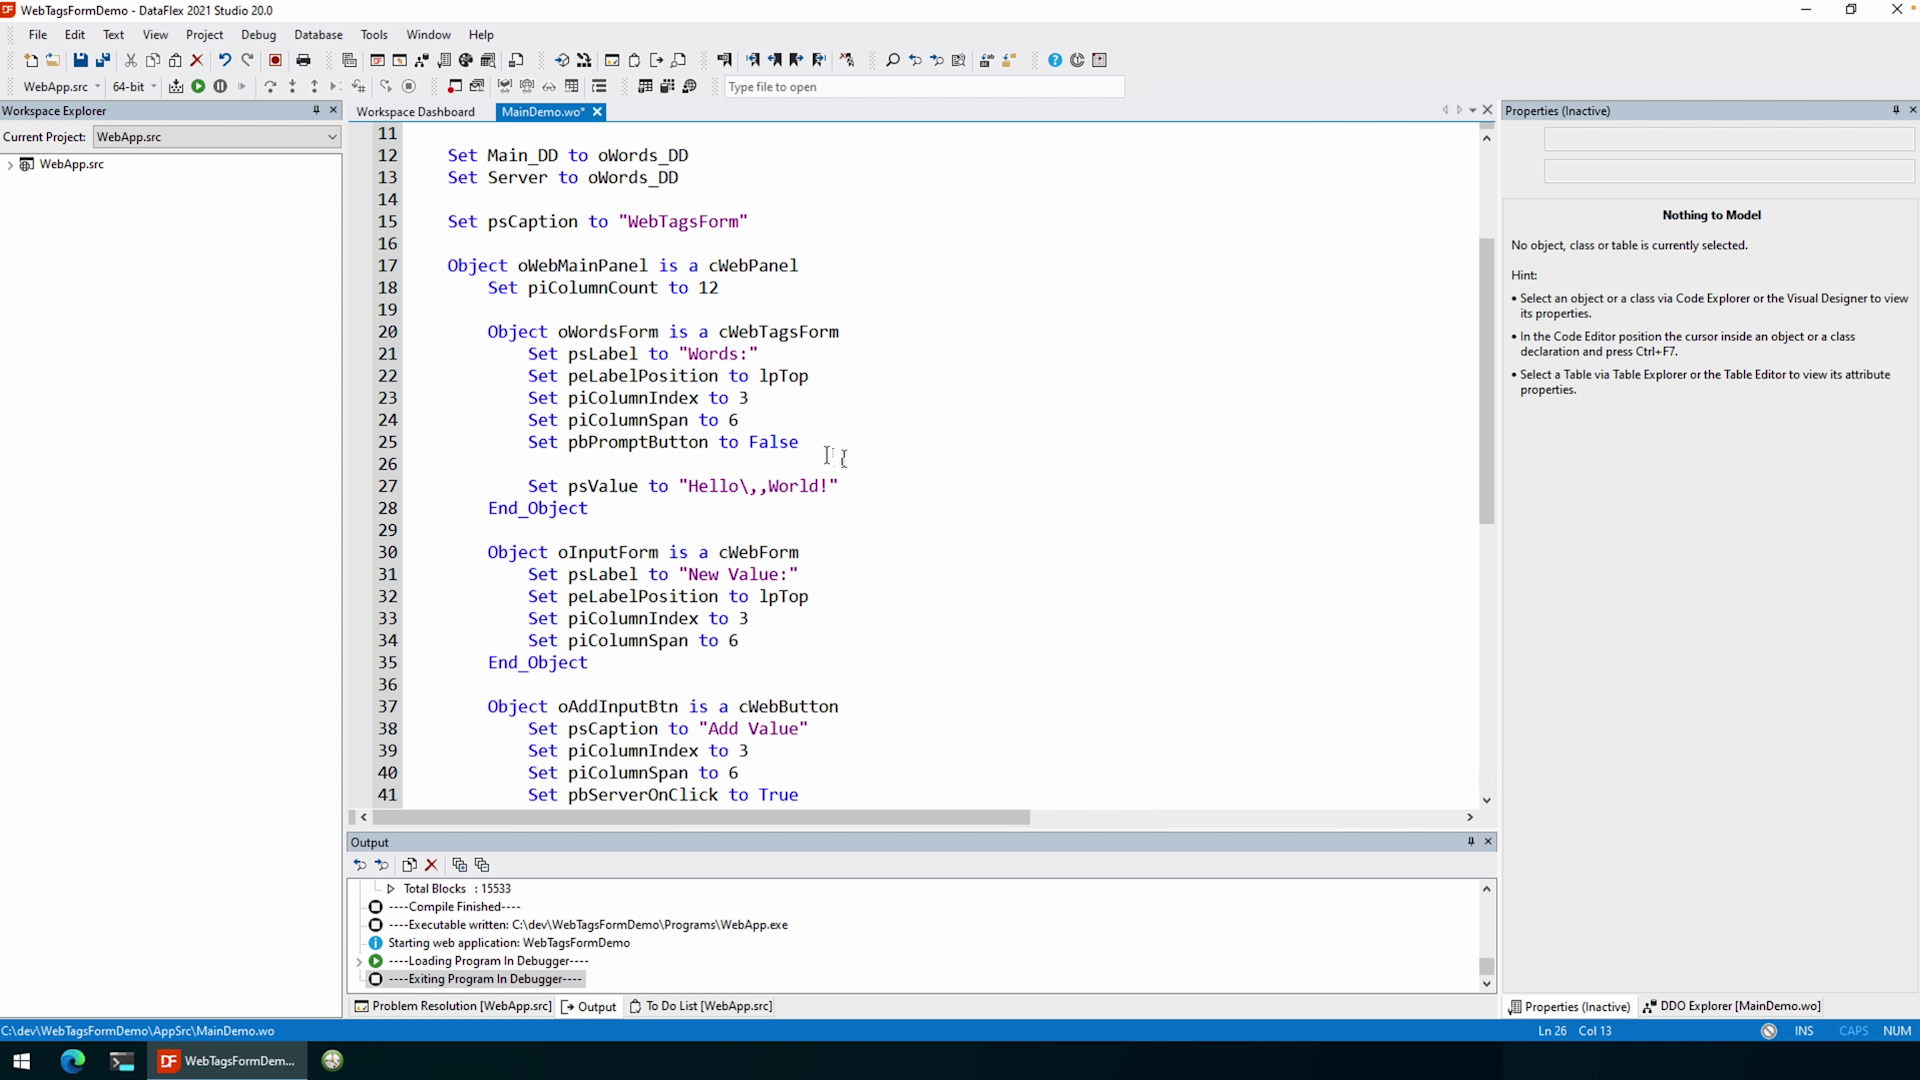
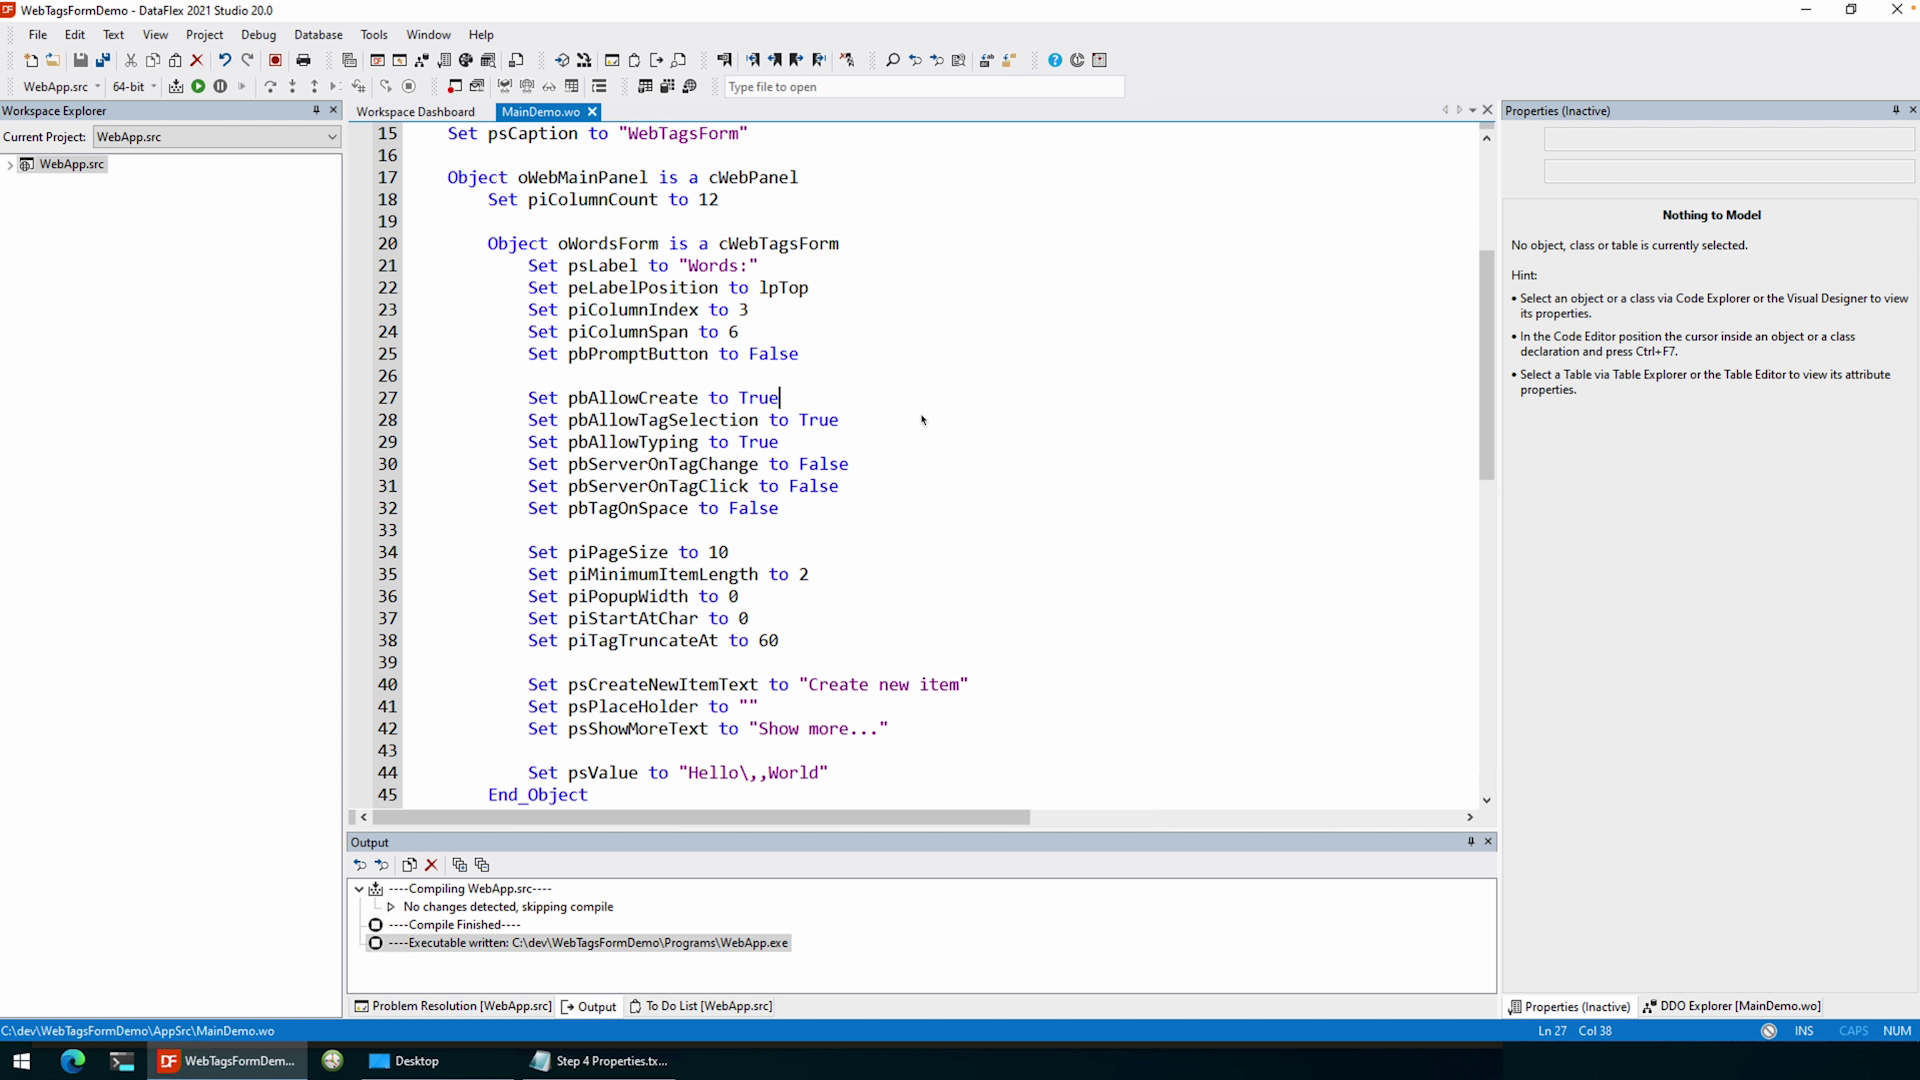
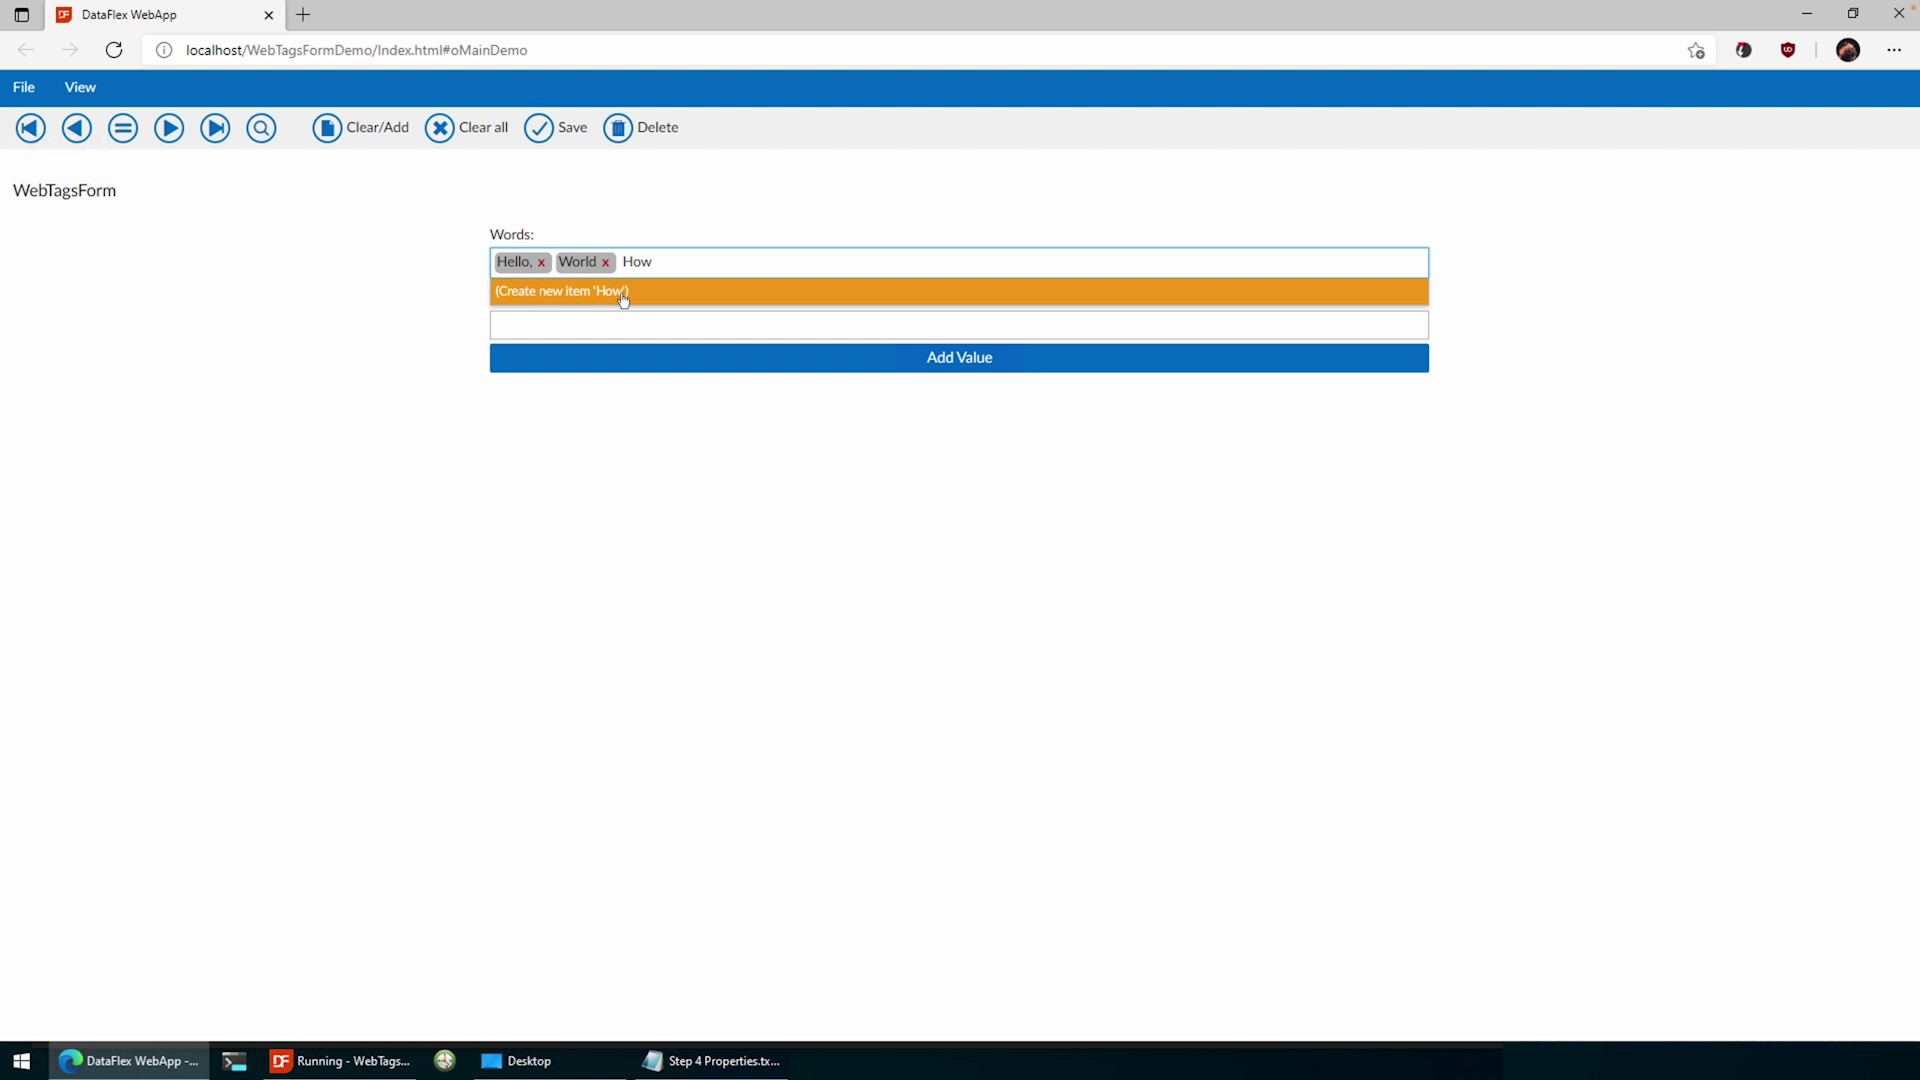
DEMONSTRATION

  • As you can see; I already created a basic view which we will go over now.
  • First I added my Data Dictionary and initial WebTagsForm. In this case this would be one of the simplest versions one can create. 
  • Whilst containing some normal sizing properties it only really disables the prompt button which we will get into later.
  • Additionally, I first wanted to show off the basics of working with the tagsform from a procedural standpoint. 
  • As you can see I added a basic Web Form and a button. 
  • Now this button grabs the values from the input form and tagsform. 
  • For the Tagsform you are able to use the GetTags function which fetches the tags for you into an array.
  • You can see that I iterate over all values in the tagsform and that should the value already exist, I remove it.
  • Then after adding the value to the end of the array, I update the tagsform values using the UpdateTags procedure which takes that same string array.
  • As you can see we have our view complete and are able to add our tags from any point in our code; in this case a button click. 
  • Should we now try to add the same value it automatically deduplicates them.
  • Going back to our code, now that we have everything set up we can start taking a look at basic usage.
  • Like any other web control, we are able to customize it’s psValue property; but… with the tags form it works a bit different. 
  • Changing the psValue should only be used with literals. This means that I suggest you don’t start adding content to the psValue property but instead use the earlier specified functions like the UpdateTags procedure.
  • Using a literal for the tags form though is very easy. Tags are comma separated with or without spacing. 
  • Having said that it is also the first control that allows for some form of escaping characters. This means that should I want a comma in my tag I can use a backslash to escape the comma, as to specify that it is not a separator in this case.

  • To customize the tagsform we’ll be going over the new properties from top to bottom. 
  • As you can see I already wrote them down specifying them with their default values.
  • First off we have the pbAllowCreate property that allows us to enable/disable the creation of tags from a user’s perspective within the control.
  • As you can see, if I start typing a non-defined value it will allow me to create the typed value.
  • The pbAllowTagSelection property allows us to specify whether a user is allowed to select a tag. 
  • The selection of a tag can be handled by our web application and also allows us to easily remove a tag by keyboard or mouse.
  • The pbAllowTyping property is able to make the control read-only. It could be easy for showing already specified settings or otherwise.
  • Another behavioural property is pbTagOnSpace which compels the user to only use words. If desired.
  • We also have some additional properties. 2 behaviour-oriented properties like piMinimumItemLength which compels the user to write tags longer than the specified number of characters.
  • piStartAtChar which is used the same as in the suggestion form; It shows the drop down only after the specified number of characters typed. 
  • The only difference is that the WebTagsForm shows it by default immediately or rather from the first character.
  • Lastly the appearance-oriented properties. The psPlaceHolder works as always showing the specified text if no tags or text is specified. The psCreateNewItemText and psShowMoreText are properties that allow us programmers to add translations for the control’s labels. 
  • Then we have one last property to finish it all; the piTagTruncateAt property that allows us truncate very large-sized tags and replace the rest with three dots.
  • This is the simplest use case for the tags form and all types of customizability from the users perspective. In the next lesson we’ll the discuss the new flow of data.