How to deploy your WebApp
Lesson 8: SPLF Configuration
In this final lesson, we’ll take our WebOrderMobileClone application and deploy it in an SPLF configuration. To save time we’ve already installed the required software and licenses on each of the machines and placed the WebApp deployment folders appropriately. Also, we’ve already converted our data to be hosted on Microsoft SQL Server.
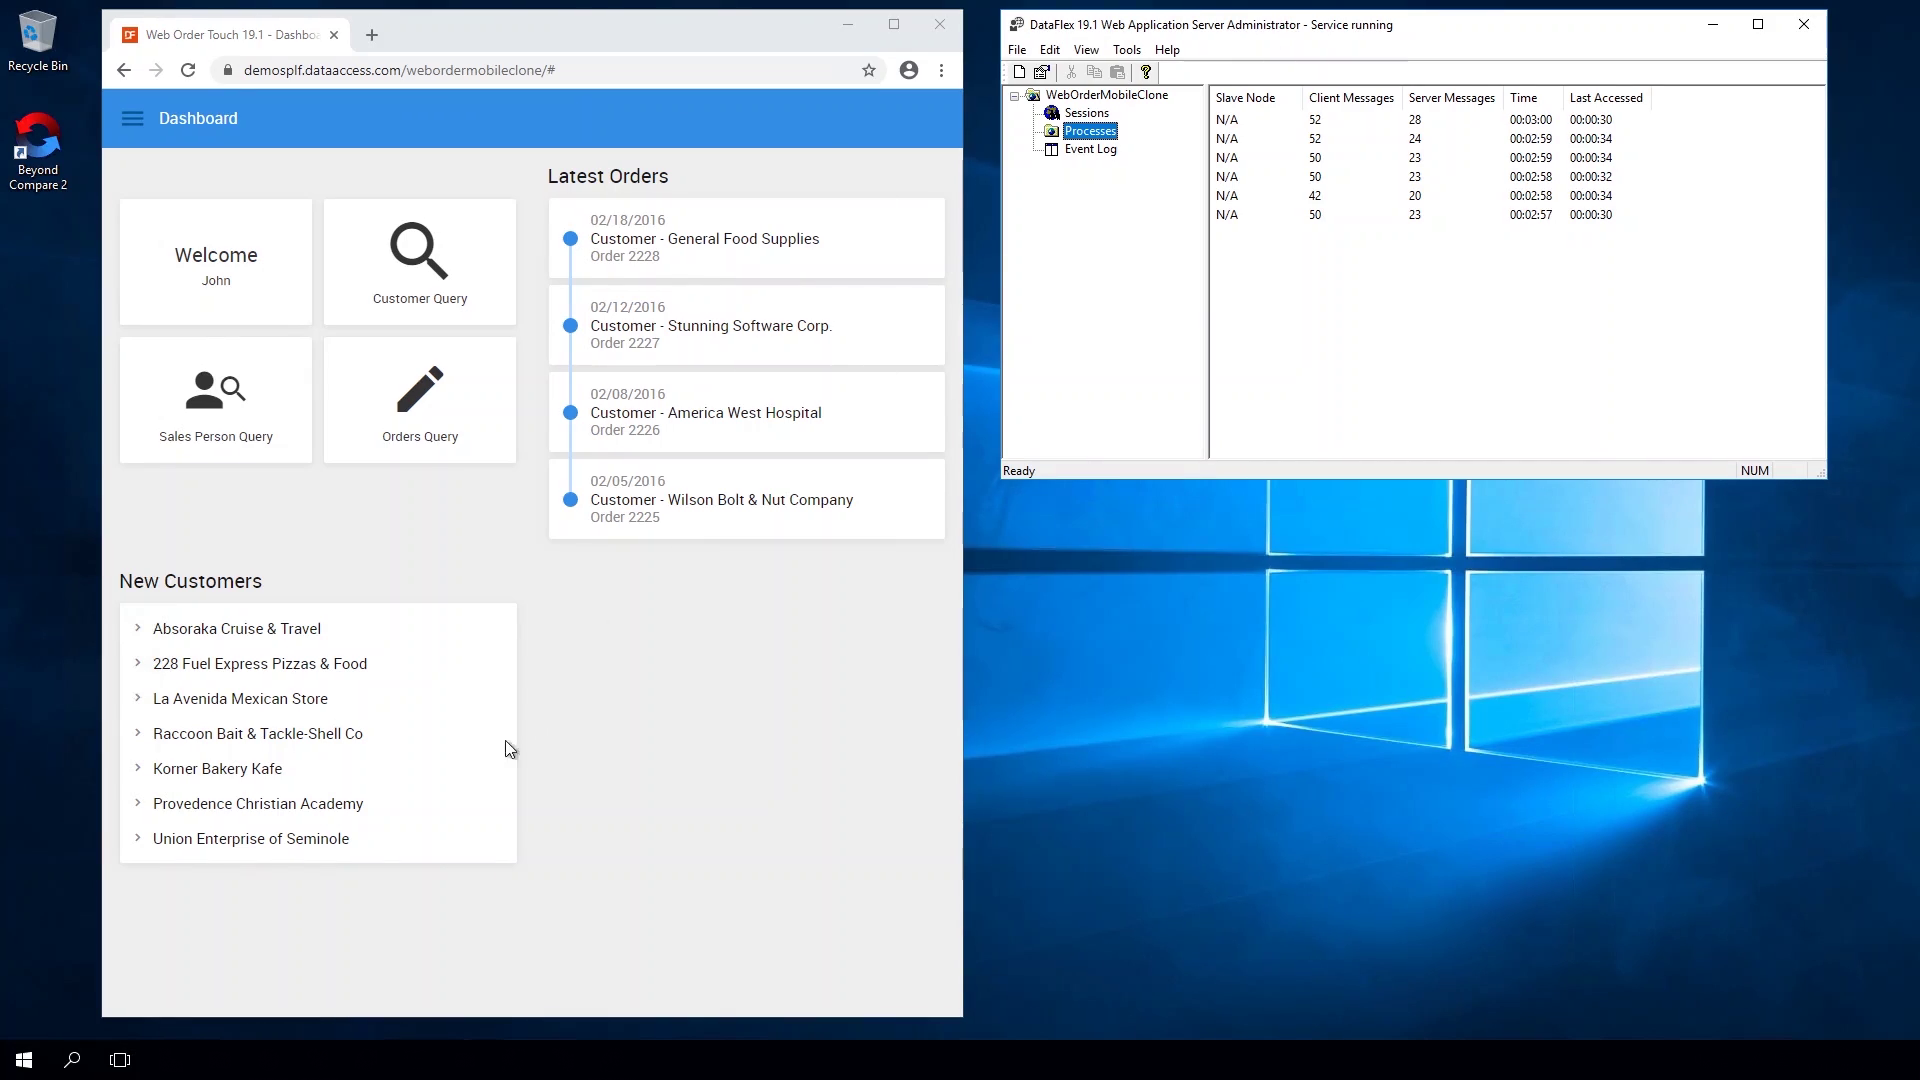
Our WebApp will be configured to run over 2 application servers. Remember that only the main web server is running IIS and is exposed through a publicly accessible IP address. All the other machines inside the firewall are on a private network with no access to the outside world.
Demonstration
- Available resources in our network:
- Desktop is the web server. It's outside the firewall
- It runs the WebApp server, the SPLF server
- It has a connection to the private network that hosts the servers
- Inside the firewall we see:
- The database server
- Application Server 1
- Application Server 2
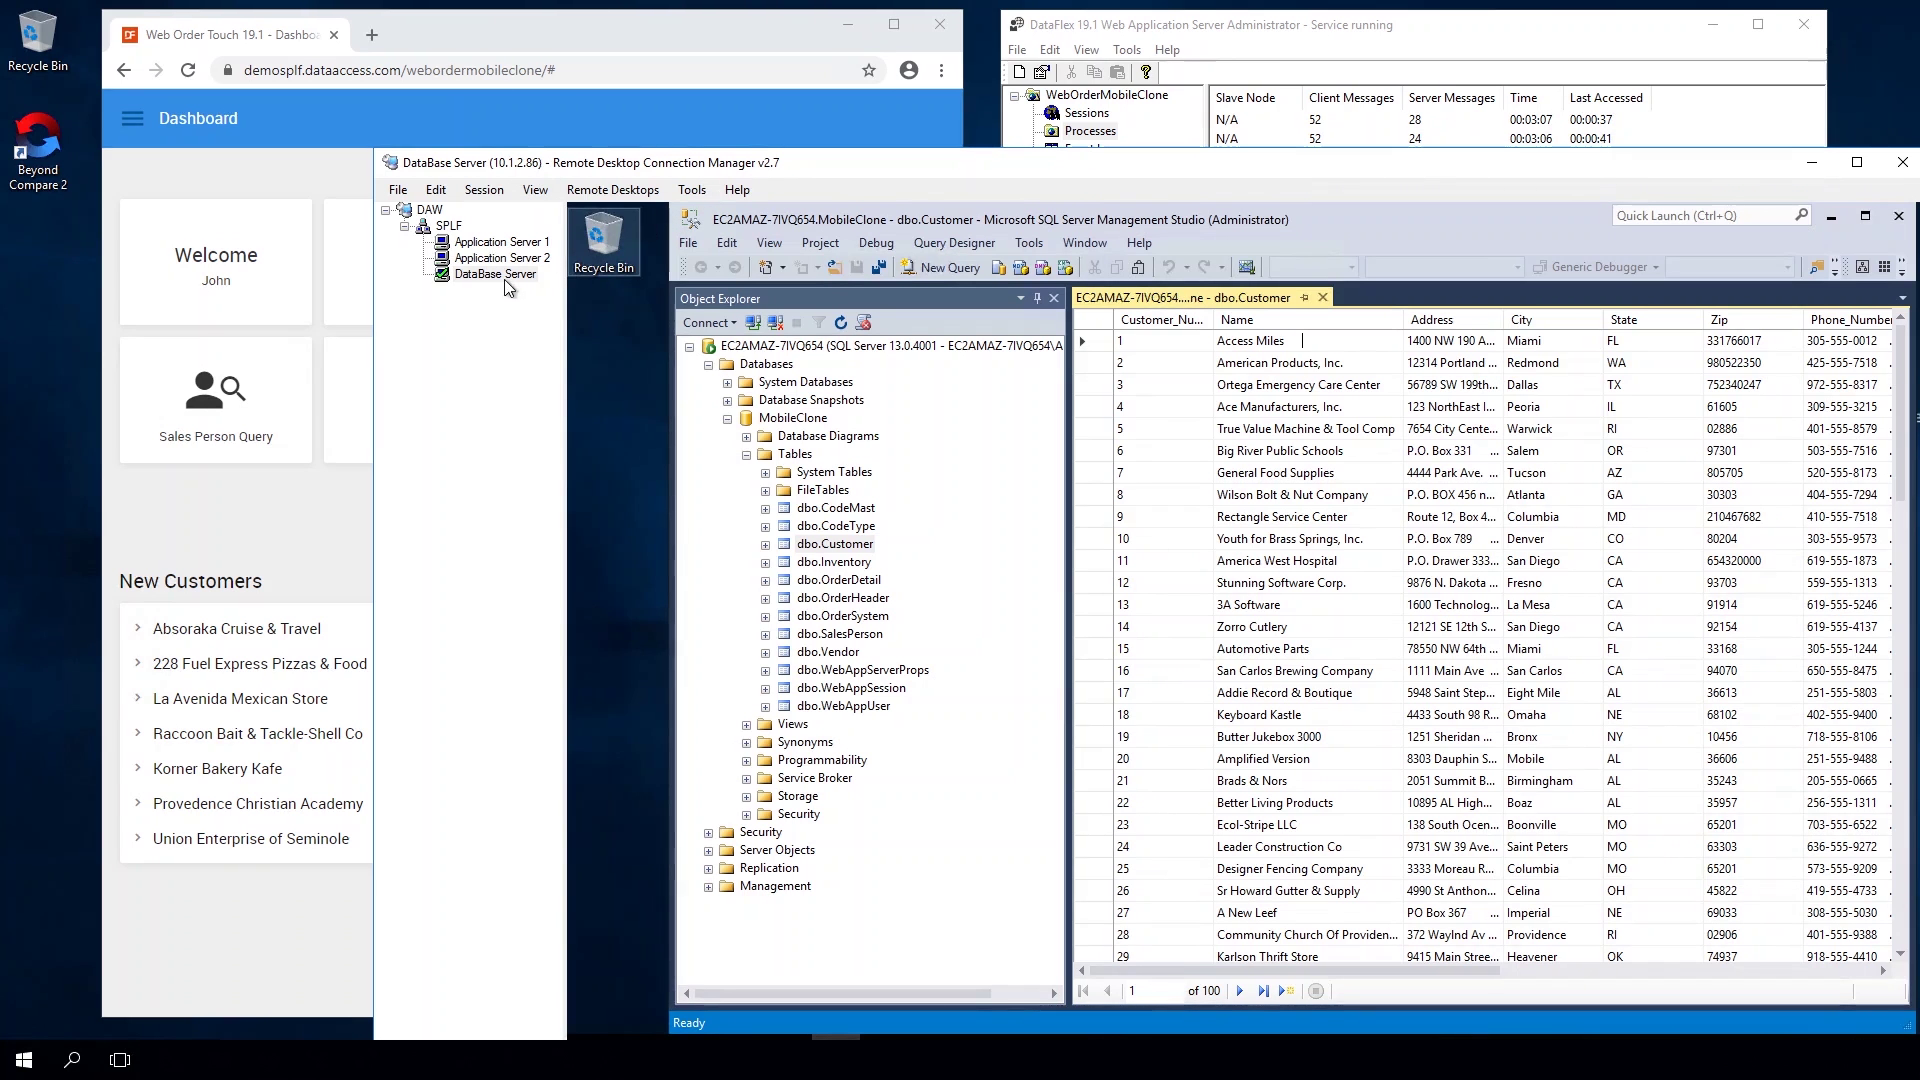
- We focus on the database server
- We're running Microsoft SQL Server and have the data of the application in place
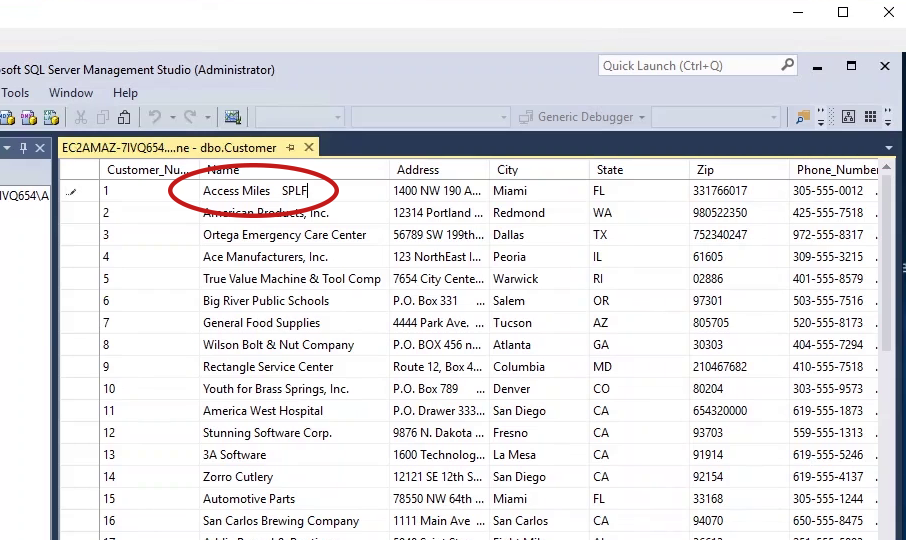
- We add 'SPLF' to on of the customers name, to see if the data is live
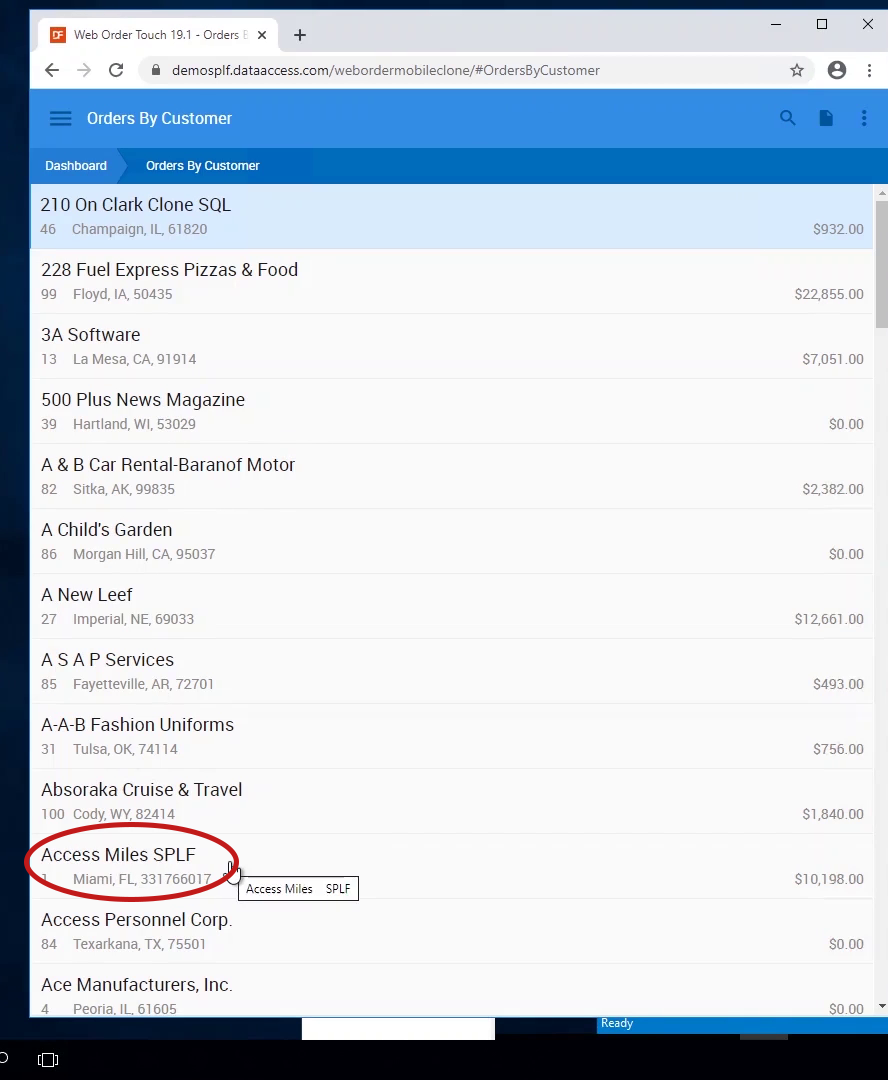
- Eventhough the WebApp is still running on the web server, we've taken the first step towards a robust SPLF system
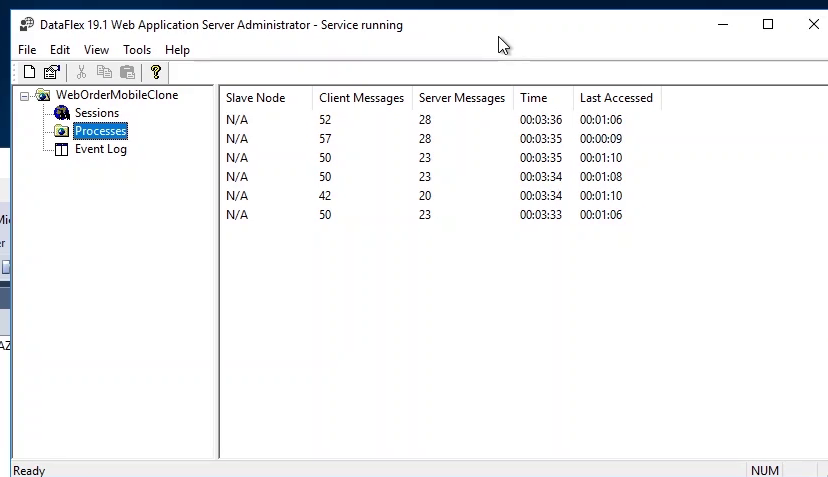
- We see all processes running on the web server, but the data is protected behind the firewall, and the SQL server provides performance, scalability and increased data integrity
- The next step is to bring our first application server online and move the processes completely off the web server and behind the firewall
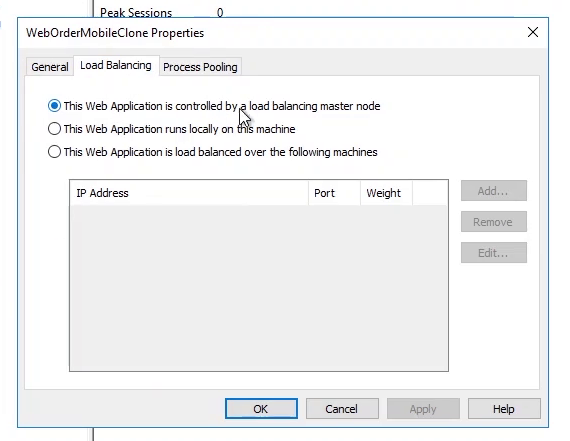
- When in the Administrator we can see that we already have the application registered and set to be controlled by the load balancing server
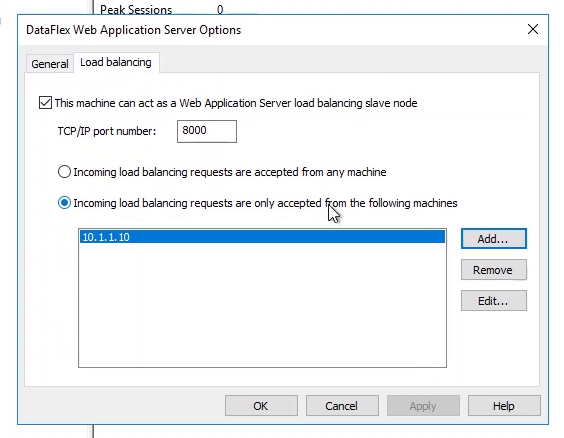
- As an additional security measure we've instructed the application server to only accept requests from the IP address of our SPLF server
- All that's left is to instruct the SPLF server to run the application load balanced instead of local
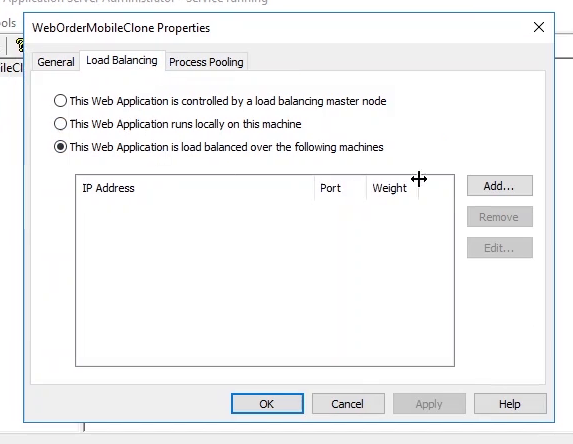
- We use the Administrator on the SPLF server and the IP address, Port number and weight for this first application server
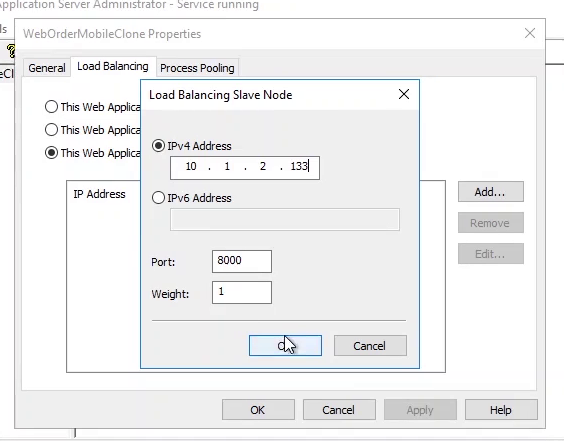
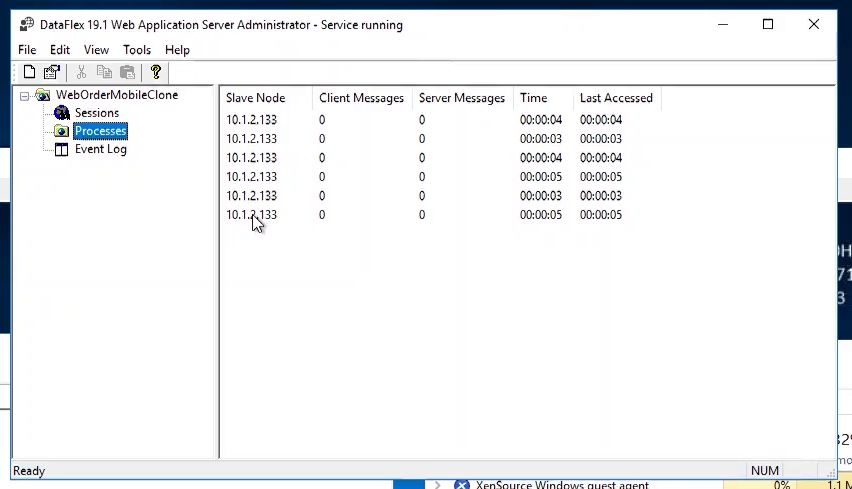
- As soon as we make that change the processes that are running locally are stopped
- The processes are restarted on the application server. We see the IP addresses of the processes handling the requests
- The taskmanager shows the processes that are started
- Now we repeat the process for the second application server
- By following these steps we've taken the website from a single server to a saver environment
Conclusion
In this course we showed how to deploy your DataFlex Web Applications. If you have any questions, go to the Data Access forums.


