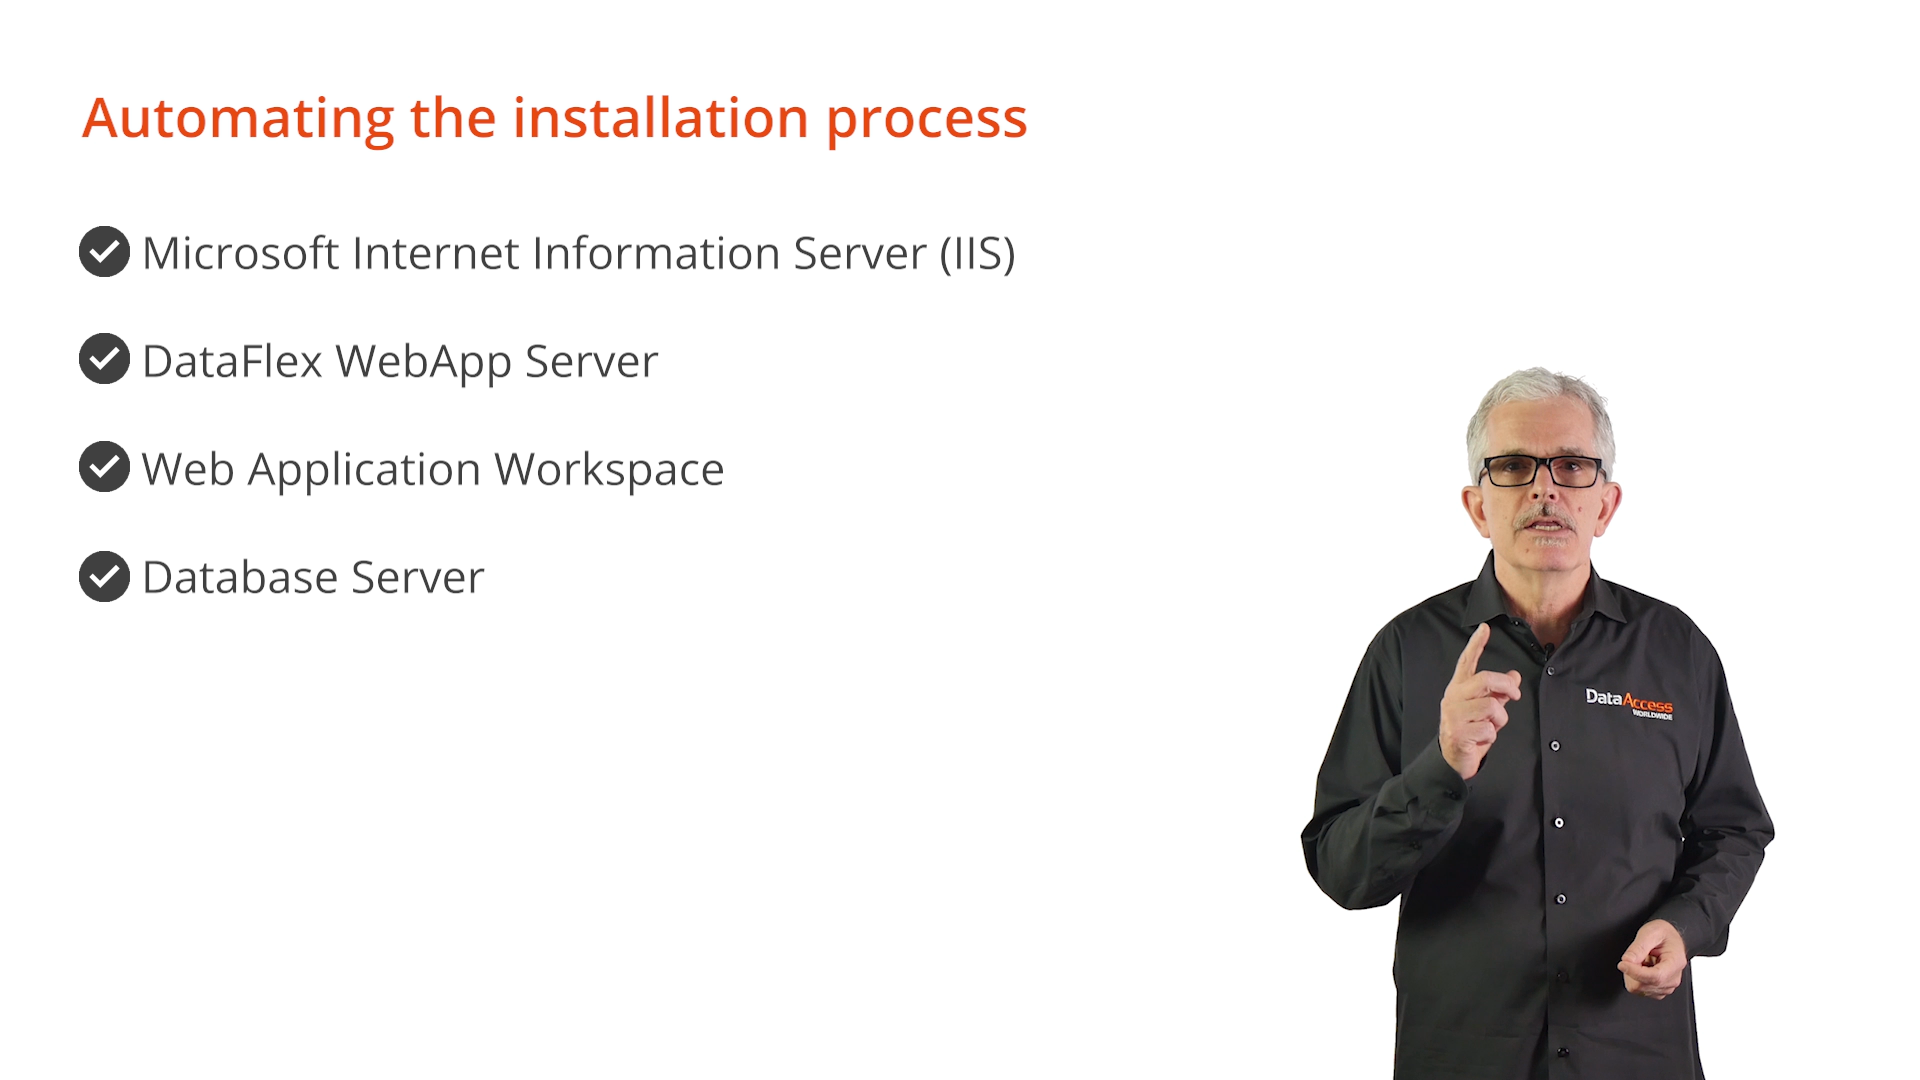
The deployment process can be automated through scripting or the creation of a complete installer. These are components that will be discussed, and then examined to show how the installation of each can be automated.
Microsoft Internet Information Server (IIS)
Since a web application is being deployed, the target deployment server often is already properly configured with IIS, but it is still important for the script or installer to check IIS for the necessary settings.
The installer for the DataFlex WebApp Server makes this easy because it does all the work. When the installer is chosen to configure IIS it will check the target system and…
This automatic management of IIS is the default option for the WebApp Server installer.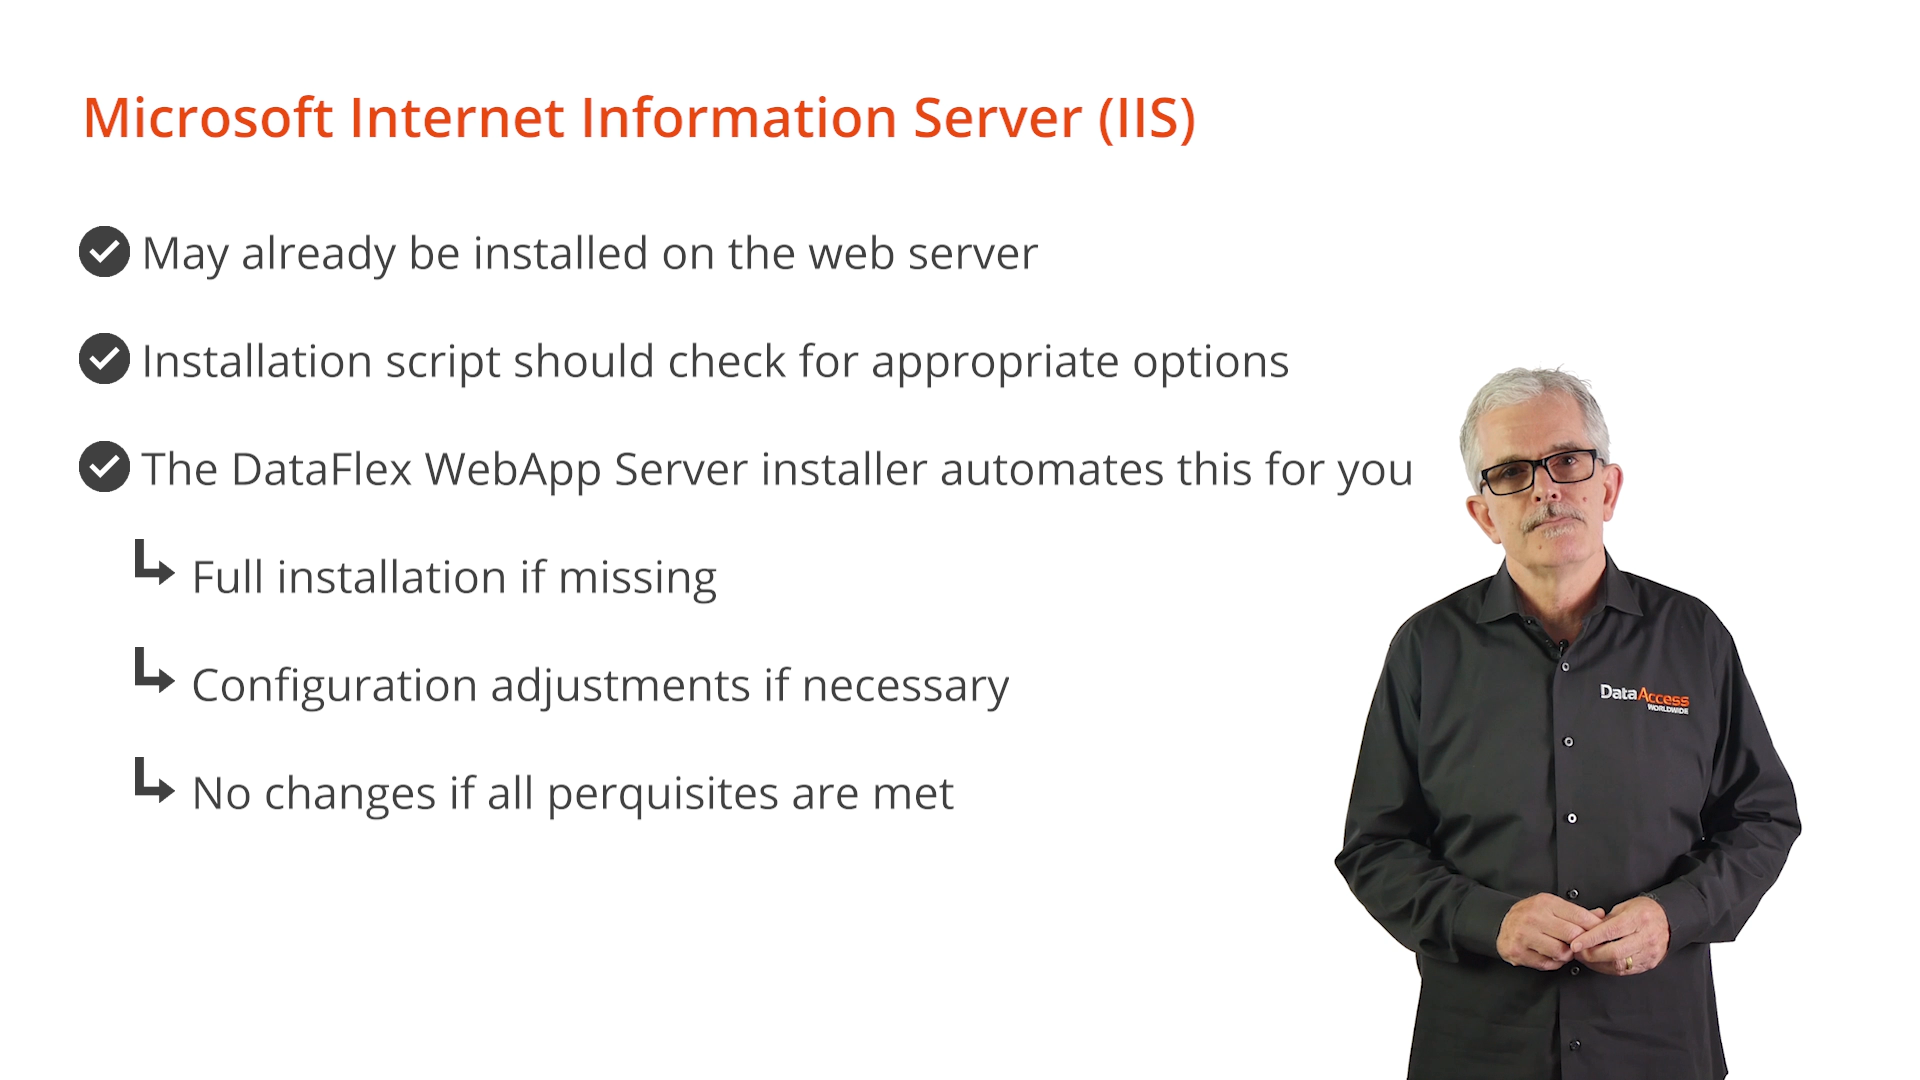
DataFlex WebApp Server
The server installer can be scripted or completely embedded in the application installation giving the developer complete control over all aspects of the installation, including:
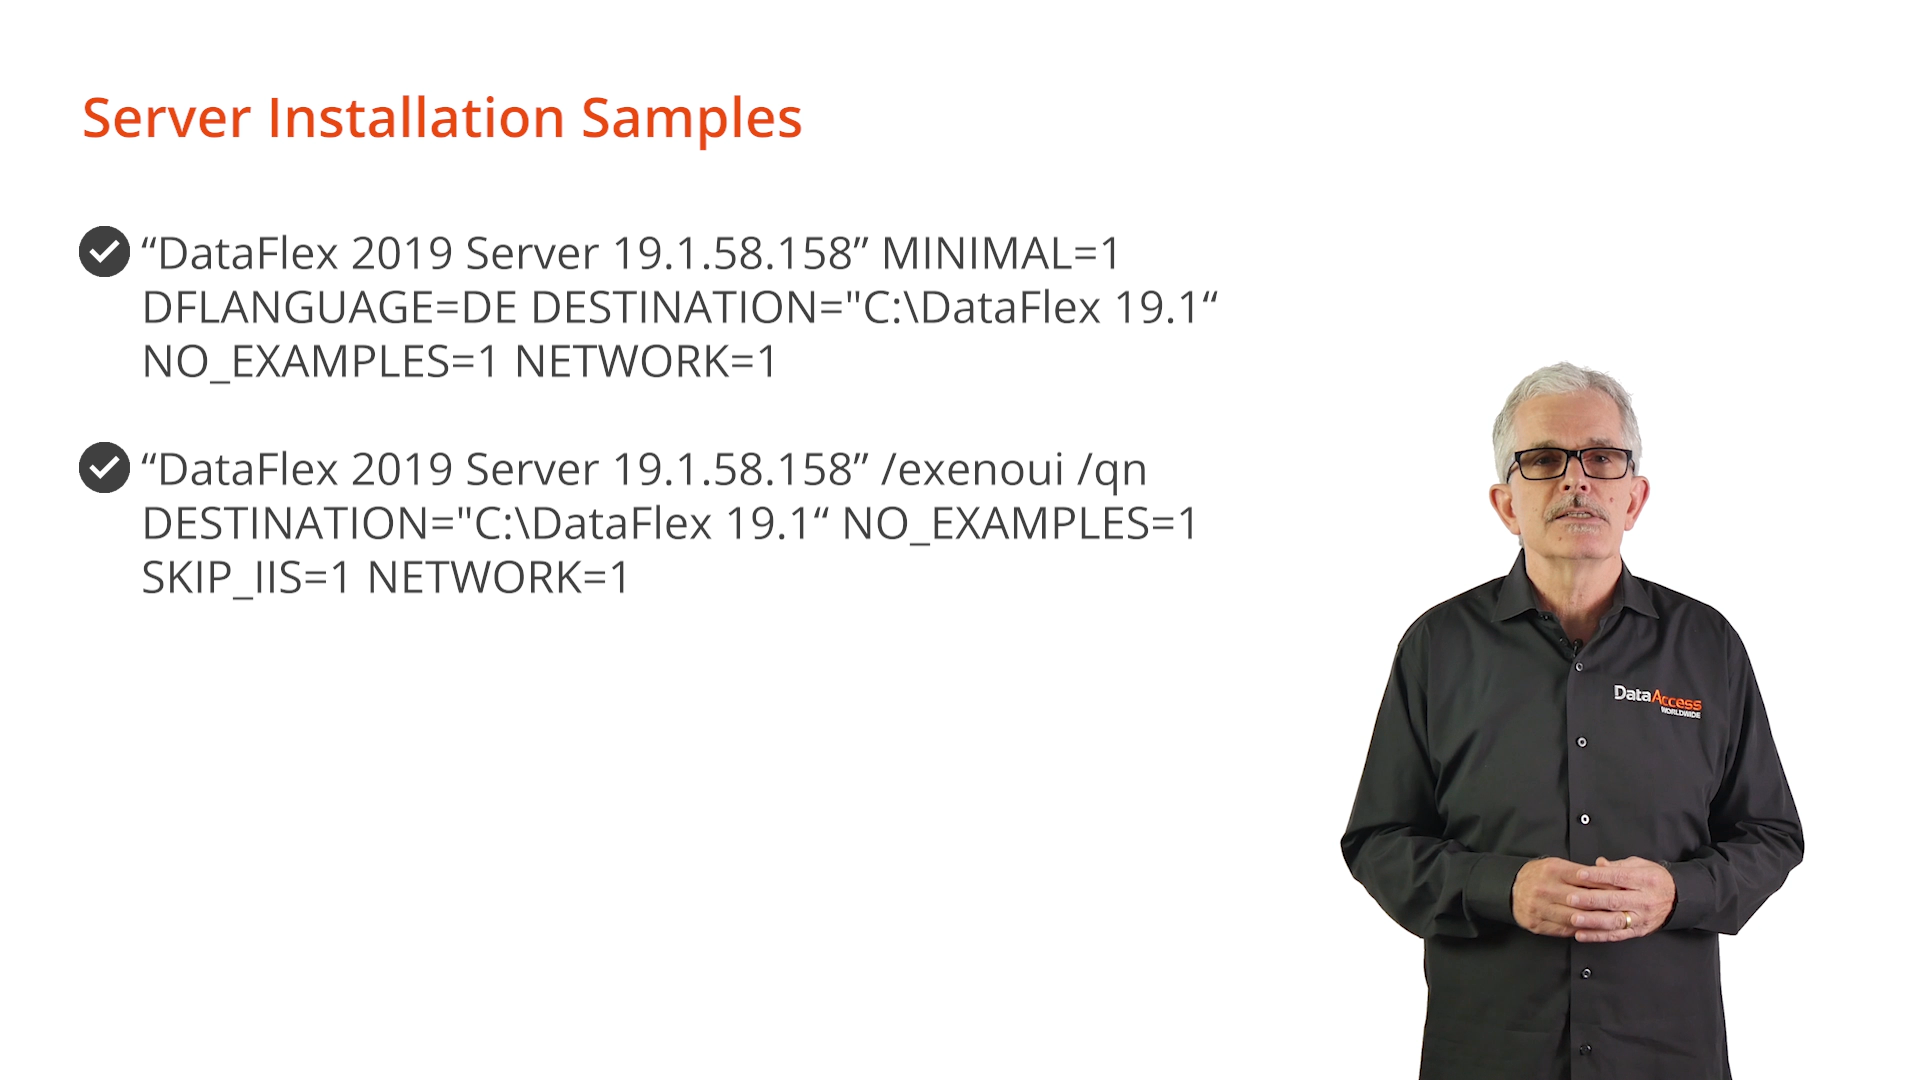
Recommendation: read the documentation section “Controlling Installation with Command Line Parameters” for complete information on all the installer options.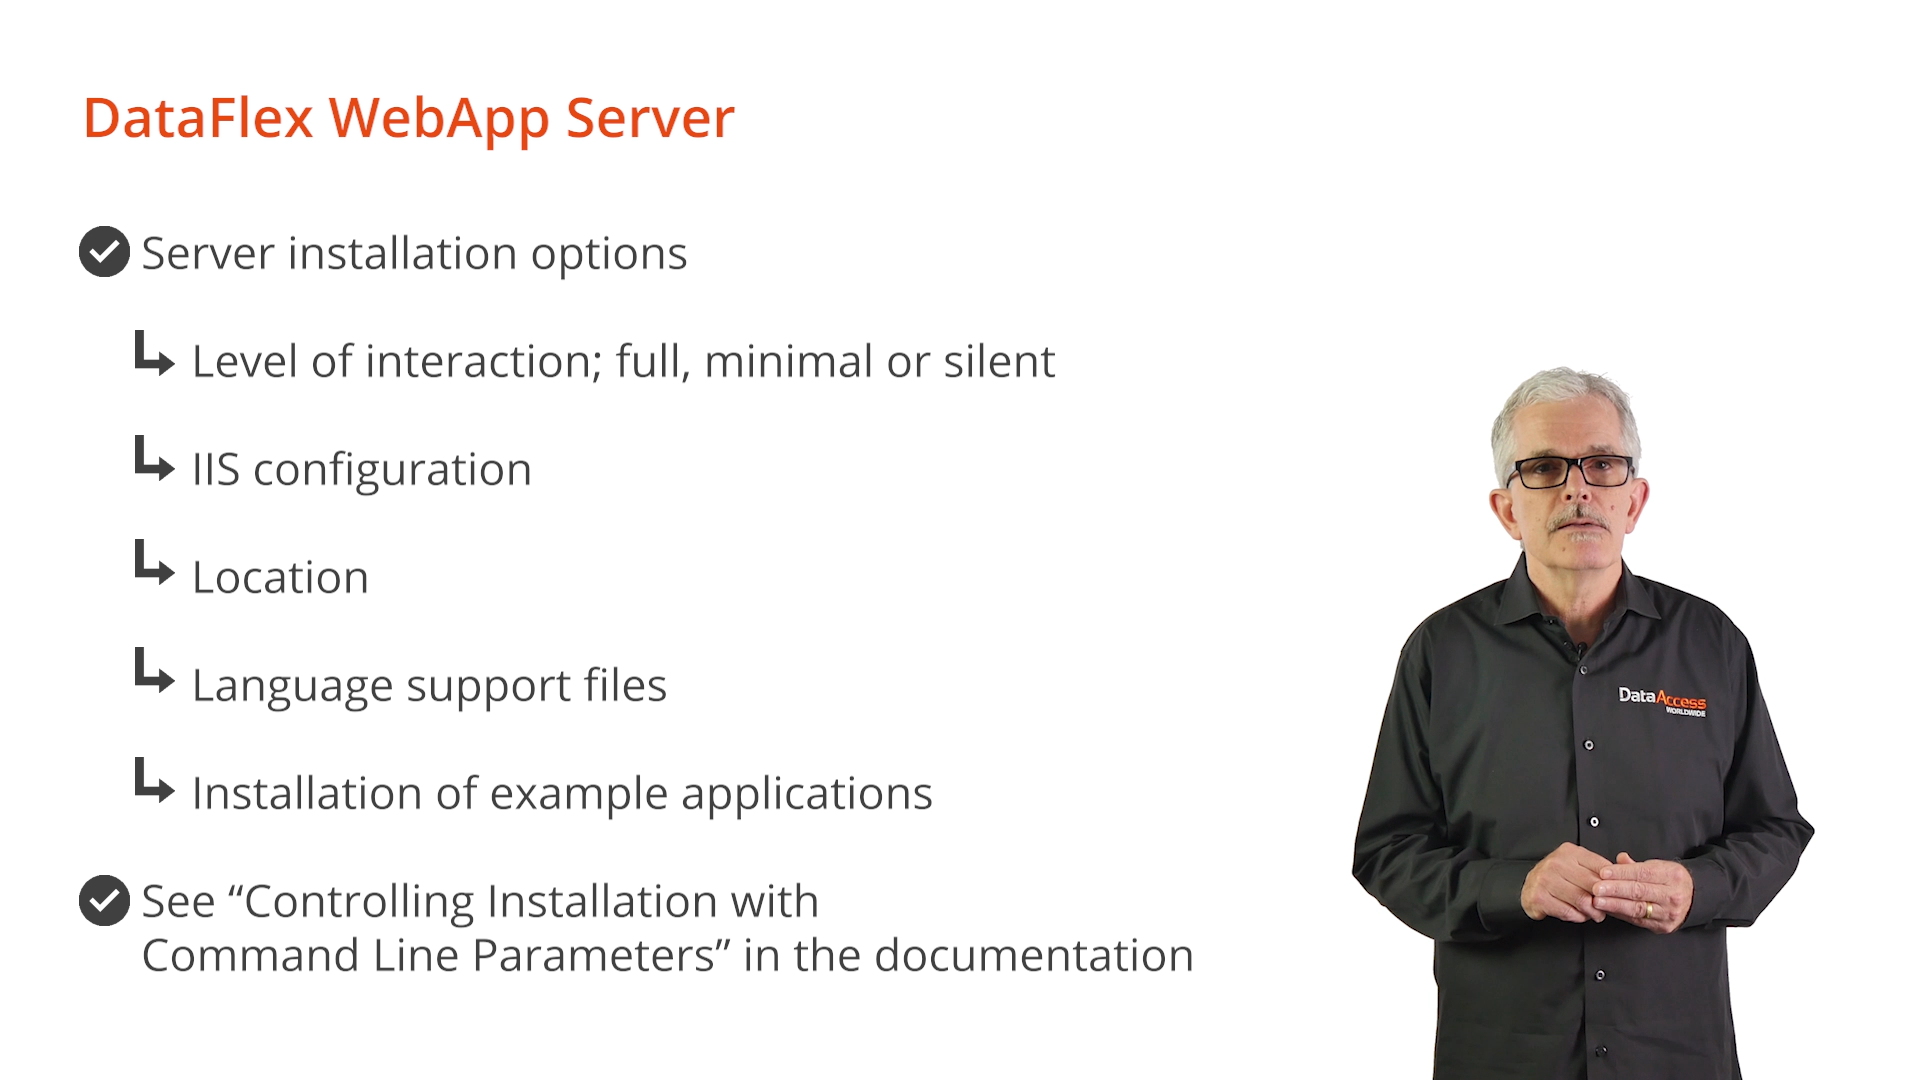
Server Installation Samples
How to control the server installation:
Web Application workspace
The application workspace and pared it down to only those folders needed for deployment.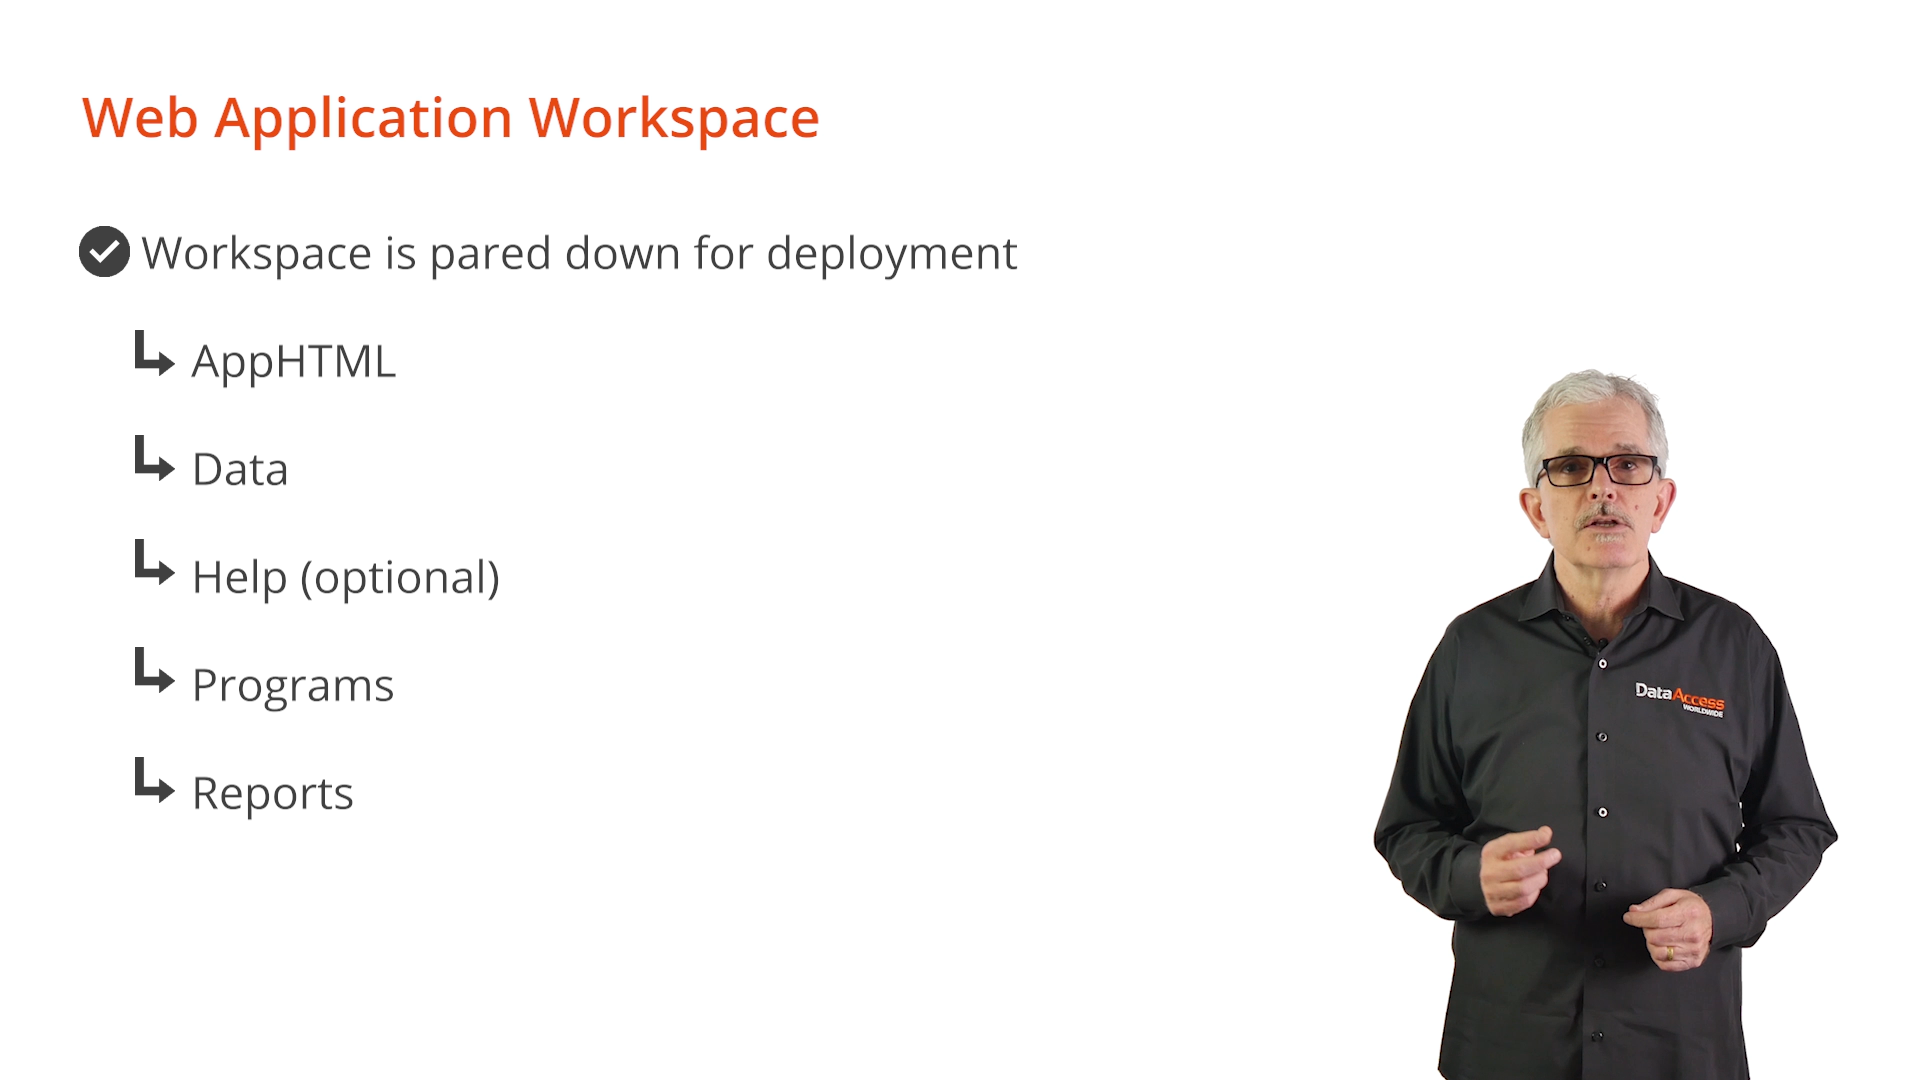
The script or installer will place the deployment workspace in an appropriate location based on the server configuration. It’s important that the destination is in a shared location on the server that will be accessible by any network users and also the system account that runs the server service. Once the workspace location is known, the WebApp must be registered with both IIS and the DataFlex WebApp Server. This is a two-step process because the Administrator is not being used.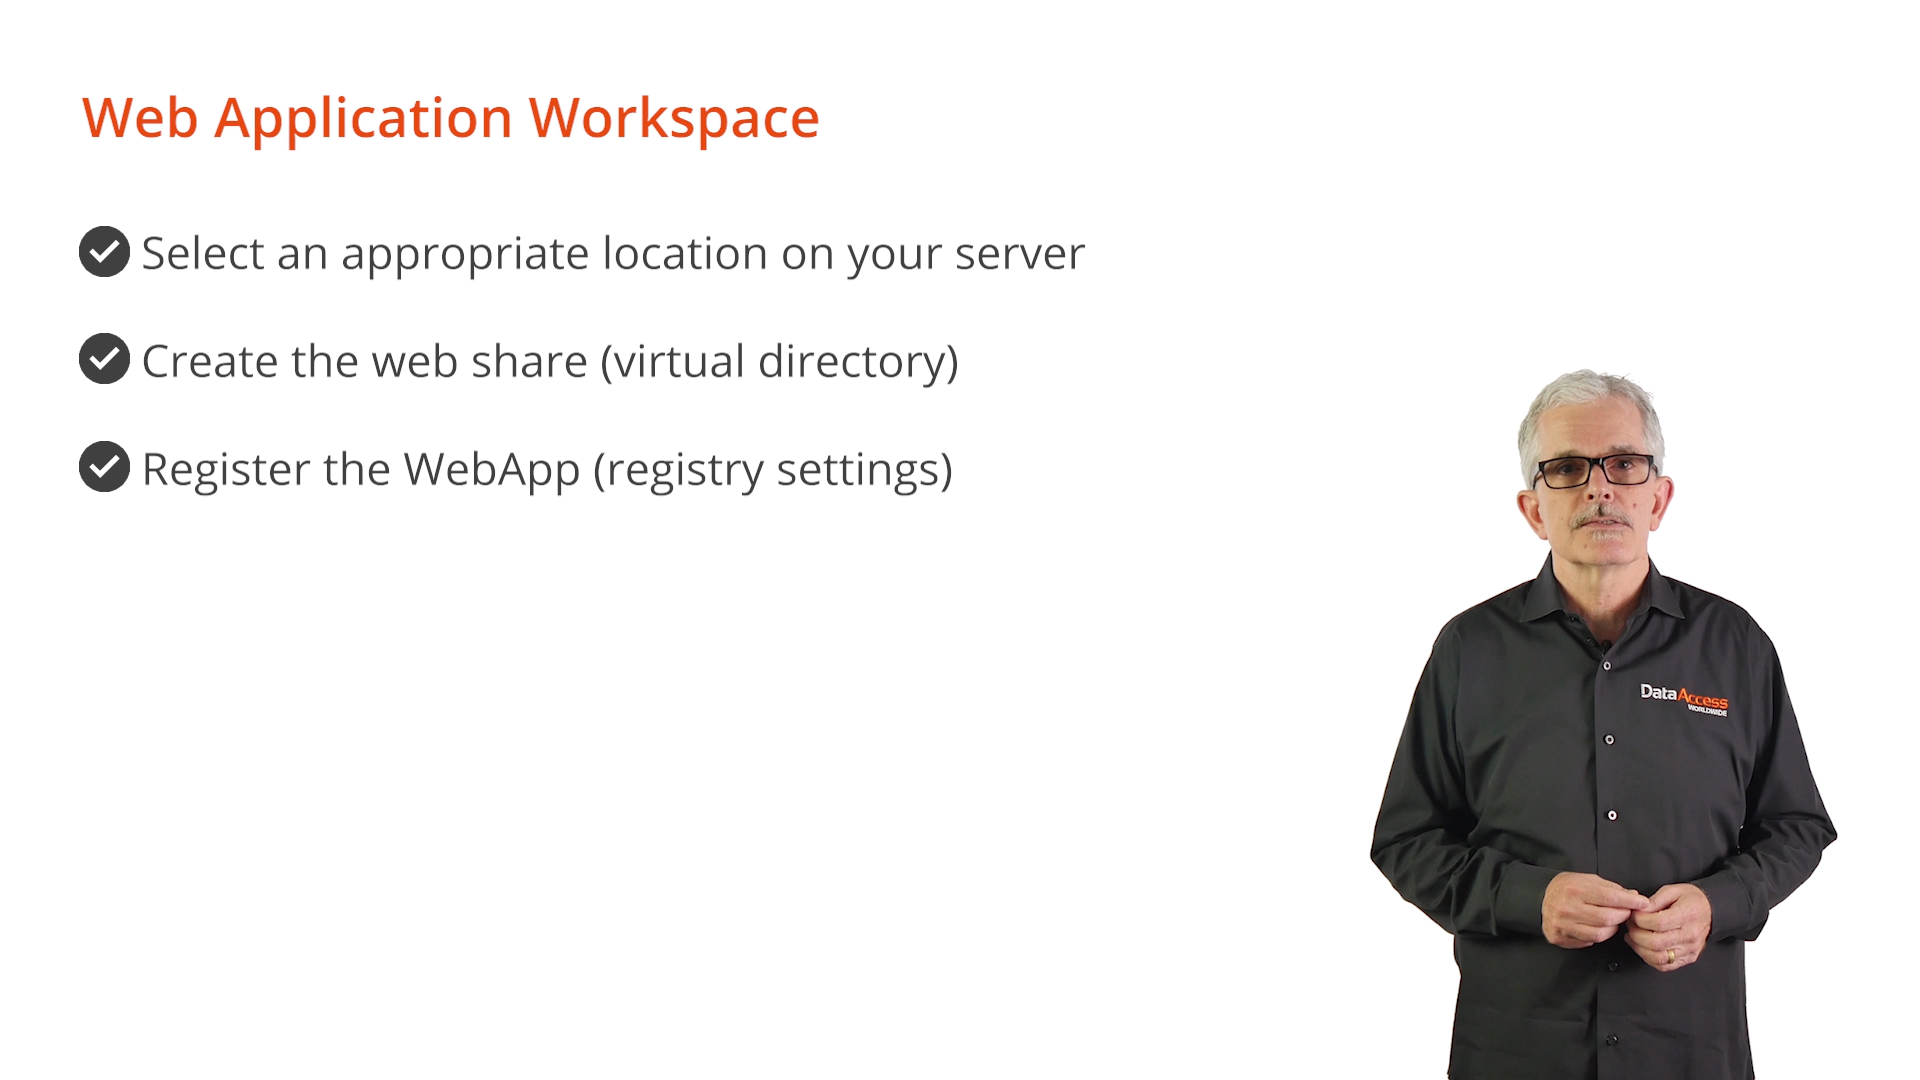
Creating the Web Share
The DFManageVDir executable (located in the Bin folder) creates the web share. Command line arguments are to be used for the IIS website name (if left blank it will use the default website), the name of the virtual directory (this is used in the URL), the full path to the AppHTML folder and using the overwrite option is recommended. The example…
“c:\program files\DataFlex <rev>\bin\dfmanagevdir.exe” create “” “WebOrderMobileClone” “C:\DataFlex 19.1 Examples\WebOrderMobileClone\AppHTML” /overwrite
…installs the WebOrderMobileClone application previously created in Lesson 3.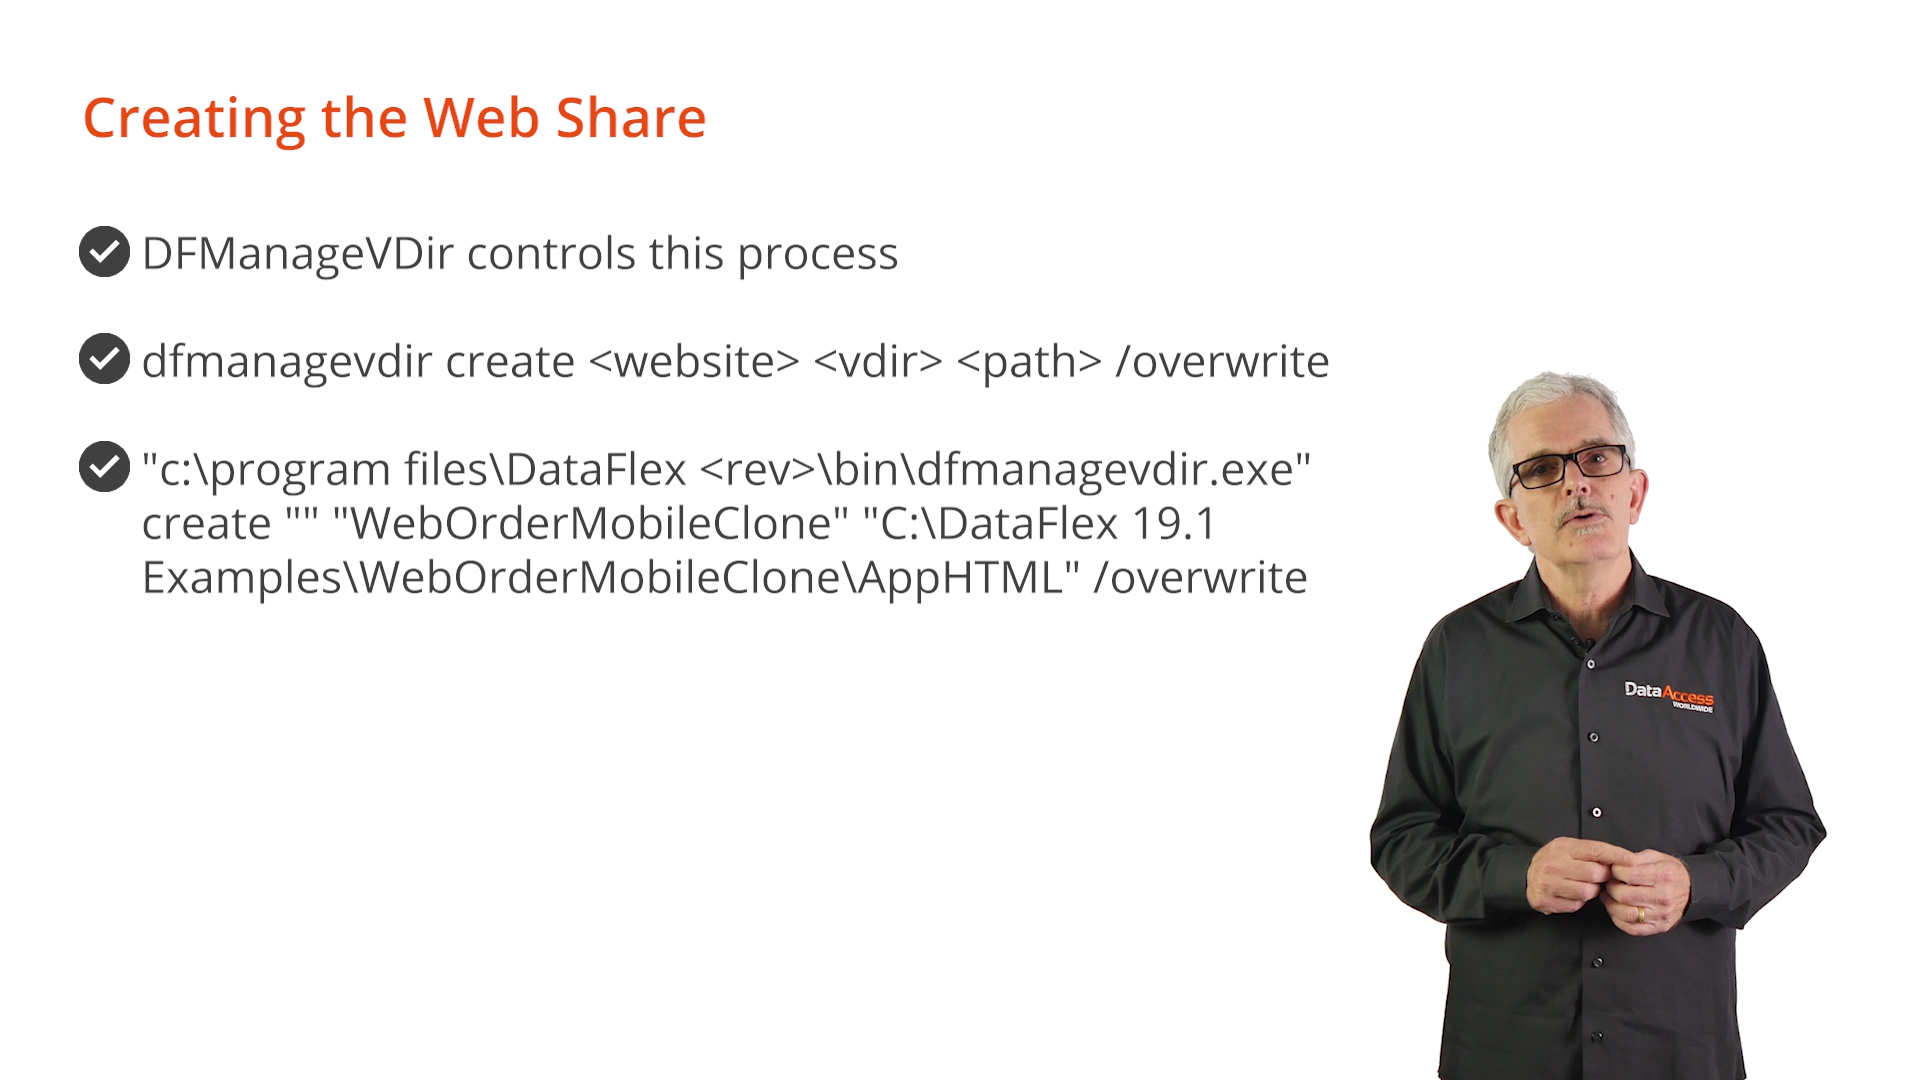
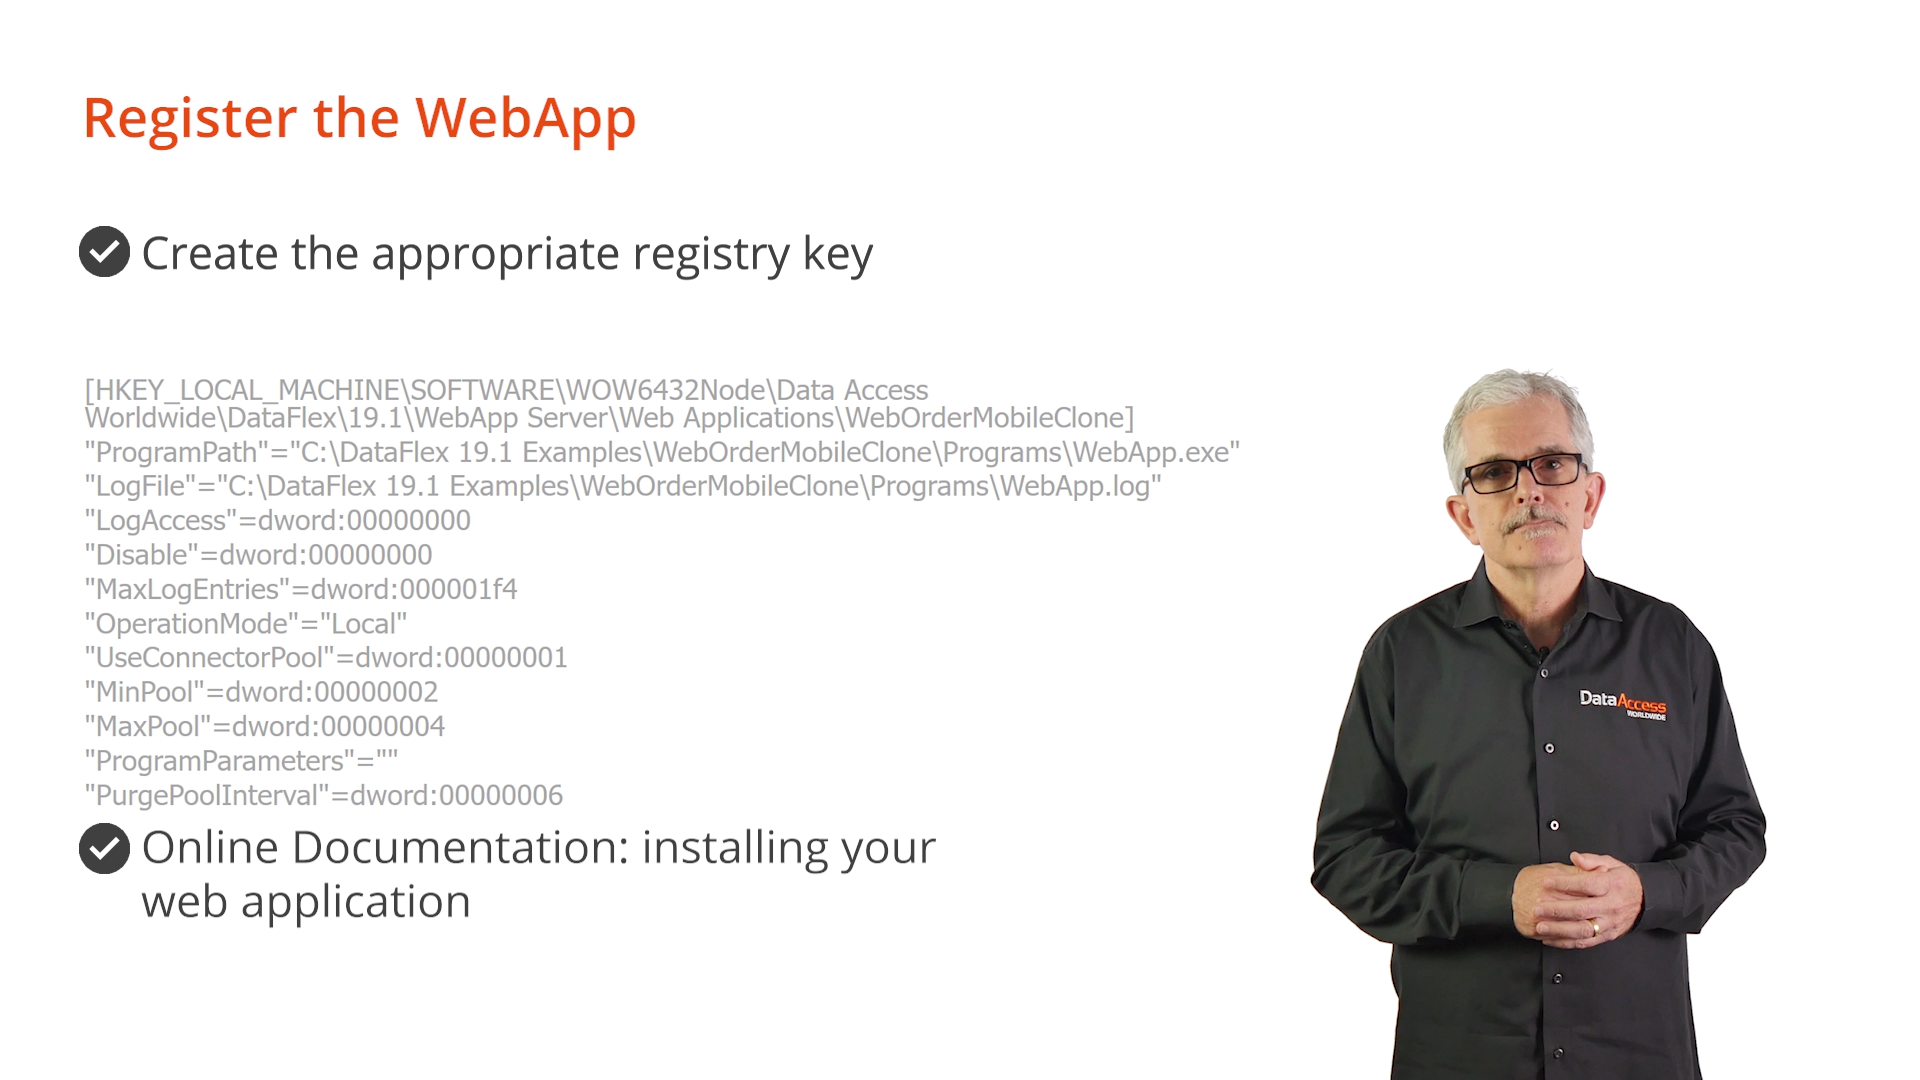
Register the WebApp
The last action to be taken is to register the web application with the server. This is done with registry entries that control all the options that would normally be set using the Administrator. An existing registry block can be imported or the installer can be used to set them. The example shown would set up our WebAppMobileClone with the same settings chosen in Lesson 3.
See the section titled “Installing Your Web Application” in the documentation for complete information.