DataFlex and Continuous Integration
Lesson 1 - Installing Gitea
Summary of the video course
In this lesson we will show how to install and configure Gitea (a version control system) on a Windows system to run it as a Windows service:
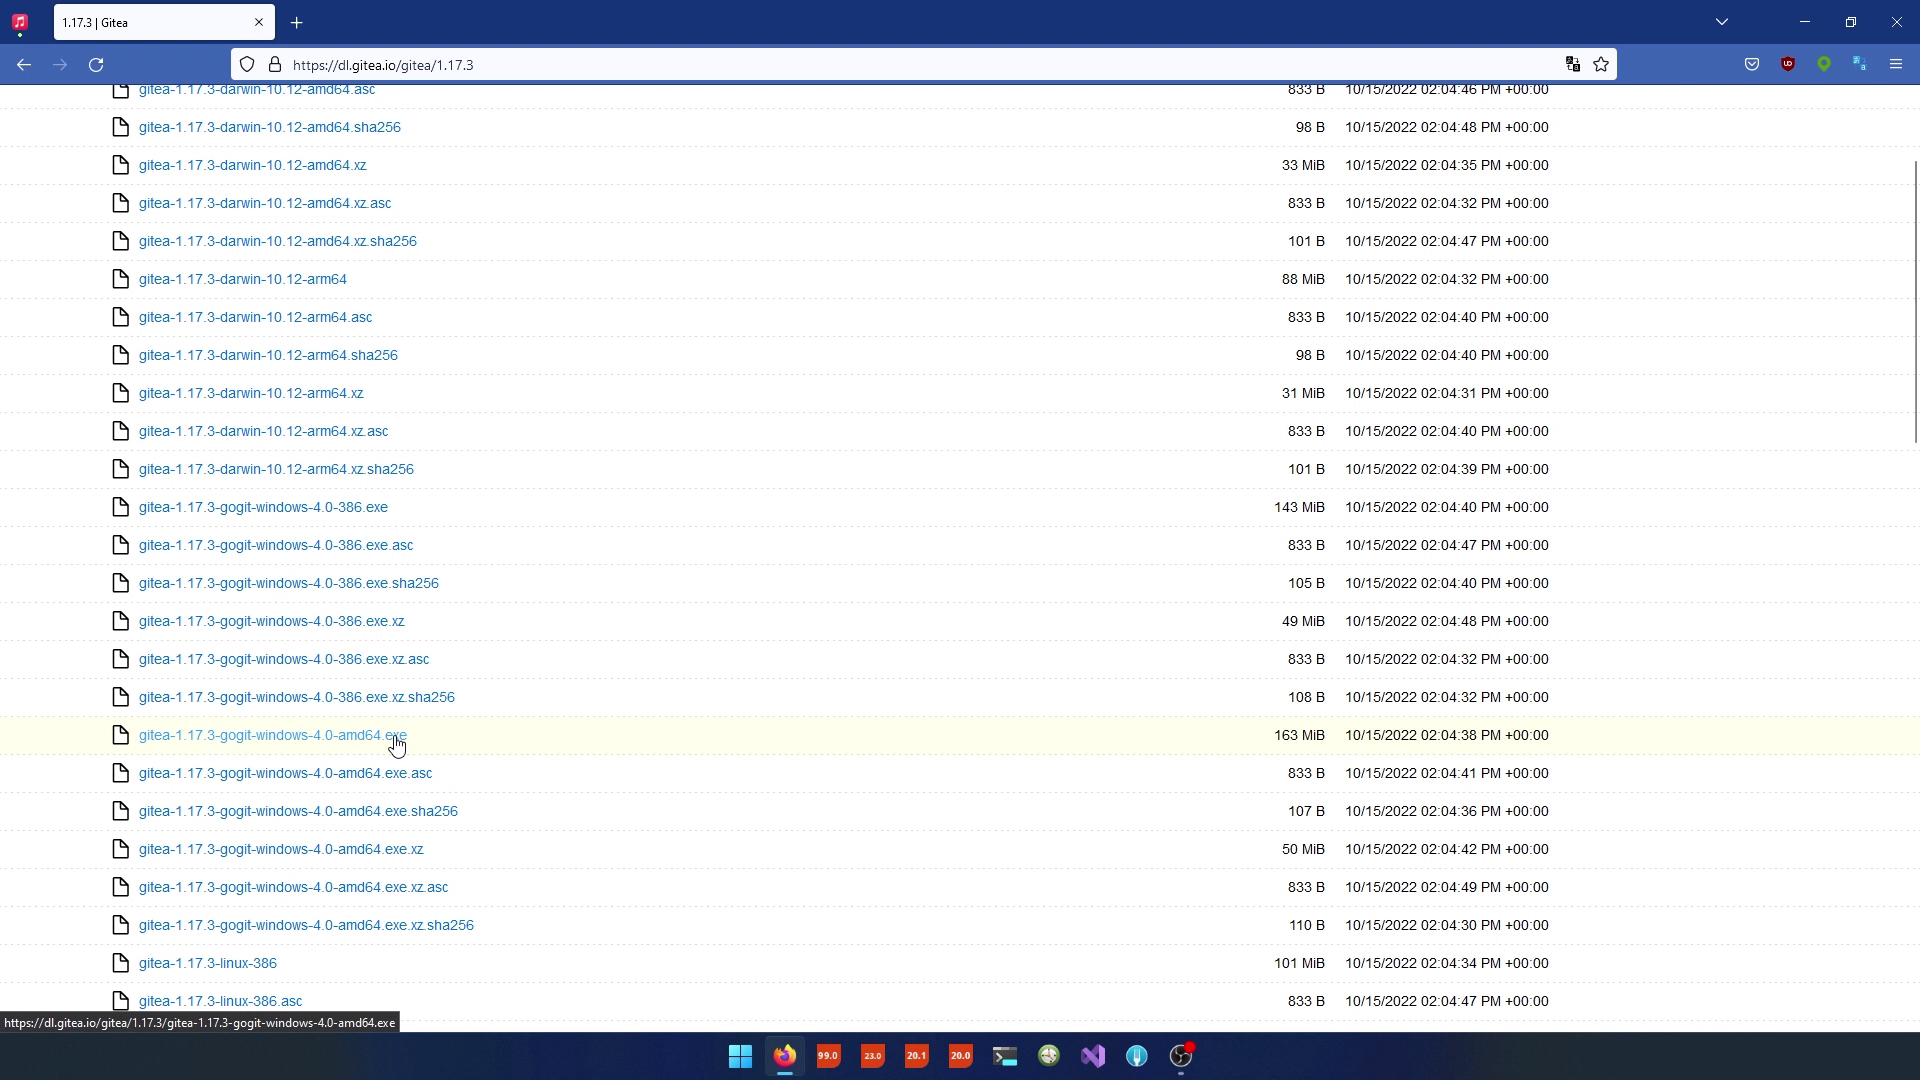
Download Gitea
- Open your web browser and go to the Gitea website at gitea.io.
- On the Gitea website go to "Downloads"
- Go to "Gitea"
- Select the version you like (we choose the latest release)
- And then we choose the gogit version for Windows, the amd 64 bits
Installation and Renaming
- Once the download is complete, navigate to the directory where the downloaded file is located.
- Rename the downloaded file to "gitea.exe" to simplify the filename.
- Move the "gitea.exe" file to a more central location, such as the "C:\build\gitea" directory. You may need to create these directories if they don't exist.
Starting Gitea
- Double-click on the "gitea.exe" file to start Gitea . Allow Windows to run the application.
- Gitea will provide you with some logging information, including the IP it's running on and where the log and configuration files are located. Note the IP and port (usually 3000) where Gitea is listening.
Configuring Gitea
- Open a web browser and access Gitea by navigating to http://localhost:3000 (or the IP and port where Gitea is running). You'll be presented with Gitea's configuration options.
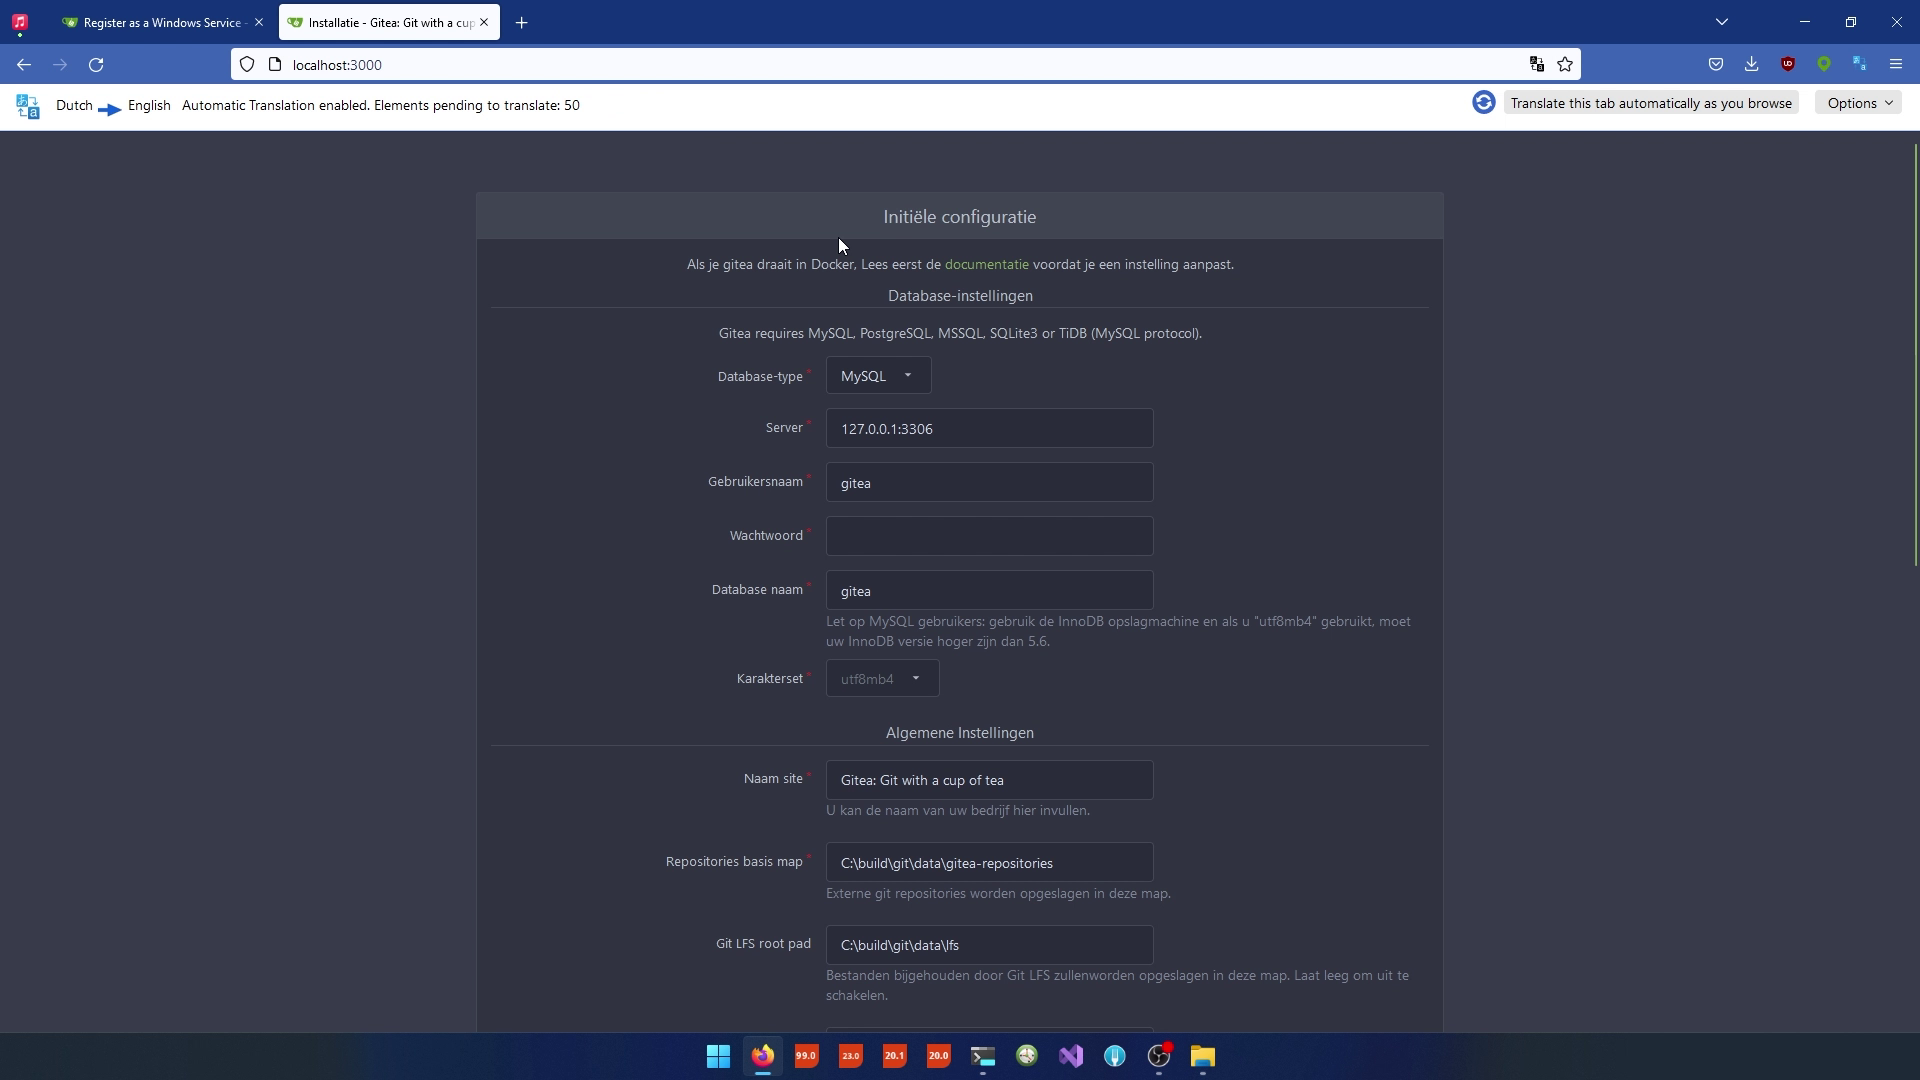
- Configure Gitea according to your preferences. Pay attention to the following settings:
- Database Type: You can choose a database type (e.g., SQLite) based on your needs.
- Gitea Database Location: Specify the location of the Gitea database.
- General Settings: Set the name of the site and other custom options.
- Perform As User: Change this to the desired user account (not the system user).
- SSH Server Port: Adjust if needed.
- Explore and configure other optional settings based on your requirements, such as email settings, third-party service settings, and password hashing algorithm.
- Set up an administrator account with a secure username and password.
Manage Gitea
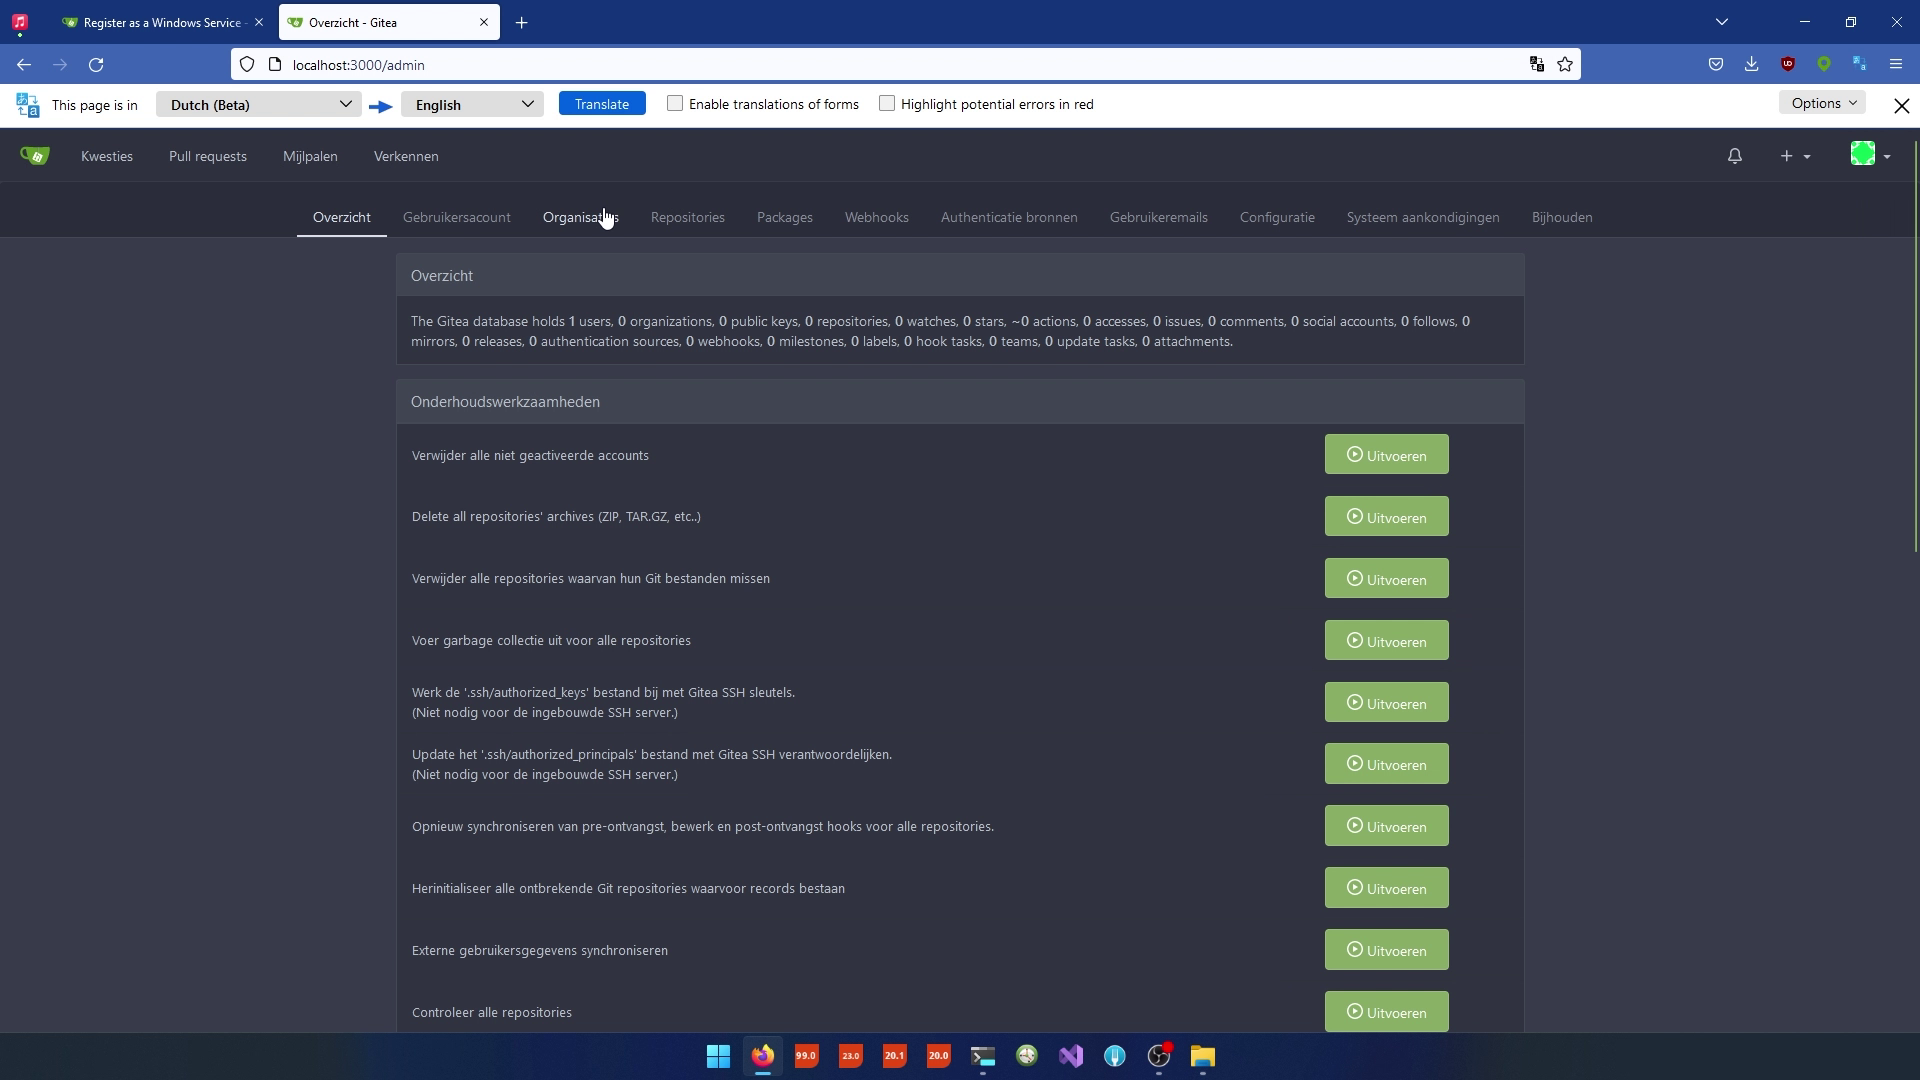
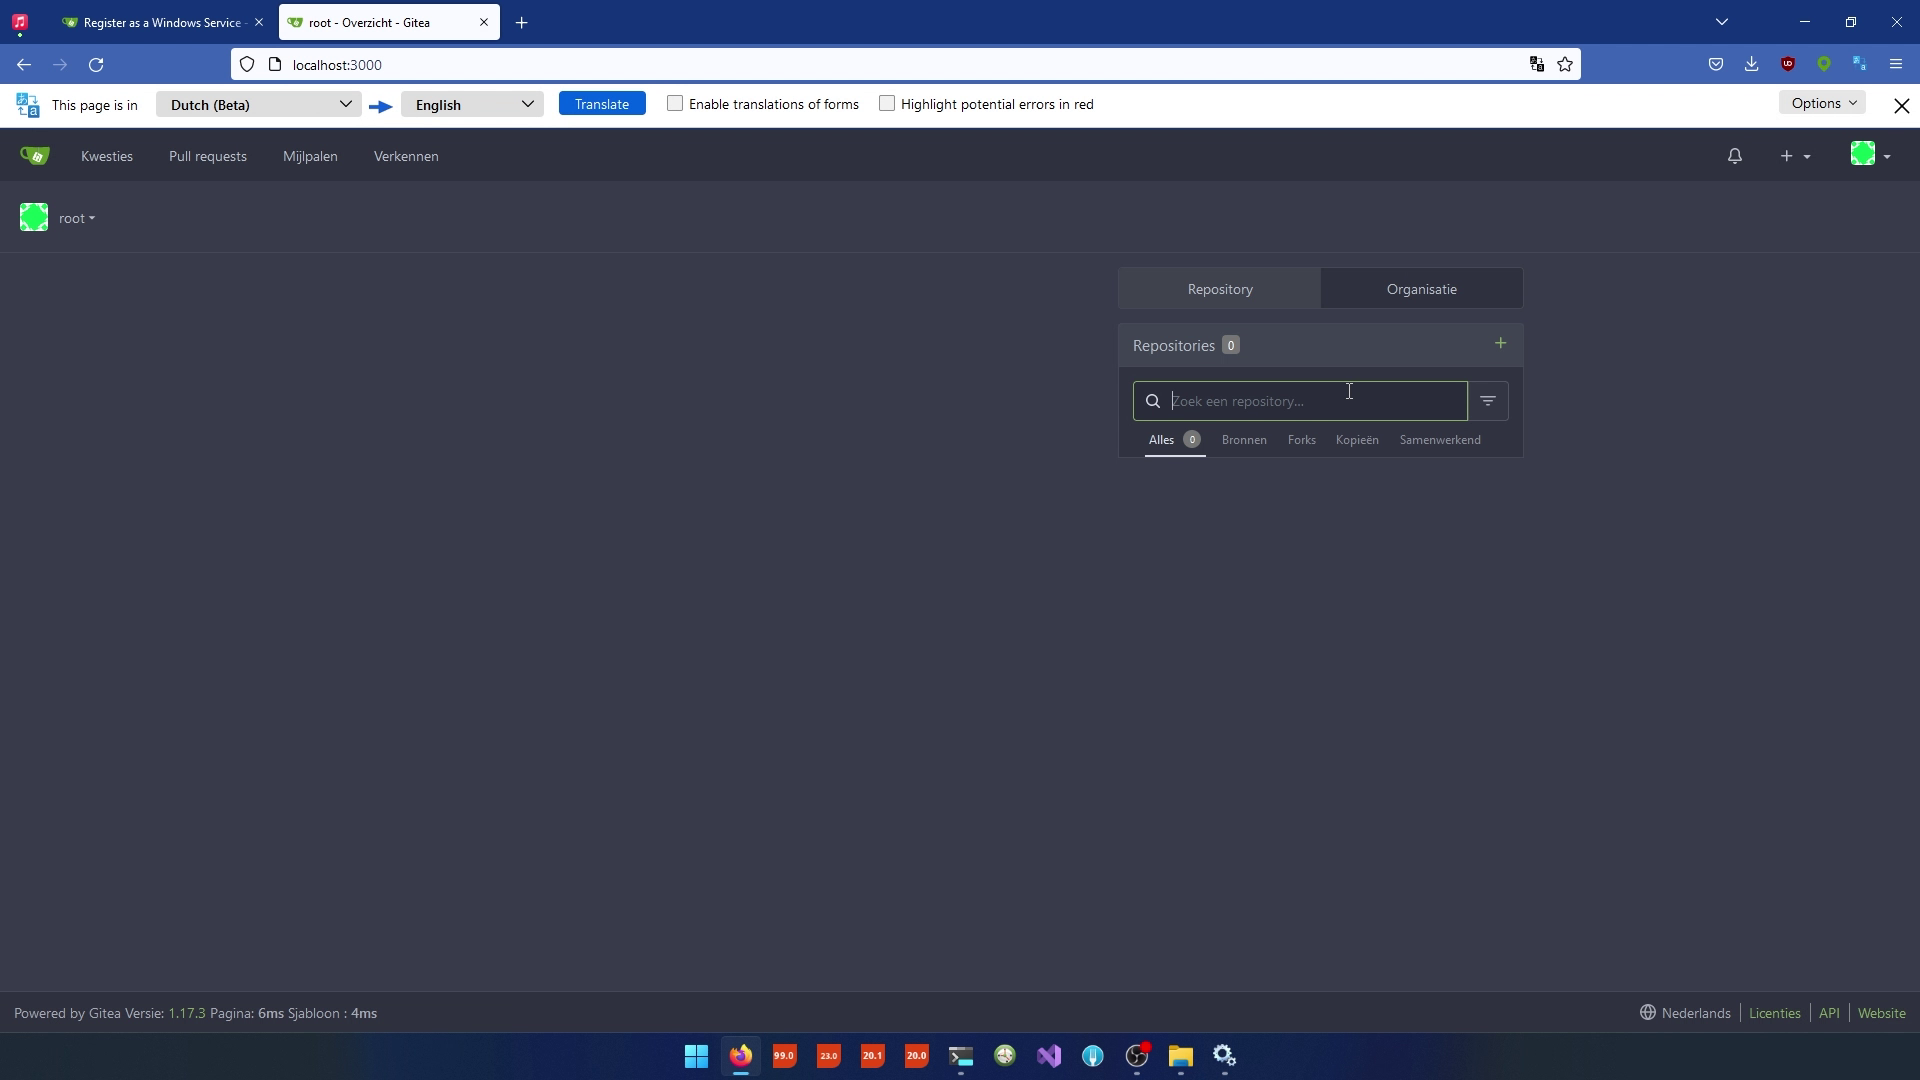
- Access the Gitea administration panel by navigating to http://localhost:3000/admin (or your configured address) to manage user accounts, organizations, and repositories.
Running Gitea as a Windows Service
- To run Gitea as a Windows service, stop the Giteaservice temporarily by pressing Ctrl+C in the command prompt where Giteais running.
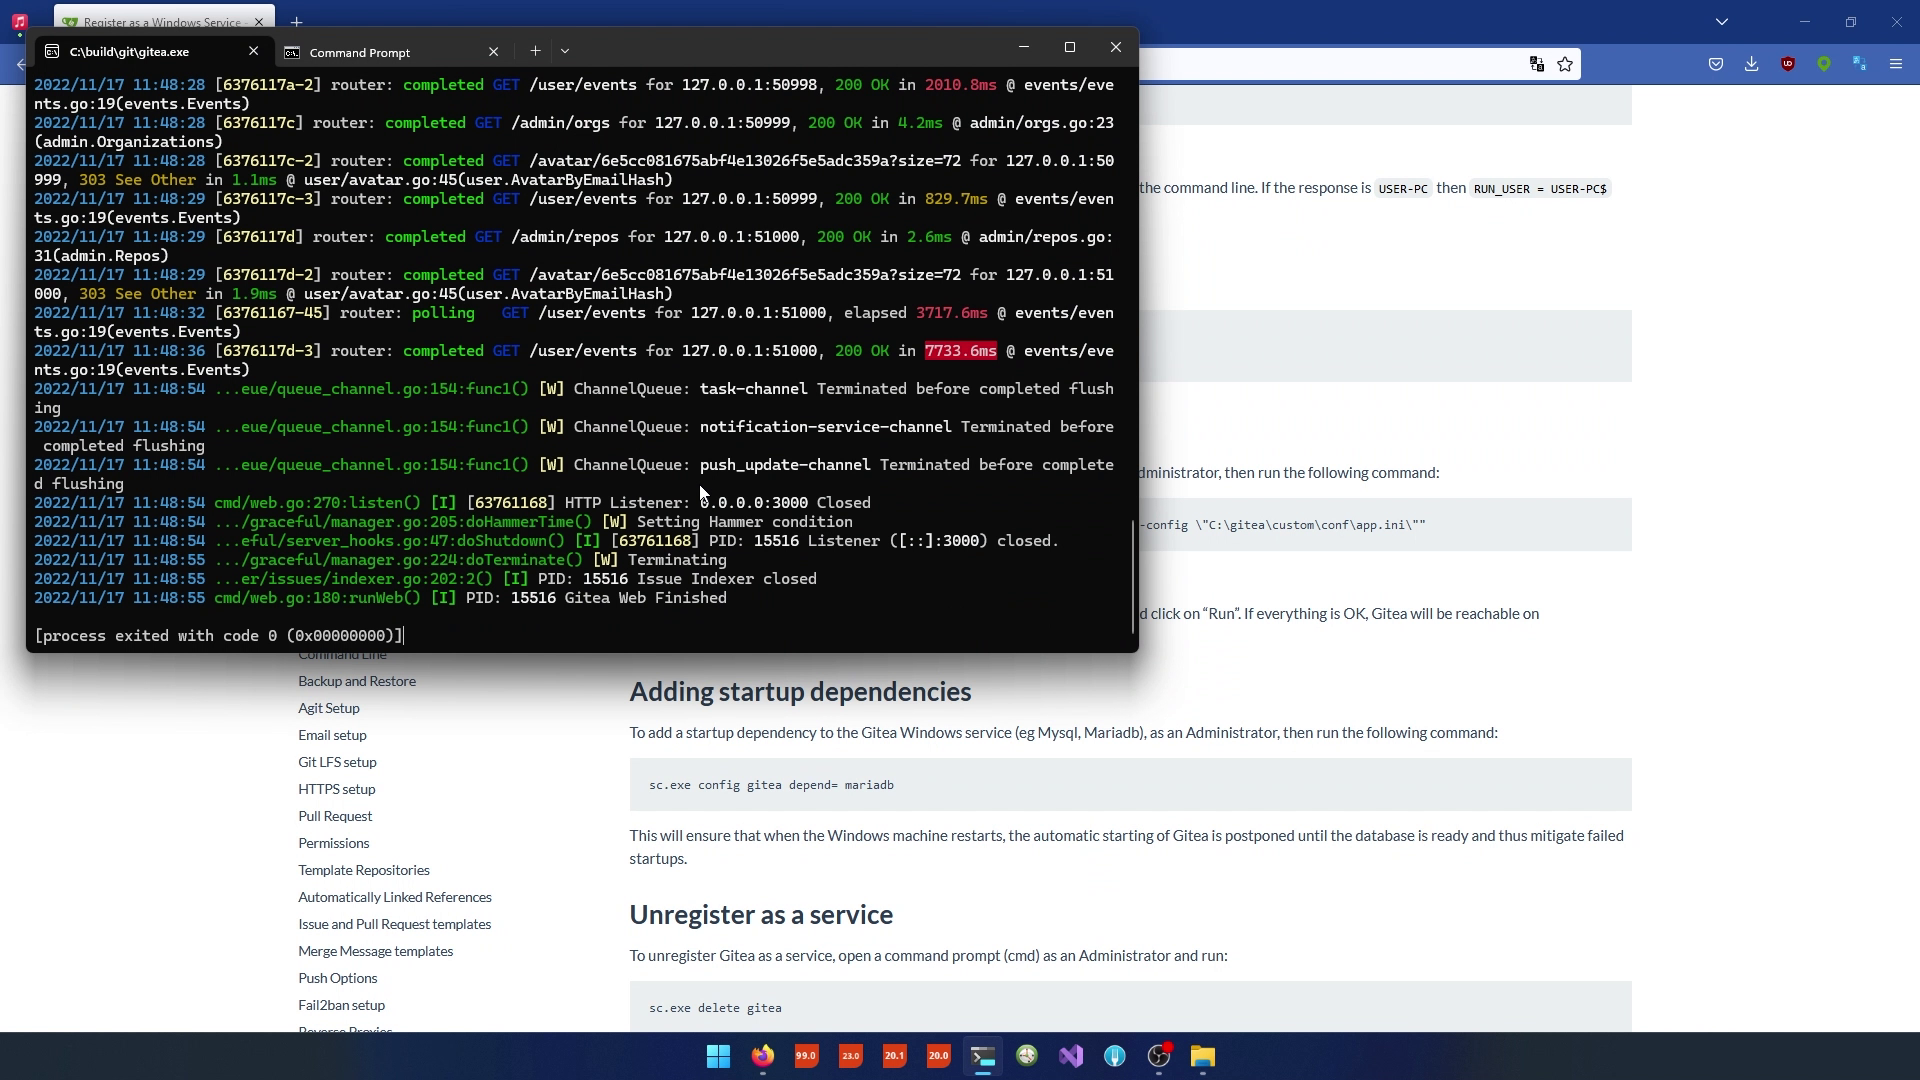
- Open a command prompt with administrative privileges (Run as Administrator).
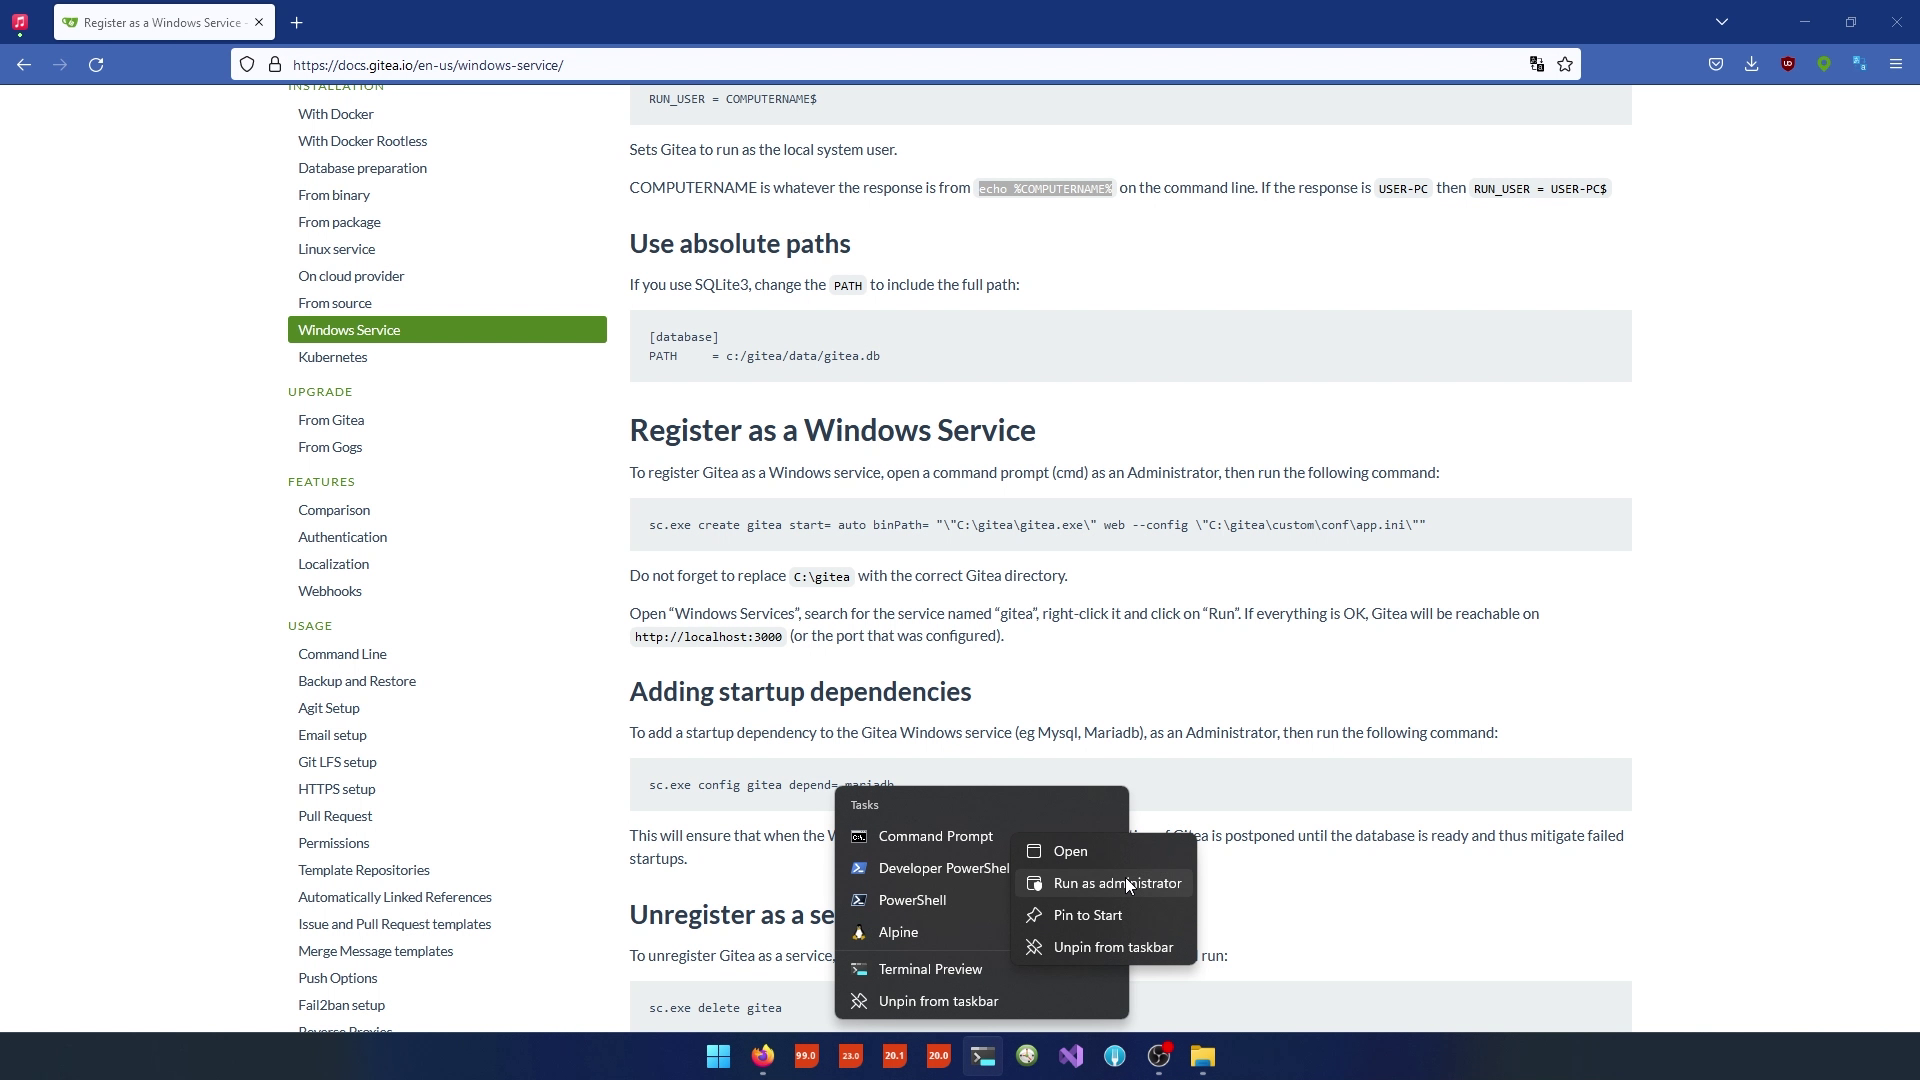
- Execute the command provided in the documentation to register Gitea as a Windows service. Make sure to remove the escape characters and adjust the paths as needed

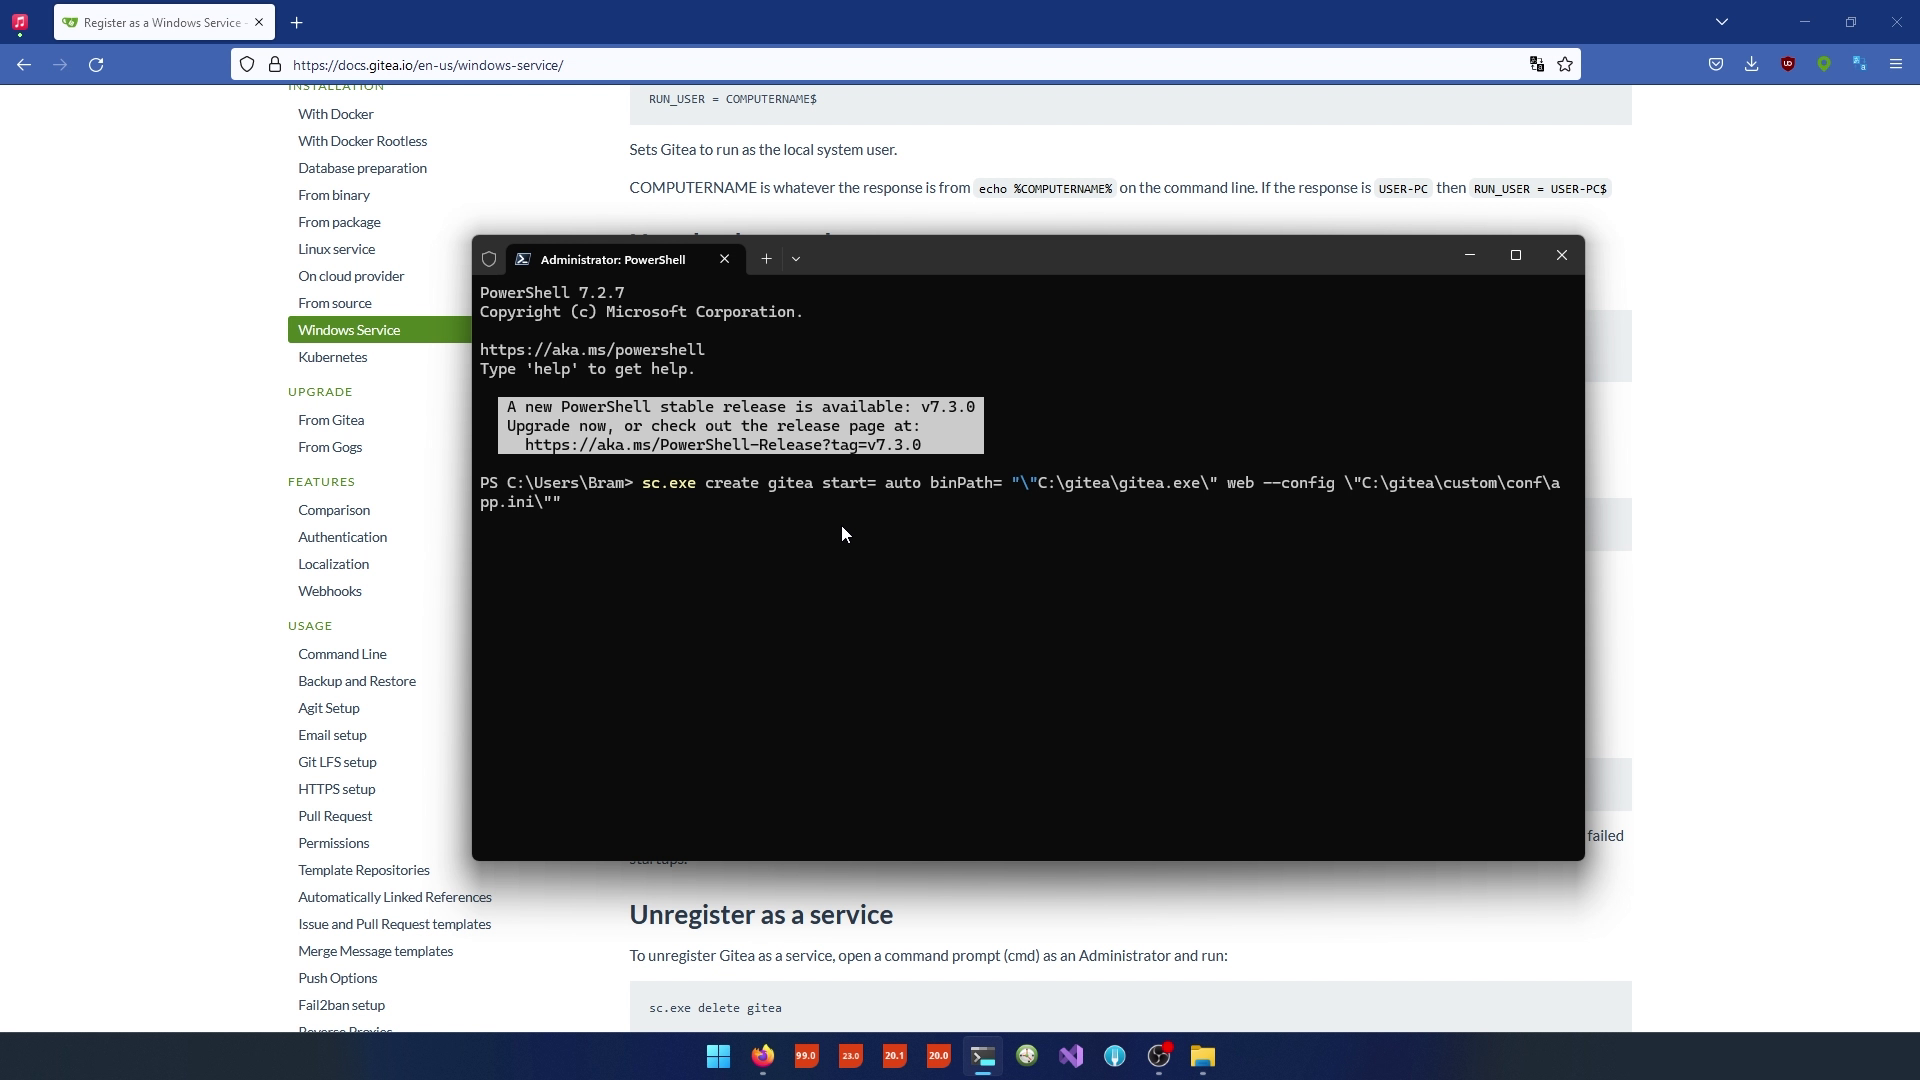
- Once the service is created successfully, check the Windows Services panel to ensure that the Gitea service is listed and set to start automatically.
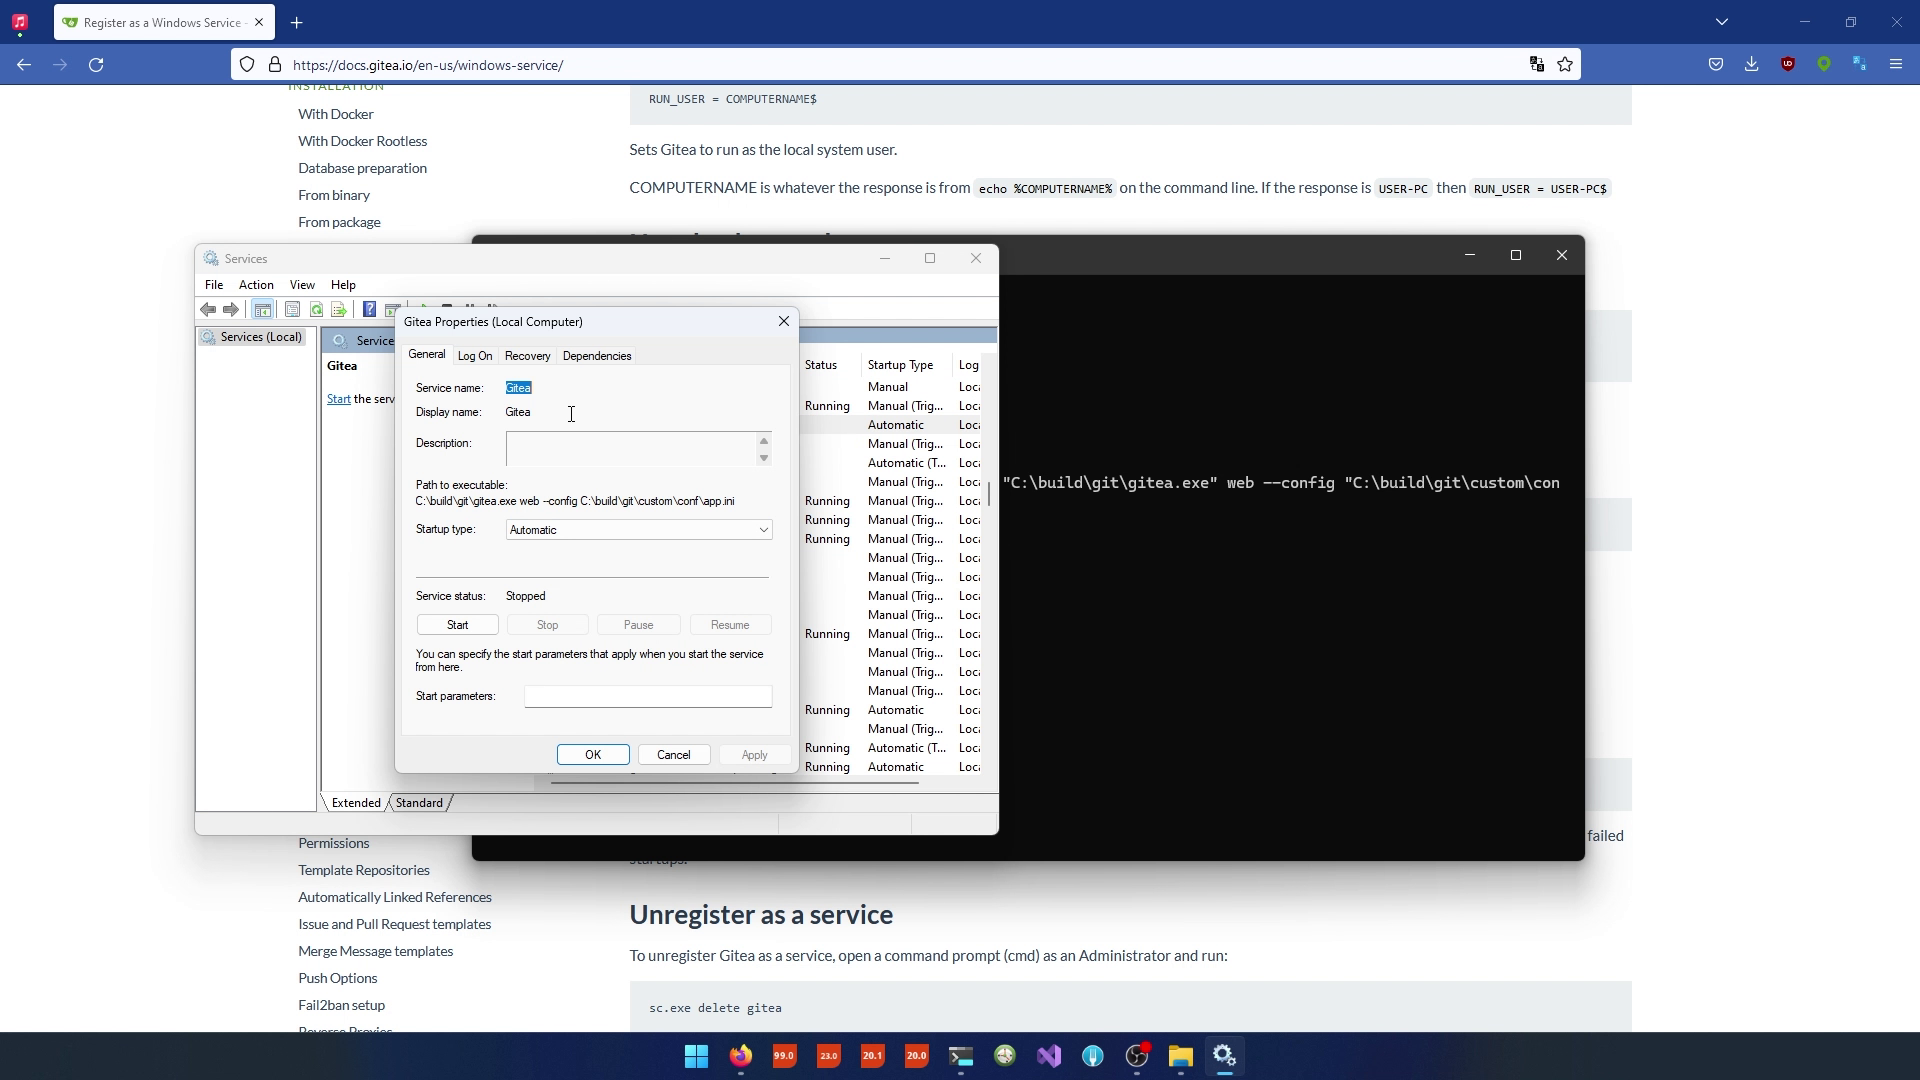
Step 8: Verify Gitea as a Windows Service
- Start the Gitea service from the Windows Services panel.
- Verify that Gitea is accessible and working by navigating to the configured address (e.g., http://localhost:3000).
Congratulations! You've successfully installed and configured Gitea as a Windows service. In the next lesson, we'll set up Jenkins for further development and automation tasks.


