Custom Controls
Lesson 5: DOM Manipulation
This lesson is going to show how to add DataFlex events to interact with the Document Object Model (DOM).
- Open WebMsgBuilder.js in the text editor
- Add logic to the AddBtn, SendBtn and to the form
//Add a listener to the buttons and form
df.events.addDomListener(“click”, this._eAddBtn, this.doAddMessageItem, this);
df.events.addDomListener(“click”, this._eSendBtn, this.sendMessage, this);
df.events.addDomKeyListener(this._eForm, this.onKey, this);

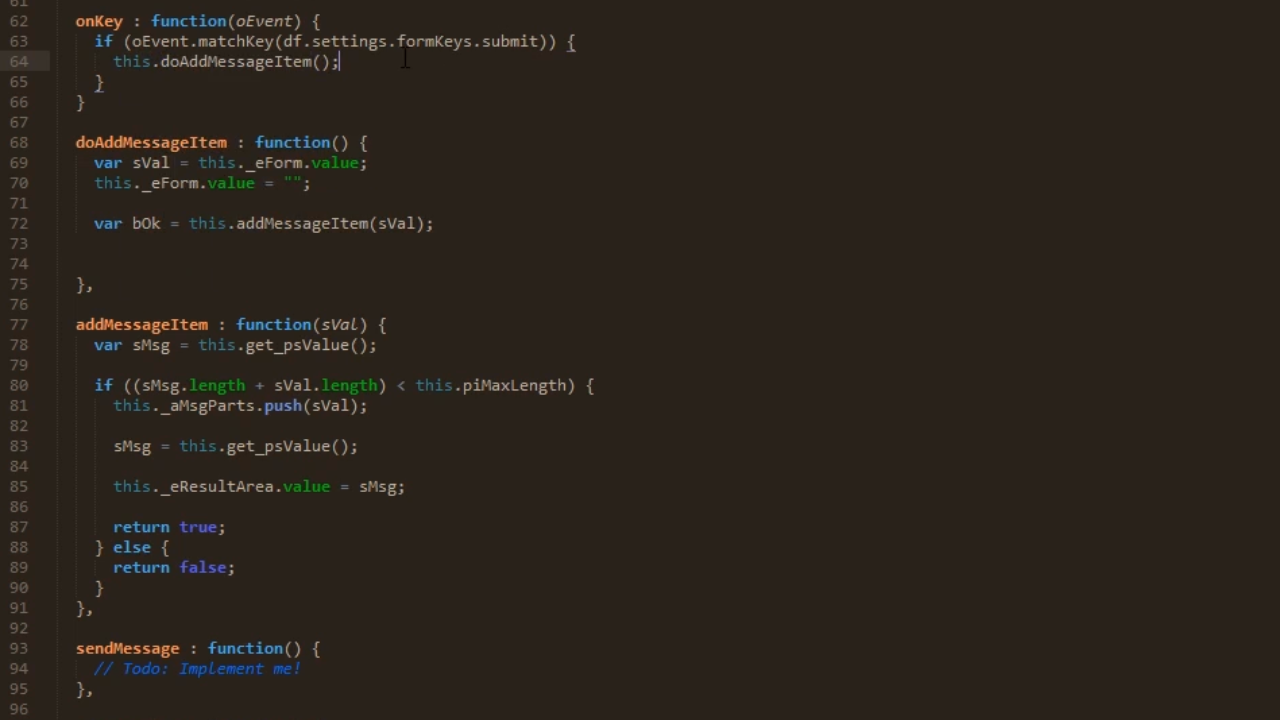
- Add functions to make the buttons work
onKey : function(oEvent) {
if (oEvent.matchKey(df.settings.formKeys.submit)) {
this.doAddMessageItem();
}
},
doAddMessageItem : function () {
var sVal = this._eForm.value;
this._eForm.value = “”;
var bOk = this.addMessageItem(sVal);
},
addMessageItem : function(sVal) {
var sMsg = this.get_psValue();
if ((sMsg.length + sVal.length) < this.piMaxLength) {
this._aMsgParts.push(sVal);
sMsg = this.get_psValue();
this._eResultArea.value = sMsg;
return true;
} else {
return false;
}
},
sendMessage : function() {
//Todo: Implement me!
},
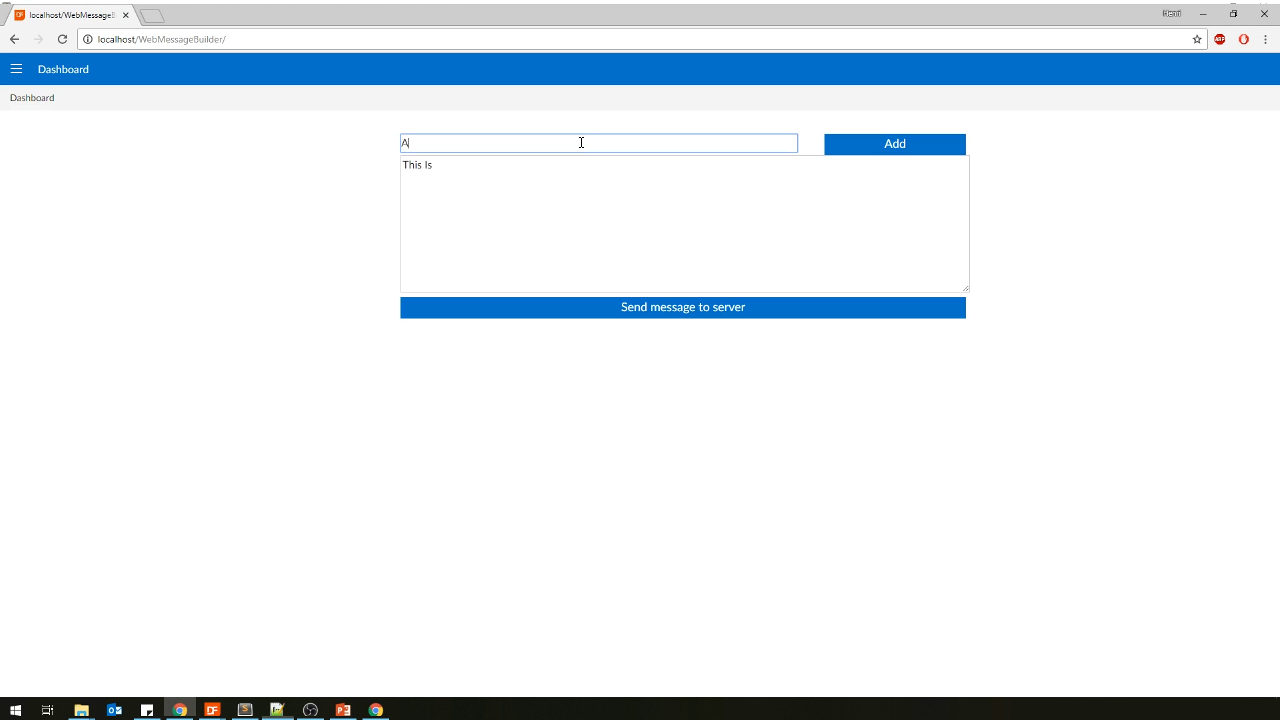
- Return to the web browser and refresh the page.
- Enter words into the top field, and either press ‘Add’ or the ENTER key to have them applied to the dialogue box.
- This can be done until the maximum length of 10 is reached.