Lesson 2: Making a data source sortable by specific column indexes
Open the DataFlex Studio.
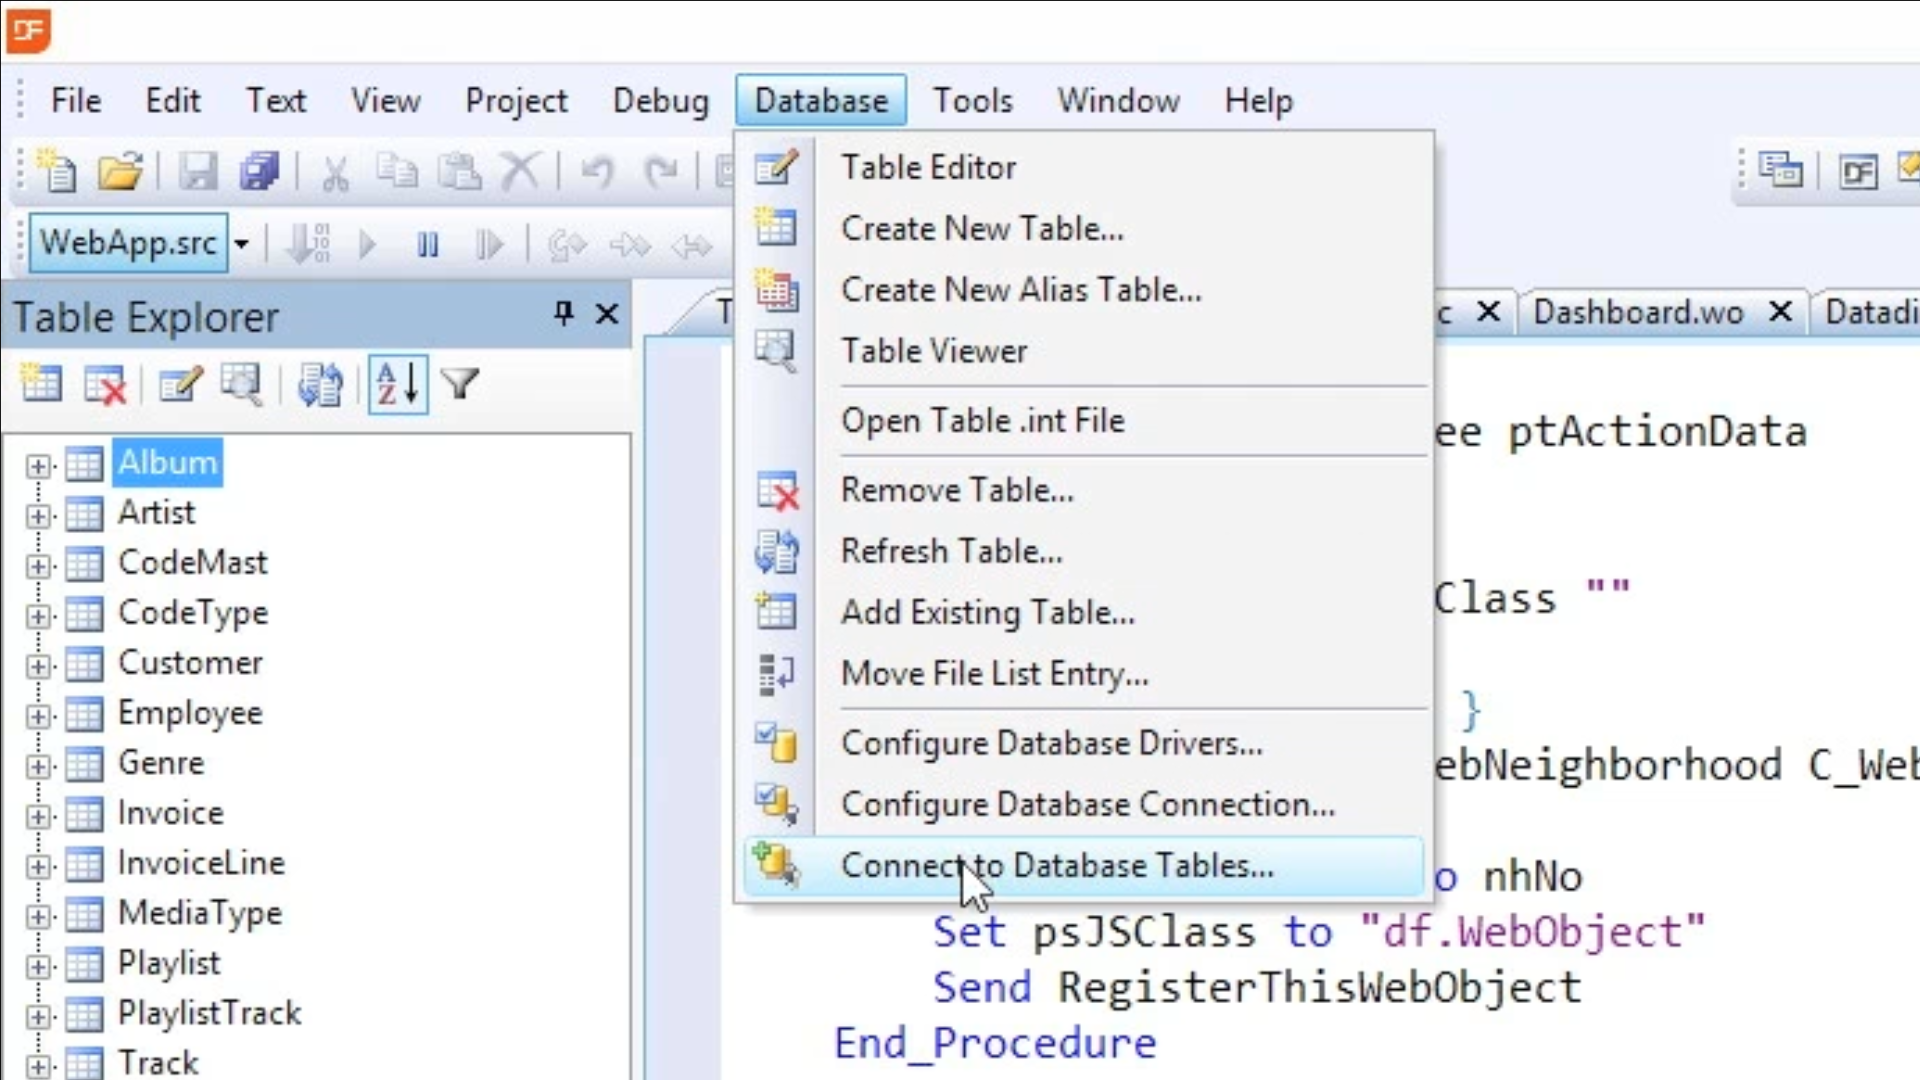
Open the Table Explorer on the left.
Select CONNECT TO DATABASE TABLES from the DATABASE menu at the top to open a connection wizard.
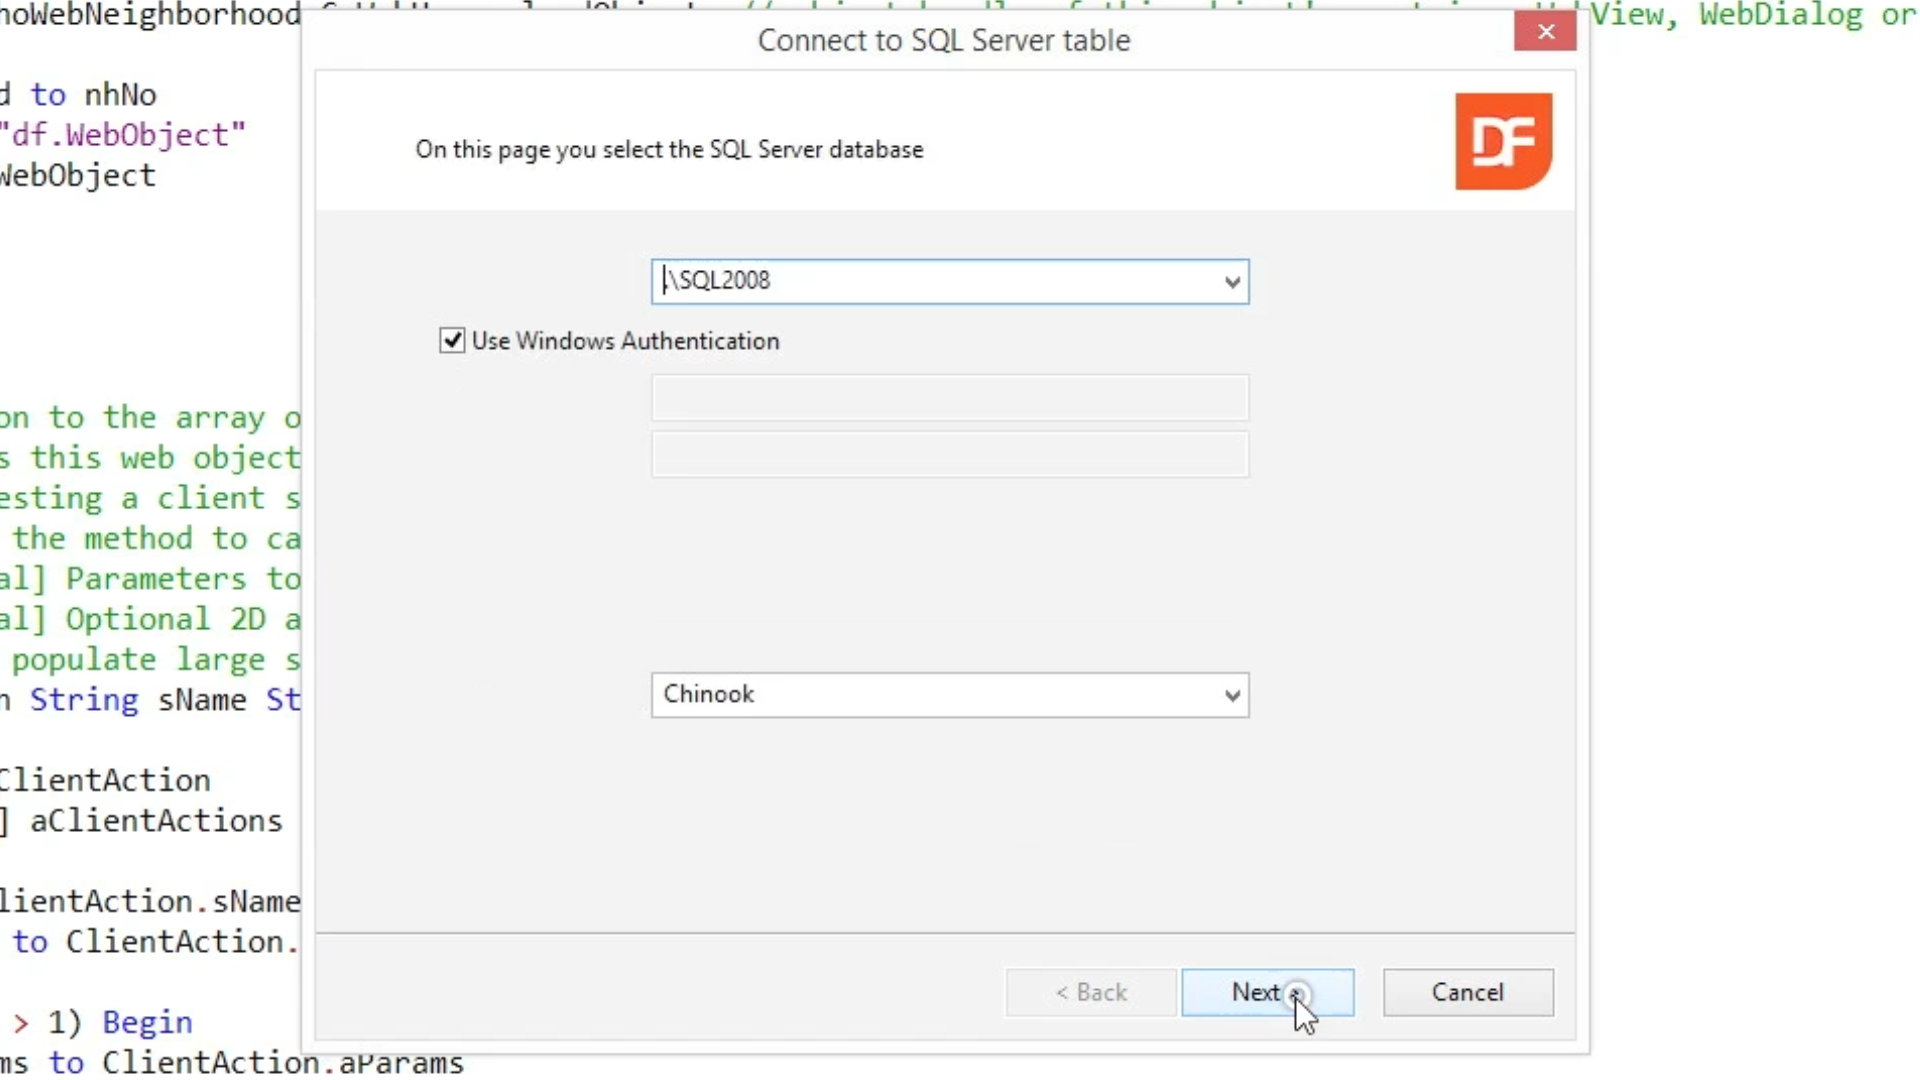
On the Database Selection screen specify the desired server and database. Select NEXT twice.
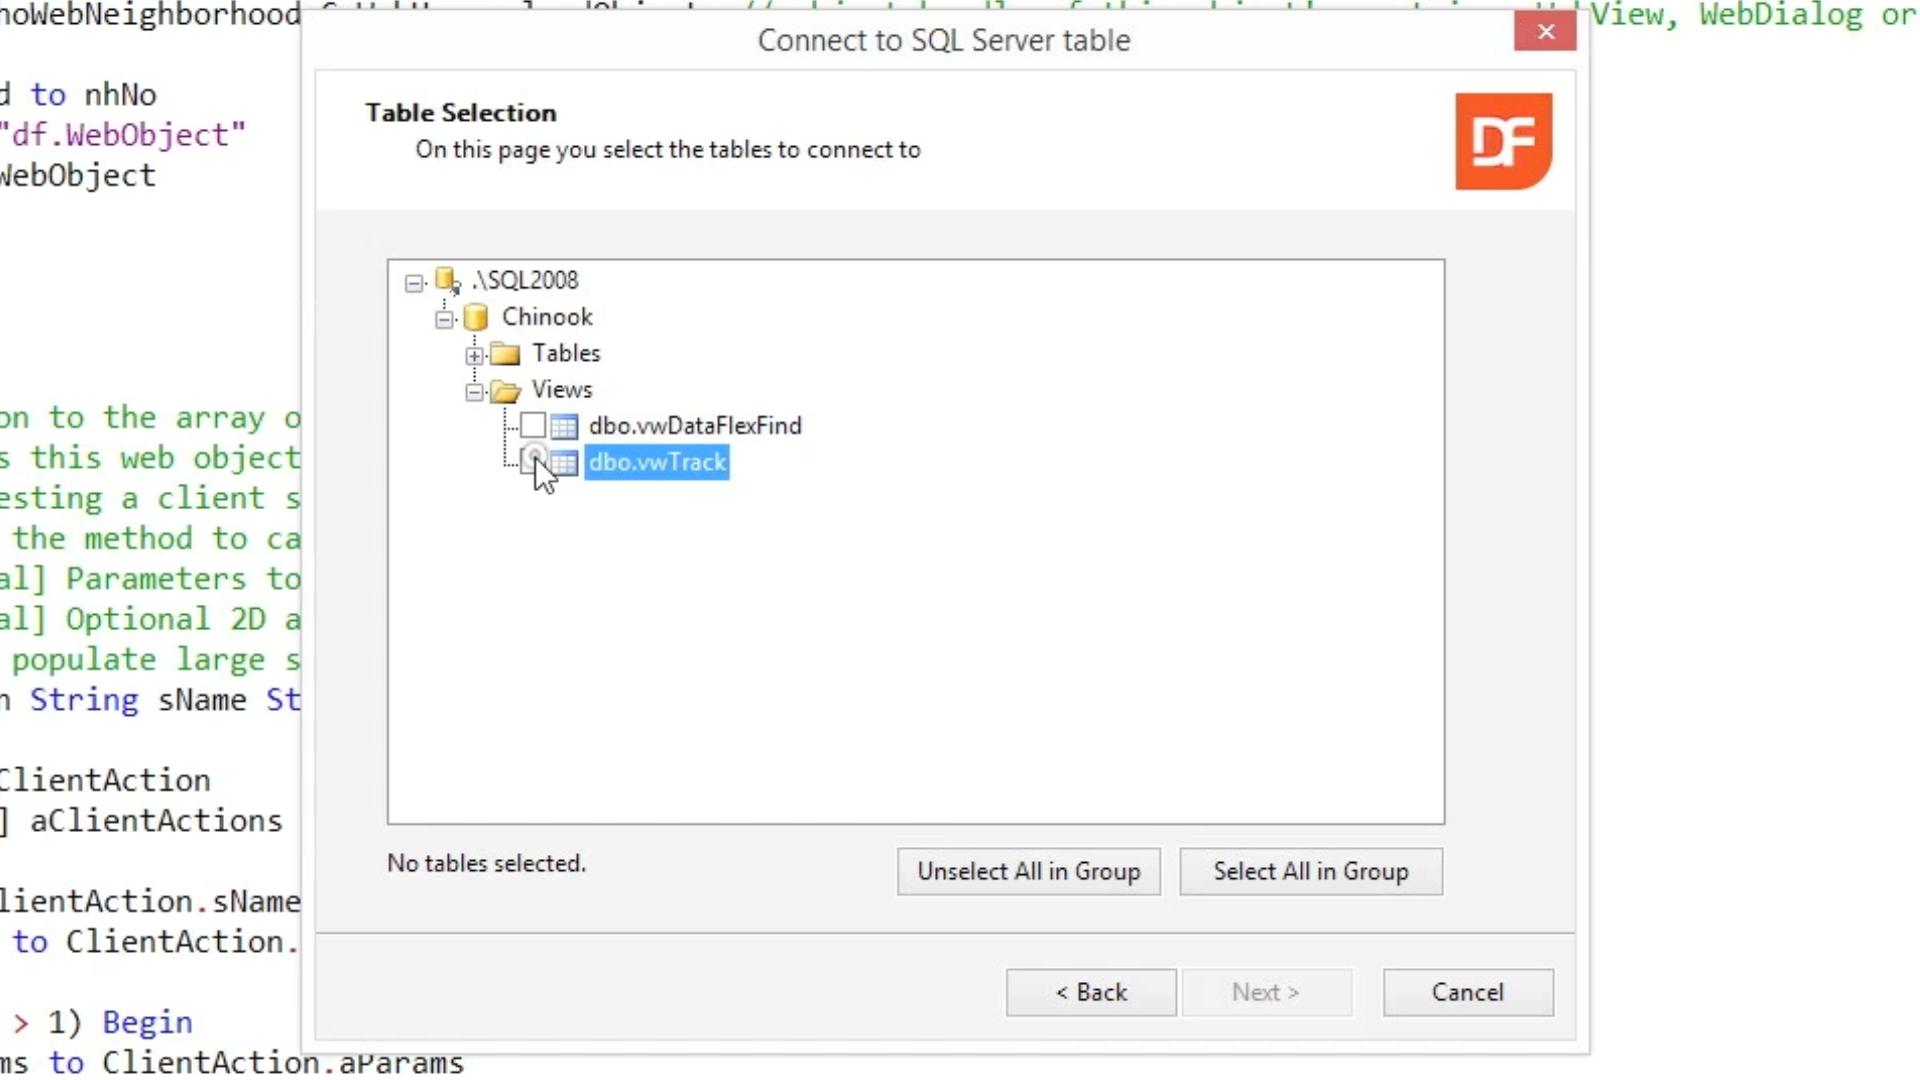
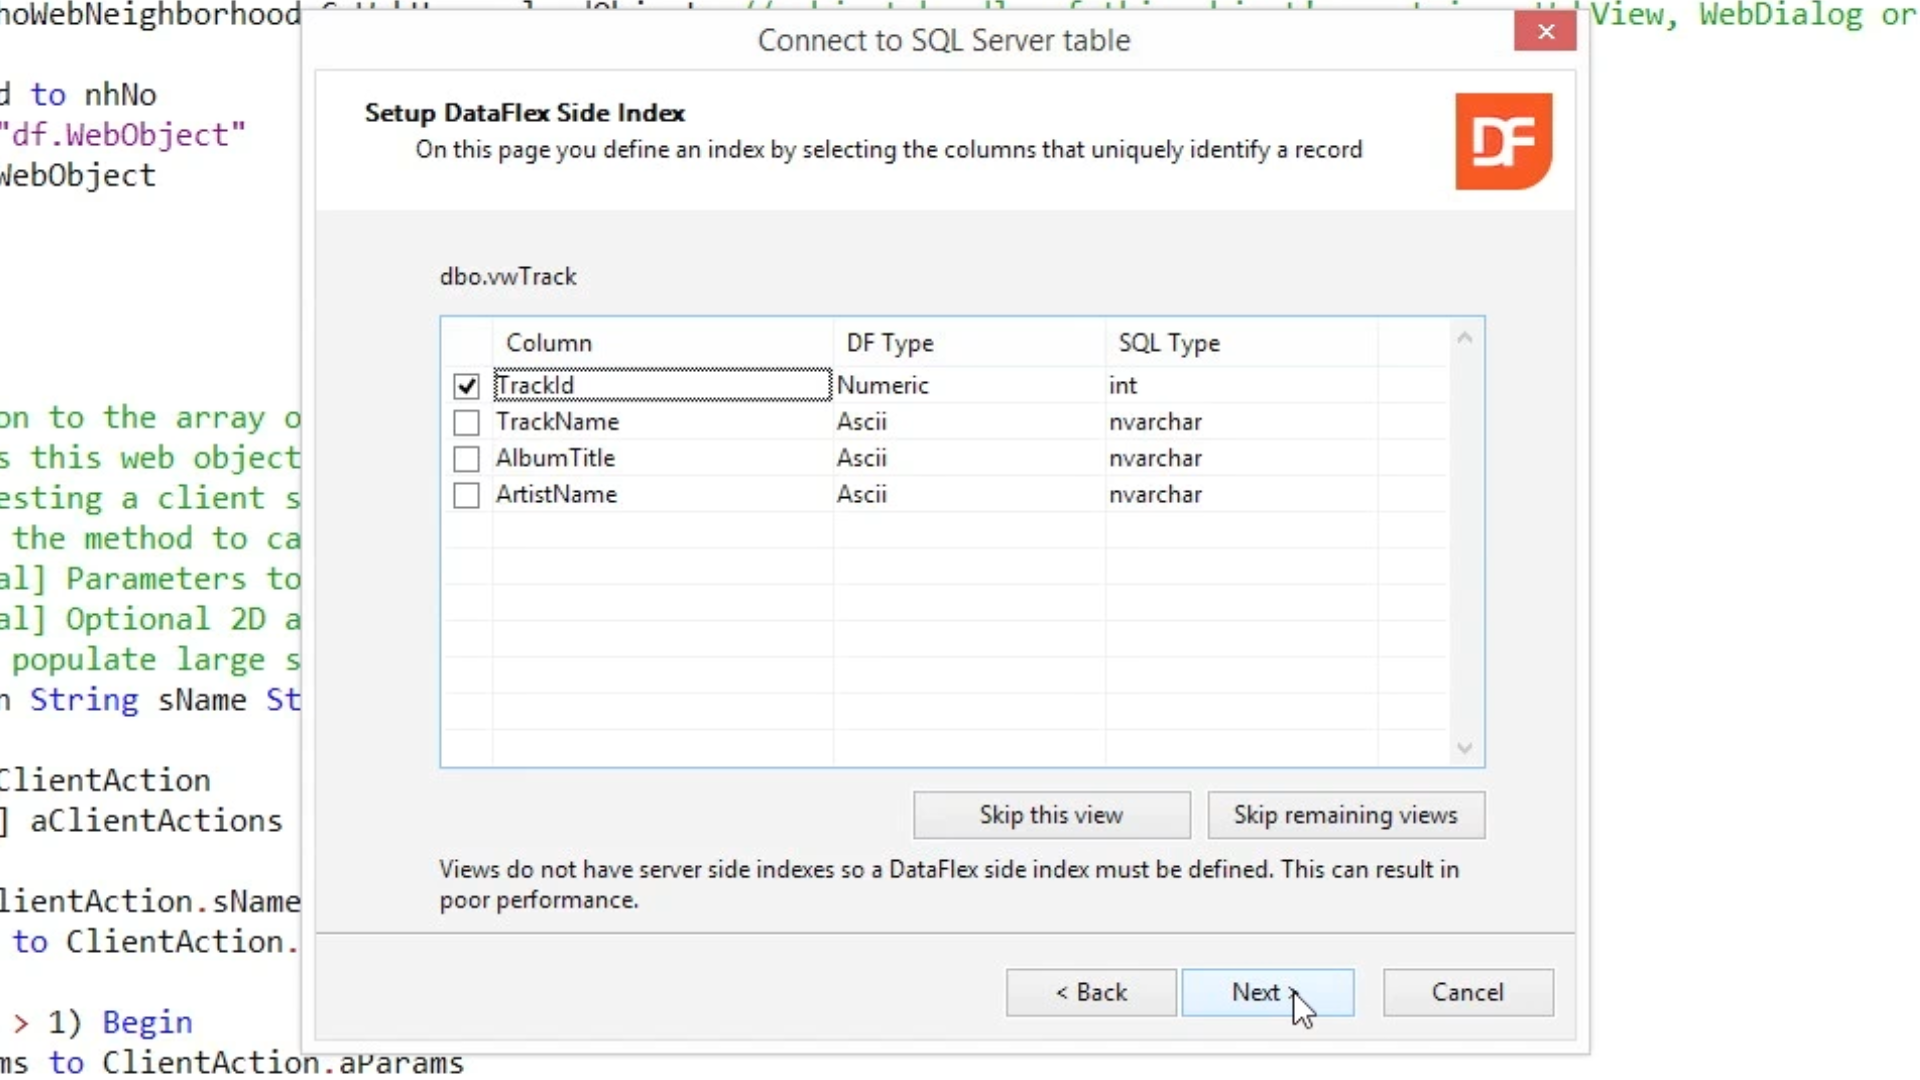
On the Table Selection screen expand the Views directory, and select the previously made view (dbo.vwTrack). Select NEXT.
On the Setup DataFlex Side Index screen choose the columns that uniquely identify the view to make it selectable (TrackID). Select NEXT three times, and then FINISH.
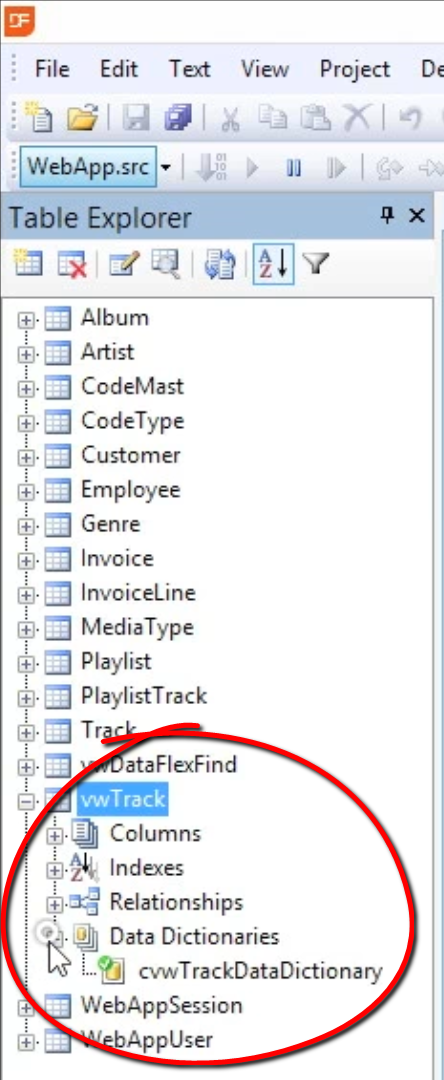
The newly created view is now shown in the Table Explorer.
Double clicking the view in Table Explorer will open it in the Studio, so that you can view its parts.
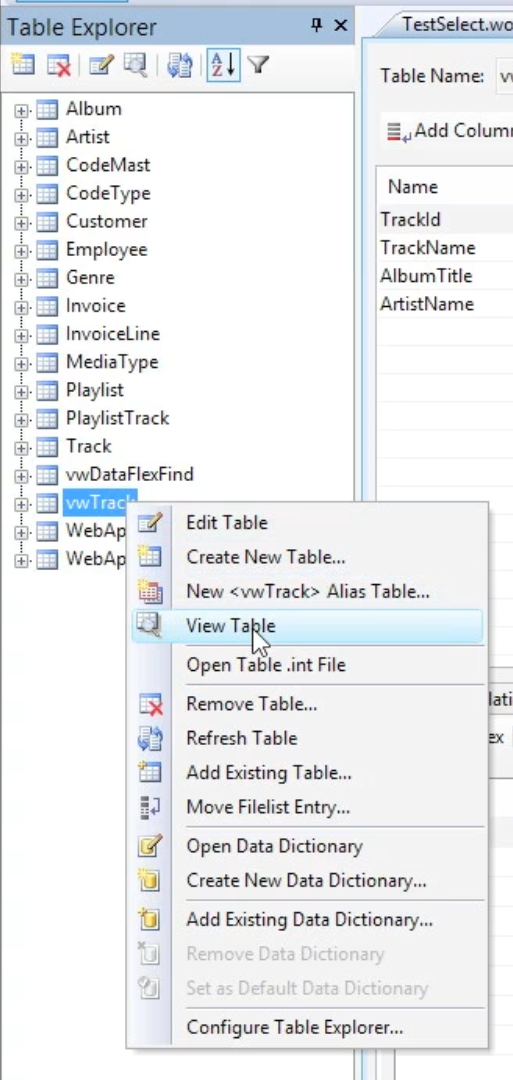
Highlighting it, right clicking, and selecting VIEW TABLE will open the view as a table in its entirety.
Also note it now has it’s own Data Dictionary attached to it.
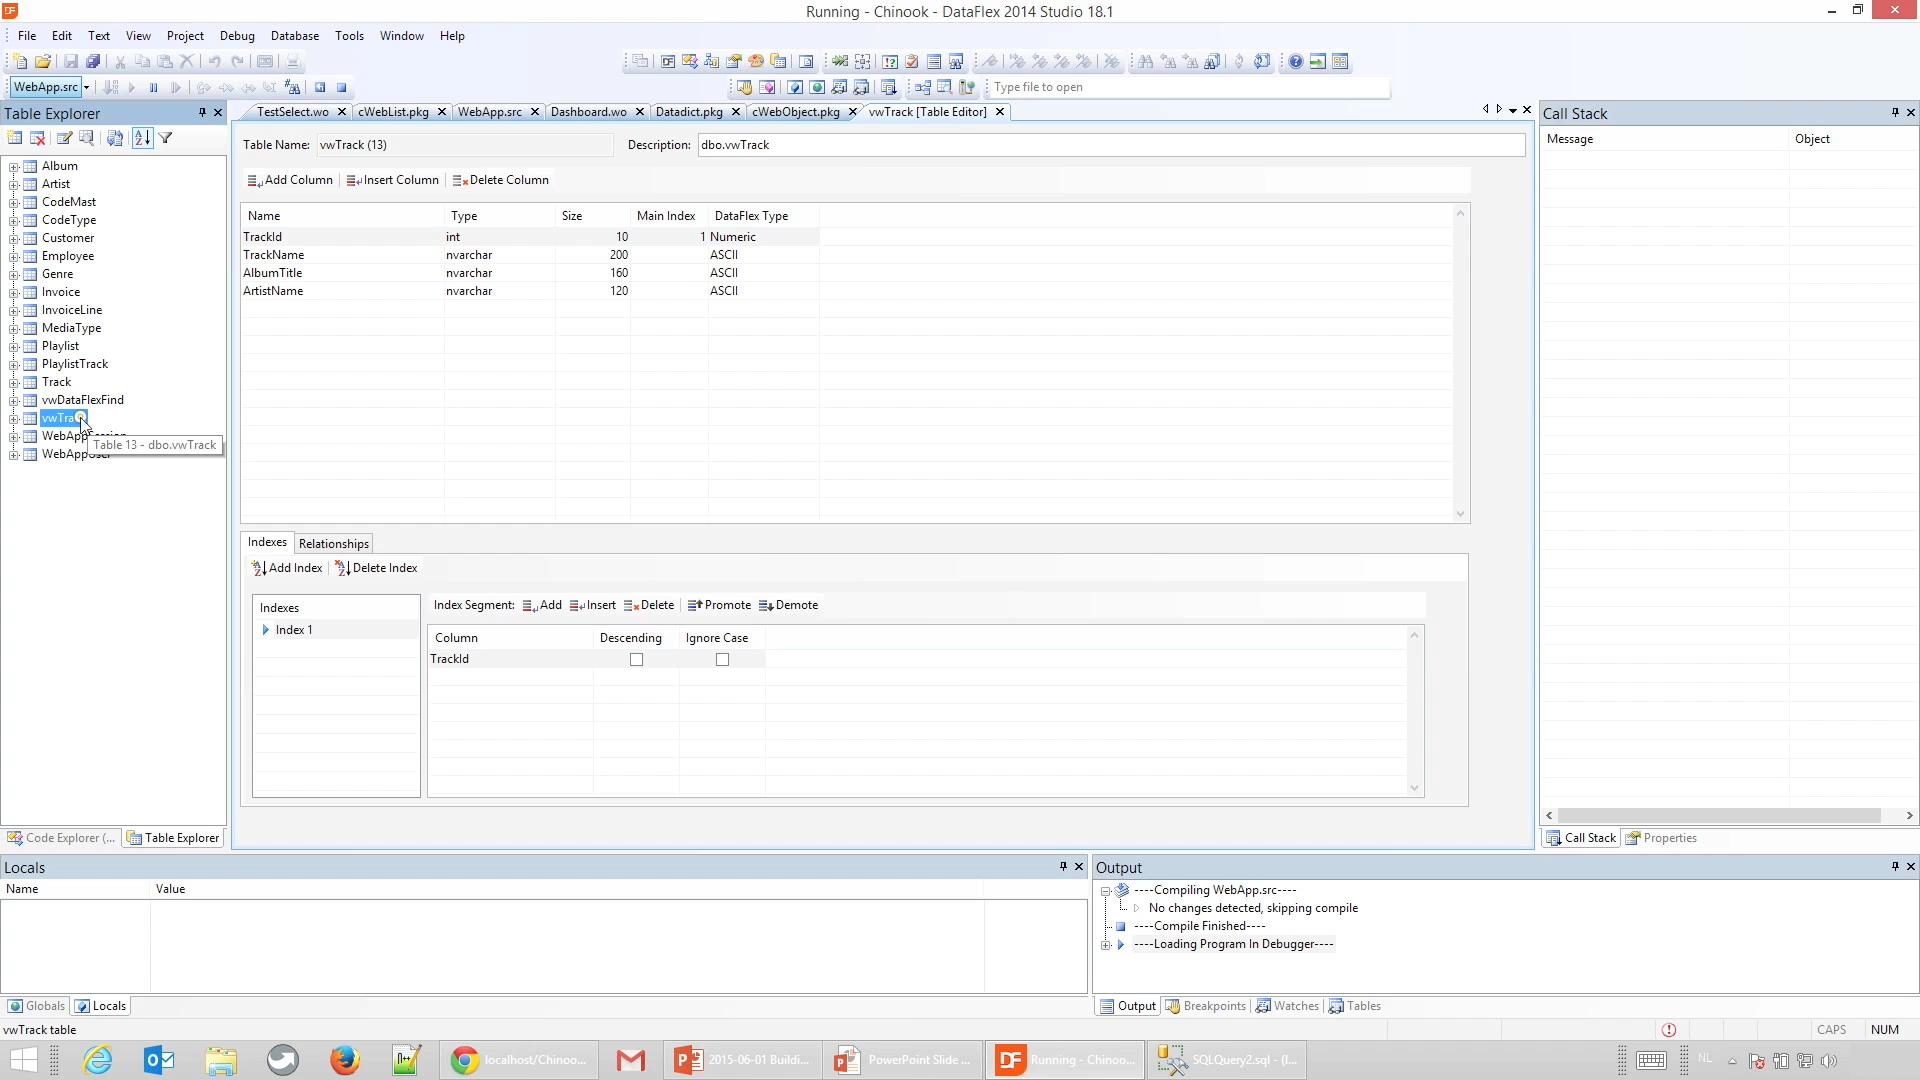
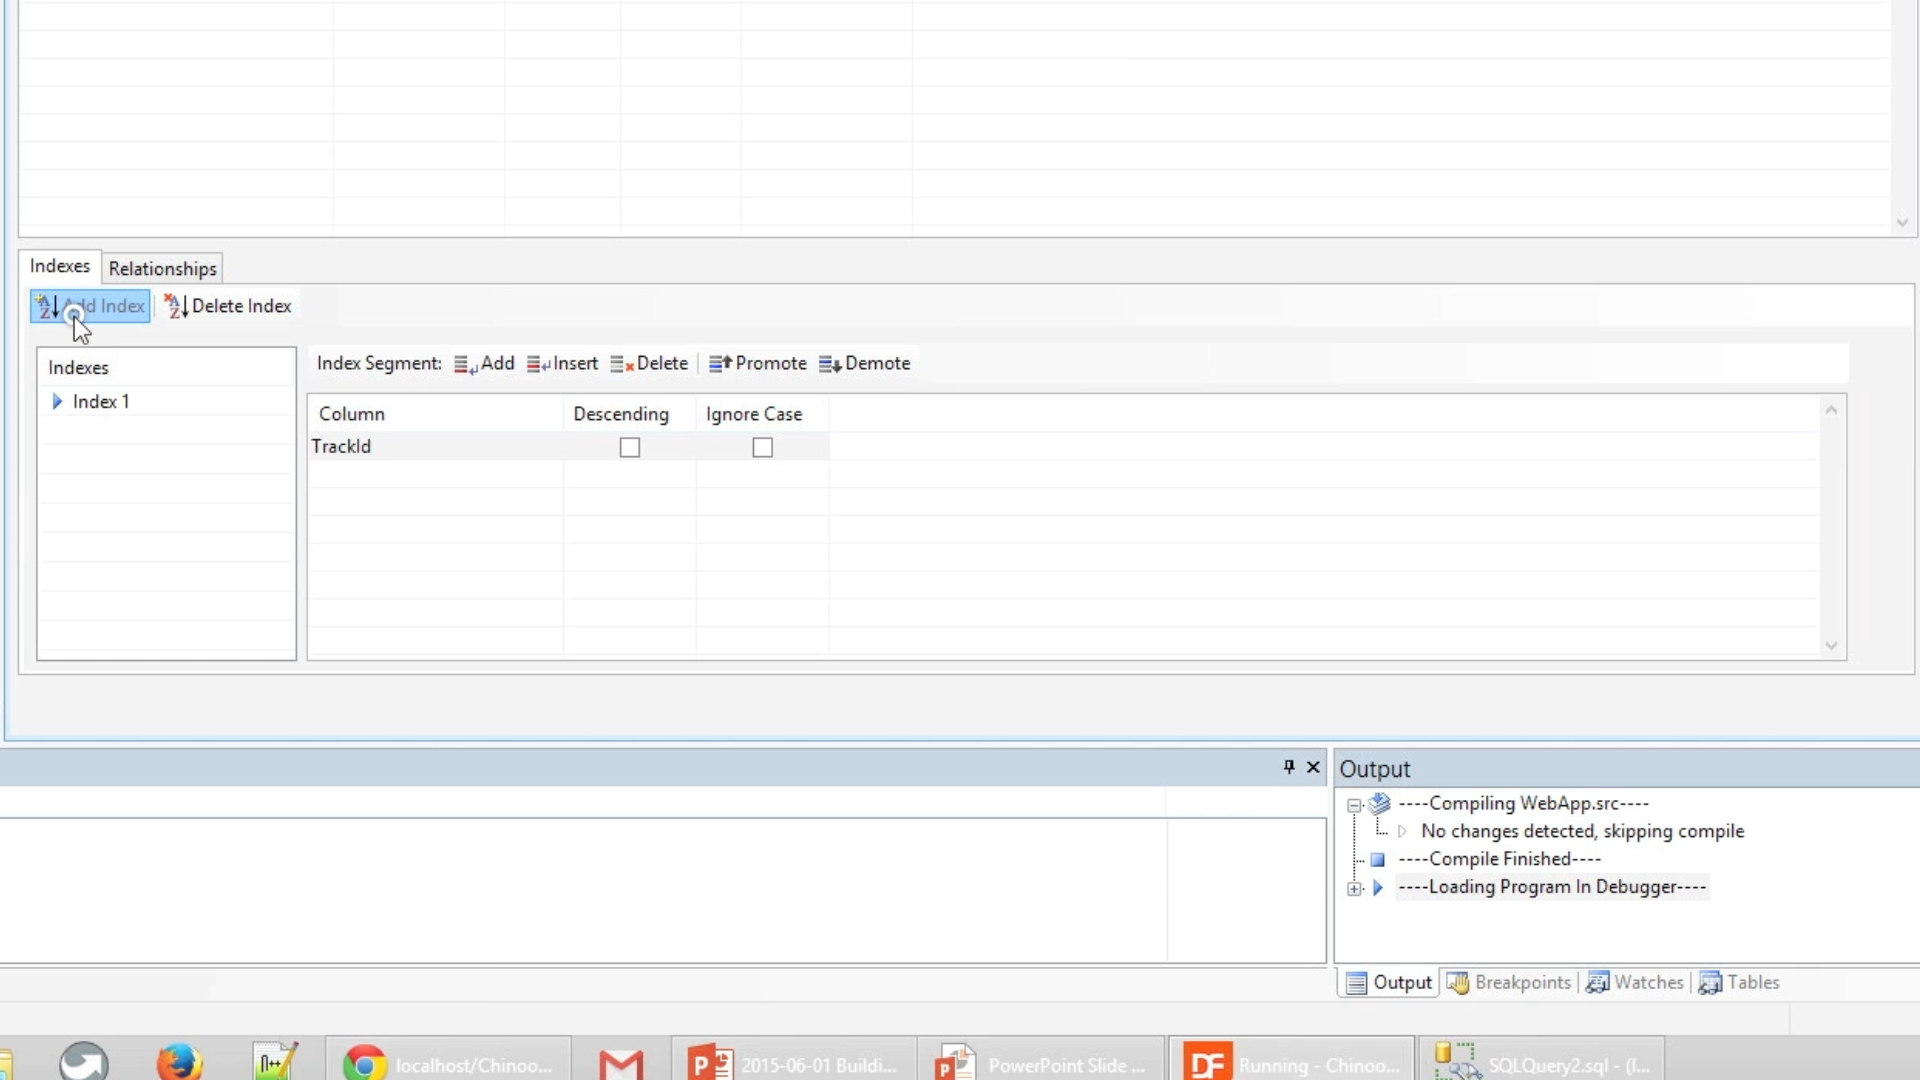
To make the data source sortable by a specific column indexes must be created.
Double click vwTrack in the Table Explorer.
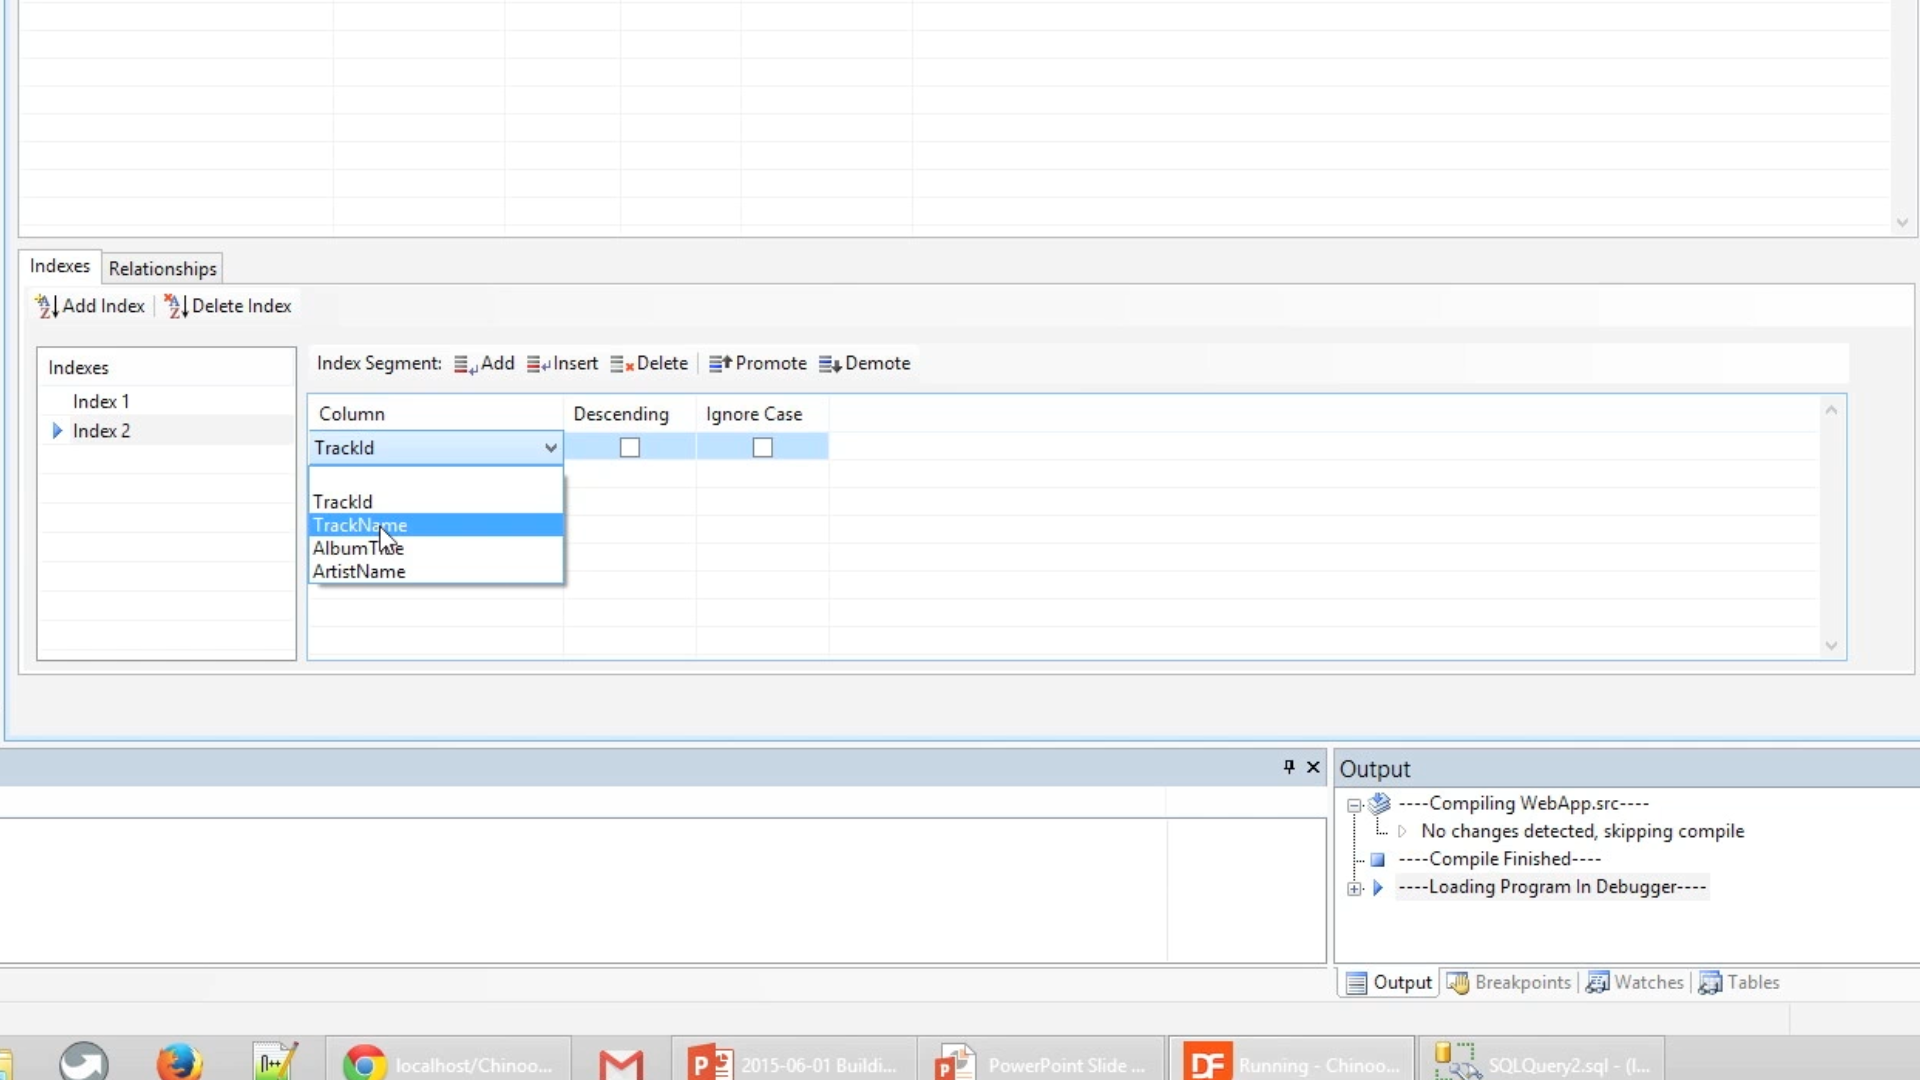
One index, “TrackID,” is already shown in this example in the Indexes tab on the bottom of the Studio. To add additional indexes, elect ADD INDEX from the top menu in the ‘Indexes’ tab.
Select the desired column from the drop down that appears. ‘TrackName’ for this example.
To make it unique, click the empty row below ‘TrackName,’ and select ‘TrackID’ from the drop down that appears.
This step is repeated twice more creating indexes for ‘AlbumTitle’ >> ‘TrackName’ >> ‘TrackID’ and ‘ArtistName’ >> ‘TrackID’ ultimately resulting in four indexes.