Advanced Dynamic Objects
Lesson 6 - Step 5: Modification Phase
This lesson demonstrates some of the capabilities of the dynamic objects framework regarding modifying existing dynamic objects. These modifications correspond to the fifth and final step of the dynamic objects workflow. This sample application loads three dynamic objects when the page loads: an empty cWebForm object, a button to add a new address line and a button to remove the last address line. In a previous lesson, two lines of code were shown that would be discussed later. These two lines modify an object previously loaded.
Demonstration
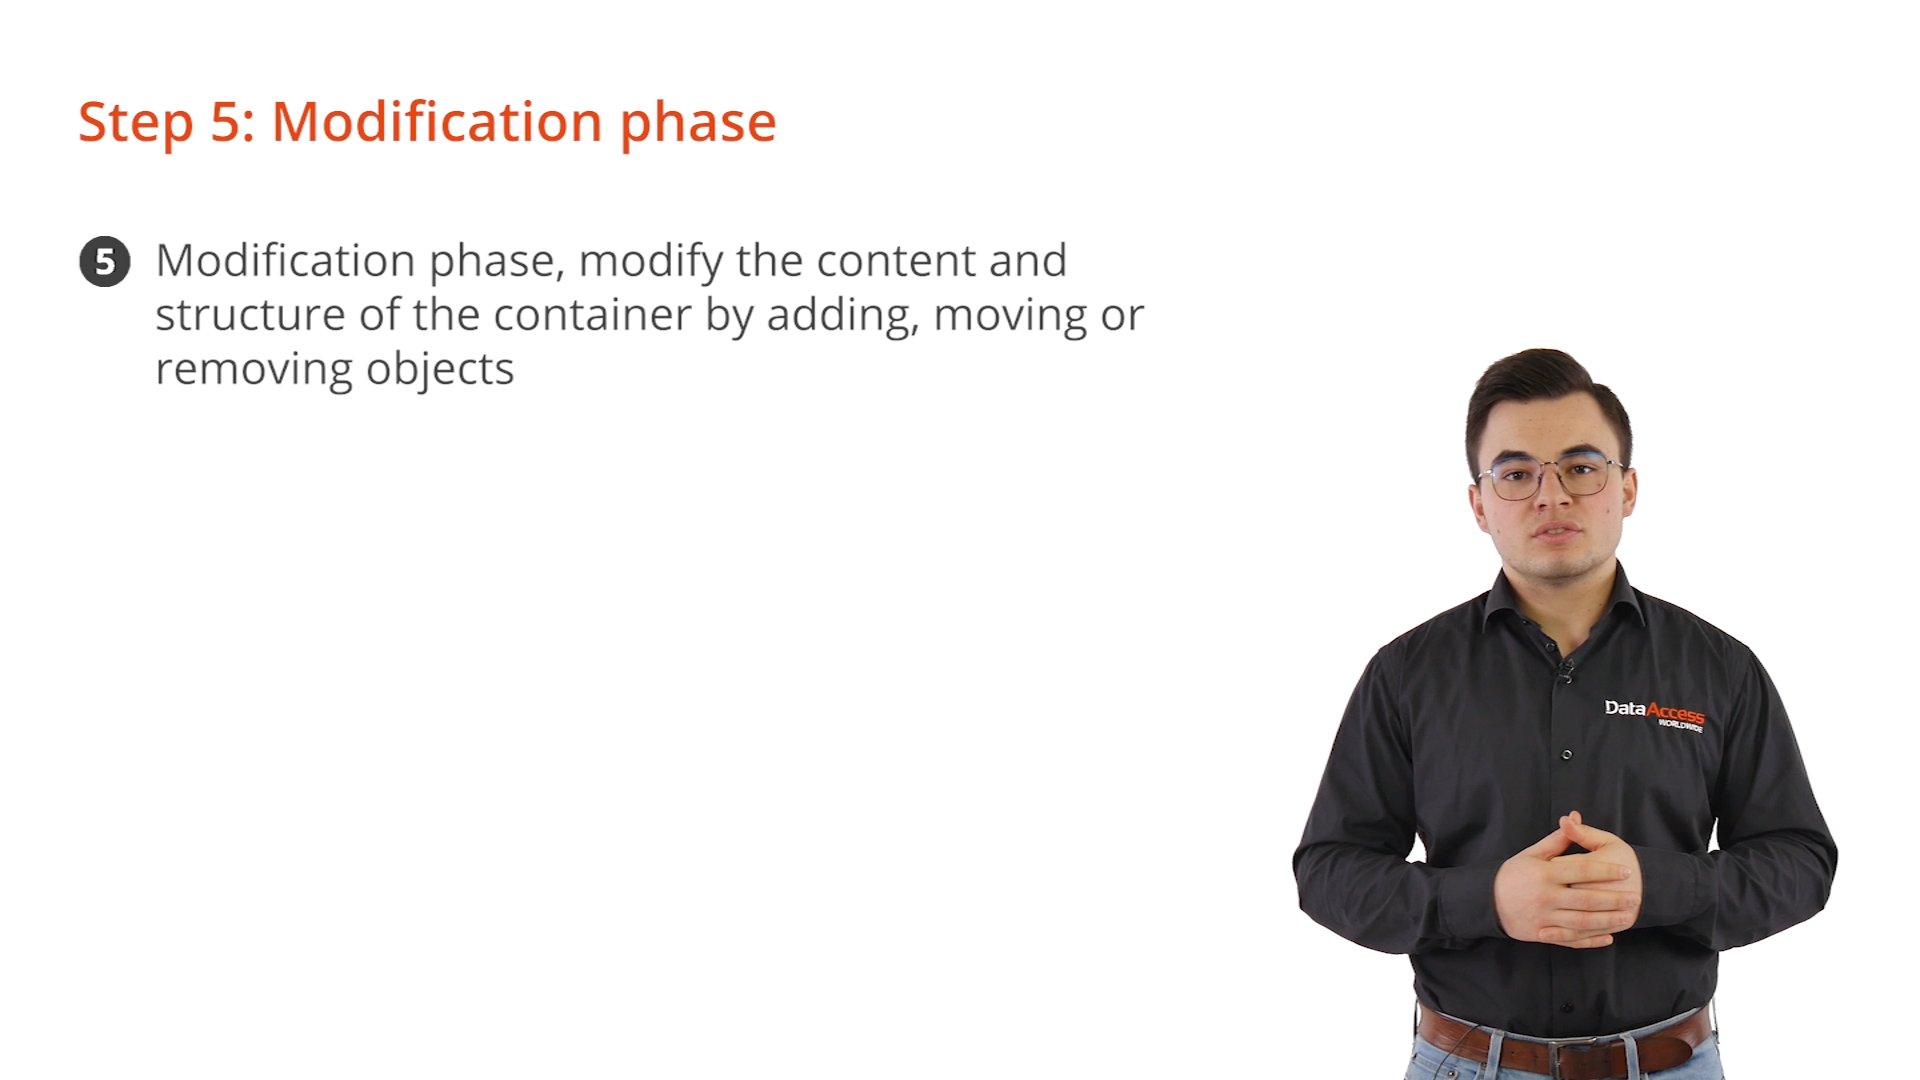
- Some empty space was left inside the OnClick procedure of the cAddRow button. In here, the procedure InsertDynamicObject is called. This procedure inserts one object after another. It requires two arguments; the first argument is the ID of the object to be inserted, and the second argument is the ID of the object to insert after.
- Important: the object to be inserted must be created first. This was previously done with the CreateDynamicObject call. Furthermore, not calling the InsertDynamicObject procedure here results in the newly created object automatically being inserted after its siblings. Please keep this in mind.
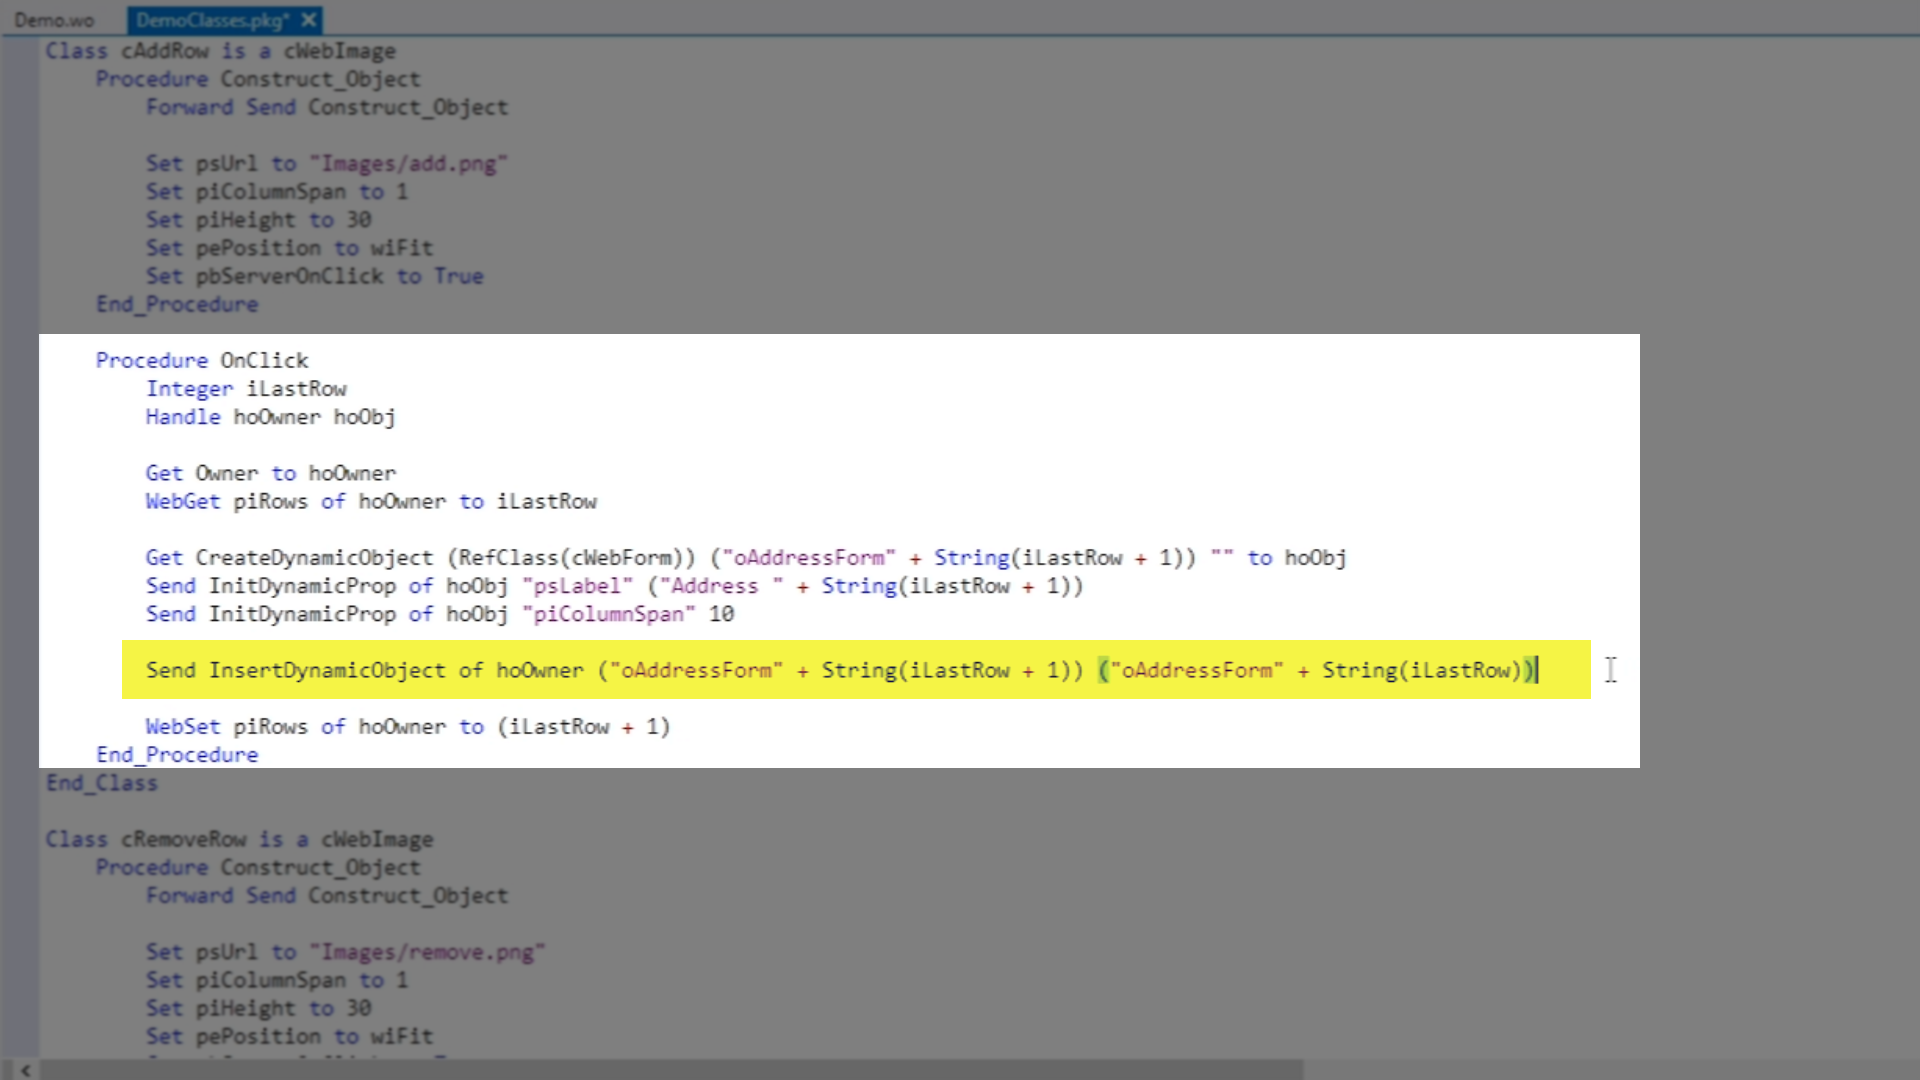
- Blank lines were also left inside the OnClick procedure of the cRemoveRow button. This procedure removes the last row rather than adding a new one.
- To do this, the ‘DestroyDynamicObject’ procedure is used. This procedure takes only a single argument: the unique ID of the object you wish to destroy. Destroying in this case means completely removing the object from the dynamic container, as well as from the client. The object that is to be destroyed is the last address line.
- In the OnClick procedure of cAddRow, “oAddressForm” + the current number of rows is used to generate a unique name for newly added address lines. This same naming scheme is used to find the ID of the address line that is to be removed.
- These last two changes signify that the demo application is now finished and can dynamically add and remove address lines to the user form.


