Advanced Dynamic Objects
Lesson 3 - Step 2: Define object-specific behavior
The second step of the workflow is defining object-specific behavior. Examples of behaviors are methods, procedures and event handling. The dynamic objects framework uses subclassing to define behaviors. Note that methods are normally written in the instance object of a class. This is not possible with dynamic objects, because it requires inserting new source code at runtime. Therefore, all the behaviors need to be defined in code beforehand. This imposes a restriction on the framework, so please be aware of it.
DEMONSTRATION – Create a subclass
- There are three types of dynamic objects in this demonstration:
- A button to add a new address line
- A button to remove to last address line
- The address lines themselves
- The address lines are simple cWebForm objects with no functionality, so only the buttons require subclasses containing functionality.
- Suggested practice: create a separate file for each subclass in the project, and then simply include them in the project.
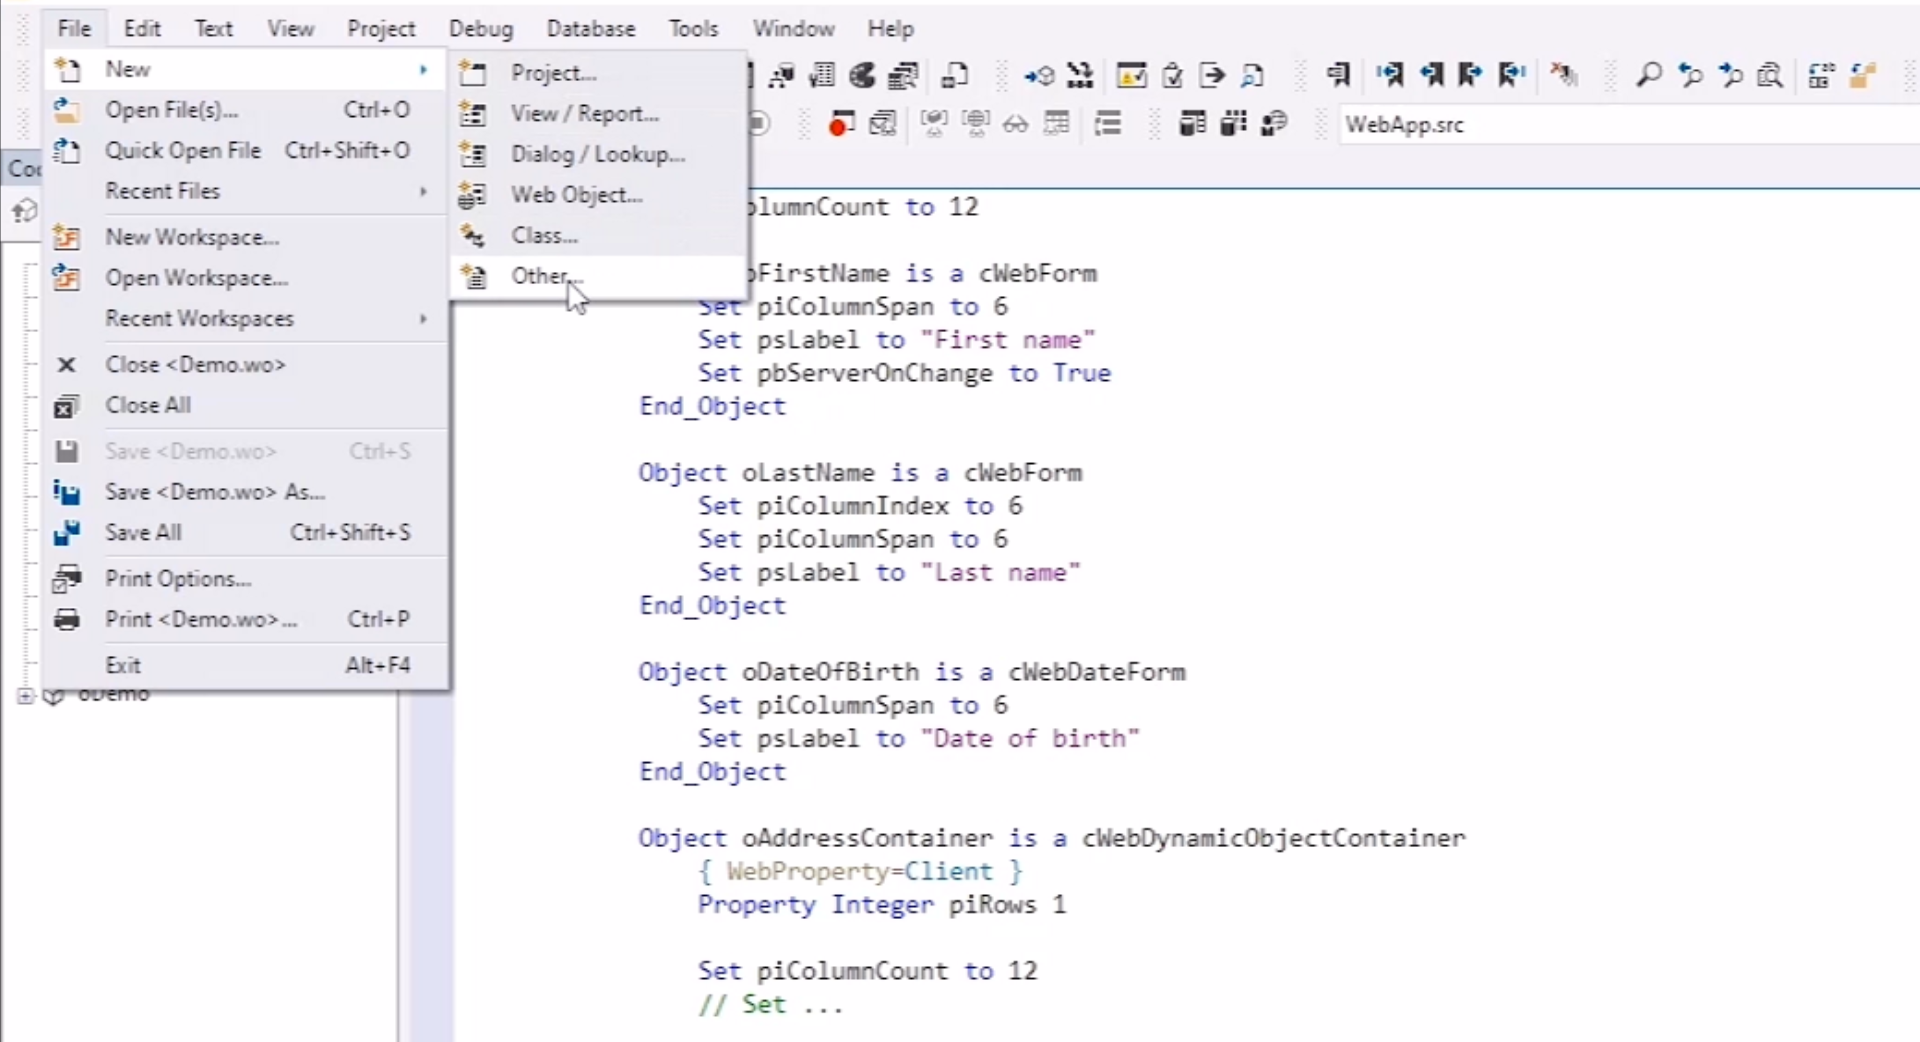
- From the DataFlex Studio select FILE > OTHER from the main menu
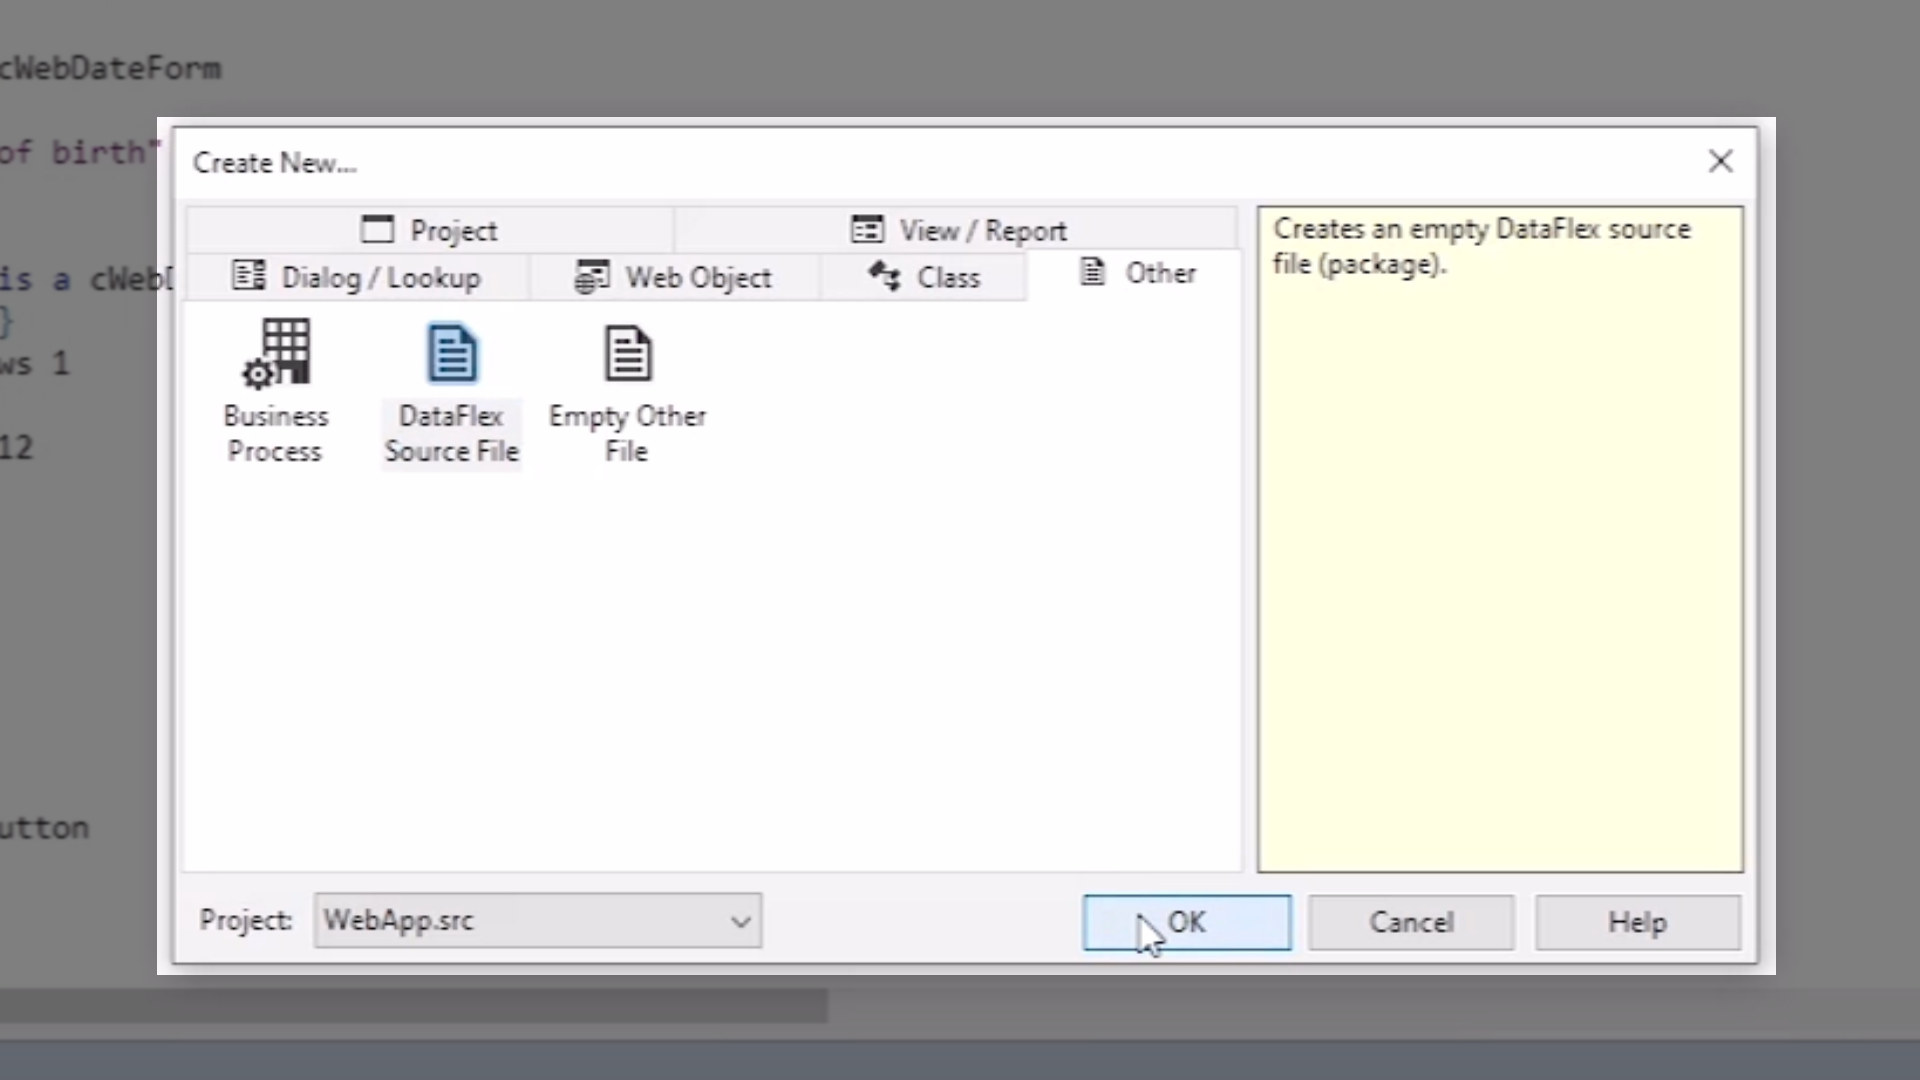
- Select ‘DataFlex Source File’ from the ‘Create New’ window and select OK
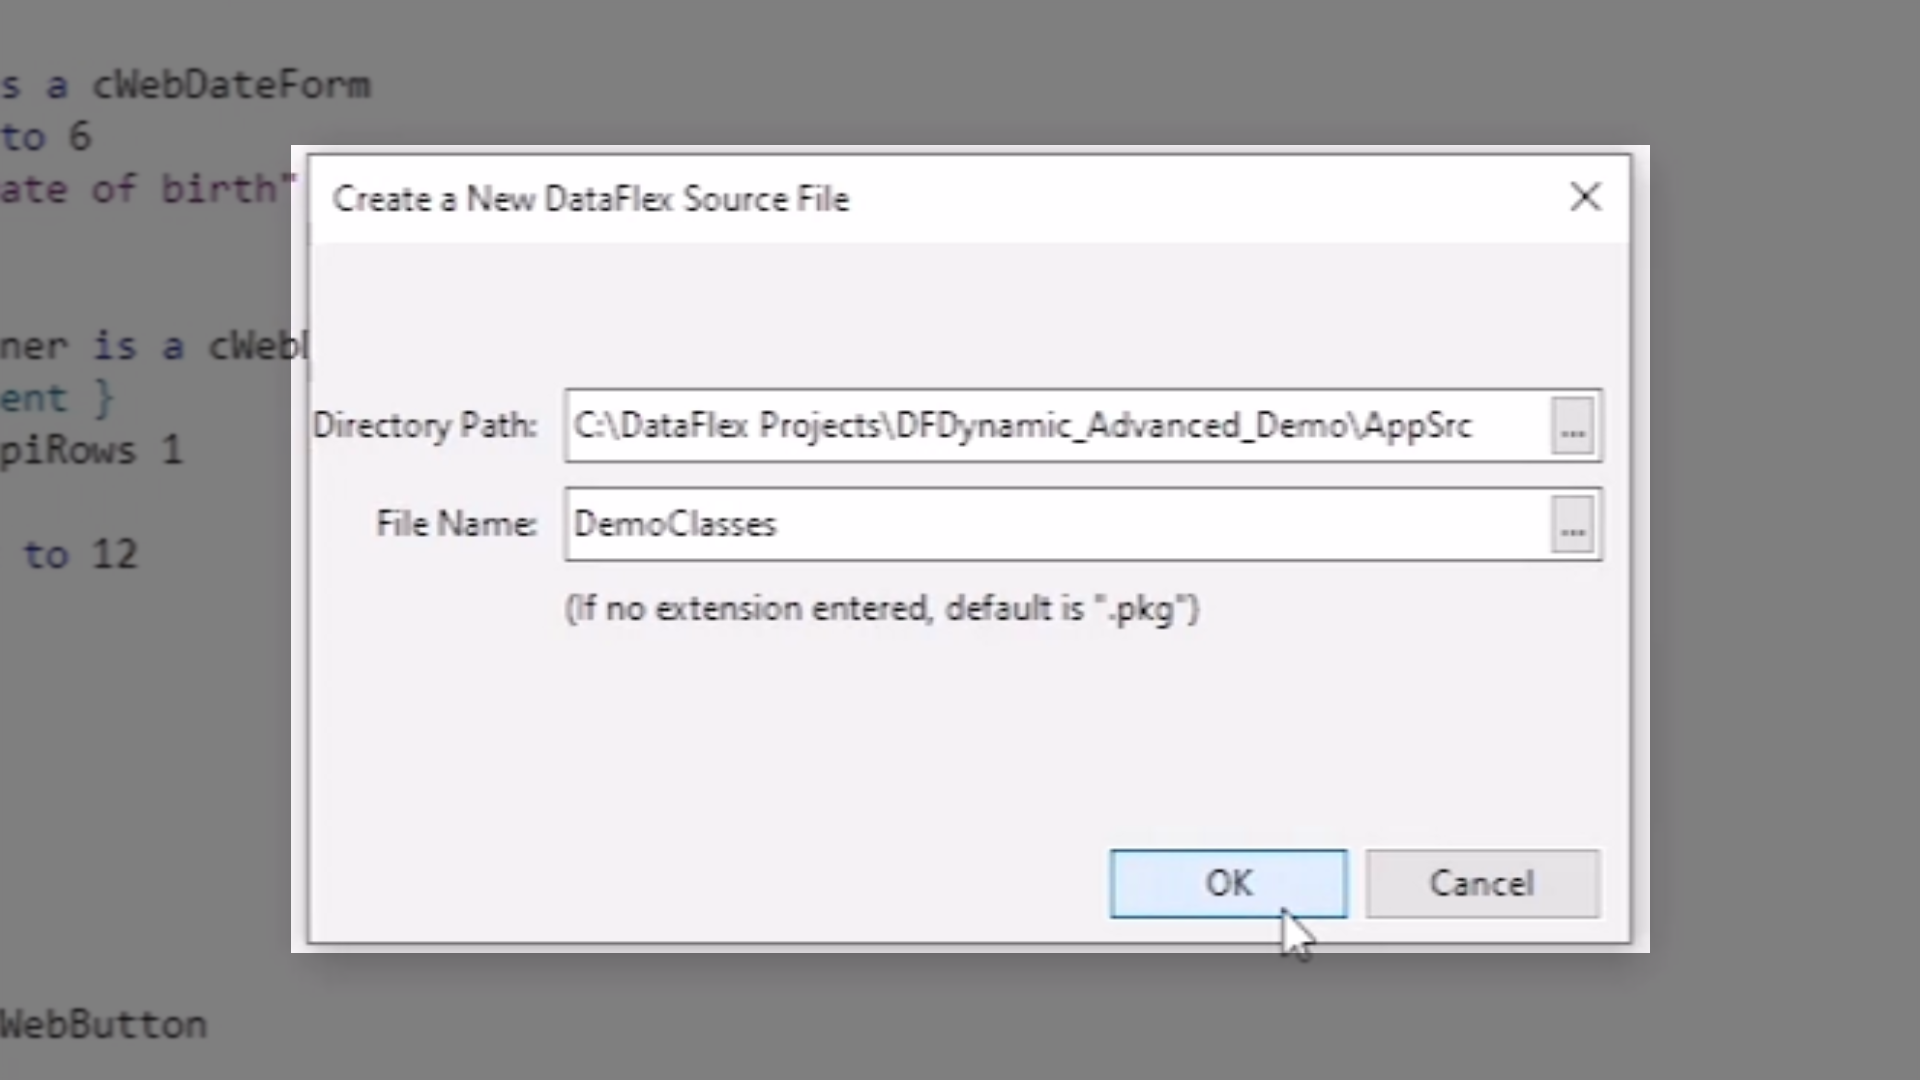
- Add ‘File Name,’ “DemoClasses,” and select OK
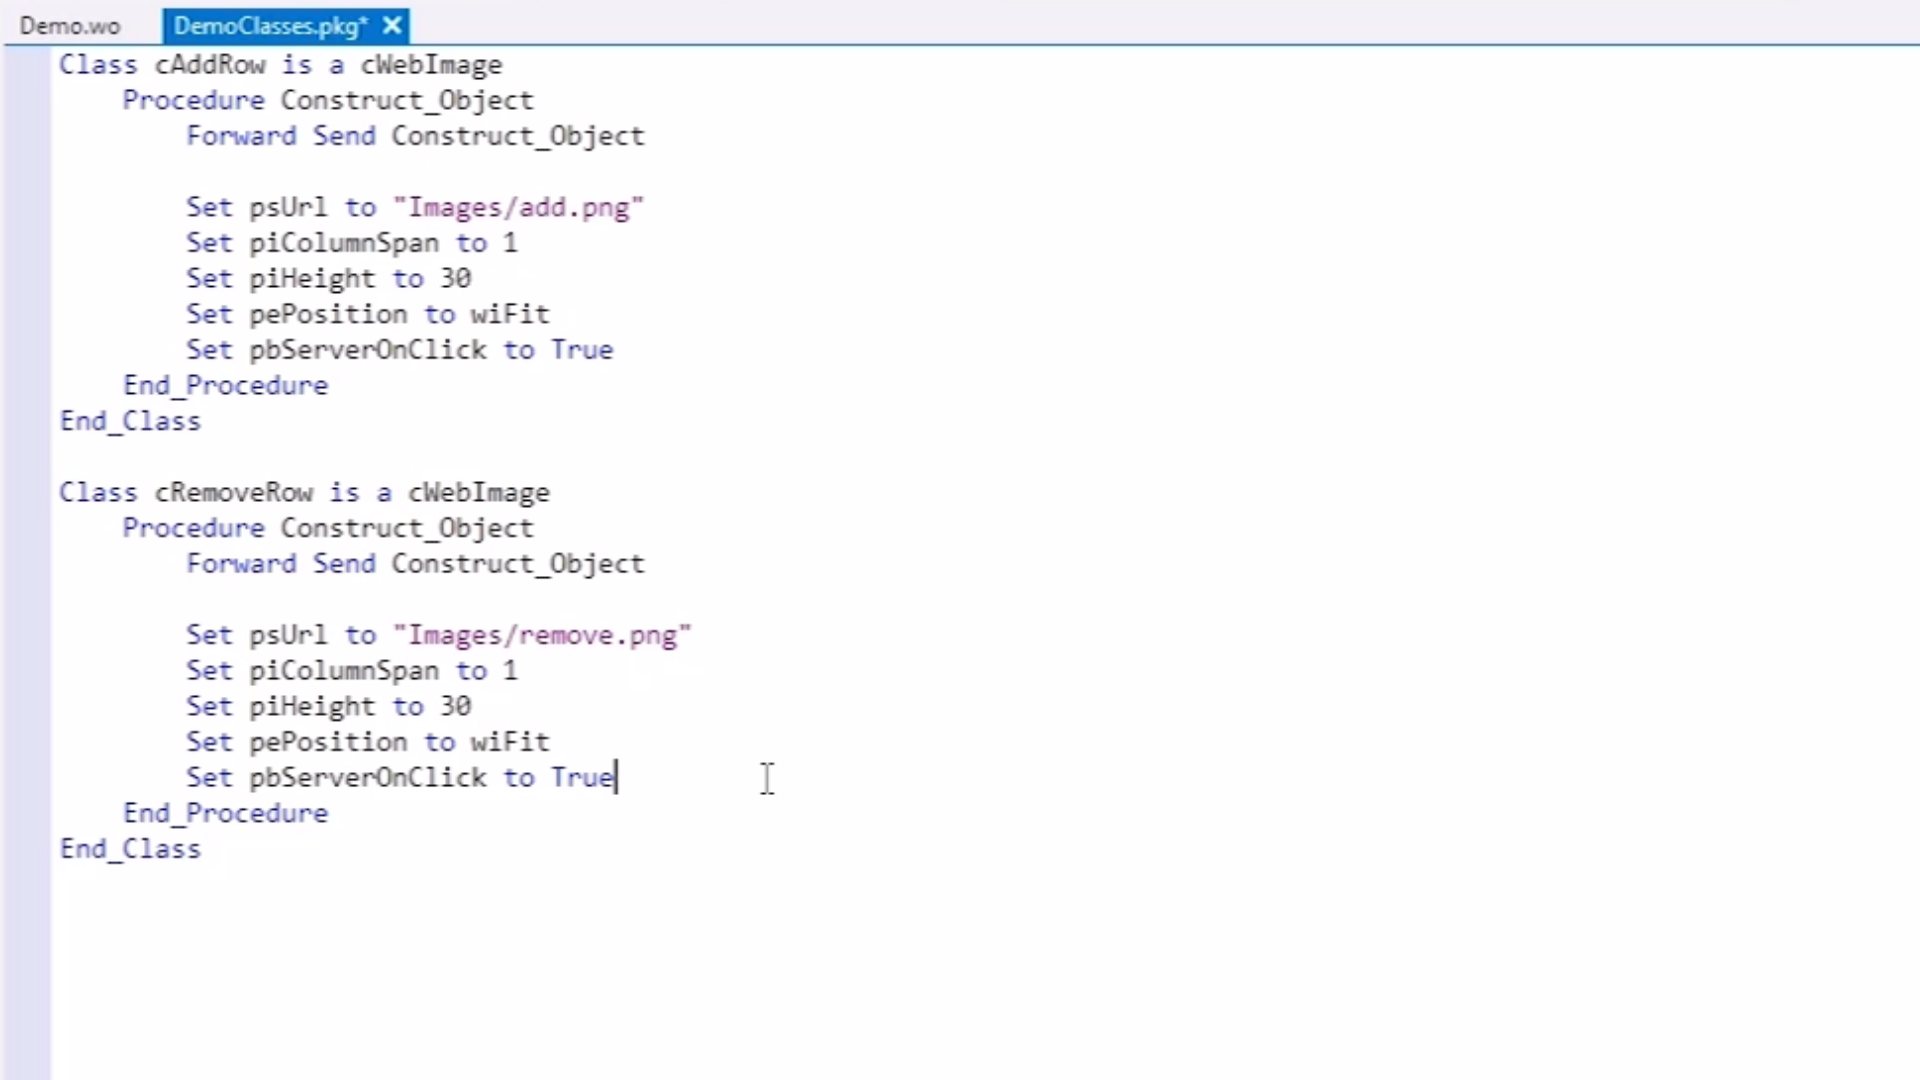
- Inside the new file, create two cWebImage subclasses, “cAddRow” and “cRemoveRow,” that will function as the two buttons in the application
- Add ‘Construct_Object’ procedures for each subclass that include some basic properties
- The next step is to write the OnClick function for each of the buttons. The OnClick procedure for the cAddRow button inserts a new address bar causing the two control buttons to shift downwards.
- The OnClick procedure for the cRemoveRow button removes the latest address line causing the control buttons to shift upwards.

Demonstration – Add OnClick functionality
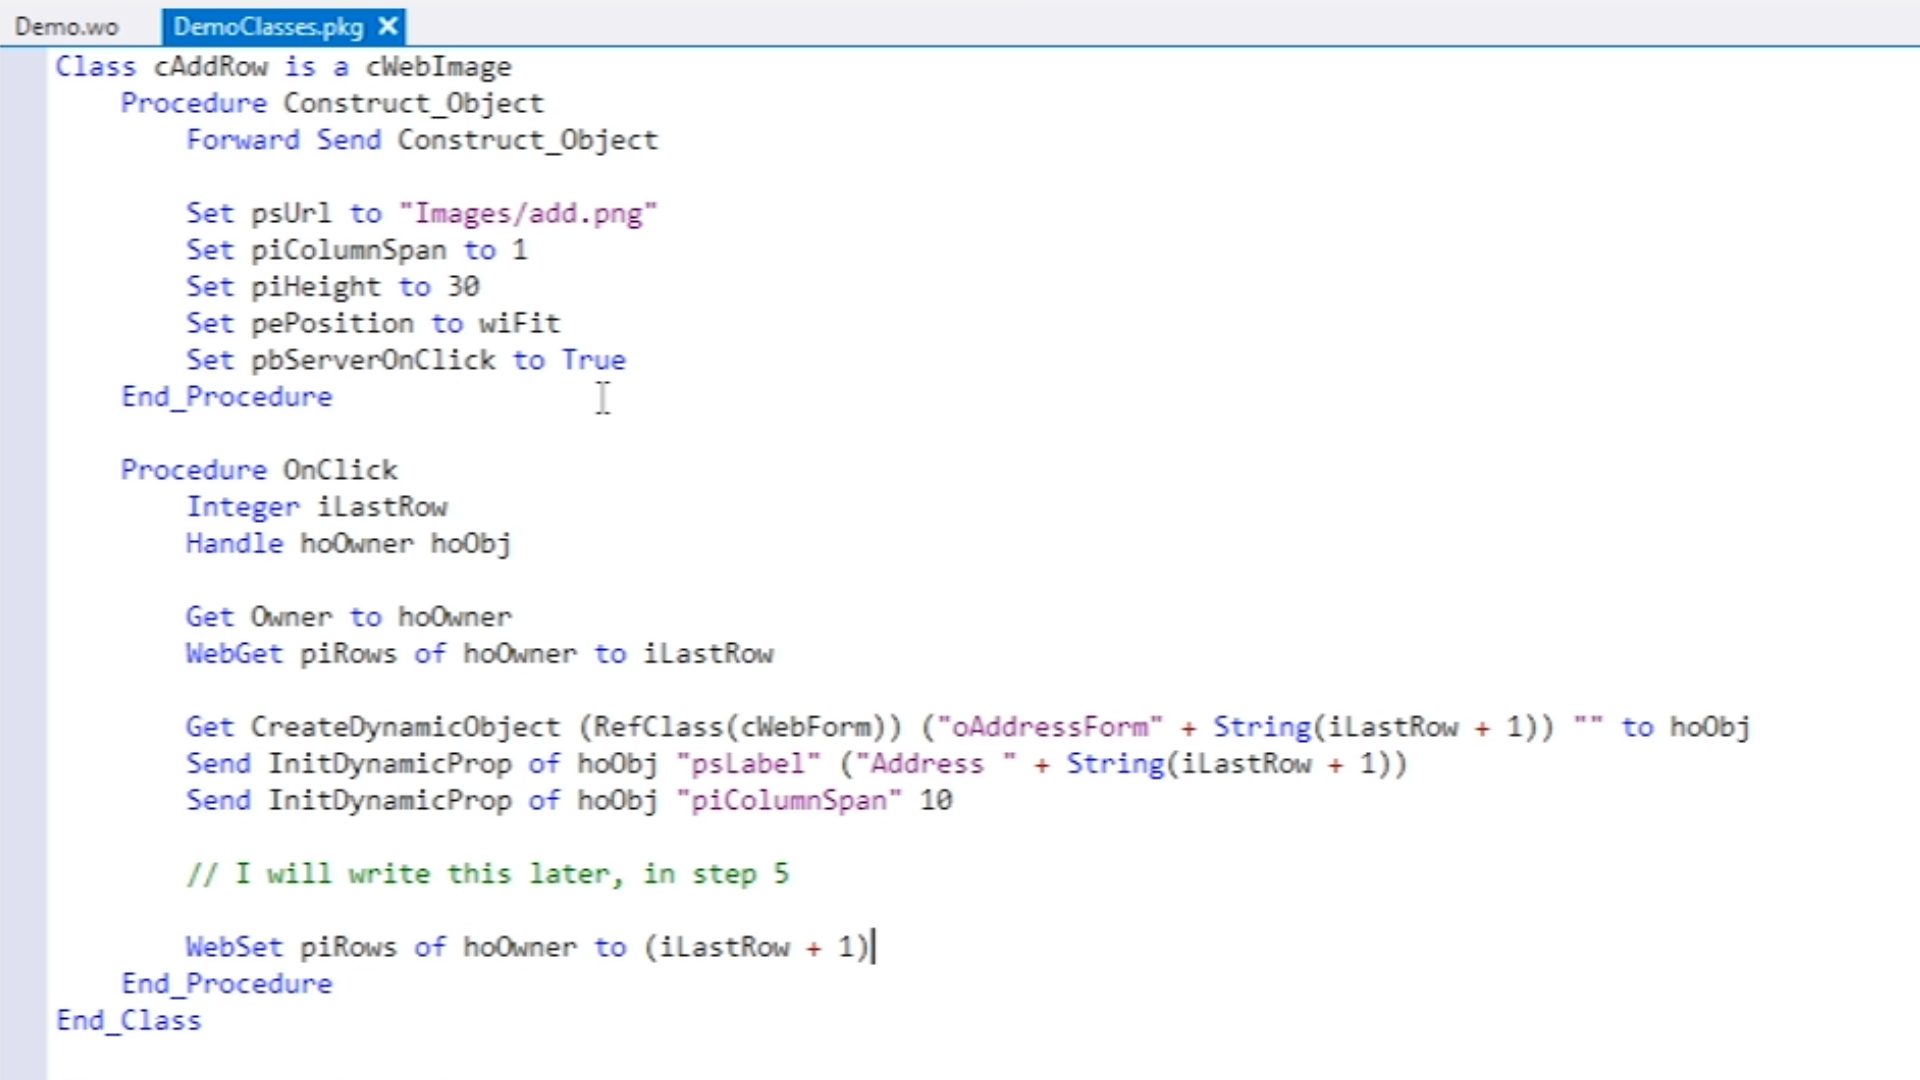
- Continuing to work with DemoClasses.pkg in the DataFlex Studio, and starting with the cAddRow button…
- First, retrieve the owner of the dynamic object
- Owner = container in which the dynamic object is located
- Next, retrieve the current number of rows
- This number is used to give the next row a name because the names need to be unique
- Next, the CreateDynamicObject function is used to create a new dynamic object, which as three parameters.
- The type of the new object
- The unique ID of the new object
- The unique ID of the new object’s parent
- The function creates the dynamic object and returns its handle.
- The handle is used to call the InitDynamicProp procedure twice. This procedure initializes a new dynamic property.
- Note: dynamic properties hold initial property values for dynamic objects. Normally, these are defined when an object instance is created. For more information about dynamic properties, please refer to the dynamic object manual.
- Finally, increase the number of rows for the next time a row is to be added.
- Note: unless the newly created dynamic object is specifically moved to a location, it is appended behind its sibling objects, which are objects with the same parent. In this example, a line of code is added to handle this.
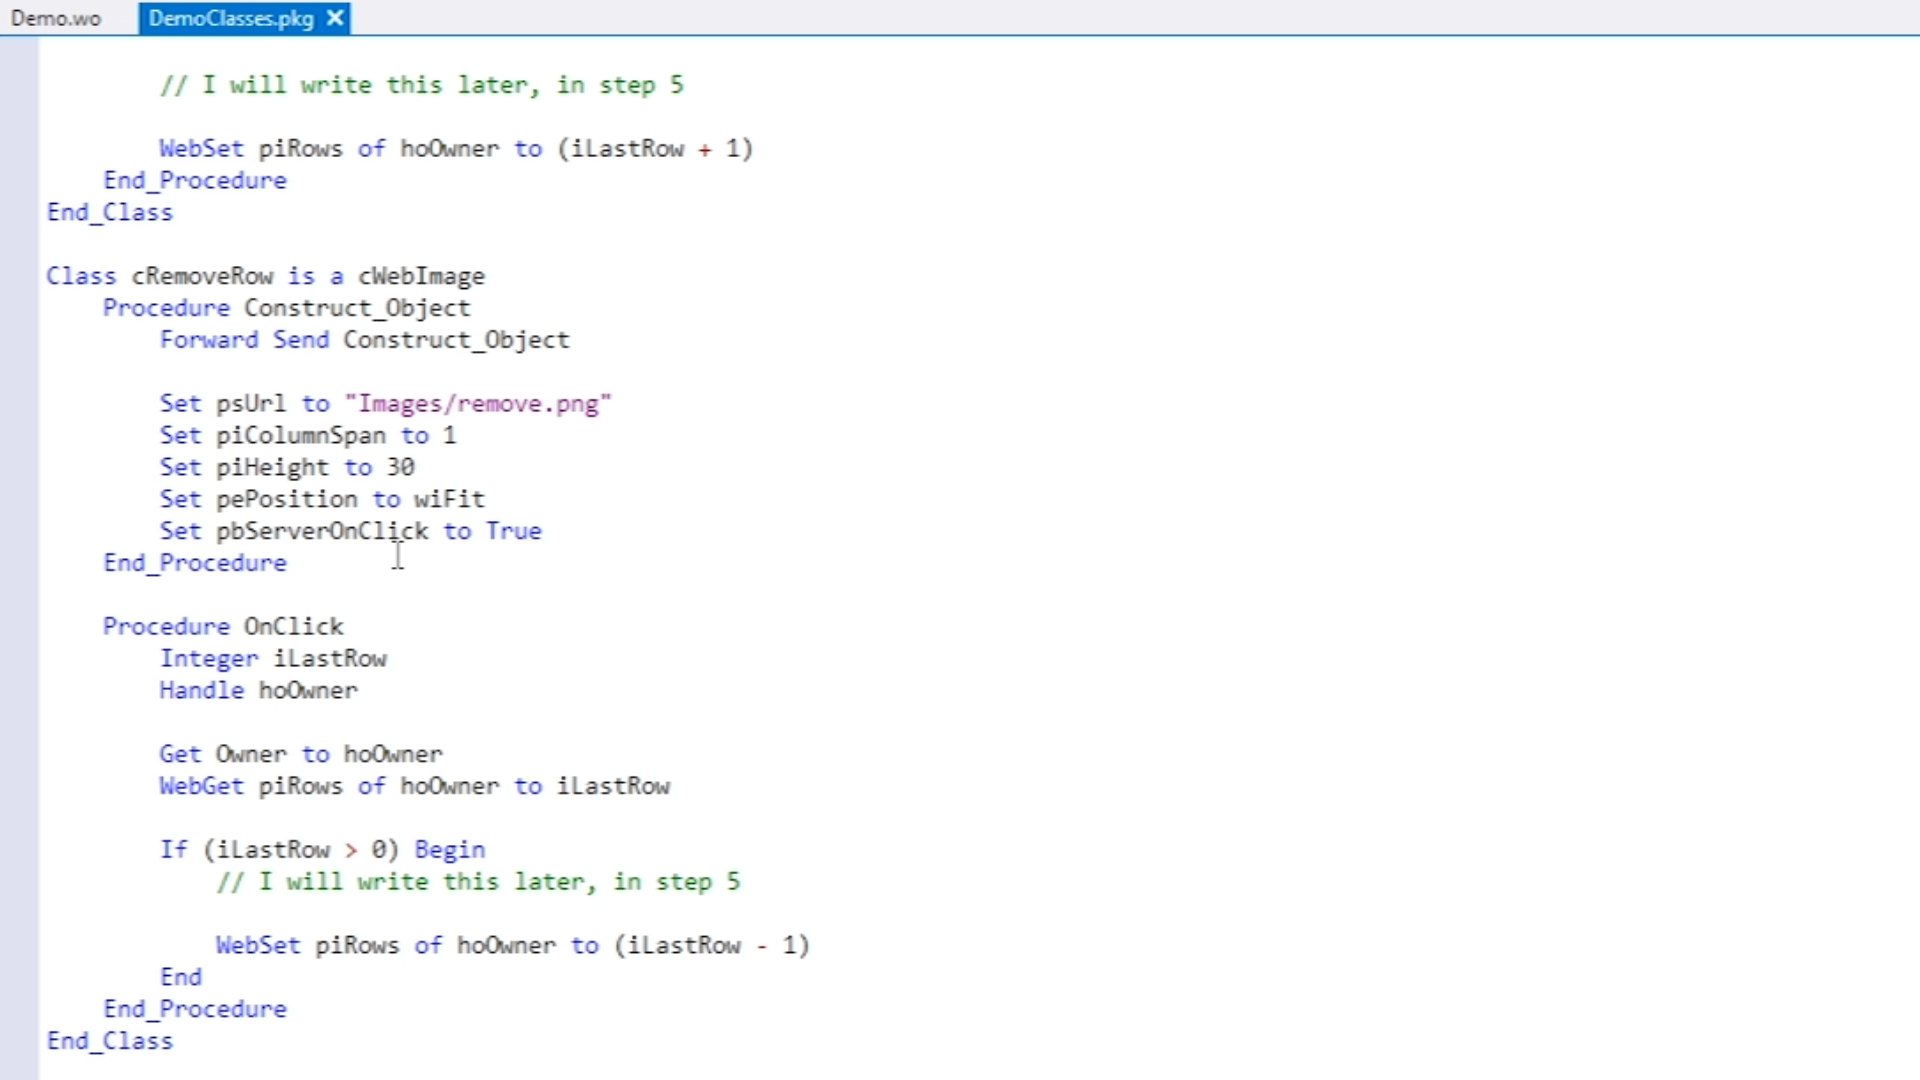
- For the cRemoveRow button, the same steps are followed…
- Retrieve the current number of rows
- Check whether the container contains more than zero address lines to make sure that one line always remains
- The final step does differ slightly because for this button the number of rows is decreased
Mentioned resources in this lesson:


